Monthly Archives: October 2008

Time for Clocktower Cottage

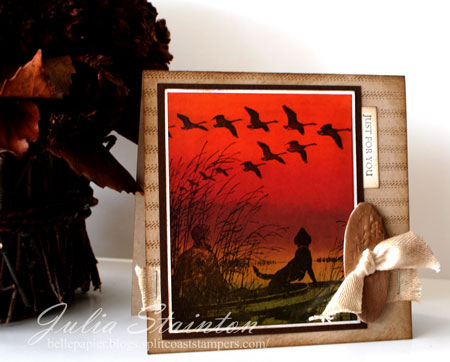
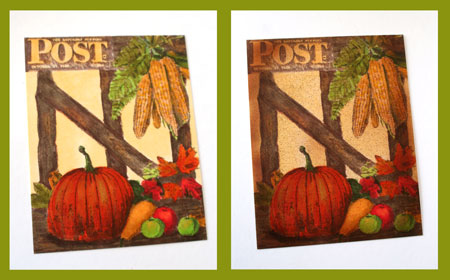
Clocktower Cottage is the beautiful latest Thomas Kinkade stamp release from Cornish Heritage Farms. I’m always excited with each TK release as the art work is so stunning and so unique! This image looks stunning in monochromatic as well as colored. I find that the more you practice coloring the images, the easier they are to do. Really…isn’t that the way with everything?This design actually only took just over 20 miniutes to color. I always love looking at what Thom has to say about each of his paintings. I found this quote on-line….

“In a way, a painting is itself a time traveler – its message memorialized for generations to follow. The message of ‘Clocktower Cottage’ is one that I believe is as timeless as a fresh new morning: Your stay on earth is brief, consider the days and be wise.” – Thomas Kinkade

*****A few other  quick notes about time today… the time is almost up to win one of two copies of PC Gourmet. Filled with gorgeous papercraft projects and recipes, you can enter the drawing here.Time runs out at 10 pm EST tonight. And…don’t forget to turn your clocks back this Saturday night! I love the “fall back” time change. An extra hour of sleep…sigh.
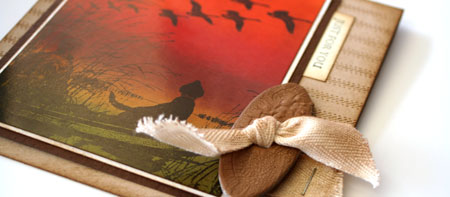
Clocktower Beauty

jks-clocktower-cottage.jpg

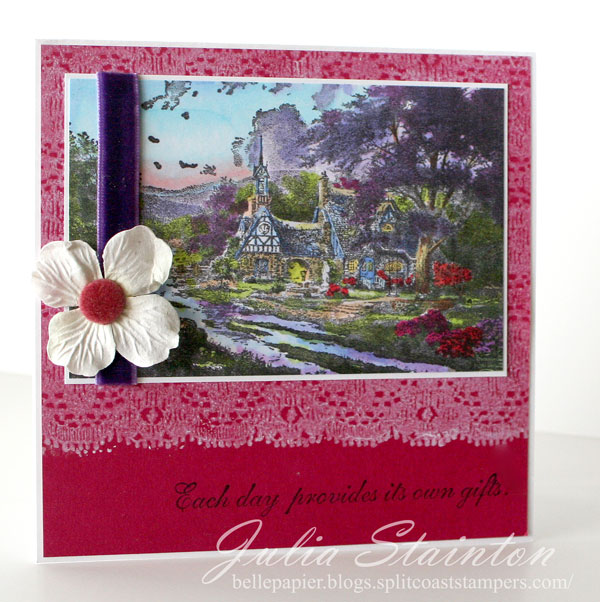
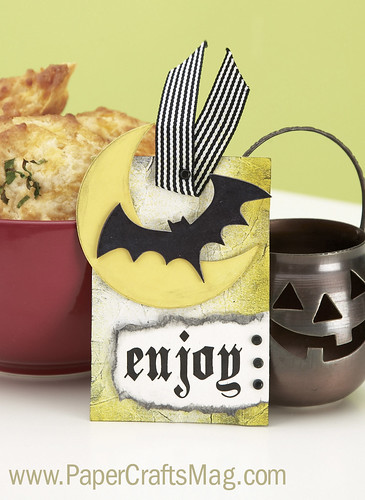
I thought that this Each Day sentiment worked perfectly with the time theme of this image.
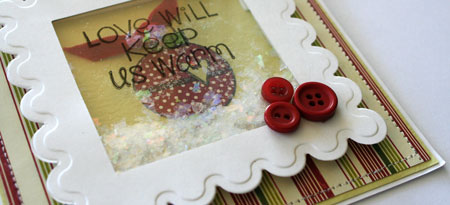
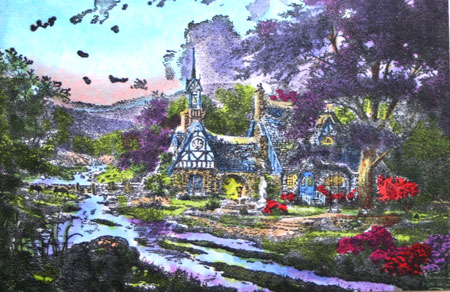
Here’s a close-up…

jks-clocktower-coloring-det.jpg

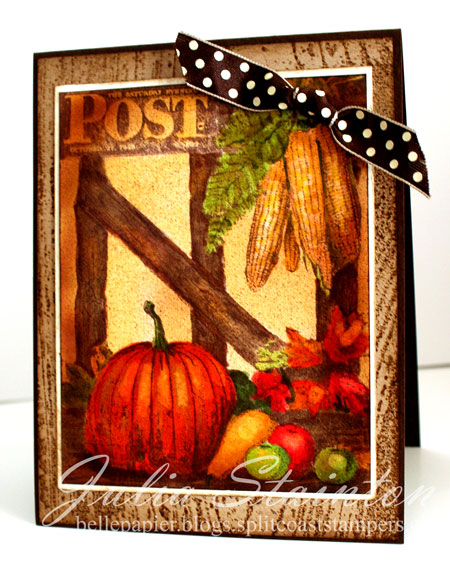
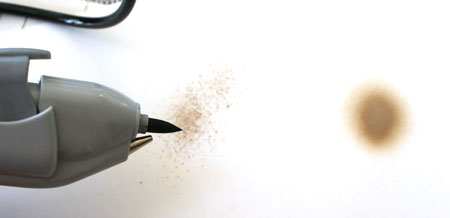
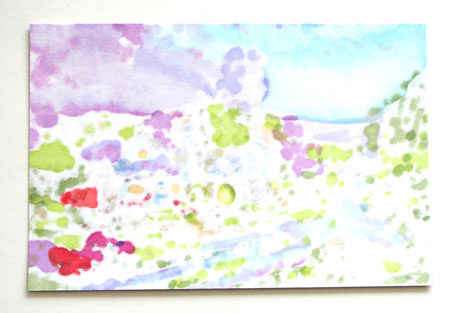
I just wanted to show you a photo of the back of the coloring as well. Copics blend better the more ink you use so you should definitely be able to see ink coming through the back of the paper. When coloring detailed images with Copic markers…take your time and use lots of shades, slowly building up the color.

jks-clocktower-back.jpg

Quick Tip: To get a good impression when stamping a highly detailed image, paper, ink and technique make all the difference! I ink my stamp with Black or Rich Cocoa Memento ink then brayer to smooth out the ink. I love the Prism Simply Smooth White cardstock for a crisp impression. To get a perfectly even image I place 5 0r 6 sheets of cardstock underneath to provide a firmstamping surface that has the tiniest bit of give.

Thanks for stopping by!

a-signature-2.jpg

Supply List:

Stamps:
Clocktower Cottage (Thomas Kinkade line) by Cornish Heritage Farms
Each Day… (Thomas Kinkade line) by Cornish Heritage Farms
Scalloped Lace Backgrounder by Cornish Heritage Farms

Ink: Tuxedo Black Memento Ink by Tsukineko
-Cotton White Adirondack Pigment ink by Ranger

Paper:
-Simply SMooth white Prism cardstock
-Magenta cardstock by Prism

Other:
-flower by Prima
-markers by Copic
-velvet ribbon by May Arts
-velvet brad by Making Memories

Get Cracking…

jks-bird-watching-clip.jpg

I love texture! It’s especially something I love to add to my fall and winter cards. It always seems so cozy! Texture and especially cracked textures are especially great for masculine designs that I can’t add my usual flowers and rhinestones too. Today’s challenge is a great way to add interest and texture to your projects. Get cracking on this crackle challenge! Whether you try a cracked glass technique, Ranger Crackle Accents, Distress Crackle Paint or any other way you can think think of…have fun with this challenge here.

Sunset Flight

jks-bird-watching.jpg

Now I haven’t pulled out my Spectrum ink pads in almost forever! Well…not quite but you get the idea! When I first saw a peek at this image, I knew that I’d be pulling them out as soon as this rubber hit my hands. This is an absolutely perfect image for it and it gives a simply stunning look. I just love how easy it is to create as well. Just stamp on glossy cardstock and then brayer. I don’t think anything matches the glow of color like stamping on glossy cardstock…so rich and vibrant!

To add my texture to this design, I used some Tim Holtz Distress Crackle Paint. I adore this paint for painting on paper, chipboard, just about anything. I love how the paint cracks in one step…just brush on and leave to dry. Now that is my kind of crackle finish!

Enjoy the challenge and happy stamping!

a-signature-2.jpg

Supply List:

Stamps:
Bird Watching (Saturday Evening Post line) by Cornish Heritage Farms
Ticking Backgrounder by Cornish Heritage Farms

Ink:
-Spectrum pad by Tsukineko
-Black Memento ink by Tsukineko

Paper:
-kraft, Suede Brown Dark and Simply Smooth white by Prism
-glossy white cardstock by Ranger
-scrap of Basic Grey patterned paper

Other:
-twill tape
-brayer
-stapler
chipboard button by Cosmo Cricket

Rainbows, snowflurries and layouts…

jks-layout-story-close.jpg

My husband came running in the house Monday night telling me to grab my camera. Now this is not an ordinary occurrence…he usually shuns the thing 😉 but after a day of rain, there was the most stunning rainbow I have seen in years.Across the road and fields of Fall wheat this rainbow was just radiant and spanned in a complete arch from side to side. There was no way to capture it with my camera as my lens is not wide-angled. Here’s one of the few pics I managed to take right before my camera battery died.

rainbow.jpg

Now image my surprise this morning to wake up to everything well-blanketed with snow! Hmmmm…are those costumes for Friday night going to fit on top of snowsuits?! I totally can’t believe it because I had the boys standing out waiting for the bus for a long time. The delayed the bus by two hours. What a day!

snow-pic.jpg

Now as for the layout part of the post…it’s layout challenge day again.

layout-sketch-october.jpg

We’d love to have you join us for this layout sketch challenge! Jennifer Roach has also created a sample for this layout…check it out here!

The Story of Us

jks-layout-the-story.jpg

Thanks for stopping by! Have a wonderful Wednesday!

a-signature-2.jpg

Fall Harvest

I’m just loving the richness of today’s image….Fall Harvest. I colored this new Saturday Evening Post image with my Copic markers and tried a little airbrush on it too.   Now that I have that tool back on my desk…it’s hard to stay away from!It’s super cold here again today. Brrrr….I’m pulling out the winter coats and boots and mits.

I also want to tell you about the new CHF Creative Blog. I’m really excited about this new place to share information and designs and today is a great day to celebrate with us. Make sure you stop by and comment as Becky has a lot of wonderful raks to hand out!

Fall Harvest

jks-fall-harvest.jpg

To create this design, I first colored in my image and then added my airbrushing to add texture.

jks-airbrush-pumpkin.jpg

To create a splatter effect with the Copic Airbrush, you can insert the brush end of the Copic marker and get a very splattered effect. In the photo below, the spray on the right show the chisel end results as compared to the brush end on the left. Also… if you take the chisel end and use a medium brown marker, you can get a nice soft inked effect around the outside of your image. It’s similar to sponging in stamping and burning in photography.

jks-airbrush-splatter.jpg

Quick Tip: Always practice first on a scrap piece of paper before airbrushing. You wouldn’t want to spoil your artwork.

Thanks for stopping by!

a-signature-2.jpg

Supply List:

Stamps:
-Fall Harvest (Saturday Evening Post line) by Cornish Heritage Farms
-Woodgrain Backgrounder by Cornish Heritage Farms

Ink:
-Brushed Corduory Distress ink by Ranger
-Rich Cocoa Memento ink by Tsukineko

Paper:
-kraft, Suede Brown Dark and Simply Smooth white by Prism

Other:
-markers and airbrush by Copic
-ribbon by Creative Impressions

Mmmmmmmmmmmmmm… Gourmet Goodness

Do you love cooking as well as paper crafting. I don’t know about you but these cold Fall days just beg for yummy home-cooked meals and after a very busy summer, I’ve been pulling out my recipes and baking more too! I’m really excited about this new special publication by Paper crafts called PC Gourmet. I’ve seen a sneak peek at a few of the recipes as I have a few designs coming out in this issue. Today though…I have a couple great things to share with you! Paper Crafts has send me two copies of this magazine, one of them to share with you. Since I’ll already be getting my own copies, I thought it would be even better to give them both away for you to enjoy! 🙂 If you’re looking for copies of this great magazine (they’d make some great Christmas gifts) you can purchase them on-line here.  Fpr a chance to win, simply respond to this post by Friday October 31st at 10 pm EST. If you like, tell me what you’re crafting or cooking up these days! Please enter only once. I’ll be posting the two random winners on Saturday.

I also have a great recipe and project to share with you today designed by Alisa Bangerter. Enjoy!

Cheesy Garlic Drop Biscuits

by Alisa Bangerter

This is a perfect recipe to pull out if you are short on time because there is no rolling or cutting. The cheese and garlic add extra kick to a plain biscuit, and kids love them. They are the perfect accompaniment to serve with soups or stews, and are great served with a salad.

INGREDIENTS

2 c. flour

2 tbsp. granulated sugar

4 tsp. baking powder

1 1/2 tsp. garlic powder

1/2 tsp. salt

2/3 c. butter or margarine

1 1/2 c. grated cheddar cheese

1 1/4 c. milk

Chives (optional)

DIRECTIONS

Mix together dry ingredients. Cut in butter with pastry cutter until mixture is fine. Add cheese and mix well. Add milk and stir until just moistened. Drop by spoonfuls onto greased baking sheet. Sprinkle top with chopped dried or fresh chives if desired. Bake at 400 degrees for approx. 15 minutes.

Enjoy Halloween Tag

Designer: Alisa Bangerter

SUPPLIES: Cardstock: (ivory) Dye ink: (Black) Stewart Superior Corp.; (Summer Sun) Stampin’ Up! Specialty ink: (Mango Lemonade color wash) Stewart Superior Corp. Color medium: (black chalk) Craf-T Products Accents: (black brads) Making Memories; (chipboard bat, moon) Melissa Frances Fibers: (black striped ribbon) Pebbles Inc. Font: (Black Family) www.dafont.com Adhesive: (foam tape) Finished size: 3″ x 4 1/2″

1 Make tag from cardstock. 2 Crumple tag and smooth out. Spray edges with color wash; let dry. Apply chalk. 3 Ink chipboard moon; let dry. Chalk edges and adhere. 4 Ink chipboard bat; let dry. Adhere with foam tape. 5 Print sentiment on cardstock; trim and tear edges. Chalk edges and adhere with foam tape. Attach brads. Attach ribbon with brad.

I’ll share one of my projects with you once this issue goes on sale. 🙂 Good luck winning your copy! I think I’m off to try baking these biscuits for dinner!

Have a great week!
Julia

Shakin’ it up

jks-holiday-shaker-close.jpg

Today I’m shaking it up a little with a fun holiday shaker card! If you’ve never made a shaker card, they are fun and easy. Yes…they do take a little more time than some designs but they are so worth it. For this design, I filled my shaker with a fun new product from Art Institute…Faux Snow. These soft iridescent flakes have so many uses and are the product spotlight at Cornish Heritage Farms this week. Now I don’t know about the weather were you live, but the snow flakes are pretty much ready to start flying here in Ontario. The weather has definitely taken a turn for the colder. I thought it would make a fun challenge for this week’s Challenge Chicks Challenge to use faux snow on the designs. Whether you use Faux Snow from Art Institute, create some snow with Liquid Applique, glitter, etc., let those flurries fly and show us how you like to create snow in your designs. Check out the challenge here!

As always…some of the other designers have played along with this challenge. Check out their super-cool designs too…. Kristine, Michele, Dawn, Julie, Jennifer & Lesley

Holiday Shaker Card

jks-holiday-shaker-card.jpg

To create a shaker card, you’ll need a clear transparency for the window. I love using the Clear Card Sheets as they are so thick, crisp and professional.To create my window, I ran two Nestability dies through my die cut machine together with my white cardstock. They are so thin and the straight smaller square will nest perfectly in the larger scalloped square. To add my embossing, I simply removed the smaller square and then ran the scalloped die with my die cut cardstock through the machine with my embossing mat. To get enough dimension to the product so that my flakes with shake ;), I used foam adhesive strips between the layers.

Thanks for stopping by! Have a wonderful week!

a-signature-2.jpg

Supply List:

Stamps:
Heart Warmers (Kim Hughes line) by Cornish Heritage Farms

Ink:
-Black Stazon by Tsukineko

Paper:
-Spring Willow Light, Simply Smooth White by Prism
-Making Memories patterned paper

Other:
-Clear Card Sheet by Cornish Heritage Farms
-Nestabilities dies by Spellbinders
-buttons by Autumn Leaves
-sewing machine
-Faux Snow by Art Institute
-ribbon by Creative Impressions

Jessica Sprague On-line Classes {C’est Bon}

So I’m done! Wow!Where did four weeks go? I am incredibly glad I took this digital course! So if you want a resounding recommendation…I want to sign up for each and every Jessica Sprague class that comes up! 😉 If you’re new to my ramblings…I’m just finishing up my second Jessica Sprague on-line digital class called Now You’re Rockin with Photoshop. Very aptly named…this class rocks! I’ve also completed Up and Running with Photoshop which is now a self-paced class you can take anytime. So….why do I think these classes are so fabulous?

  • Very reasonable and affordable
  • Each class has four lessons and layouts that teach you a myriad of things
  • each class builds on your knowledge
  • each class is taught in video and audio format…you can listen to Jessica teach while watching EXACTLY every step she makes on the computer to get the results
  • Weekly extra assignments reinforce your knowledge and challenge you to design your own layouts
  •  Each class builds knowledge at a great pace…enough to challenge you but not enough to overwhelm
  • Daily e-mails from Jessica Sprague
  • Great mini book tutorial links each week
  • Forums and Gallery to share and ask questions…I’ve always gotten the support I need
  • Free digital downloads come with each lesson that you can use again and again
  • Jessica teaches lots of great hints and shortcuts
  • Lots of photo editing tips
  • You can see the class taught in either Photoshop Elements or in CS, CS2, C3s versions
  • You always have access to the class tutorials so that if you forget, you can always come back and relearn your skills
  • links to great digital scrapbooking sites and many times great coupons

Summer Evening

summer-evening-wip.jpg

Lesson Four Layout – this is a double spread layout…to see the detail, click on the image

simple-pleasures.jpg

{love} week four Wed. assignment

love-assignment-wip.jpg

WALL-E just a quick fun layout

walle-wip.jpg

Quick Tip: Digital elements can be used over and over again. Did you notice that layouts 1 & 3 and 2 & 4 use the same flourishes?

Just in case you think I sound a little TOO effusive…I am not affiliated with Jessica Sprague in any way…just a huge fan! I’d been dabbling in digital (self-taught) off and on for about a year. It took FOREVER for me to learn each little thing by trial and error. When I think of the time I’ve wasted…sigh. I’ve learned so much in a few short weeks that I know this is one hobby I’ll be enjoying for a long time to come. If you’re interested in “growing you skills”…this is a fabulous place to start!

While I’ll always be an ink and paper girl… maybe, just maybe, I’ll be a bit of a digi girl too. 🙂

Have a fabulous day!

a-signature-2.jpg