Category Archives: C’est Bon

C’est Bon…an update

It’s been such a beautiful weekend I’ve been out enjoying the wonderful weather. Finally, there is green grass, perennials coming up, tulips blooming.It’s dandelion season again and I have been blessed with some beautiful bouquets. It’s all how you look at it right? Strawberries are on our table quite a bit now as the stores have lovely ones right now. The little boys are eagerly awaiting strawberry season in about 6 weeks so that we can pick our own. The teenagers of course, are not so thrilled about the outing. Hope you’ll allow me a little spring-time photos and thoughts. Just so you know…my Feedblitz updates have been hit and miss the past few days for some reason. You may want to scroll down as there are a few  new designs there.

strawberries.jpg

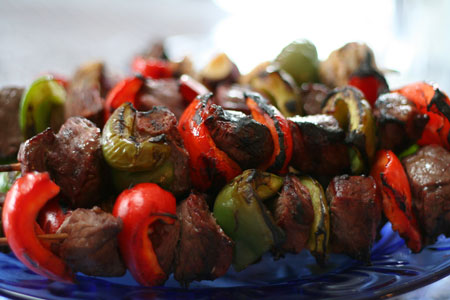
And what’s Spring without BBQ? My oldest son made these for dinner Friday night. I wasn’t having a great day but what a yummy way to end it!
jks-shishkabobs.jpg

While I don’t have a new C’est Bon product for you today, I thought it would be fun to revisit the some of my past entries and update you on whether I’m still using that product and still love it. What gave me the idea was a trip back through memory lane, looking to see what I had written. I was amazed that there were so many and it was so interesting to find that almost all of the reviews, even those from two years ago are pretty much how I feel about the products today. If you’re thinking about purchasing one of these products, you may want to check out the details below. I’ve listed links to all 42 of them.

Anyhow…this gives you a bit of reading for today if you’ve missed something. If not…get outside and enjoy the beautiful spring day!

 Have a good one!
jks-spring-signature.jpg

KI Memories Lace Cardstock {C’est Bon}

This post has been a LONG time in coming! I’ve been meaning to get back to my C’est Bon posts but life has been crazy. I love writing them and I know a few of you have been missing them so I’m going to try and make an effort to at least squeeze in one a month…hopefully more! When I actually started these posts I had envisioned a short post but they kind of grew into a thing of their own. I don’t want to be doing that each week but keep them to shorter, quick highlights. If you’re new to reading this blog, the C’est Bon posts are things I like and enjoy using. You can find more posts like this by clicking on the C’est Bon category tab.

jks-ki-lace-paper.jpg

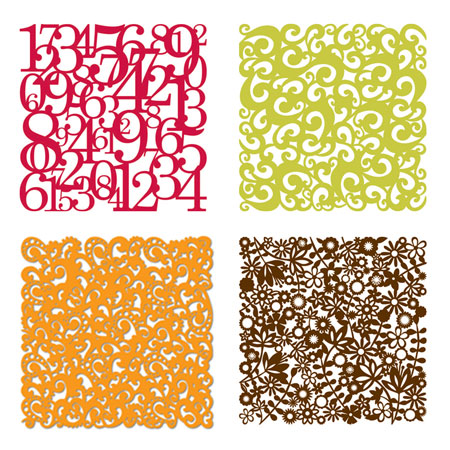
One of my favorite new products released in the past year is the KI Memories die cut paper. So pretty! And now it’s even better. You can purchase it pre-glittered. I had hardly wait for the next big release to see what they do next. I love this paper as it is so elegant and original and comes in quite a few, right on trend colors. Lace paper looks fabulous layered over cardstock or patterned paper for interest and dimension. KI Memories lace paper comes in 12×12 format. You can use one full sheet on a layout or get multiple uses from one sheet by adding sections on cards. If your wanting to use smaller pieces of this beautiful paper, simply cut out along the motifs for a custom embellishment. I’ve even used one tiny little piece along the edge of a card as a border. I think my all-time favorite color of this paper is simply the white. So elegant and pretty. Each paper is intricately cut with beautiful smooth edges for a high quality product.

Quick Tip: One really need idea for using this paper is to use it as a mask. Lay it over some plain cardstock and then sponge ink or airbrush on top. When the lace paper is removed, you have a beautiful pattern. I love to use the colored lace paper for an extra project as well.

Ideas for Using Lace Paper

  • cut motifs out of it for paper embellishments
  • use as a mask
  • Spritz with glimmer Mist to add color and shine
  • layer over an acetate card for a peek a boo effect
  • embellish design with brads or eyelets
  • stamp it
  • die-cut it

Cost: $2-4

Where to find: your local scrapbook or on-line scrap supply store

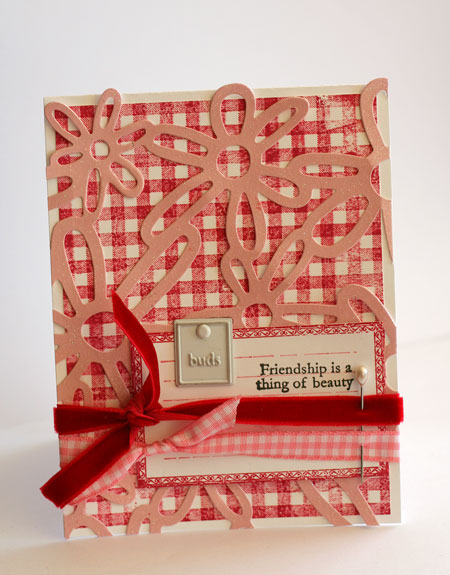
Gingham Friendship
jks-gingham-friendship.jpg
Supply List:

Stamps:
Fine Gingham Backgrounder by Cornish Heritage Farms
Ornamental Beauty (THe Rummage Bin line) by Cornish Heritage Farms
Ink: Cranberry Adirondack ink by Ranger
Black Memento ink by Tsukineko
Paper: Simply Smooth white cardstock by Prism
die cut glitter paper by KI Memories
Other: ribbon, charm & pin by Making Memories

A few more ideas…

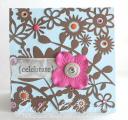
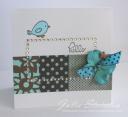
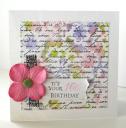
jks-celebrate.jpgjks-layout-emily.jpgjks-paradise-5.jpgjks-eyelet-celebrate.jpgjks-hello-chica.jpgjks-someday-shower-card.jpgjks-sweet-sixteenth.jpg

Have a great day!

jks-spring-signature.jpg

Ranger Paint Dabbers {C’est Bon}

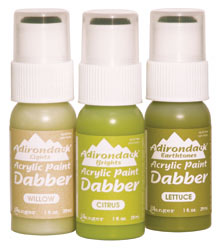
As most of you know, I try to feature a product that I really love each Sunday for my {C’est Bon} entries. One of the products I have been having the most fun with lately is the Ranger Adirondack Paint Dabbers line. Until I started buying this fabulous product, I loved the look of paint but rarely used it. Such a mess! I’m a pretty speedy stamper, I have to be! And I’ll be honest…I’ve ruined more than my fair share of brushes because I didn’t get them washed out in time. The best thing about this product is their dabber top. It’s fabulous to use in so many ways and you can apply paint to many surfaces directly with the dabber end. I admit…I’ve gotten so addicted to this product that I now have over 25 bottles of it!

lgpics_adirdkdabbers.jpg

What I love about the Ranger Adirondack Paint Dabbers…

  • coordinates with the Ranger Adirondack inks
  • easy to use dabber top
  • easy to use without brushes
  • no clean-up…simply cap on lid
  • works on so many surfaces….wood, paper, glass, transparencies, metal, plastic, polymer clay
  • acid-free, non-toxic acrylic paint
  • beautiful opaque look
  • metallic options give a shimmery look…copper, pearl, silver, gold
  • great value
  • one bottle goes a long way
  • huge variety of colors
  • work so well for fun and funky styles as well as shabby and vintage ones

Ideas for using Ranger Paint Dabbers

  •  “inking” up rubber
  • perfect for stamping on darker colors. With dye inks, you can’t stamp light ink on dark
  • painting edges of paper for a shabby or vintage look
  • dilute with water to create a translucent paint look. Looks great on patterned paper.
  • paint works wonderful on Clear Card Sheets or transparencies
  • perfect for covering chipboard
  • layer colors for a varied look
  • dab on top of Ranger Distress Crackle paint
  • use on fabric
  • add an opaque layer behind a transparency to easily see stamping
  • create your own “art style” background by dabbing on the paints in circles or creating swirls

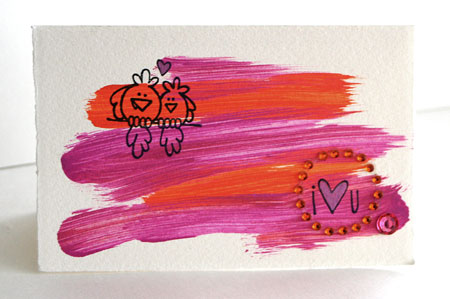
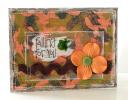
i heart u

jks-i-heart-u.jpg
Supply List:
Stamps: The Birds and the Bees (Kim Hughes line) by Cornish Heritage Farms
Ink: Black Memento ink by Tsukineko
Paper: Fabriano Mediovalis notecard
Other: orange and raspberry Paint Dabbers, Sakura Glitter Pen, rhinestones by MAMBI 

How to Prime the paint…
Inside the dabber, there is a mechanism to control flow. To get the paint flowing, simply turn paint dabber upside-down and press dabber end down onto some scrap paper. Squeeze bottle until paint starts to squeeze out from dabber end. You are now ready to apply your paint as desired.

Where you can find it…

A few more samples from my blog…
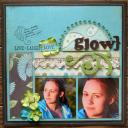
jks-patience.jpgjks-dream-gift-plaque.jpgjks-courage-2.jpgjks-layout-glow.jpgjks-falling-for-you.jpgjks-painted-hello.jpgjks-deer-baby.jpgjks-snowy-christmas-flat.jpg

If you have questions about this product, I’ll try to answer them from my experiences with it by editing into this post.

Have fun trying something new and out of the ordinary!

Have a beautiful day!

winter-julia.jpg

Making Memories Spiral Journaling Books {C’est Bon}

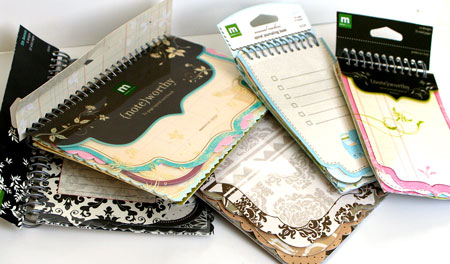
One new product from 2008 that I’ve really loved is the Making Memories Spiral Journaling Books. The fun scrappy office style is so “in” right now and I love how many different ways you can use them. Designed for the scrapbooking market to allow scrapbookers a quick and fun journaling space, these little tear-away sheets are also the perfect size to use on cards and altered projects. As you can see…I’m more than a little addicted to collecting them! 🙂

jks-spiral-books.jpg

What I love about them…

  • perfect size to use on cards as well as layouts
  • fun die-cut edges
  • lots of variety in each pack
  •  great for stamping on
  • many of the designs include lines that make it easy to space writing
  • love the texture the”notebook” edge gives
  • great variety of shapes
  • easy to find at your local scrapbook store
  • one package goes a long way
  • coordinate perfectly with other Making Memories products in the line
  • available in almost every Making Memories line releases as they have been so popular
  • designs are extremely easy to incorporate with other product on the market
  • inexpensive – price approx. $5.00 US (6.50-7.50 CDN) for thirty pages…$.17 a page

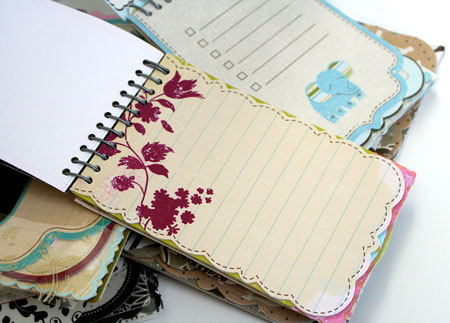
jks-sprial-close.jpgIdeas for Using Journal Sheets

  •  write your journaling on them…of course! 😉
  • stamp images on them
  • stamp sentiments
  • apply rub-on transfers
  • use as an anchor for your embellishments…cluster together on the sheet
  • layer under another layer
  • trim off the “notebook” edge if you want a cleaner look

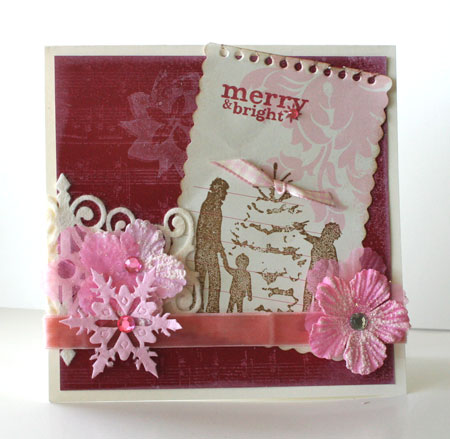
Pink Christmas

jks-pink-christmas.jpg

I created this non-traditional color scheme Christmas design using one of the Making Memories Journal Sheets. By simply stamping on it…I got a fun scrappy look.

Supply List:

Stamps:
Family Tree (Classic Collection) by Cornish Heritage Farms
Poinsettia (Classic Collection) by Cornish Heritage Farms
Aged Sheet Music Scrapblock™ by Cornish Heritage Farms

Ink:
-white pigment ink by Clearsnap
-Burnt Umber Palette ink by Stewart Superior
-Memento Ink by Tsukineko

Paper:
-blush Red Dark by Prism
-Natural Smooth by Prism

Other:
felt die-cut by Prima
flowers and snowflakes by Prima
-ribbon by Creative Impressions
rhinestones by MAMBI
-velvet by Melissa Frances
-Spiral Journaling Book by Making Memories

A few more…(These designs are all from my blog. Click on the image to enlarge)

jks-believe.jpgjks-rambling-thoughts.jpgjks-tweet-hello.jpgjks-flocked-deer.jpgjks-no-eye-has-seen.jpgjks-missing-you.jpgjks-sonshine-resized.jpgjks-celebrating-you-2.jpgjks-blessing.jpg

Where to Find Them…

  • local scrapbook store…I like to support my local store and they carry a good variety of them
  • on-line stores…try a goggle search

Quick Tip: This product moves fast so if you see it…buy it right away so you are not disappointed!

I hope you enjoyed this little peek into one of my favorite products! Have a wonderful Sunday!

a-signature-2.jpg

Prima Decorative Tape {C’est Bon}

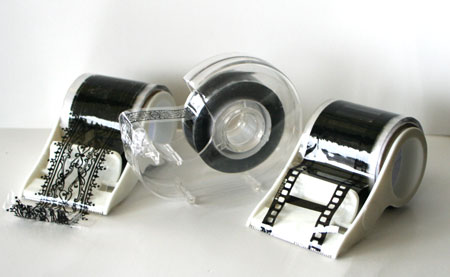
Tape is one of those products that we use on a regular basis to wrap presents, hold things together and we just really never think much about it. It’s usually one of those things we DON’T want seen. Leave it to Prima to come up with some cool decorative tape that makes an awesome embellishment, is economical and so easy to use. You may have seen this product before but never really thought about how to use it. I like to use mine just as you would any strip of paper or ribbon…as a layer to break up the design and add a fun look.

jks-prima-tape.jpg

Why do I love it?

  • quick to use…just pull off a strip and use it
  • fresh and funky product
  • sticky backed and easy to adhere
  • gorgeous classic decorative patterns that can be used in traditional, vintage, shabby, grungy or even clean styles
  • I love clear accents and this product adds a nice visual interest without adding bulk
  • they are a great embellishment for masculine designs as well as feminine
  • mostly comes in black but is available in a few other colors
  • available in packing tape size width or the smaller tape size
  • inexpensive ….$2.99 US each

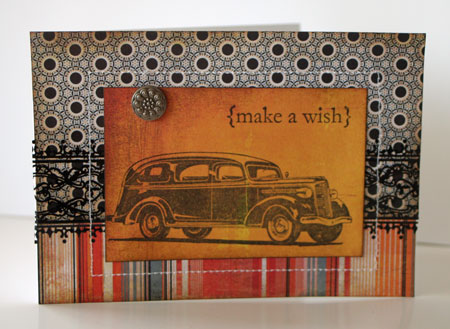
Make A Wish
jks-make-a-wish.jpg

Stamps: 1938 Suburban GM line by CHF, Birthday Centers (Mona Lisa Moments line) by CHF

Ink: Black Palette ink by Stewart Superior, Brushed Corduroy Distress ink by ranger

Paper: Simply Smooth White by Prism, Ambrosia 6×6 paper pad by Basic Grey

Other: sewing machine, decorative tape by Prima, decorative brad

For this design I adhered the Prima tape directly over my patterned paper layers to add an ornate, vintage look.

Ideas for using it…

  • over seams on layers
  • layer under ribbon
  • use like ribbon
  • adhere on clear acrylic pages or cards
  • create a frame
  • create a binding

A few more samples that you can find on my blog…
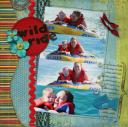
jks-sweet-sixteenth.jpgjks-girly-close.jpgjks-girly.jpgjks-love-tag.jpgjks-travel-card.jpgjks-layout-wild-ride.jpg

Where to buy it…

Got any great ideas for this product or have any questions? I’d love to hear from you!

Have a great day!

a-signature-2.jpg

Maya Road Chipboard {C’est Bon}

jks-chipboard-loose.jpg

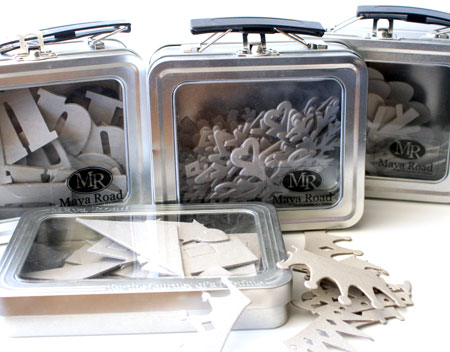
I have a serious addiction to Maya Road chipboard! It’s not fancy but that’s part of the allure…I can change it into any look I wish! The best things about this chipboard is it’s weight and the darling shapes it comes in. A lot of the chipboard on the market is thin and flimsy. When you try altering it…it’s so easy to bend and buckle. Maya Road chipboard is an extremely heavy weight, sturdy chipboard.If you’ve never seen the Maya Road chipboard boxes, binders and other alterables…you are missing out. They are perfect for creating altered projects and mini-albums.

jks-chipboard.jpg

Good Things about Maya Road Chipboard

  • an extensive line to choose from
  • beautiful, unique shapes that are right on trend
  • most of it comes pre-punched from the backing
  • it comes in darling little metal tins that you can re purpose when empty
  • super sturdy weight
  • cleanly cut…no sanding of little spots where it was attached to the backing
  • sized to work well on cards, layouts and altered projects
  • it’s not finished so YOU choose what you want it to look like
  • priced well for the product…for instance the snowflakes tin 36 snowflakes for $8.00 = $.22 a piece

Ideas for altering it…

  • paint it
  • stamp it
  • ink it
  • distress it
  • paint with Distress Crackle Paint
  •  stitch it
  • trace around it and stitch the negative shape
  • cover with patterned paper
  • embellish it with flowers or rhinestones
  • color with a metallic paint pen
  • cover with glitter
  • emboss
  • airbrush
  • alter the tin for a darling package

Quick Tip: Maya Road chipboard is so addictive you may want to share with a friend. If you both buy a couple tins and then swap some, you’ll have twice as many options!

Here’s a few designs I’ve created over the past few months…You can click on the photo for a better look. These designs are all on my blog so if you need product info and details…you can find them by typing Maya into the search box.

jks-blossom-dreams.jpgjks-travel-card-close.jpgjks-courage-2.jpgjks-layout-glow.jpgjks-someday-my-prince.jpgjks-deer-baby.jpgjks-glitter-frame-birthday.jpgjks-postcard-miss-you.jpgjks-enjoy-explore-layout.jpgjks-princess-mini-clipboard.jpgjks-snowy-christmas.jpgjks-vintage-christmas-image.jpg

Where to find it…

If you have any questions about this product…please comment on this thread. I’ll do my best to answer from my experiences. Have fun and have a beautiful Sunday!

a-signature-2.jpg

Jessica Sprague On-line Classes {C’est Bon}

So I’m done! Wow!Where did four weeks go? I am incredibly glad I took this digital course! So if you want a resounding recommendation…I want to sign up for each and every Jessica Sprague class that comes up! 😉 If you’re new to my ramblings…I’m just finishing up my second Jessica Sprague on-line digital class called Now You’re Rockin with Photoshop. Very aptly named…this class rocks! I’ve also completed Up and Running with Photoshop which is now a self-paced class you can take anytime. So….why do I think these classes are so fabulous?

  • Very reasonable and affordable
  • Each class has four lessons and layouts that teach you a myriad of things
  • each class builds on your knowledge
  • each class is taught in video and audio format…you can listen to Jessica teach while watching EXACTLY every step she makes on the computer to get the results
  • Weekly extra assignments reinforce your knowledge and challenge you to design your own layouts
  •  Each class builds knowledge at a great pace…enough to challenge you but not enough to overwhelm
  • Daily e-mails from Jessica Sprague
  • Great mini book tutorial links each week
  • Forums and Gallery to share and ask questions…I’ve always gotten the support I need
  • Free digital downloads come with each lesson that you can use again and again
  • Jessica teaches lots of great hints and shortcuts
  • Lots of photo editing tips
  • You can see the class taught in either Photoshop Elements or in CS, CS2, C3s versions
  • You always have access to the class tutorials so that if you forget, you can always come back and relearn your skills
  • links to great digital scrapbooking sites and many times great coupons

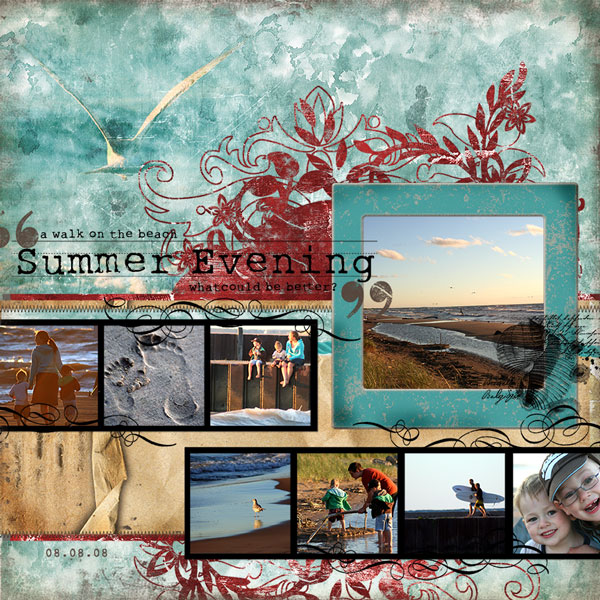
Summer Evening

summer-evening-wip.jpg

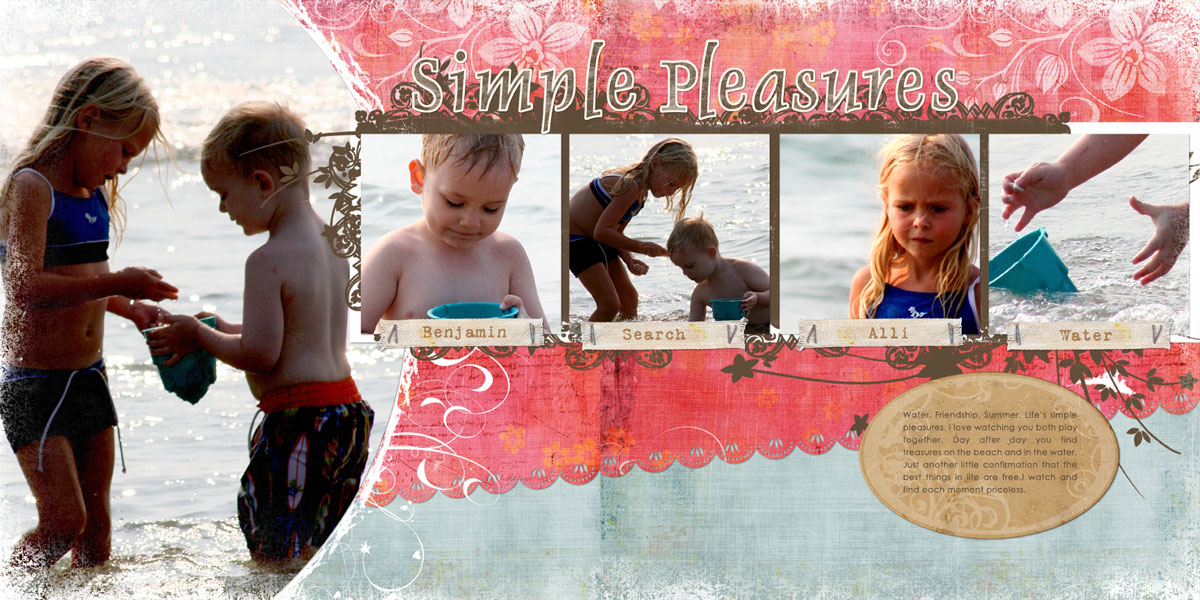
Lesson Four Layout – this is a double spread layout…to see the detail, click on the image

simple-pleasures.jpg

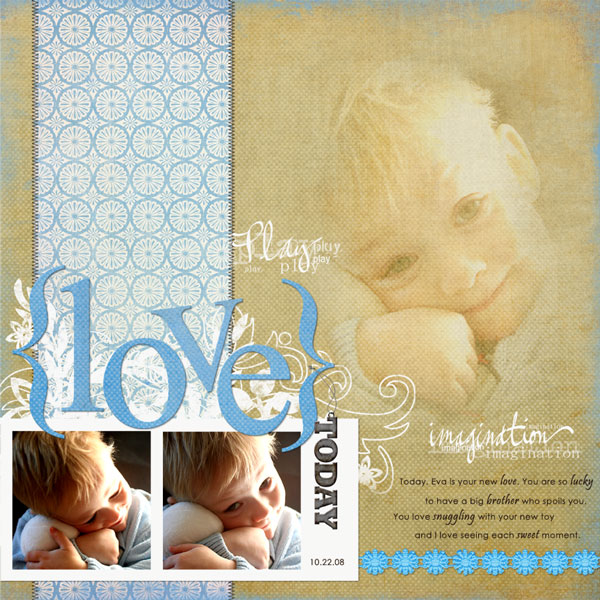
{love} week four Wed. assignment

love-assignment-wip.jpg

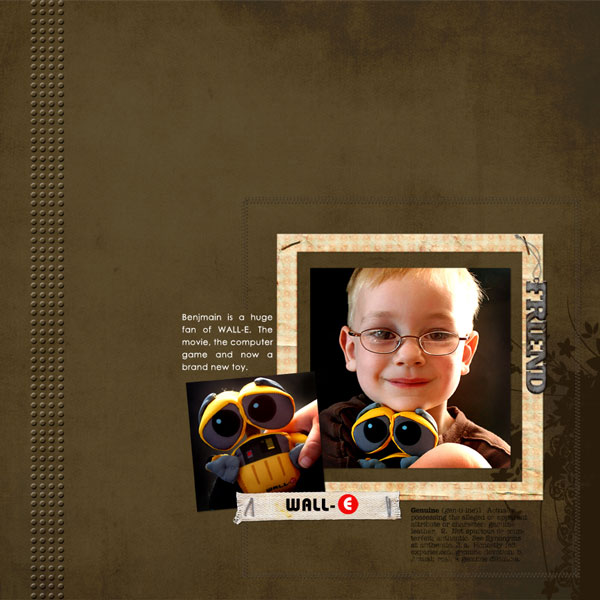
WALL-E just a quick fun layout

walle-wip.jpg

Quick Tip: Digital elements can be used over and over again. Did you notice that layouts 1 & 3 and 2 & 4 use the same flourishes?

Just in case you think I sound a little TOO effusive…I am not affiliated with Jessica Sprague in any way…just a huge fan! I’d been dabbling in digital (self-taught) off and on for about a year. It took FOREVER for me to learn each little thing by trial and error. When I think of the time I’ve wasted…sigh. I’ve learned so much in a few short weeks that I know this is one hobby I’ll be enjoying for a long time to come. If you’re interested in “growing you skills”…this is a fabulous place to start!

While I’ll always be an ink and paper girl… maybe, just maybe, I’ll be a bit of a digi girl too. 🙂

Have a fabulous day!

a-signature-2.jpg