Monthly Archives: October 2008

Simply Saturday… Clear and Fun

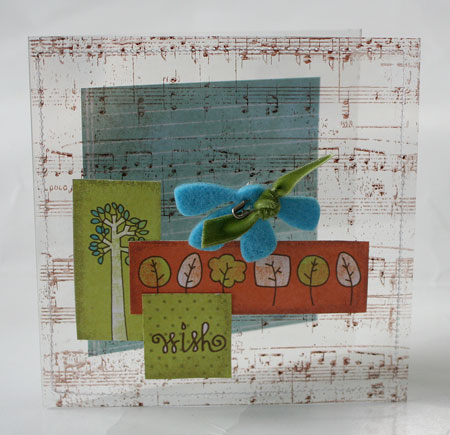
I think by now you probably know how much I love clear product. I always adore that peekaboo look. Clear cards are among my favorites to create. Recently I was asked to create a tutorial for Scrapbooks and Cards Today. S&CT is a great Canadian magazine that is available at retailers in Canada. If you’re not from Canada, don’t worry! You can still see each issue as you can download the entire issue on-line here. S&CT also has a blog and if you’re looking for it…here’s the link to the tutorial I wrote for them.

final-photo-closed.jpg

step-seven.jpg

Have a simply wonderful Saturday!

a-signature-2.jpg

A little light…

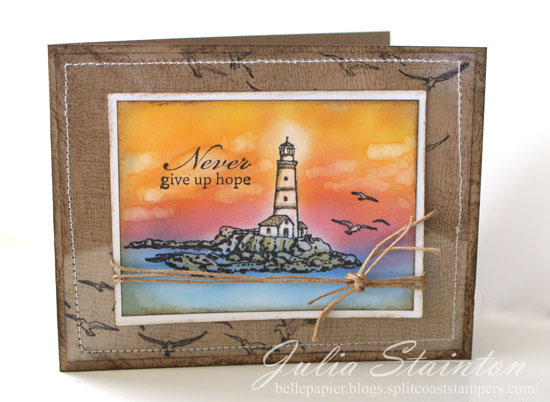
I adore lighthouses. They remind me of wonderful trips to the East Coast as a child and more recently as an adult. I’m so excited about this new stamp set from Cornish Heritage Farms called Beacon of Hope. You may have seen some of them before. It’s a compilation of images and now they are all scaled and designed to work together with each other and some incredible sentiments.  This new line is called Scene-it and you’ll want to watch each month for the release as they are stunning, bring you limitless ways to stamp scenes, and put together in a set, they are an incredible value.

Sorry I’m just getting back to you with the winners of the blog goodies. I’m announcing them at the end of the post so keep reading. 🙂

Never Give Up Hope
jks-never-give-up-hope.jpg

I’ve been having fun with my Copic Airbrush over the past few weeks and have gotten quite addicted to it. I know you’ll be seeing a lot of airbrushing in the weeks to come.This lighthouse background was created by stamping my image and then airbrushing over the design. No masking! I’m lazy! 😉 Because there wasn’t a large amount of white area..I simply took my Colorless Blender pen and removed the color from the lighthouse and seagulls. I used this same pen to color in clouds. To get the white glow around the light, I put my blender pen right into my airbrush and sprayed to remove the color softly.

To create my background I stamped the Cheesecloth Backgrounder onto my kraft cardstock card base. Seagulls from the Beacon of Hope set are stamped on my Clear Card Sheet layer before stitching it to my design.

This design is part of a new Craft Critique article that I’ve written on the Copic Airbrush System. If you’re interested in this product…check it out here.

Quick Tip: When airbrushing with Copic markers, make sure you use the same ink you would when coloring so that the image doesn’t bleed. I like to use Tuxedo Black Memento Ink by Tsukineko and Pitch Black Adirondack ink by Ranger is a good choice as well.

And now those winners! I used an on-line random number generator to choose two winners from the comments left. Thanks so much to everyone who stopped by!#16 Amy is the winner of the first package of goodies and #119 is Carrie…the winner of my second package of blog candy. Please e-mail me ladies with your addresses and I’ll get them out to you!

 Thanks so much for stopping by! I hope you have a fabulous Friday!

 a-signature-2.jpg


Supply List:
Stamps:
Beacon of Hope (Scene-it Collection) by Cornish Heritage Farms
Cheesecloth Backgrounder by Cornish Heritage Farms

Ink:
-Black Memento Ink by Tsukineko
-Black Stazon ink by Tsukineko
-Brushed Corduroy Distress ink by Ranger

Paper:
-Simply Smooth White by Prism
-Kraft Cardstock by Prism
-Clear Card Sheet by Cornish Heritage Farms

Other:
-hemp cord
-sewing machine
-markers by Copic

Just one…

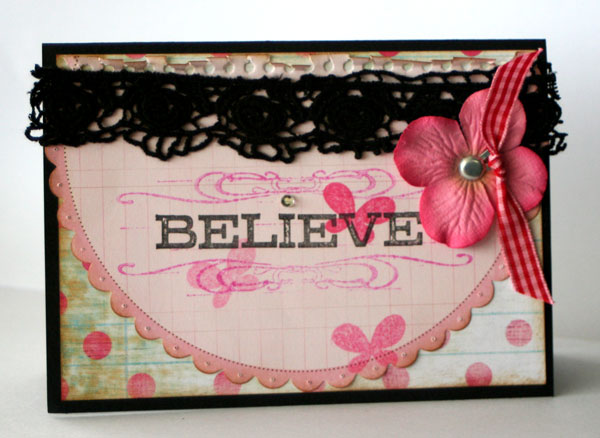
Sometimes simplicity is the way to go. I love the design trend of using just one word to capture what you’re feeling. Actually…at the beginning of the year, inspired by Ali Edwards , Lisa Strahl encouraged me and some others to come up with one word to set the tone for 2008. I chose {embrace} and while most of the year has spun by with dizzying speed, I’ve enjoying embracing the moments the best I can. Today I’m asking you to use the same concept in your design project, whether you decide to create a card or a layout…to simply use one word. If you decide to do a layout…you’ll still want to journal a little so tuck it into a pocket to hide it. As part of the challenge…you need to incorporate the color pink. This week at SCS we’re having a challenge theme week. Because October is Breast Cancer Awareness month, these week all the challenges incorporate the color pink. I think that SCS will be having a pinkalicious gallery! 😉 Whether you create an inspirational card is up to you but if you do…you may want to consider donating your card. To play along...here’s the challenge. Sorry for the wordy post…you’d think that a challenge about just using one word would require a little less rambling! LOL

Believe

jks-believe.jpg

A very simple scrappy card design from me today. I have another in my head but we’ll have to see if I can find the time to get it out. 😉 Our renovation seems to finally be getting somewhere…we get carpet in the basement today! Yay! I can’t wait although I’m sure it will be a busy for the next week trying to get things set up and some bedrooms switched around. We started digging the addition September 2007 so this is huge for us!

I’ll be back with the winners of the blog candy as soon as I can catch my breath!

Have a fabulous day!

a-signature-2.jpg

Supply LIst:

Stamps:
-The Art of Framing (Rummage Bin line) by Cornish Heritage Farms
-butterflies from Little Gal set (Kim Hughes line) by Cornish Heritage Farms

Ink:
Black palette ink by stewart Superior

Paper:
black prism cardstock
Noteworthy by Making memories
Pink Paisley

License to Drive

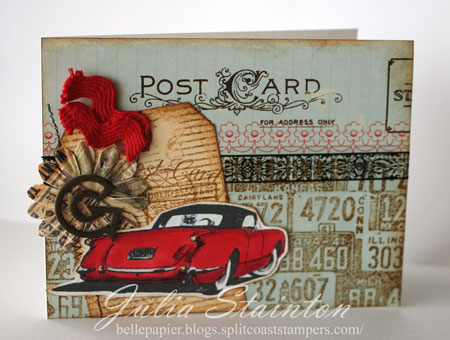
I had so much fun putting together this fun card that I hope you like it! I wanted a very scrappy collage look combining a lot of elements. What could you use this card for…well…how about I miss you, have a great trip or how about a card for a new driver. Hmmmm….I have that to look forward to again in a few months….sigh. Life is full of interesting twists! I taught my oldest child to drive. I’m thinking maybe it’s hubby’s turn next!

 Travel Card

jks-travel-card.jpg

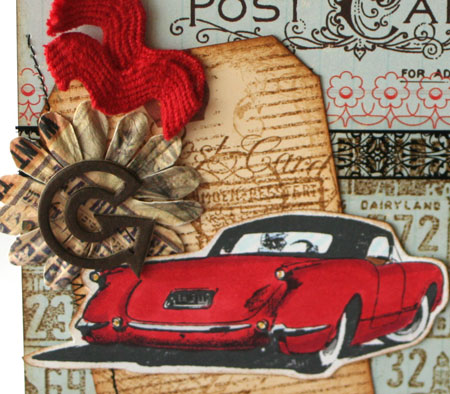
This card was inspired by this new License Plates stamp that you see in the bottom half of the design. I stamped it right on my patterned paper. This stamp is part of a Saturday Evening Post release at CHF next Tuesday. It’s super fun to pair up with the GM line as well.
jks-travel-card-close.jpg

Quick Tip: To get the look of a die-cut…stamp and color your image then cut out leaving a slight border. Lightly sponge the edges and adhere to your design.

Have a wonderful day! What’s up tomorrow? A simply onederful challenge. 😉 See you then!
a-signature-2.jpg

Supply List:

Stamps:
-License Plates (Saturday Evening Post line) by Conrish Heritage Farms
-Fine Lines Backgrounder by Conrish Heritage Farms
-Corvette (GM line) by Conrish Heritage Farms
-(postmark from)Journal Box (Rummage Bin line) by Cornish Heritage Farms

Paper:
-Simply Smooth white cardstock by Prism
-Avery Tag
-Making Memories travel line patterned paper

Ink:
-Brushed Corduroy distress ink by Ranger
-Tuxedo Black Memento Ink by Tsukineko

Other:
chipboard by Maya Road
-ric rak by Creative Impressions
-tape & flower by Prima
-markers by Copic

Cardboard anyone?

jks-girly-close.jpg

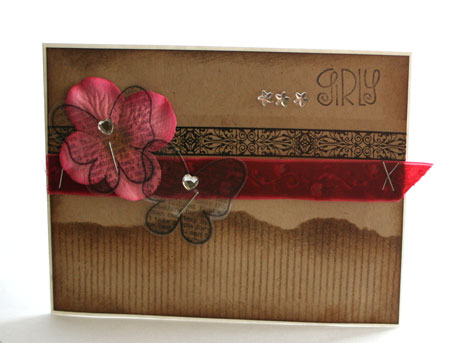
I just love the look of this new Fine Lines Backgrounder stamped on Kraft cardstock. Does it not look like faux cardboard? I decided to try a quick masking technique to make a fun faux torn cardboard edge on my layer. By simply tearing a piece of scrap cardstock and then using it to mask the top area while I stamped the backgrounder and then sponged to create a shadow, I gave this card a bit more dimension without adding another layer.

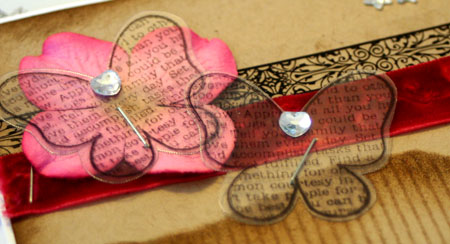
I’ve also been having fun making my own custom embellishments using this darling butterfly stamp from one of Kim Hughes’ new releases. Simply stamp onto a Clear Card Sheet using Black Stazon (one of those must-have inks IMHO) and you can make all the custom butterflies you wish!

Girly

jks-girly.jpg

Quick Tip: When using clear embellishments…layer them over other items such as flowers, ribbon etc. to highlight their clear properties.

Wishing you a fabulous day!

a-signature-2.jpg

Supply List:

Stamps:
-Little Gal (Kim Hughes line) by Cornish Heritage Farms
-Fine Lines Backgrounder by Cornish Heritage Farms

Ink:
-Burnt Umber and Black Palette ink by Stewart Superior
-Walnut Stain Distress ink by Ranger
=Black Stazon by Tsukineko

Paper:
-Simply Smooth White cardstock by Prism
-Kraft Cardstock by Prism

Other:
-Clear Card Sheet by Cornish Heritage Farms
-stapler
-ribbon and flower by Prima Marketing
-rhinestones by MAMBI
-tape by Prima

Getting in Shape…a challenge

Today’s Monday challenge is all about getting in shape! Not with exercise (although I certainly need a good push in that direction) but with designing your projects. How often do we rely on squares or rectangles to design your projects around….pretty much all the time? 😉 I’m certainly guilty of that! That’s why I thought this would be a great challenge to push me, and hopefully you….out of the box and create a shaped design. As this isn’t something I do often and I was a little short on time, I decided simplicity was the key for my challenge design. To play along with this challenge…check it out here.

A lot of the CHF designers were really excited about this challenge. I hope you’ll take the time to check out their fabulous ideas! Kristine, Kim, Lisa Silver, Alli, Carole, Joanne, Val, Dawn, Michele, Lesley, Julie

Believe Ornament Card

jks-believe-ornament-2.jpg


To create this card, I used my circle cutter to cut out the circle leaving a small area to one side uncut to form the hinge. The Pindot Scrapblock™ was stamped in Cranberry over the design and then my snowflakes from the Joyeux Noel set stamped on Rose Bud. Edges were sponged Rose bud and then Distress ink to make it ornament appear to have some depth. My little sentiment was created using a Making Memories grommet that says believe on it. Inside the design…a sentiment from the same set, Believe in the Magic of Christmas.

Have a wonderful start to your week!
a-signature-2.jpg
Supply List:
Stamps:
-Joyeaux Noel (Classic Collection) by Cornish Heritage Farms
-Pin Dot Scrapblock ™ by Cornish Heritage Farms
Ink:
-Cranberry Adirondack ink by Ranger
-RoseBud Memento Ink by Tsukineko
-Brushed Corduroy Distress ink by Ranger
Paper: Blush Red Dark, Medium Pink by Prism
Other:
-ribbon by Creative Impressions, buttons by Autumn Leaves, Grommet by Making Memories, circle punch, decorative tape by Prima

A card and a giveaway…

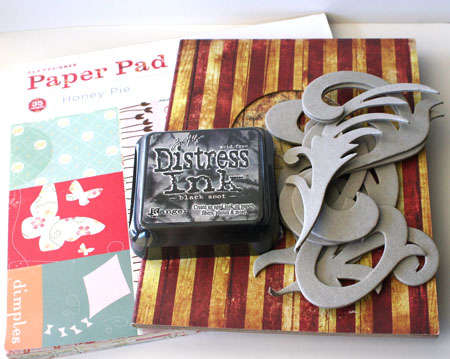
I have a card design to share with you today but first, I just wanted to share a few goodies! A couple weeks ago I had promised another giveaway, this time with lots of goodies. For a chance to win, simply comment on this blog post between now and 10 pm EST Wednesday October 22nd. I’ll be randomly drawing two names from the comments to win and announcing the winners on Thursday. Please only comment once. Thanks!

What I’m giving away….

#1 Daisy D’s Wonder Years 8×8 pad, Basic Grey Chipboard, Making Memories Star Brad, 2 Daisy D’s Patterned chipboard mini albums

wonder-years-goodies.jpg

#2 Cosmo Cricket Honey Pie 8×8 pad, Maya Road Chipboard Flourishes, Black Soot Distress Ink pad,  2 Daisy D’s Patterned chipboard mini albums

honey-pie-goodies.jpg

Finally…my card today…

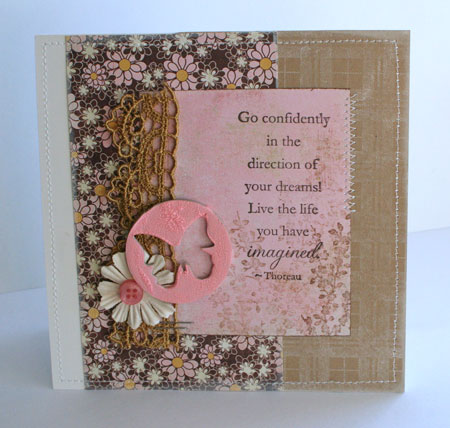
Blossom Dreams

jks-blossom-dreams.jpg

I love using quotes in my designs. Don’t think you always have to stamp them in the middle of your layer…try stamping them to the side.

Quick Tip: For a fresh look…don’t mat your layers. Keep it clean and simple

Thanks for stopping by and good luck! Have a wonderful Sunday!
a-signature-2.jpg

Stamps:

-Silhouette Blooms 1 (Kim Hughes line) by Cornish Heritage
-Perfect Plaid Scrapblock™ by Cornish Heritage Farms

Ink:
-white pigment ink by clearsnap
-Black Palette ink by Stewart Superior

Paper:
-Simply SMooth white and kraft by Prism
-Sugared 6×6 paper pad by Basic Grey

Other:
-flower by Prima
-sewing machine
=chipboard by Maya Road
-Worn Lipstick Distress Crackle Paint by Ranger