Monthly Archives: October 2011

love you}

Love is always in season, right? It doesn’t matter that Valentine’s is a long way away. Letting someone know that you love them is something important all year long.

Today’s card features a stamped tag that says I love you in two languages. I hope you like the inky look. If you’re looking for a tutorial and step outs on it, stop by the Lily Bee Design blog at this link as I share the entire process there. Wow…seems like I’m busy “traveling” all over the web these past couple days. Hope you don’t mind tagging along.

Supplies:


Sending a little love…


a little vintage…

Anyone up for a little vintage today?

How about a little vintage-style Christmas?

Today I’m in the CLASSroom with a tutorial on how to create these vintage style holiday ornaments. I hope you’ll join me!

Have a fabulous weekend!

dream come true

Young love. It’s always so wonderful isn’t it? A few weeks ago I was so excited to hear that some friends of ours got engaged. I just had to make them a card to congratulate them. Best wishes Laura and Marco! We think you make the perfect pair.

For today’s card I used my new Head Over Heels line. It’s fits the occasion perfectly. Head Over Heels started shipping Monday so start looking for it in your favorite stores that carry Lily Bee Design products. I’m so excited to see it in the Ellen Hutson LLC store already. Yay!

To make the paper rosette, I’ve used a Tim Holtz Sizzlets die. I adore these quick and easy rosettes. I just can’t go back to making them the hard way! You may notice that the Maya Road Daisy Trim comes as a ribbon trim by the yard. It’s also perfect as a single embellishment just by trimming off one single daisy. I’ve used one to embellish the center of my rosette.


additional supplies: sewing machine, twine, corrugated heart by Jillibean Soup

Happy creating!

a second look…

Do you remember this stamp? I hope you don’t mind a second look at it. While I had it out last week (see this post for the other design) I just couldn’t resist making another card.

This time I’ve stamped it with the same Jet Black Archival Ink but onto watercolor paper instead of the vellum. I wanted a very loose watercolored style so I made sure to let some of the color pool a little and also leave some white areas as well.


Supplies:


Thanks for stopping by!

festive fall candle

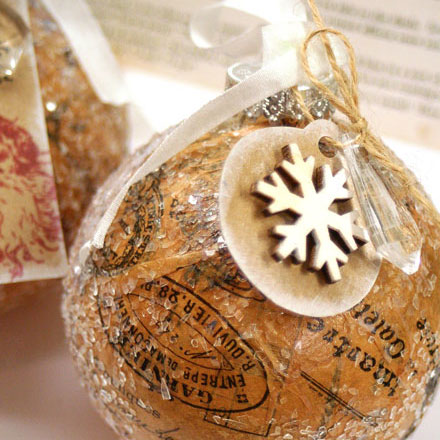
One of my very favorite quick and easy projects to give away is a wrapped candle. With the days getting shorter and cooler, candles have been flickering in my home for the past few weeks. I love the spicy food scented ones like cinnamon, apple and pumpkin. I love how warm and wonderful they are.

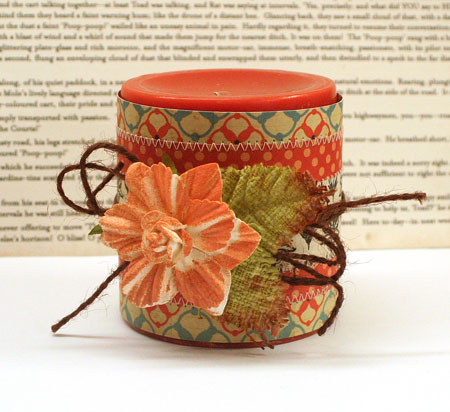
Today I have a wrapped candle project to share with you. I love all the texture and warm colors of fall and have incorporated them into this design.

To create a candle wrap, first measure the height of your candle so that you can plan for the size. I’ve cut 3 – 12″ strips of patterned paper in varying widths.

I like using Glue Dots® when stitching paper layers to hold them in place. One or two dots does the trick and I place them in areas where I’m not going to be stitching.

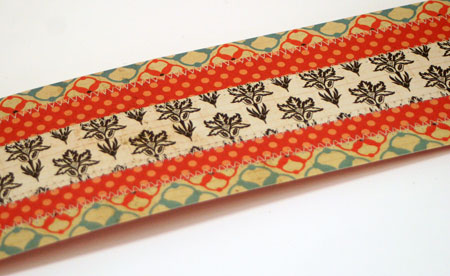
After you stitch the strips together, you should have a 12′ wrap. Mine is 2-3/4″  high.

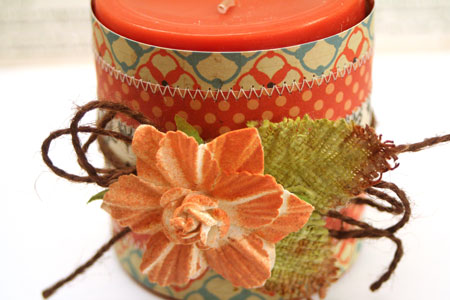
Apply Glue Dots® to wrong side of each end. Wrap around the candle and adhere.

Glue Dots® is the adhesive I turn to time and time again to adhere my embellishments. I can’t begin to imagine how many boxes I’ve used over the past few years. They are clean, quick and easy to use and I love how well them hold my embellishments in place.

To finish off my candle, I’ve tied it with some twine. A Glue Dots® dot under the twine bow keeps it from sliding down the candle. After misting the flower with Glimmer Mist I adhere it and the fabric leaves with Glue Dots®.

Supplies: Glue Dots®, scented candle, twine, sewing machine, Harvest Market Collection Kit by Lily Bee Design, flower by Prima Marketing, Leaf by Prima Marketing, Tiger Lily Glimmer Mist by Tattered Angels

Thanks for stopping by!

I wrote this blog post while participating on the Glue Dots design team.

so special

It’s October 17th and I’m bouncing. It’s a special day for me. Felt like it would never get here. My new Head Over Heels line ships today so it’s time to start looking for it in stores this week. I hope you’ll find it worth the wait.

Head Over Heels is a love-themed line so it’s perfect for Valentine’s, weddings, anniversaries but I’ve also designed it will all the colors and prints I love so I hope you’ll love it for lots of other things as well.

Today’s layout is of my daughter dressed up for prom so you can see it totally works for other occasions as well.

I’ve used a lot of the papers together in this project. One of my favorite elements of this line is the flowers from the Swoon paper and I’ve fussy cut it out here to work as an embellishment. Feel free to click on the above picture for better detail.

You can also find some of the stickers from this line on the page as well as some stamped elements from my new Head Over Heels stamp set.

Today on the Lily Bee Design blog, we’re featuring projects using the Head Over Heels line.  Please join us for some fabulous inspiration from the LBD DT. The projects are so beautiful, I have to tell you, they brought tears to my eyes. I’m so grateful and inspired to be part of such a fabulous team and company.

Wishing you a beautiful day!

’tis the season

’tis the season to start gearing up for the holidays. I adore everything Christmas. It’s such a beautiful time of year. Warm and cozy, full of love and Christmas cheer.

I especially love crafting for the holidays. There are always so many fun products and so many different looks. I’m especially partial to a vintage style for holidays but I love clean and simple too. I think it’s the sentimental part of me that loves all things from long ago.

This card combines some pretty vintage style stamps with the new Jingle Lily Bee Designs collection for a nostalgic Christmas card. The stamping is easy and I’ve adding is some subtle sponging with Distress Ink to define the edges and add to that shabby look.


I’m totally loving these Maya Road snowflake transparencies. They are so pretty and the way they catch the light…swoon.

If you’re ready to get into the Christmas crafting mood, Ellen Hutson LLC is having a wonderful Christmas Sale for the next three days. Everything in the Christmas Sale category is 20% off! I’ve already been shopping this morning as I couldn’t resist. There’s more than 1300 items and you’ll find things like ink, glitter and paint that you can use all year round as well. Happy shopping!

Here’s my supply list…


Have a fabulous weekend!