Monthly Archives: September 2011

Paper Crafts magazine Presents: 12 Days of Christmas Blog Hop

Christmas is coming! It’s that time of year when I start getting excited about Christmas cards and crafts and cookies and all the wonderful things I plan to do this year. Of course, most often my dreams exceed my available time but oh well! That’s life.

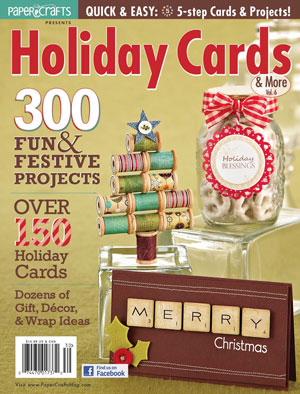
Can you tell that I seriously enjoy Christmas? It’s my favourite time of the year. It’s a time of peace and hope, a time for family and a joy for the senses. If you’re looking for some fabulous Christmas inspiration, look no further. I’m so excited about this latest Paper Crafts Magazine issue, Holiday Cards & More.

Why?

So many reasons. It’s always one of my favourite issues as it is packed chock-full of ideas for my favourite holiday. The creative ideas always get me in the mood to create. Just look at that uber-cute spool tree on the cover. That’s a must-do project for sure! I just can’t wait to get started.


Speaking of getting started, I actually did get a head start on Christmas last spring when working on designing submissions for this issue. I’m excited to have 12 projects in it. When it comes to designing for Christmas in the spring, it’s always a bit of a challenge to get your head in the right time of year but once I pull out those holiday papers and goodies, the joy of Christmas pops right back up again.

Looking for this issue? Find it on-line here.

Christmas can be a busy time though, right? It always sneaks up. Holiday Cards & More features lots of quick and easy projects so you can squeeze them into your hectic schedule. They are easy to mass produce and great to mail.

So how about a blog hop featuring quick and easy holiday cards for today? I actually created two. I just couldn’t help myself! 😉

This card uses the new Jingle collection from Lily Bee Design. I just adore the muted holiday colors. I’ve die cut the snowflake from patterned paper over chipboard for a simple wintery look. Now if you just can’t help yourself for a few special cards, this design would also be easy to step up a notch if for some strange reason you have an overabundance of time. Some tied on twine, some bling or some glitter on the snowflake will do the trick.


Supplies: Kraft Cardstock by Bazzill, Jingle 6×6 Tiny Tablet by Lily Bee Design, Snowflake die by Sizzix, Craft-a-Board by Essentials by Ellen, buttons by Basic Grey, Tissue Tape by Tim Holtz, corner chomper by We R Memory Keepers, Glue Dots®

Tips for Creating Quick Holiday Cards

  • limit your layers – it will save time, money and also postage fees
  • purchase 6×6 paper pads for your cards as all the papers will coordinate and save time
  • choose a simple layout
  • die cutting your own embellishments can save money. to save time adhere your patterned paper to your chipboard before cutting so that you can die cut in one single step
  • adhere buttons and other embellishments with Glue Dots for instant adhesion
  • stamp your sentiment or leave without one for even quicker cards
  • go for a clean look. i love inking and distressing but they do add time
  • mass produce your cards by doing all the cutting in one block of time, the stamping in another block of time and adhering layers in another.
  • i love bows and twine but leaving them off your holiday cards will really speed things up
  • don’t over think your design – use the kiss approach (keep it simple stupid 😉 )
  • remember…it’s the thought that counts!


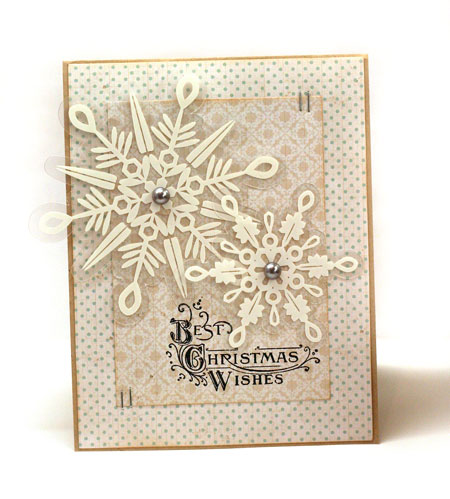
This card also uses the Jingle 6×6 paper pad. Once again I’ve used a simple design and added some pretty snowflakes for a wintery look.

Supplies: Jingle 6×6 Tiny Tablet by Lily Bee Design, White Snowflake Transparencies by Maya Road, Christmas Emporium Cling Stamp 3 by Hampton Arts, Jet Black Archival Ink by Ranger, Pearl rhinestone stickers, Tiny Attacher by Advantus

I hope you’ll doing some blog hopping today for some fabulous quick and easy holiday card designs. I know they are going to rock! Just check out this line-up…

Lastly, you just KNOW that Christmas means giving and this blog hop is all over that! There’s lots of ways to win!

Check it…

  • leave a comment on my blog (this post) by midnight (MDT) on Sunday, Oct. 2 for a chance to win a copy of fabulous Holiday Cards & More, Vol. 6
  • stop by all the above blogs on the list and leave a comment for more chances to win a copy of this issue
  • Don’t miss this one!!! Stop by the Paper Crafts Connection for a chance to win an absolutely wonderful stampalicious paper crafting prize. Seriously. I’m totally jealous of whomever wins it! Good luck!

Whew! Aren’t you glad you stayed with me to the end?

Ready, set…start hopping! And good luck!


wreathed in fall

One of the best things about fall is all those beautiful leaves. They are always stunning here in Ontario and my children love jumping in them. Last year they turned into a photo op and this year I think we’ll have to do the same. I must admit, if I had to rake them, I probably wouldn’t love them so much. We have a lot of open space around us though and I’m very lucky that they just blow away.

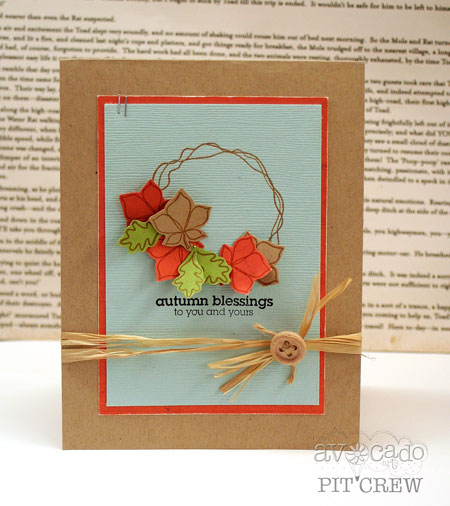
The new Avocado Arts stamp set, Ho Ho’s and Holiday Blessings is the perfect set for this time of year. It’s a fun blend of fall and Christmas so you can create those Autumn cards now and also get started on your Christmas ones as well. Today I’ve focused on fall. I have another card featuring this set to share tomorrow so pop back in for a Christmas idea then.

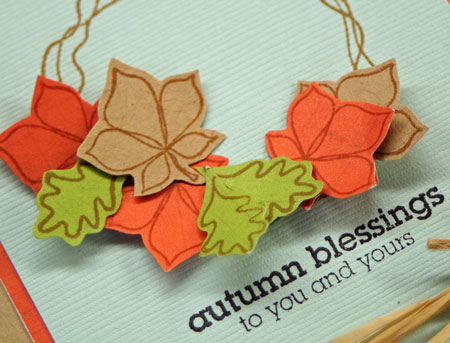
I love the wreath stamp that comes with this set and here I’ve simply stamped it and then added on some accent leaves. They are stamped onto patterned paper (Lily Bee Stationery line) and kraft cardstock for those pretty fall colors.

Supplies: Kraft and blue cardstock by Bazzill, Stationery Line Patterned paper by Lily Bee Design, Ho Ho’s and Holiday Blessings stamp set by Avocado Arts, Jet Black Archival ink by Ranger, Sepia Archival Ink by Ranger, Wood Button by Maya Road, Sanding Block by Tim Holtz

Want to see some great samples with this set? The Avocado Arts Design  Team is sharing them today so stop by and be inspired…

Have a fabulous day!

sweet smile

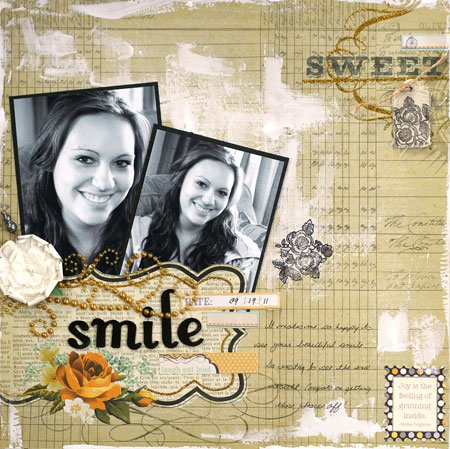
It’s always a treat to see your children smile. It makes you want to smile too. Last week I took a few photos of my daughter smiling. It was a beautiful big smile. She’d just gotten her braces off and we loved the results. A new beautiful white smile is definitely worthy of a scrapbook page, don’t you think?

Using a scrapbooking kit makes it easy. I was so excited with September’s stunning kits from Up the Street Scrapbooking. This layout uses the Bliss kit and it’s very aptly named. Gorgeous glittered papers. Sigh. Love it!

Now this layout uses just one main sheet of patterned paper but I managed to create a pocket in it for my photos by using one of the printed design elements. I carefully cut along the top and part of the side of the bracket box using a craft knife. To add a distressed feel, I brushed on some Picket Fence Distress Crackle Paint. The sweet little Maya Road canvas tag is stamped to embellish it.

Keep smiling!


autumn & argyle

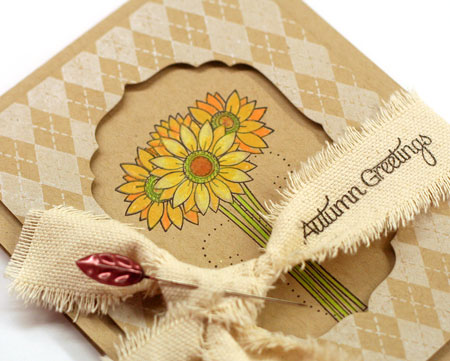
It’s officially fall and I’d like to share some Autumn greetings with you today. When I think of Fall I think of wool sweaters, leaves and cozy prints. I think of back to school and I think of argyle. Argyle is one of those classic patterns that looks great with almost everything. The Argyle Background from Market Street Stamps is so lovely stamped in any color but I’m lovin’ it here stamped in white pigment ink on kraft. I have lots of ideas for this stamp so stay tuned. You’ll be seeing it a lot!


I paired up last month’s beautiful Autumn Greetings stamp set with the Argyle Background for sneak peek week at Market Street Stamps. I love how beautifully they pair up together! My argyle layer creates a frame for the beautiful fall flowers by using a die to cut out the window. Coloring kraft cardstock with colored pencils is a super easy technique and always looks beautiful.


As I mentioned above, it’s sneak peek week at Market Street Stamps. Here’s how sneak peek week works…

  • DT projects (sneak peeks) on the Market Street Blog Monday thru Wednesday. All peeks are scheduled at 7 pm Central Time.
  • On Thursday, the sets are revealed and all the sets go on sale at 7 pm Central Time.
  • For ONE WHOLE WEEK after that, new sets are 15% off individually or 25% off if you buy that month’s bundle (all sets in the release)

Supplies: Kraft cardstock by Bazzill, canvas fabric, Argyle Background and Autumn Greetings Stamp set by Market Street Stamps, Primsacolor Pencils, Jet Black Archival Ink by Ranger, Frost White Pigment Ink by Clearsnap, Leaf Trinket Pin by Maya Road

And here’s a peek at another upcoming Market Street set, Sweet Spooks…

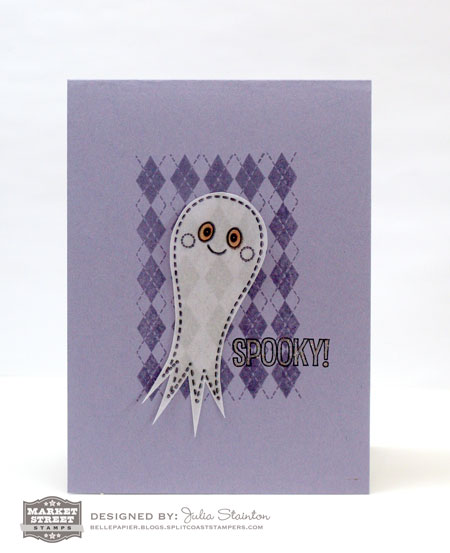
This card is super simple. It has an argyle mini stamp in it as well. It’s a slightly smaller scale and comes as just a strip of argyle so that you can stamp it however wide you wish. I’ve stamped the argyle image 5 times for the above card to make the background.

To make the ghost look “spooky”, I’ve stamped it onto vellum and allowed it to “float” on the card. I know vellum can be tricky to adhere without showing the adhesive so here’s my trick…

Quick Tip: Color in the ghost eyes on the reverse side of the vellum for a subtle look. Then, use a glue pen to apply adhesive just on the back of the eyes. You won’t see the adhesive this way and the ghost seems to float on the card.

Supplies: Sweet Spooks stamp set by Market Street Stamps, wisteria ink and paper by Stampin Up, Vellum by Bazzill, Jet Black Archival Ink by Ranger, Glitter pen, Tangelo Memento Marker by Tsukineko

Happy stamping!


my wish

Cancer.

It’s a dreaded word, isn’t it? I’m sure if you think about it someone in your life right now is touched with it. It’s had an impact on my family.

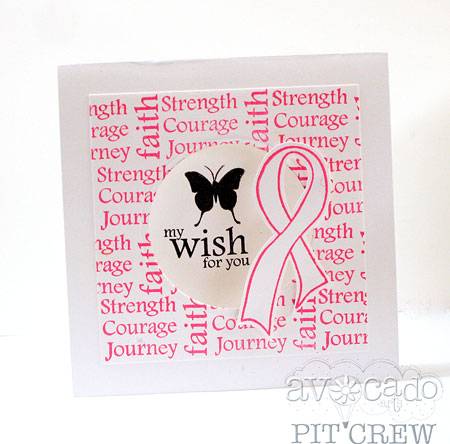
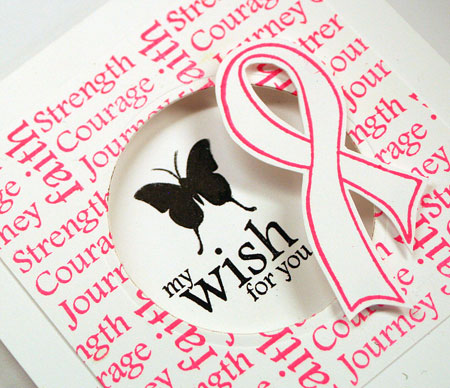
Today I want to share a card I created with a new Avocado Arts stamp set. It’s called My Wish for You. It’s a beautiful set…a wonderfully flexible set too. I love all the possibilities. My Wish for You doesn’t have to be just for illness but can be used for every day stamping as well. The interesting thing about this set is that each month a portion of the sales will go to a different charity. Until September 30th, they will go to Isaac’s Foundation, to be used for Childhood Cancer Research.

Since I have a friend who is fighting breast cancer right now, I decided to go pink with this card for her. This card is a clean and simple design with a window die cut in the middle. I’ve created the background by arranging four different sentiments onto an acrylic block into a rectangular motif and then stamped the background pattern.

Supplies: White Cardstock by Neenah, My Wish for You stamp set by Avocado Arts, Rose Bud Memento Ink by Tsukineko, Jet Black Archival ink by Ranger, Circle die by Spellbinders

Have a beautiful day…


simply get well soon

Ever make a get well card for yourself? I may just be the first to do such a bizarre thing. Stay with me. I’ll explain.

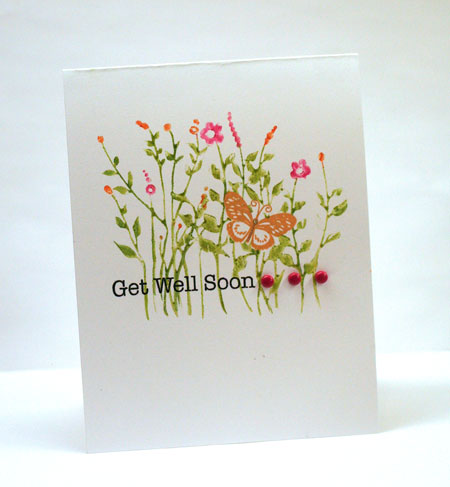
I have had the worst fall cold or flu or something! Nasty! Wednesday and Thursday I could barely function. Friday, a little better but not much.You know how it can be. Almost zero energy. To try and get myself going again, I decided to make a card. I pulled out a stamp on my desk and made this for me. No. I’m not really giving it to myself but I made it to make me happy. A little creative therapy before hauling myself back to bed. While I could have put any sentiment at all on it, I’m always in need of get well cards and this certainly fit my mood.

So…how am I doing? Slowly getting better each day, I think. Hopefully by tomorrow I can start making headway on my to do list and get caught up.

You may notice this is the same stamp I used a couple days ago for my CLASSroom post. Yes, I’d left it on my desk. The fun thing is that you can see how easy it is to get two different looks from the same stamp. I love stamps!

To create this clean one layer design, I first stamped the butterfly and masked it with Eclipse Tape. Then I simply inked my stamp with colors of Memento Dye Markers, “huffed” on it and stamped my image. I always love this simple technique.

Supplies: Solar White Cardstock by Neenah, Pear Tart, Rose Bud and Tangelo Memento Markers by Tsukineko, Basic Grey Butterflies and Wildflowers stamp set by Hero Arts, Everday Sayings Stamps set by Hero Arts, Jet Black Archival Ink by Ranger, brads, Eclipse Masking Tape

What do you do to make yourself feel better? Do you craft a little?

Thanks for stopping in!

Pretty Petals

I’m always had a thing for little boxes. They are just so cute.

Lately I’ve been diggin’ pillow boxes. I had one of my desk the other day and the end of it reminded me of a petal. Which got my mind whirling. What would a bunch of them look like together? Could I make a flower?

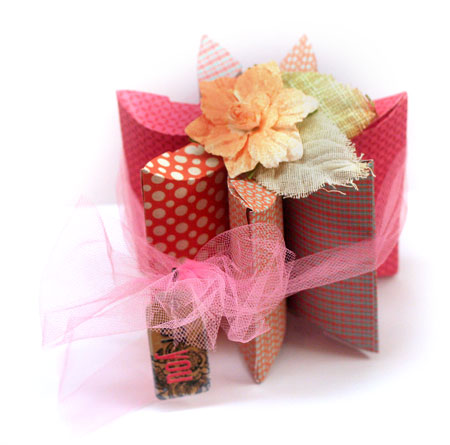
So here it is. My petal box flower. It’s a fun and unique gift wrap option for a bunch of little things. There are seven petals on it. Odd numbers always look so much better don’t you think? There’s also seven days in the week. Hmmm… how about filling it with treats or notes, one for each day of the week? It’s a possibility.


To create this fun flower from pillow boxes, I used a pillow box die and put together seven little pillow boxes. You can use a template but using the die really makes things precise and speeds things up. I put together seven in NO TIME! The fun papers are from Lily Bee Design.

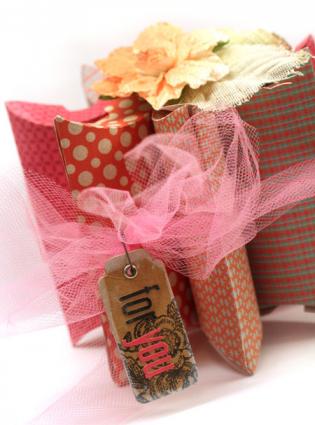
Once the pillow boxes are assembled, I held them together at the inner edges with Glue Dots. The flower is tied together with some tulle for stability and also to hold on the tiny little stamped tag.

I created this fun box to share on the Lily Bee Blog the other day. Stop by and check it out if you have the time.

Supplies: Happily Lost Tiny Tablet by Lily Bee Design, ABC Stickers by Lily Bee Design, Picket Fence Stamps by Lily Bee Design, Pillow Box Die by Sizzix, tulle, Jet Black Archival Ink by Ranger, Wedding Shoes Flower by Prima, Tiger Lily Glimmer Mist by Tattered Angels, leaves by Prima, Kraft Tag by Maya Road, Glue Dots

Have a fabulous weekend!