Monthly Archives: October 2011

sweet spooky spider

Boo!

It’s Halloween! I’m not so into the spooky side but I do love all those sweet treats and the smiles on the childrens’ faces. So today I have a not-so-spooky card to share with you. I think you’ll agree with them that this spider is darling. I can’t believe I’m saying that about a spider. I’m much more inclined bid them a quick good-bye!

Today I’m sharing this project on the Market Street blog along with how I created it. If you’re looking for supplies, check out the links below…


Happy Halloween!

merry & bright

I got a shock the other day when looking at the calendar. It’s almost November! I know this probably isn’t a huge newsflash or anything but I guess I was just shocked at how quickly time is flying by. Didn’t school just start?

November means that it’s almost December and Christmas is just around the corner. So I looked at the calendar and do you know what? Just 54 more days until Christmas! Good job I’m sitting down. Good thing I’ve already started my Christmas cards! Like this one…

This card uses the new Avocado Arts Bring on the Holiday Cheer Stamp Set. I had a little fun thinking outside the box with this stamp set. What you can’t see in the above photo is that the stamp set does NOT have a solid tree stamp.It’s actually just the outline.

What I did to get the solid image is to actually put the stamp WRONG-side up on the acrylic block and then ink it up. Then I carefully peeled the stamp off the block and placed it onto my paper. To get a good impression, you need to press the stamp into the paper with your finger to make sure that all the areas stamp fully. Try it out on scrap paper first. It takes a few tries to get the hang of it.


To add my glitter to the tree garland, I simply traced the lines with a glue pen and then sprinkled on the glitter. Super quick and adds a lot of shine.

Looking for more fun and festive ideas with this set? Be sure to check out these Avocado Arts DT designers’ posts…


Supplies:


Happy holiday stamping!

love always

One of my favorite things to do is stamp.I know I’ve said this before but the possibilities are endless. I’m always looking for fun new ways to use them.

Last spring I was excited to dream up this card and sent it off with a few others to the Paper Craft Magazine  2011 Stamping Royalty Contest. It was my favorite submission and I was so thrilled to find that Paper Craft’s liked it too. There are 15 Stamping Royalty winners, 3 in each category I believe, the all the projects are in this month’s issue of Paper Crafts Magazine.

Since this issue came out, I’ve been getting a few e-mails on just how to create this card. I thought I’d share the full instructions here as sometimes the ones in print often get edited due to space.

Instructions:

  1. Adhere Eclipse Tape to scrap of cardstock and die cut with bird die. The cardstock you can use on another project, it just helps if you have something to stick the tape to when die cutting.
  2. Adhere the die-cut Eclipse Tape to your card front. You want the piece with the negative shape of the bird.
  3. Stamp the definition stamp over the eclipse tape and then remove masking. You should be left with a stamped text bird image.
  4. Cover the stamped bird with the OTHER piece of masking material. Mist card front with white mist spray and allow to dry. Remove mask. Your bird is now complete.
  5. Stamp heart and cut out. Adhere along with knotted twine.
  6. Finish the design by stamping the sentiment.

Now if you still can’t figure it out…don’t worry. I’m going to be writing a tutorial on this technique making a similar card so that you can follow along pictorially. I’m hoping to have it done for tomorrow or Saturday so stay tuned. Hmmm… how about a holiday version? That may be fun!

Supplies:


Additional supplies: Mr. Huey’s White Mist by Studio Calico, twine

Have a beautiful day!

Feelin’ Shabby

I think it’s the rain.

I just haven’t been feeling myself the past couple weeks. It has truly been the rainiest few weeks. To be honest, I’m a little down in the dumps. I don’t usually like to unload on this blog but let’s face it… we all have these kind of days sometimes. I do want to be real.

My solution to feeling better? Take a break. Have a nap. Go for a walk. Or like I did the other day, clear my desk of all the must-dos and just create for fun. When I just want to let go, I usually get into the paint. I love a messy, shabby look. Paint on my fingers…bring it on!

So while I was creating with paint and lots of this and that, I remembered the latest Moxie Fab World Challenge….texture! Perfect! Texture is my thing, baby! So I’m linking this project to the Textured to Perfection Challenge. There’s still time to play along! Why not join me here?

  • corrugated cardboard die cut
  • Glass glitter texture
  • Distress Crackle Paint
  • Canvas banner and roses
  • fabric brad

One of the things I’m excited about on this card is the rolled roses. Here’s how I created them…

Making Canvas Roses

  1. Cut two pieces of sticky back canvas to 5″x5.5″ and adhere backs together.
  2. Die cut double-sided canvas with 3D Rose die.
  3. Roll rose up around a small paintbrush end or other narrow tool.
  4. Adhere flower onto the base with a hot glue gun.
  5. Mist canvas flower with Glimmer Mist.

Supplies:


Enjoy your day!

Something Spooky…

Halloween is just a week away! I need to get cracking as I have absolutely no idea what kind of costumes my two little guys are going to wear this year. I think they’ve outgrown everything I have on hand. I’m kind of a frugal girl so I’m trying to think of what to make with what we have one hand. If anyone has a great idea, I’d love some suggestions!

This card came about as I’ve been just dying to use some of Lily Bee Design’s new Index Journaling Cards. Some have journaling lines on them which are perfect for writing on but others like this witch, are perfect for using as accent layers on your cards and scrapbook pages. This Harvest Market Collection is so great for all kinds of fall and halloween projects.

Supplies:


Thanks for stopping by!

a simple thank you

I don’t think I’ll ever get tired of stamping. There are just so many ways to stamp from clean and simple to complex techniques. Today’s card is one of the simple ones as the stamps themselves are just so beautiful.

While it’ might not be apparent at first glance, this card does use a simple technique. Misting. If you look closely at the colored flowers, there are places on the petals that look like a watercolored image. The color has pooled very slightly.

To mist your image, all you need is a misting bottle filled with water. After inking up your stamp with some dye ink, spritz a small amount of water onto your stamp and then make your impression. Play around with this on some scrap paper before you start to get the right amount of water on the stamp for the look that you are wanting to achieve. The more water you spray, the looser looking your image will be.

I wanted to keep most of the detail in this flower so I held my mister quite a distance from the stamp while spritzing to keep the amount of water to a minimum.

Quick Tip: If you end up stamping quite a wet image, use your heat gun to dry it quickly and prevent the ink from over-spreading.

Supplies:


Have a beautiful day!

falling…

Playing in the leaves is one of those special childhood things. Last year we did a lovely family photo in the leaves and then my two littlest ones had the best time playing in them. Of course, getting them to stay still was almost impossible. This resulted in more than a few blurry photos but all in all, I love the movement in them so why not scrapbook them anyway? I love the photo on the right. Yes there is camera blur but there is so much joie de vivre, it’s actually one of my faves.

Right now the leaves are just starting to fall. I’m excited that my daughter is home for a fall break for the next week. It will be the perfect time to do that family photo shoot again. Of course it needs to stop raining first. PLEASE let it stop raining.

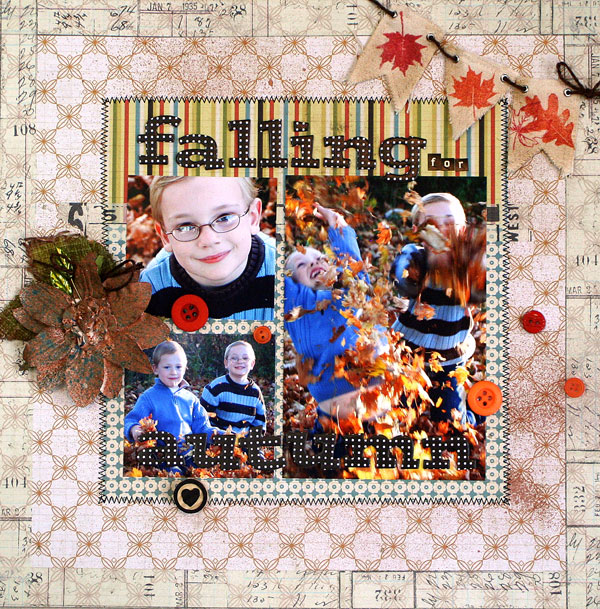
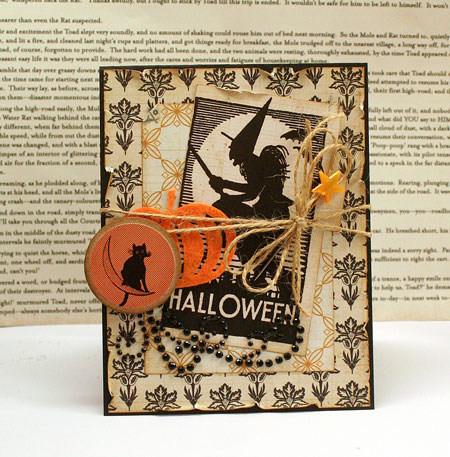
There’s a lot of stamping and inking going on in this layout so I’ve kept the design of it very much in a square grid style. All the photos and embellishments are anchored in the main square of the design.

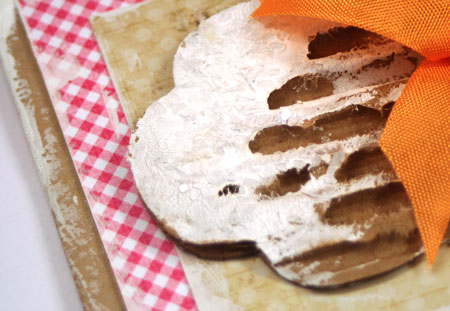
I always love adding in all my embellishments with Glue Dots®. They work perfectly for so many different things. Plastic buttons, paper flowers, wood and they are also perfect for keeping that little tiny canvas banner in place.

My craft room is in the basement. After the summer, it’s been a little damp down there and I keep the dehumidifier running all the time to keep things dry. Sometimes though, my chipboard alphabet stickers get a little less than sticky. I HATE it when they fall off the layout. Soooo not cool! A great trick it to adhere them with Glue Dots® and then you don’t have to worry about this happening.

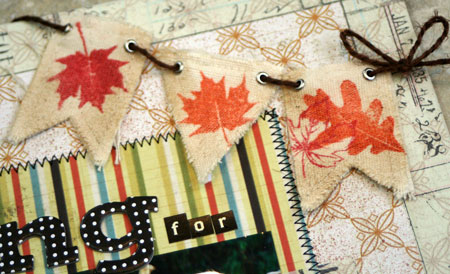
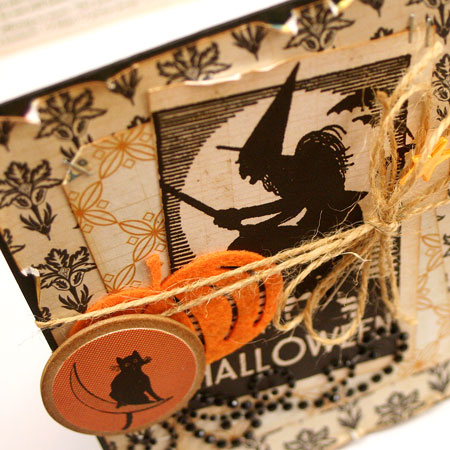
Here’s a little detail of the stamped banner. I probably sound like a broken record here but yes, once again I’ve stamped my canvas with the Ranger Archival Inks.

Supplies: Harvest Market Patterned Papers by Lily Bee Design, Buttons by Basic Grey, Chipboard Letters by American Crafts, Twine, Sewing machine, Copper Mist Spray by Maya Road, Leaves by Prima Marketing, Large Rose Lily  Flower by Prima Marketing, Green Leaf Trinket Pins by Maya Road, Leaf Print Stamps by Hero Arts, Tissue Tape by Tim Holtz, Wood Bingo Motif by Maya Road, Mini Pennant Canvas Banner Pieces by Maya Road, Mini Triangle Canvas Banner Pieces by Maya Road, Ultra Thin Glue Dots®, Craft Glue Dots®, Brushed Corduroy Distress Ink by Ranger, Vermillion Archival Ink by Ranger, Sienna Archival Ink by Ranger

So…what has you falling in love with Autumn?

Enjoy the leaves!

I wrote this blog post while participating on the Glue Dots design team.