Monthly Archives: October 2011

Autumn

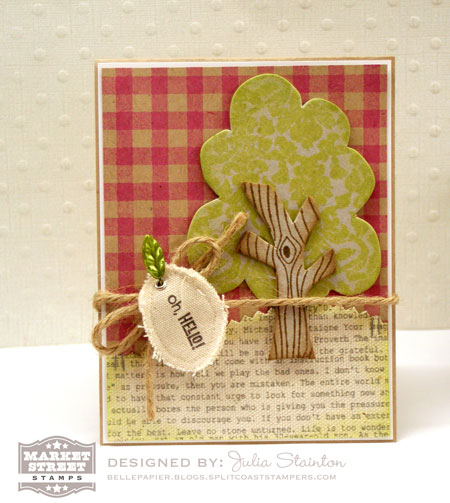
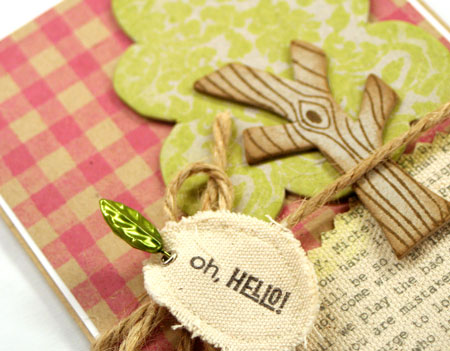
I love the fall leaves. It’s a stunning time of year. A contrast of warmth and crispness. How about a walk through the trees…

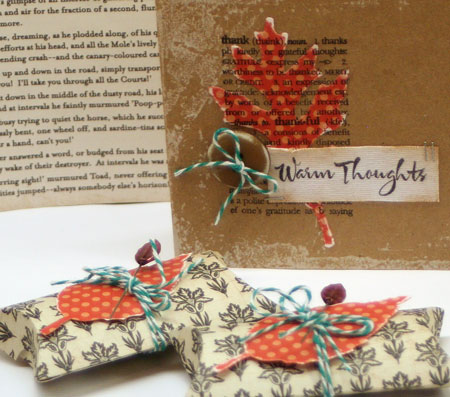
I have a sneak peek at the new Avocado Arts set in this card. Can you find it? It’s a super sweet stamp and it’s inked up brown in this design. I’ve paired it up with two other previous stamp sets.

To create this fall scene, I started off by masking a square space to stamp and sponge ink into. The background has a very subtle graduation of color that I’ve sponged into the unmasked area. Mustard Seed Distress Ink is at the top, Dried Marigold in the middle and Spiced Marmalade at the bottom. I then stamped the trees and sentiment before removing the masking material.

My sweet little pumpkin was stamped and then colored using the Distress Inks. Instead of coloring them per se, I sponged the Distress Ink right onto the stamped pumpkin and stem and then cut them out.

The Avocado Arts Design Team has some more peeks at this new set to share with you. Check them out here…

Supplies:


Enjoy your weekend!

forever and a day

22 years ago today the sun was shining, the fall leaves were  stunning and it was an incredibly warm beautiful fall day.

22 years ago today i felt like a princess.

22 years ago today was one of the best days of my life.

22 years ago today i made one of the biggest commitments of my life.

22 years ago today i thought i couldn’t love my man more. i was wrong. i love him more today.

22 years ago today i married my love, my friend, my support

22 years ago seems like just a blink away.

(this card is designed using the October Bliss Up the Street Scrapbooking Kit)

to my man…

i love you honey.

i love you through the good times and the bad.

i will love you forever and a day.

22 years and counting…

very vellum

Do you ever have a stamp just sitting there in your craft room that you know exactly what you want to do with it but for some reason or other, it keeps getting put off until tomorrow. Well, after months of tomorrows, I finally managed to ink up this sweet stamp.Immediately when I saw this stamp I knew it needed to go on vellum. I’m sure there’s a ton of other beautiful ways to use it. I’m thinking I just may try watercolor next but I really wanted to stamp it on vellum.

Vellum is really difficult to photograph and I don’t think theses images do it justice but I hope you’ll use your imagination and see the softness and translucency of this card.

To create this design, I first stamped the image on the front of the vellum card. The Jet Black Archival ink works really great on vellum too. Ink takes quite a while to dry on vellum so be sure to heat set it with a heat gun.

To get a beautiful soft look when coloring on vellum, I love coloring with markers on the reverse side. Above you can see how vibrant the color is and then how soft and subtle it is on the front in the photo below.

Another thing you can do with vellum is emboss it easily. Even dye inks take a while to dry and I’ve stamped the sentiment and then embossed it with clear embossing powder to make it really stand out.

On the inside of the card, I’ve adhered a white cardstock panel that will be easy to write a message on.

Supplies:


Thanks for stopping by!

just came to say hello…


It’s a party! Wanna come?

Market Street Stamps is having a great block party to kick off their 1st Anniversary! Congrats MSS!

I hope you’ll join us and have some inky fun. There’s a guest designer spot for Market Street Stamp up for grabs as well as a $50 store credit each month for an entire year. Be sure to check it out here!

Once again I gave into the allure of my background stamps and had some inky fun with them. For this design, I’ve combined three different Market Street Stamps to create the background as well as the fun color and pattern on the chipboard tree. Stamping with background stamps is a great way to add interest to a design.

Here’s the close-up…

Quick Tip: I’ve been asked by quite a few people how I stamp so cleanly on canvas and fabric. As I stamp with many types of stamps, I think the secret is in the ink. I love all the Ranger Archival Inks for clean and permanent stamping on fabric. My absolute favorite ink is the Ranger Jet Black Archival Ink. I use it for all black stamping except when using Copic Markers.


Supplies:


Happy creating!

punch it up

I love my punches. Especially my border punches. While die cutting has some fabulous options, I think there is a place for the quick and easy punch in every craft room. I don’t have to worry about anything, just a quick punch and it’s done.

My favorite border punches are the simple ones. The ones that are timeless and can be used on so many different designs. I’ve punched cardstock and patterned paper with them and just finally got around to trying punching vellum borders. I love the subtle lacy look.

To create this card, I’ve punched a series of layers of vellum with different edger punches. At the bottom you get see the blue cardstock showing through and as you go up, the layers of vellum become more opaque.

Because vellum is translucent, you need to take care where you adhere it. I’ve made each layer longer than the first so that they would all adhere from the same place. They all adhere with strips adhesive and I then covered it up with the lace trim.

If you’re looking to round out your punch collection, Ellen Hutson LLC has a punch clearout. Most punches are 40% off. I’ve had my eye on a few and now is a great time!


So today has been a great day. My family at home and lots of turkey and pie. I have so much to be thankful for. I’m sad though too, as I just said good-bye to my daughter. I’m thankful she’ll be home in two weeks. I hate good-byes.
Take care and happy creating!

bountiful blessings

Happy Thanksgiving!

It’s Canadian Thanksgiving today and I’m so excited to be spending the day with my family, cooking pie and turkey and just enjoying all my blessings. I hope today is a day of blessing for you to, even if it’s not Thanksgiving where you are. Every day is a good day to count your blessings.

This card uses the Autumn Greetings Market Street Stamps set and be working a little masking magic, I’ve turned the sweet pumpkin into a lovely festive container for the fall flower bouquet.

Eclipse Tape is my favorite product for masking. It really can’t be beat for precision. To mask this little arrangement I first stamped the flowers and only inked up the blossoms and not the stems. After stamping the flowers, I restamped them onto the masking tape and carefully cut out the image. The more care you take in precision cutting, the better and cleaner your masking will appear. Cover up the flower image with the cut out masking tape and then stamp the pumpkin. I’ve then colored the image with my Copic Markers to finish it off.

Here’s the Copic Marker colors that I used.

Supplies:


Wishing you a wonderful Thanksgiving!

Warm Thoughts

Fall is in the air and I’m busy gearing up for a wonderful long weekend here in Canada. Monday is Thanksgiving here and I’m so excited to have all my family home and under my roof. I’m still trying to get well. This cold has really done a number on me but I’m praying for a little more energy and hope to make some pies. Thanksgiving just isn’t the same without turkey and pie is it?!

I’ve also been in my craft room making up some quick fall projects to celebrate the occasion. Come join me today in the CLASSroom for how to create them and a fun text stamping tip.

Wishing you a safe and wonderful Thanksgiving weekend!