Monthly Archives: November 2007

Simply Saturday…a quick holiday set

Quick designs are perfect for busy weekends, especially at Christmas time. There is so much going on,baking, shopping, wrapping, decorating, so many fun things to do and of course, you want time for your family. That is why it is great to have quick holiday projects. The following set is one I came up with a little while ago, a fun holiday set of an invitation, place card, and napkin wrap that is easy to put together. Especially when you are making more than one…it is best to use that KISS approach. 😉

Beaded Christmas Invitation

jks-beaded-christmas-invitation.jpg

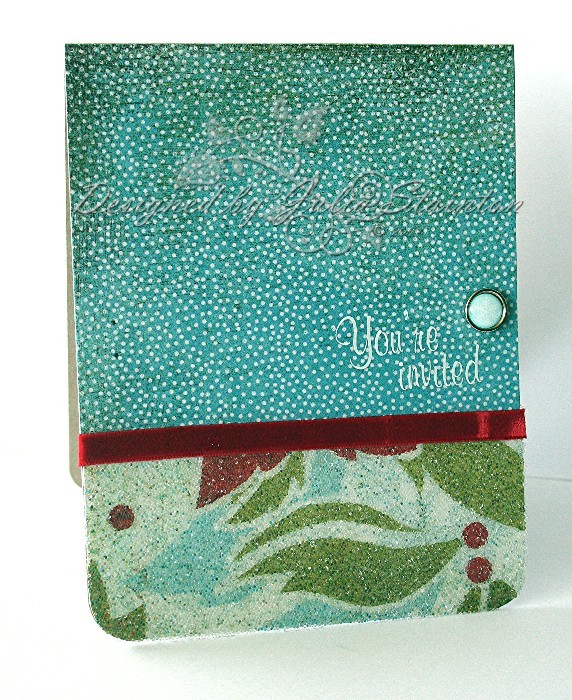
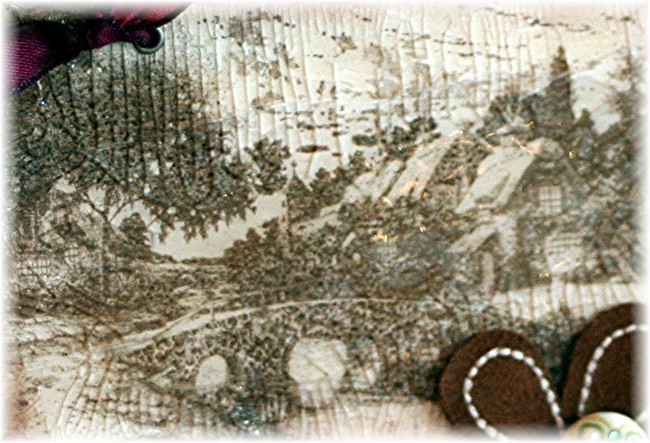
This quick invitation uses a clean design with the beautiful Basic Grey Dasher paper. For the bottom section of the design, to make it special and a little frosty looking, I covered the patterned paper with some double-sided adhesive and then covered the entire surface with micro beads. A warm red velvet ribbon from Flair Designs adds an elegant look. The You’re Invited sentiment is a white rub-on that could easily be stamped instead if desired. It is a little hard to see, but the blue brad is a Making Memories Pebble Brad in a holiday snowflake design.

Quick Tip: I find the best micro beads to use for this project are the very tiny ones by Provocraft. I’ve tried other larger size glass beads from Michael’s but just didn’t have the same success with them.

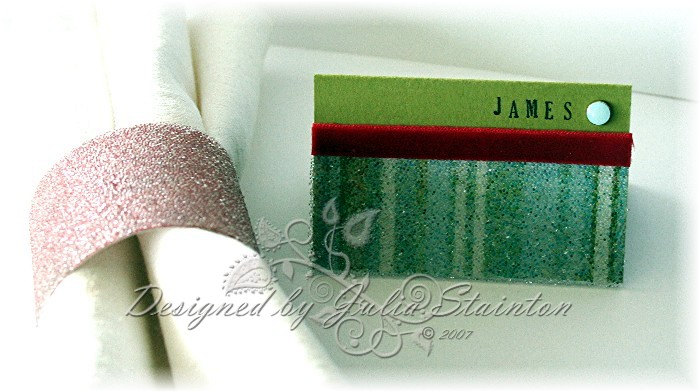
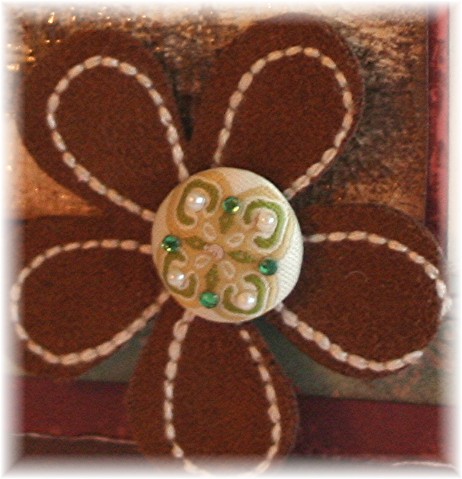
For table settings, a quick coordinating look is great for the party. The little place marker is created with coordinating striped Basic Grey Dasher paper as well…covered int he same manner as above with double-sided adhesive and microbeads. Names can be easily stamped to personalize the design with Karen Foster Snap Stamps and a little ink.

For the napkin ring, simply cut a strip of patterned paper the circumference you need and adhere the ends together well. Cover with more double-sided adhesive and roll in microbeads. You can further decorate them if you wish with ribbon or other embellishments.

jks-beaded-christmas-placecard-napkin-ring.jpg

I also designed a Holiday Candle Centerpiece to go with this design. You can check it out at this post or in Paper Crafts Magazine’s Holiday Cards and More special publication.

Wishing you a great weekend and wonderful holiday season. It’s coming quickly so have a little fun and get started on those holiday creations!


A Little This…. A Little That….

Lots of things going on….I have a few links for you to check out today! AND snow has arrived overnight! Oh it is sooo pretty! The boys have been having a blast! My littlest guy is two and doesn’t remember last winter. You should have seen his eyes this morning when we brought him out of bed and to the window. Big wide eyes and a big round O for his mouth. So darling! Don’t you just love little ones? They make you see the wonder of it all with fresh eyes! I have a few pics to share with you at the bottom of the post. But first…

  • Cornish Heritage Farms has a new product spotlight today. CHF is spotlighting all four Ranger Liquid Accents products. You’ll want to check out Lisa’s spotlight and tutorial on how to use these products. You’ll also want to note that these products are on promotion for the next two weeks Yesterday, I posted a design using the Ranger Crackle Accents. It was fabulous to work with. Now I can’t wait to try out the other products as well!
  • Jacksonbelle is having a huge Thanksgiving Sale at her store featuring Basic Grey, Prima, Around the Block, Queen and Co. and Webster’s Page … all 30% off until the end of the weekend. Wowsers girls…I am NOT missing this one! You can check it out at Jacksonbelle’s Embellishments. 🙂
  • Lizzie Anne Designs has announced their new stamp release date. You can find it and other cool info in their new SCS Forum . Also…sorry this is rather late…but I wanted to congratulate the winners of the October Card Contest. All entries were donated to Card for Cancer. Check out the fabulous entries at Card Contest Winners. Congratulations ladies! All the designs were beautiful!
  • Webster’s Pages…If you’ve never checked out these gorgeous papers, you really must. They are stunning! And Terri Conrad is having a fabulous Twelve Days of Christmas celebration that you don’t want to miss! Check out the details below and be sure to visit Terri’s Blog & Terri Conrad Designs to play along. Honestly…my mouth was just hanging open at some of the gorgeous creations.

tcd_tingaling_howtoplay.jpg

And finally…those snow pics! 🙂 Please bear in mind it was VERY difficult to get two very excited boys to stay still long enough for a photo! LOL That and the fact that fogged up bi-focals on a 5 yo are tricky as well. As you can see…they are having a blast! They wanted to stay out all morning. So much for stamping today…but these moments are precious and work can wait, right? 🙂

Baby, It’s Cold Outside!

jks-boys-snow-composite.jpg

Building a First Snowman

jks-joshua-snow.png

Have a great weekend!

With Love…

Black and White designs…I just love them! Always classic and elegant…for this design I paired up a simple color scheme and design with lots of little texture touches. Velvet rub-on flowers, and textured black cardstock, along with a little stitching and a couple distressed edges.

This design is published in the latest Paper Crafts Magazine issue… December 2007/Jan 08. I know…how did time fly that quickly?! It was just released this past Tuesday I can’t wait to see the issue. I know of a few designers whose work is published in it and it is always so much fun to see them in print…all photographed in a fabulous arrangement!  If you subscribe to Paper Crafts, you probably already have your issue…mail to Canada is SO slow right now! 🙁 I’ve heard this design is on page 94. 🙂 If you’d like the issue or would like to subscribe, just click on this Paper Craft Magazine link.

Velvet Flowers with Love

jks-velvet-flowers-with-love.jpg

Brads, Brads, Brads…

Oh I love brads…so quick and easy to use! Love the mini ones…they are fabulous in all kinds of uses, especially in numbers. But I must say…they cool new brads that are so hot on the market right now…well they have me at hello. Ever seen the movie, Jerry McGuire? You’ll know the quote I’m talking about if you have. Anyway…I see them and I’m hooked. Any kind of fun and unique brad…I’ll buy it. So…..when “Mrs. Boz” suggested a unique brads challenge…I jumped right on it! I know we’ve done brad challenges before on the Way’s to Use it Challenge but this time…it is unique brads. Use corduroy brads, ornate brads, jumbo brads, build-a-brads, embroidered brads…I tell you I have them all…well, almost 😉 and it was quite a decision on which ones to use. If you want to do more than one design, go ahead. Make a design with a different unique brad every day for the next week. Should be fun! Join in and play along…all are welcome at WT140.

Vintage Crackled Bridge

jks-vintage-crackled-bridge.jpg

This is my first time trying out this new Thomas Kinkade Cobblestone Bridge stamp from Cornish Heritage Farms. So gorgeous! I simply stamped it with my Burnt Umber ink pad by Stewart Superior and sponged the edges with the same ink. I’ve had this ink pad for a while but I have to tell you…it is a beautiful brown and I just love using these ink pads. After inking it, I pulled out my Ranger Crackle Accents and decided to try out a very crackled, vintage look on this design. I’ve had this product for months and have only tried it once so I really wanted to give it another whirl. I love how it turned out! A very fine realistic crackle, it is fabulous. Now I will admit…it DOES take longer to dry than a cracked glass technique but the results are so fine…I love it. Another great use for this product it on embellishments and solid surfaces such as a journal cover that can’t be twisted and cracked by hand. This product does all the work for you. 🙂 Cool, huh?

jks-crackle-close-up.jpg

For the rest of my design, I decided to pull out my Cosmo Cricket Hey Sugar patterned paper line again. I love Cosmo Cricket! For this design, I used two of their beautiful papers that are very subtle and vintage. After sponging their edges, I adhered them to my 5.25″ square Chocolate Chip cardstock base. You know how I love to sew, so I just had to add a little freestyle stitching frame around my design in brown thread.

For the embellishments… a scrap of May Arts ribbon was tied through eyelets set with my Crop-a-dile at the top left corner. Now this challenge is all about unique brads so I used one of my ultra favorite embellishment brads from K & Company. These brads are from the Hannah line and are simple stunning. So unique. I just had to set it into the center of a special flower as well. The flower is stitched suede by We R Memory Keepers…love its warm look! Oops just about forgot the quick tip I wanted to add today!

Quick Tip: These suede flowers by We R Memory Keepers can be difficult to push brads through. I use my Crop-a-dile to first punch a small hole in the center. After than…it’s easy!

Have a great day and hope you find some time to play along with the challenge!

A Little Winter Frame…

I love decorating for the holidays and little frames are so quick and easy to do This is one of my favorite frames from Michael’s…a little 5×5 frame from Provocraft, it is so inexpensive ($1US, $1.50 CDN…go figure as now the CDN $ is worth more than the US LOL) Makes it great for some cross-border shopping for me! 🙂 This frame uses Chatterbox papers and Basic Grey rub-on transfers. I love stamps but I love using rub-ons too! Did you hear the news? Stampin Up is actually going to be selling rub-ons too! Can’t quite wrap my mind around that one yet but I’ll be trying them out for sure.

Basic Grey Wholly Cow rub-ons are among my absolute faves to work with. So easy to apply and I LOVE their hip look. This week on Craft Critique we are focusing on rub-on transfers and I am so excited to be able to review Basic Grey rub-on transfers. Even if you don’t use rub-ons…check it out at Wholy Cow – A Basic Grey Rub-on Transfer Review. Dare you to try them! 😉

If you’d like to try out other rub-on transfers as well… Daisy D’s and Cosmo Cricket also get top marks from me!

Frosty Snowflake Frame

jks-frosty-snowflake-frame.jpg

This is such a quick, easy design. As you can tell, I’m loving this Chatterbox Winter paper. Gorgeous fun colors that don’t just limit to the Christmas season but all winter long. This little frame would make a super quick gift to whip up. Simply cover the frame with the patterned paper, trim close and sand the edges. I love using Basic Grey’s Precision File kit for that! To apply the Basic Grey rub-ons, simply cut them from their packaging, remove backing, place where desired and rub onto surface. Quick, clean, fun!

For my embellishments, a strip of dotted aqua ribbon from Michael’s is tied around the side of the frame. The acetate snowflake inside is a beautiful Ghost Shape from Heidi Swapp. I covered it with Crystal Effects and then sprinkled it with UTEE and left to dry. Don’t heat it! I love those chunky square crystals for an icy look. The snowflake is adhered to the center of the frame with a glue dot and for a little bling, a little Making Memories gem sticker.

Have a great day!

A Little Change of Pace….

A little change of pace from all the distressed Christmas cards, a change from patterned paper to all stamping…just a little different look. Today’s color challenge was inspired by a card I designed a couple months ago using Kraft and Purely Pomegranate…you can check it out Here. I was excited to have my card chosen…thanks Melody & Emily 🙂 … decided to have a little fun and create a card design specifically for the challenge!

Yes…it is simple! 🙂 Some days…I just love clean and simple. Just stamping and a clean little layout. When I saw this week’s CPS#39 I knew it was one I just had to try. What a great layout Tami!

Heart to Heart

jks-heart-to-heart-cps39.jpg
As I mentioned…this design is super simple…a Whisper White cardstock 5″ square base was stamped with the flourish from L’Amour stamp set by Lizze Anne Designs. The I Love You sentiment is from the LAD Heart to Heart stamp set and is accented by a little row of Hero Arts gemstone strips.

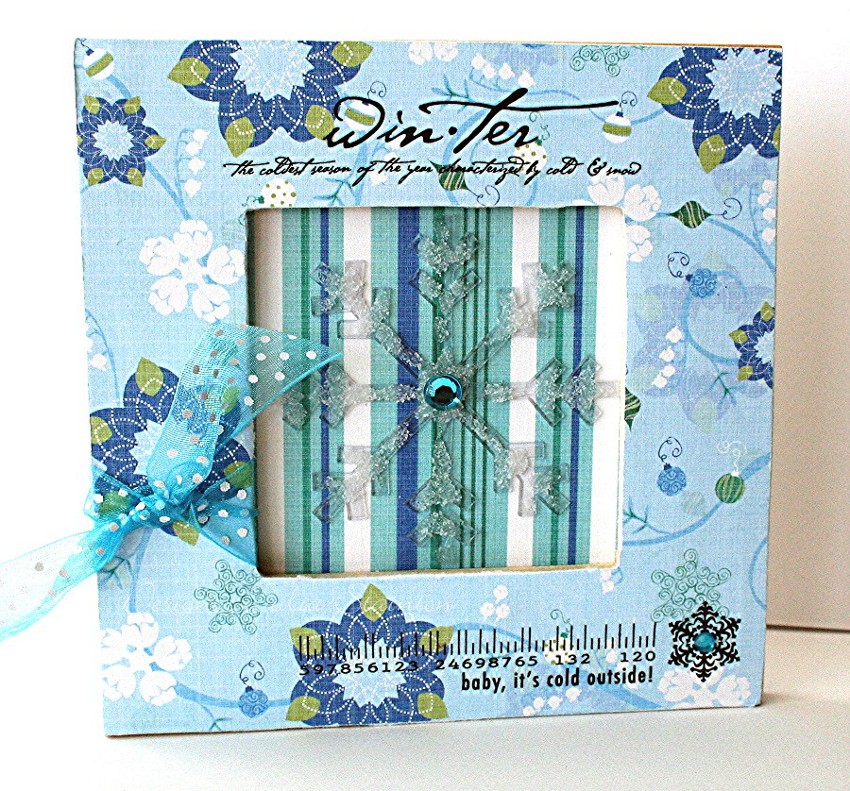
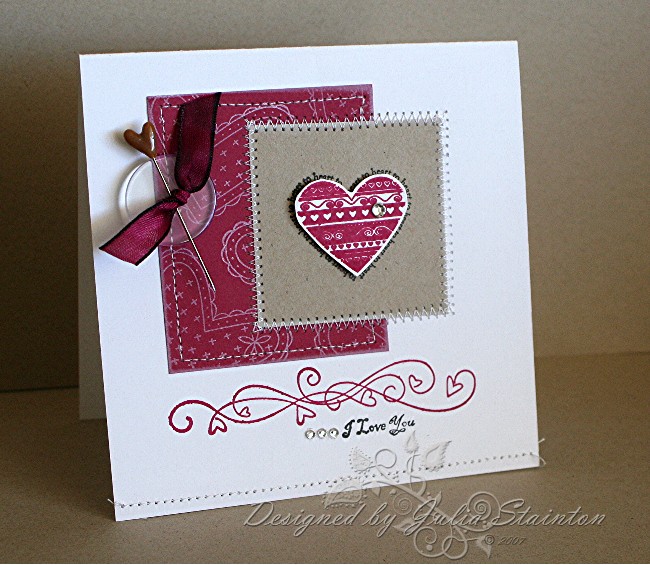
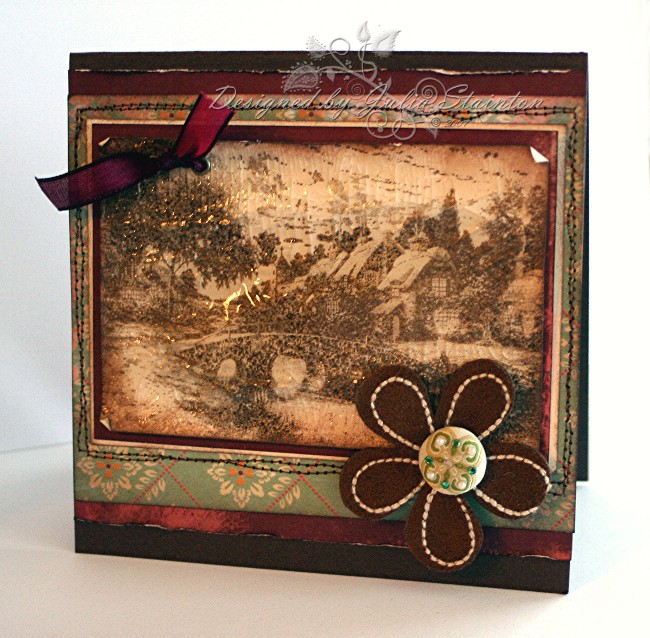
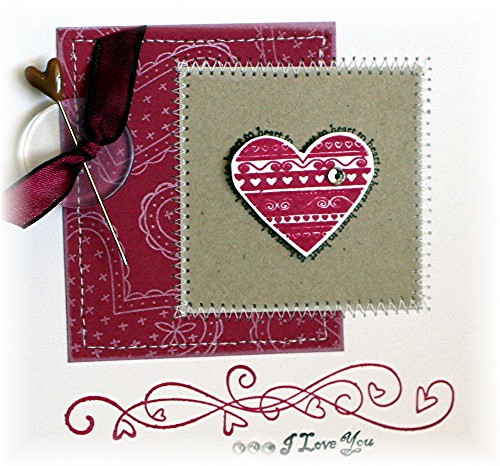
My bottom panel is Purely Pomegranate cardstock stamped with a heart from the L’Amour set in white craft ink. After swiping the edges with white craft, I stitched the layer to the card base with a straight stitch. My Kraft cardstock layer was stamped with the heart to heart stamp in black, from the set bearing its name. Inside the sentiment, I adhered a cut out paisley heart with some foam tape to pop it out. The layer was then adhered with a zigzag stitch for definition. Also on the heart…another little Hero arts gemstone for a little accent.

You may also have noticed how much fun I’ve been having lately adding these little Harvest Pins from Fancy Pants designs. I just love them! I found this little heart pin in my stash and it was a perfect coordinating brown for Kraft cardstock so of course, I had to use it! 😉 I’ve been enjoying how Nancy has been adding pins to her work using a button and just had to give it a whirl…isn’t it darling? The clear button is from Stampin Up and the ribbon…May Arts. 🙂

Christmas Card Kit Winners….

Wow! Thanks so much everyone for entering my Spreading a Little Christmas Cheer Card Kit giveaway! I had so much fun reading all the entries! What great Christmas ideas and traditions, recipes and and tips! I am SO in the Christmas spirit now. I just need to go back through with a notebook and write down all my favorite ideas. I’ve had Christmases where I was ultra-organized but sadly, the past few have been less than that! LOL With all these tips, I’m hoping to get started now. 🙂 If you haven’t taken the time to read through the list of comments…you just may want to find a notebook and a coffee and sit down and enjoy all the fabulous ideas. I wish I could send you ALL a Christmas Card kit!

My first winner, the winner of the Basic Grey 6s6 Figgy Pudding pad and the Lizzie Anne Designs Joy to the World stamp set and a few other goodies, is number 135. Congratulations Lastel!

My second winner, of the Flourishes Peace stamp set, Figgy Pudding pad etc, is number 33 – Suzanne!

Please e-mail me ladies with your addresses and I’ll get these out to you ASAP! My e-mail link is at the top of the sidebar, right under my pic.

Thanks again to everyone who shared so many wonderful ideas! I love to hear from you! Have a wonderful day!