Monthly Archives: November 2007

A Wonderland Christmas…

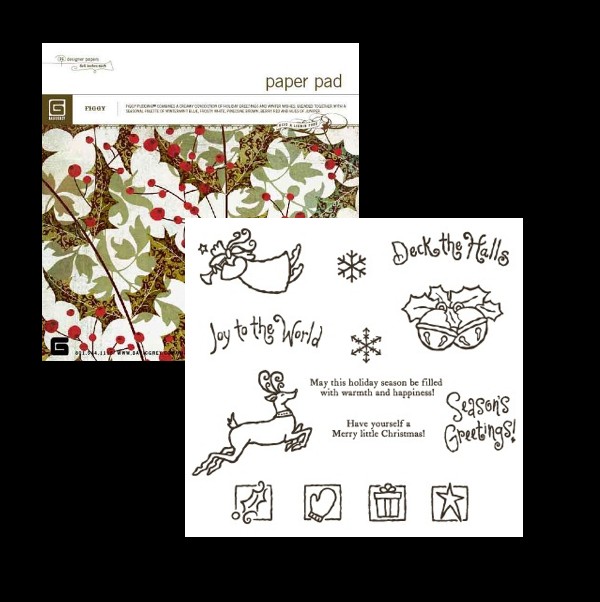
I am in such a Christmas mood here! I hope you are getting there too! New Christmas stamps are so much fun to work with! Combined with some of my favorite Christmas patterned paper, Cosmo Cricket Wonderland, I’m having a blast. What is it that I love about this stamps and paper. The warm homey cozy look is perfect for Christmas. I was one of those children …ok, don’t laugh here..with a huge imagination. I always loved pretending I lived in past times when home-made gifts were the only kind and life was simpler. I was quite enamored with pioneer times and earlier and still…my books of choice are historical fiction.

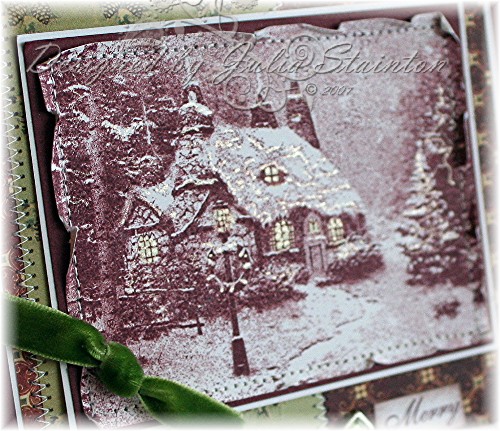
I love this Thomas Kinkade Stonehearth Hutch stamp from Cornish Heritage Farms…so pretty and warm…look at those windows and the smoke coming out of the chimney. I just want to walk up the path, open the door and curl up by the fire. I’m quite sure the inside is as lovely as the exterior and smells like pine and gingerbread. LOL I told you I had an imagination!
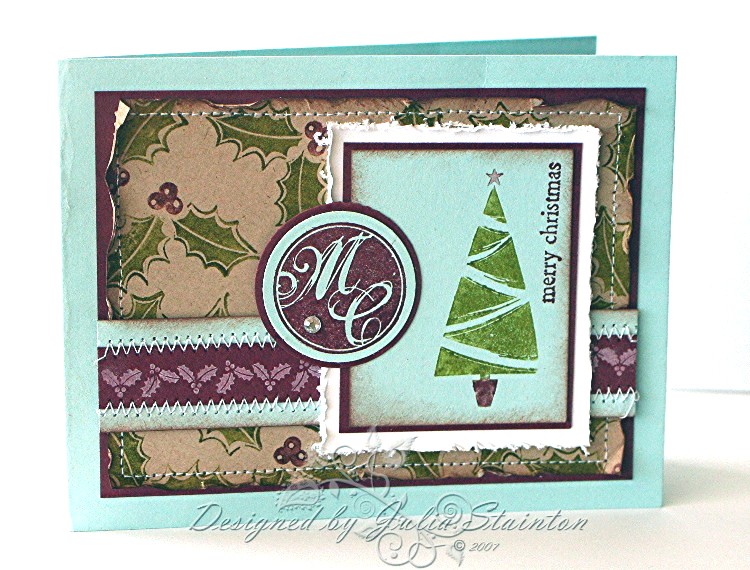
Wonderland Cottage

jks-wonderland-cottage-2.jpg

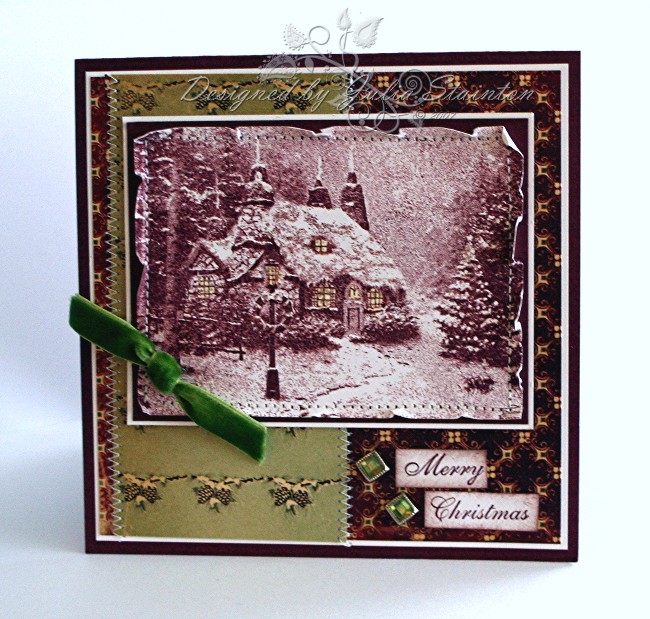
This design uses very simple stamping…I simply inked up my Stonehearth Hutch stamp in Bravo Burgundy and stamped it onto Whisper White cardstock. The monochromatic look is so easy and quick and adds to the vintage look of the design. After matting the image, I stitched around the edges with my sewing machine and then curled up the edges for a little texture and a vintage look. To add a warm glow from the windows, I carefully daubed my Copic Marker in Pale Lemon at the windows and lamppost. Be careful while doing this as the Bravo Burgundy ink is not waterproof and you don’t want to muddy up the image. To add a little sparkle and shine, I used my Sakura Gelly Roll Stardust Clear Glitter Pen to highlight the windows and where the light would shimmer on the snow.

Right now until November 15th, Cornish Heritage Farms is having a Product Spotlight and sale on these great pens. Lisa has written some great info and there are fabulous samples so have fun checking it out HERE.

Closeup – not a great pic but I tried! ;)

jks-wonderland-cottage-sparkle.jpg

For the rest of the card design…I used a 5.25″ square Bravo Burgundy cardstock base and layered it with Whisper White and patterned paper from my 8×8 Wonderland Cosmo Cricket paper pad. For my sentiment, I stamped my Have Yourself a Merry Little Christmas stamp and then cut out the Merry and Christmas. After sponging their edges with Close To Cocoa ink and adhering them, I added a couple rhinestone brads from Making Memories to add a little shine. Also pulling out the green color from the design, I added my finishing touch, a knotted celery velvet May Arts ribbon.

Quick Tip: Don’t be afraid to crop down your image or sentiment to make them work in your design. I cropped both the image and cut down the sentiment to make them work with this layout.

Check back in later Tuesday morning for the winners of the Christmas Card Kits. 🙂 Have a great day!

Decking the Halls….

It is so much fun to decorate for Christmas and a fun personal touch always makes it a little special. This design is a little different from my stamping style I mostly use. I was having fun with some beautiful cool winter paper by Chatterbox and some Basic Grey chipboard and rub-on transfers. Projects like this are quick and fun and I love the wintery look….a project I’ll be able to keep up after Christmas is over and well into the winter season.

Dashing Through the Snow

jks-dashing-through-the-snow-submission-pic.jpg

This project uses a paper mache wall hanging from Michael’s and is designed around the gorgeous large trendy snowflake chipboard shape. After sponging my chipboard with white craft ink, I sprinkled it with Iridescent Ice embossing powder from Stampin Up and heat embossed. I love how these Basic Grey chipboard shapes have adhesive on the back. It makes it so easy to adhere to your design. For a fun embellishment, I played up on the dotted ends of the snowflake and tied on a dotted Making Memories epoxy tag with some dotted Aqua ribbon from Michaels. A length of black stitched ribbon replaces the original cord to hang the wall hanging and it is tied with the aqua dotted ribbon as well.

The paper mache wall hanging is covered with layers of fun Chatterbox holiday paper. Love the fun stripes and colors…I just love aqua for winter. It looks so crisp. I like to use Alene’s Thick and Tacky glue to adhere it to the altered surface. To add some interest and sentiments to my design, I pulled out my Basic Grey Wholy Cow Rub-ons. I used the Winter Black ones. So easy to apply, I love their funky designs. This wall hanging is a great application for rub-ons as stamping on an uneven paper mache surface can be a little tricky. To use rub-ons, simply cut the image out that you want to use. Remove paper backing and rub-on to the surface. Basic Grey rub-ons are among my favorites to use as they apply so easily.

This design was part of a Craft Critique review on Basic Grey chipboard.

Wishing you a fabulous day! If you missed my Christmas Card Kit giveaway, you have one more day still to enter…just scroll down. Make sure you stop back in tomorrow as I’ll be announcing the winners. 🙂

A Webster’s Christmas

I love Webster’s Pages patterned paper and their new Christmas line is stunning! Very fresh and a little vintage…this paper is just my style and I’ve had so much fun designing Christmas cards with it this year. This paper is double-sided and a great heavy weight which I love. Now I don’t have a {C’est Bon} entry for you today but this design IS part of a product spotlight for Jacksonbelle Embellishments featuring this gorgeous paper. Seeing as {c’est bon} (It’s good) I guess this is just a shorten variation of my usual Sunday entry. Check out the Product Spotlight and see the other designs featuring the beautiful Webster’s Pages Christmas line.

Noel

jks-noel-2.jpg


This design uses a simple clean design to allow the beauty of these patterned papers to be the focus of the design. I started with a 5.25″ square card base using Very Vanilla cardstock, layered it with Purely Pomegranate cardstock adn then added my pattered papers. To create the strip across the design, I stamped my Lizzie Anne Designs Glad Tidings holly stamp in white craft ink across it and zig zagged the design. The top of my pale blue Websters is also stitched with a machine straight stitch for a little definition. Also on the light blue paper, I stamped Noel from my same stamp set with Purely Pomegranate ink.

For my main image part of the design, I punched a large circle with my mega Mary circle punch, sponged the edges and then stitched around in a circle. To add my image, I stamped my circle from LAD Celebration Frames set in Pomegranate and stamped the holly and berries in the center. The image was really quick to color in with my Copic markers. I think carefully punched out my circle using my 1 1/2 inch circle punch from Stampin Up…fit perfectly…and adhered it to my circle. YES…the circle IS meant to be off-center. 😉 A little gemstone stickers bling finishes it all off for a festive look!

Want a little more Christmas cheer? If you missed it, make sure enter to win one of blog little Christmas card kits I’m giving away … Spreading a Little Christmas Cheer. 🙂 Have a great day and blessings to you!

Simply Saturday…watercolor wishing well and a little news

Simply Saturday. Saturdays should be simple right? It is always such a busy week rushing around. So this is a simple little design I created using a Thomas Kinkade stamp from Cornish Heritage Farms. I love these stamps! So intricate but really easy to use in many ways. Really! This design went together very quickly with a little watercoloring, the Make a Wish Cottage Vignette stamp and some patterned paper by Webster’s.

As for my news…I’m so excited to share it with you! Cornish Heritage Farms has offered me the position of Design Team Coordinator. I’m so excited to be working for Richard and Liz and to be working closely with Lisa Strahl and Keri Sereika. I can’t wait to start on Monday, working with the very talented designers of both CHF Design Teams, the Fresh Faces Design Team and the Thomas Kinkade Design Team. When Lisa phoned me a week ago, I have to tell you I was just blown away. 🙂 Some of you may know that Lisa held the position of Design Team Coordinator until now. Lisa now holds the position of Art Director for CHF…perfect for her creative genius. Congrats Lisa!

Watercolor Wishing Well

jks-watercolor-wishing-well.jpg

For this design, I started with a very simple 4.25″ square card base in Very Vanilla cardstock. The patterned paper is layered over top and is by Webster’s Pages…their paper is so gorgeous! You need to check it out! for my simple image, the Make a Wish Cottage vignette was simply stamped onto some more Very Vanilla and watercolored in with my Stampin Up dye inks. Because of all the beautiful shaded detail in this stamp, the image pretty much shades itself…just roughly add in the color. To add in some simple embellishments…I added an eyelet at each corner of the matted vignette and then tied a piece of beautiful Cream May Arts ribbon and inserted a little circular clip when I was tying it.

Wishing you a fabulous weekend!

Spreading a Little Christmas Cheer!

Today I just wanted to spread a little Christmas cheer. I have some goodies to share with you to help you get a head start on your Christmas cards! My little early Christmas gift to you! I love making Christmas cards and nothing is better than some new stamps and paper. I have two prizes to give away to two of my readers. How to enter? Christmas is such a fabulous time of the year but also a very busy one as well. I’d love to hear some of your tips for organizing for Christmas, any ways you make special memories, a great Christmas recipe…anything at all you wish to share. I can’t wait to read all your ideas! Please, one entry per person! 🙂 You have until Tuesday November 13th at 10 am EST to enter. I’ll be announcing my winners shortly after. Winning entries will be chosen by a random number generator. Thanks so much for stopping by my blog! Good luck! Have a wonderful weekend!

Christmas Card Kit #1

Joy to the World stamp set by Lizzie Anne Designs

6×6 paper pad of Figgy Pudding by Basic Grey

red velvet May Arts ribbon

snowflake brads

jks-figgy-lizzie.jpg

Christmas Card Kit #2

Peace stamp set from Flourishes

6×6 Figgy Pudding Paper Pad by Basic Grey

Red Velvet May Arts Ribbon

snowflake brads

jks-figgy-peace-2.jpg

Very Velvet…a ways to use it challenge

I love velvet! So soft, warm, rich…the texture is fabulous and I LOVE adding texture. Don’t you just love projects where you want to reach out and touch it. I guess I love that velvet appeals to more than just one of the senses. Today’s challenge is to use velvet in your project. You can make a card…that’s standard, but you could also make a gift, a tag, a home dec project, a layout…whatever you wish! Just make sure you add a little velvet. If you are not sure how to add velvet, how about a flower, velvet ribbon, velvet brads! Yummmmm. I hope that this challenge isn’t as difficult as last week’s! Not too many people had chalk inks. I realize that the Ways to Use it Challenge CAN be a little difficult at times…we just can’t ALL have EVERY product out there. I do try though! 😉 LOL And so, if you have an idea for a Ways to Use it Challenge…feel free to e-mail me (link just under my pic at the top of the sidebar). I’d love to hear from you and I’ll put it on my list.

Velvet and Flowers

jks-velvet-and-florwers-2.jpg


For this design, I wanted to use some velvet accessories with my Cosmo Cricket Hey Sugar paper line to create a very feminine design. I wanted to give my Flourishes Fantasy Floral Garden stamp set another try. I totally love this ornate stylized flower. I used my Copic markes to lightly airbrush the vanilla cardstock a warm butter color, stamped my flower and colored it in with my markers. After that was finished, I decided the edges needed a little more defining so I used my darker tan color Copic marker to airbrush around the edges… I love the softnes and how it glows.
For my layout, I decided to go with this week’s CPS sketch challenge,
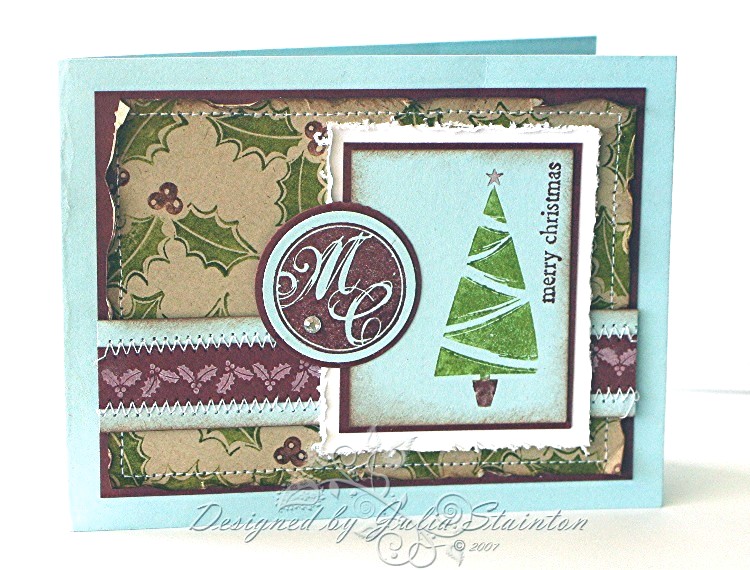
 CPS#38 , a very simple but effective layout. This Cosmo Cricket Hey Sugar patterned paper has quickly climbed to one of my top faves. It is gorgeous! I’m truly hoping that it will also be released in an 8×8 format as that would make it perfect! All edges of my patterned paper were sponged with Chocolate Chip ink by Stampin Up.

As for adding my details…the scalloped vanilla cardstock edge was created by repeated punching the edge with my small EK Success corner rounder with the guard removed. The beautiful vanilla velvet ribbon is by Flair Designs. My other velvet addition is a gorgeous velvet flower from Maya Road. I just received my order of them from Papertrey Ink and wow…they are stunning! To finish it off..the little clip is from Making Memories’ Cheek line. So cute!

Wishing you a wonderful day! Hope you join in the challenge and have a little velvet fun. Make sure you check back in tomorrow…I have something you won’t want to miss. 🙂

A Holly Merry Christmas…

I have another Christmas design to share with you today. Hope you aren’t getting tired of them…I’ve just been having so much fun! Last year was so busy, I just didn’t have time to send any out and so this year…I’ve been getting ahead of the game! 🙂 Also…we’ve been having the first signs of snow here…a few flurries in the air this morning. It is so cold after the beautiful Autumn we’ve had.

If you get the Lizzie Anne Designs newsletter…you’ll probably have seen this design before. This Christmas card was part of this month’s newsletter and is one of the Project of the Months. This month there were actually SEVEN projects and you can view the other six HERE. Gorgeous designs that are well-worth checking out. If you haven’t signed up for their newsletter…you’ll want to do that too. Lots of great info and ideas on it and sometimes even a coupon. 🙂 Just wait till you see next months cool projects too!

Holly Merry Christmas

jks-holly-christmas-2.jpg


For this design, I really wanted to have a little fun with the color combo. I love funky color combos for a fresh look and I really like this one. It was so fun to try mixing up Bravo Burgundy, Soft Sky, Old Olive and Kraft together for a really unique Christmas look. Do you have any fun unique Christmas color combos you like to use? I’d love to hear them! 🙂

I just love this Glad Tidings stamp set by Lizzie Anne Designs for a great holiday look. The stamps are so flexible…I love how the style is elegant and fresh at the same time. For this design, I started off with the Soft Sky cardstock base and added the stamped kraft layer matted with Bravo Burgundy. The Kraft layer is my “homemade” patterned paper…each of the holly image were inked up with my Bravo Burgundy and Old Olive markers and stamped. You know how much I love stitching and distressing so I finished the edges of this panel in that way.

The little strip came next. I was wanting to try out that long holly stamp to coordinate and decided to try inking it with white craft ink and stamping on the burgundy…I love the look. A little sponging and some zig zag stitching add a little attention to detail on this layer.

I decided to ink up my Christmas tree and stamp it off center on the next layer. It always shakes things up a little if you stamp off center. This panel was then matted with burgundy and a wider mat of whisper white cardstock that had the edges distressed with my Heidi Swapp edge distresser. The final touch was a punched circle stamp..MC for Merry Christmas. I added a little Making Memories gemstone sticker just a little glitz and embellishment. I found, I was having so much fun with all the stamping on this design…it really didn’t more than that.

I also decided to have a little fun creating a sketch design of this layout for you to try. 🙂 Just click on the thumbnail for the large size if you wish. If you create something with it …I’d love to come take a look. Last week I posted another sketch HERE. Check out the absolutely stunning design Lynda created with it at her post, Julia’s Sketch Challenge. 🙂 Wow! My jaw dropped! Thanks so much for sharing Lynda!

jks-sketch-07-07.png

Have a great day and check back in tomorrow for a cool Ways to Use it Challenge!