Monthly Archives: October 2007

Wanted…

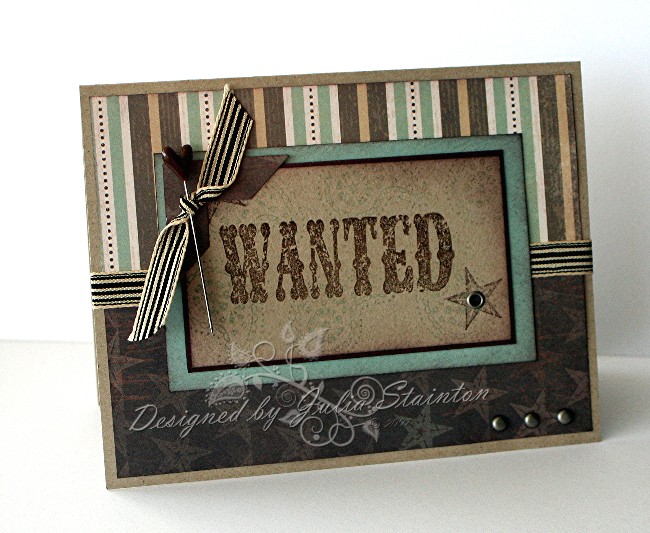
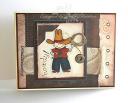
Well, today I wanted a quick design and today’s sketch challenge proved to be the perfect layout for that. I didn’t have a lot of time today…slowly feeling better but the catch-up stuff is just not fun! This is a totally simple design and so easy to whip together with patterned paper and my Wanted stamp set from Stampin Up. Although I’ve used this stamp set before, I’ve never used this Wanted sentiment until now. Pairing it up with a little heart pin from Harvest Pins by Fancy Pants designs made a quick card for my hubby.

Wanted

jks-wanted.jpg

I need to get dinner on and then get my little guys ready for Halloween so I’ll keep this short and sweet! LOL Not much you can’t figure out here anyway! Love this Outlaw designer paper paired up with Kraft cardstock, simple stamping and a few embellishments. Clean and simple with a little sponging. 🙂 You really can’t tell easily in this photo but I used the small paisley stamp from this set stamped in Sage Shadow as a background for the Wanted layer.

Want to play along with this challenge? check it out at SC148 !

Have a great night and a happy Halloween!

Supply List:

Cardstock: Kraft, Chocolate Chip, Sage Shadow – SU

Patterned Paper: Outlaw – SU

Stamps: Wanted – SU

Ink: CHocolate chip, Sage Shadow – SU

Other: Ribbon – May Arts, brads and eyelet – Making Memories, photo corner punch – SU, Crop-a-dile – We R Memory Keepers, Harvest Pin – Fancy Pants Designs

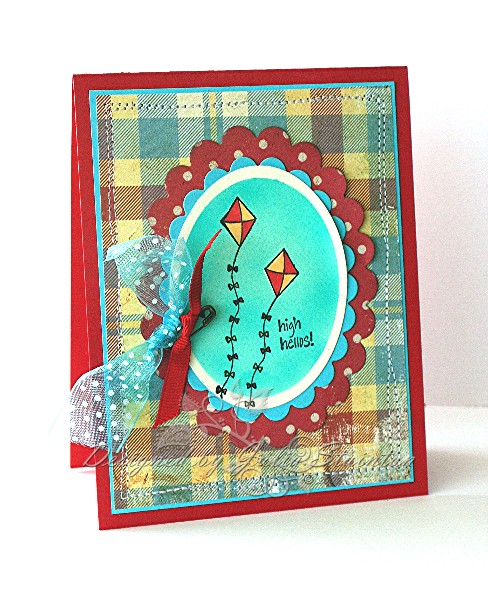
High Hellos…a color challenge design

Real Red, Tempting Turquoise, So Saffron…I actually wasn’t going to do this color challenge today…the colors are not really “me”. But…I decided to try them out anyway. 🙂 I had this scrap of Daisy D’s plaid paper when I went up to work at my desk and well…it sort of worked so I gave it a whirl. If you’d like to take this color challenge too…follow this link CC138.

High Hellos

jks-high-hello-kites.jpg

I decided the kite stamp from the Lizzie Anne Designs High Hellos stamp set might be fun to try with this color combo. Add that to a chance to try out some more masking from my Thursday’s Challenge and my Copic airbrush system…I had a little fun with it.

To create my image panel..I die cut an oval with my Cuttlebug and my new Spellbinders Nestabilities die and then use the die as a mask to spray my sky. A Copic marker the same color as Tempting Turquoise sprayed it on nicely. I masked the kites with scrap of paper and then colored them in with my markers.

For the layers, I used a scalloped oval of Tempting Turquoise cardstock and underneath, another layer of my Daisy D’s patterned paper. Both of these designs are part of an 8×8 paper pad named Chasing Butterflies. Around the edges of my plaid layer, I added some quick freestyle stitching to imitate the curvey waves of the kite cords. For a quick embellishments, I tied little scraps of ribbon to a tiny safety pin by Creative Impressions and adhered it to the card front.

Wishing you a fabulous day! If you missed all the cool things going on that I listed in my previous post…be sure to scroll down and check them out! 🙂

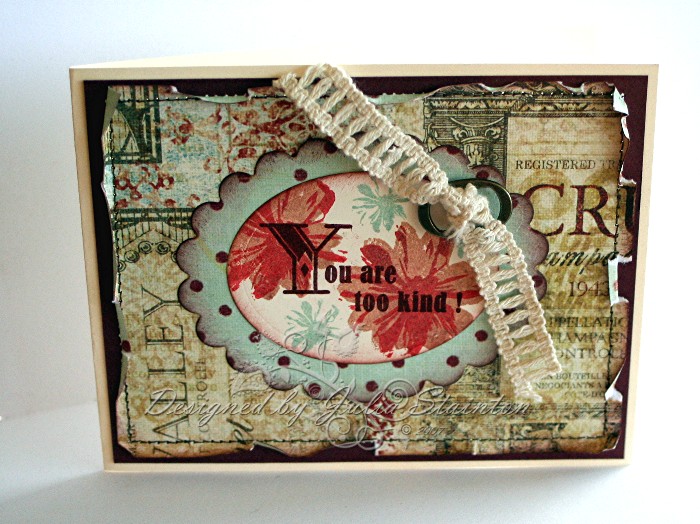
Too Kind…a vintage thanks

I thought I’d try a little vintage look with my Kitchen Sink Stamps. The design is part of a review I wrote for Craft Critique last week. I’ve been pretty sick the past week, yesterday especially and so I haven’t had the energy to make something entirely new. Hopefully things will be looking up soon. I also have a few things to note at the end of the post so make sure you scroll down to the end. 🙂

Too Kind Vintage Thank You

jks-you-are-too-kind.jpg

As you probably know…I love vintage style. I found this new Rue 88 paper line from Prima from a recent purchase of paper and realized I hadn’t used it on my blog yet. Love the gorgeous patterns on this double-sided paper! The bottom layer was sponged with ink, matted with Bravo Burgundy cardstock and then stitched to my vanilla cardstock base. I distressed the edge by pulling up the edges after stitching.

For my main image, the vanilla cardstock was die cut with my new Spellbinders oval die and then stamped with my 3 Step daisy set from Kitchen Sink Stamps. The sentiment was stamped with my Thanks with Style set by the same company…love that font! My scalloped edge mat was also die cut with my Spellbinders Nestabilities and the edges sponged with Chocolate Chip ink. For a simple embellishment, I tied a scrap of this gorgeous Melissa Frances Ivory Vintage Ribbon around a buckle of Hodgepodge Hardware and adhere it all with a glue dot. Amazing things those glue dots! Love them!

Things To Check Out!

  • It’s Lizzie Anne Designs Week at Craft Critique! Make sure you visit often as each day there will be another review each day. Also make sure you check it out because there is an upcoming Craft Critique Lizzie Anne Designs carnival this weekend. If you have some designs using Lizzie Anne Designs product, you’ll want to be a part of it. AND….. while you are there, make sure you enter the giveaway for Lizzie Anne Designs Product. Who doesn’t like some new goodies?! 🙂
  • For all of you who have been anxiously waiting…Flourishes now has their extremely popular Flourished Christmas stamp set back in stock! yay! My fave! You know…the one with that super darling reindeer! 🙂 Also, coming soon…a brand new stamp set that you are sure to love!
  • Have you entered Jacksonbelle’s Inkadinkado contest yet? There is still time! All entries are due November 9th. There are going to be some great prizes for the three top entries and the First Place winner will also be the first Guest Designer for Jacksonbelle Embellishments. I can’t wait to see all the entries! And no…I’m not allowed to play! LOL
  • Coming November 1st… My Favorite Things Stamps has 3 brand new stamp releases! Stay tuned!

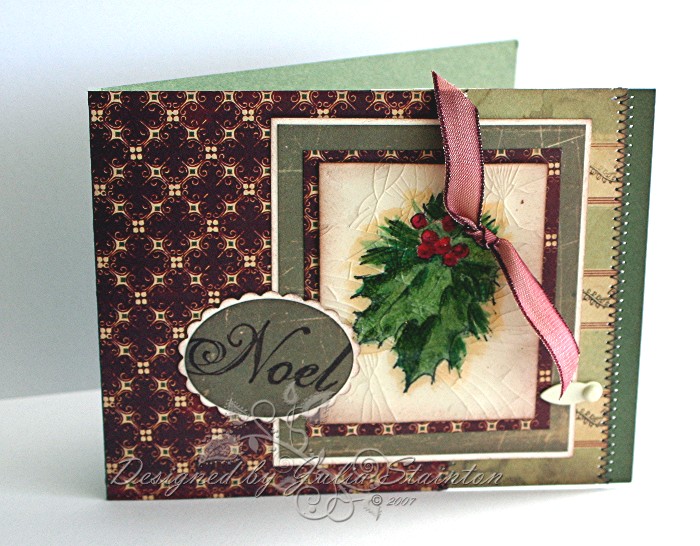
Cracked Glass…

I love the Cracked Glass technique. I was actually thinking of using it again this past week but never got around to it. When Beth posted today’s technique challenge on SCS as Cracked Glass…I just couldn’t wait to get to it. Lucky me! Just as I was wondering what to use, my mail arrived with my new stamps and paper order! Yay! I wasn’t long in choosing this darling Holly stamp from Inkadinkado and pairing it up with the Brand new 8×8 Wonderland line by Cosmo Cricket….yummmmm! If you’d like to play along with this challenge…check out the thread here.
Noel Holly Design

jks-noel-holly.jpg

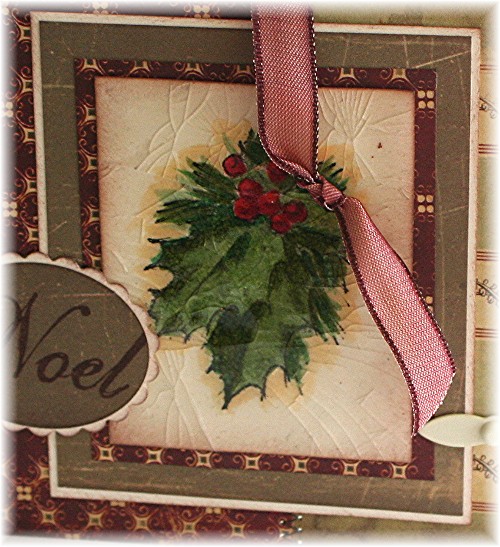
To create this design, I started wtih my new Holly Inkadinkado stamp. After coloring if with my Copic Markers, I inked the entire layer withVersamark ink and then applied a layer of UTEE (Ultra Thick Embossing Powder) and embossed it. Repeating the inking and embossing for another 3 coats to get a nice thick layer, I then put my image in the freezer for a few minutes to cool. You can take your time if you wish and skip the freezer part if you don’t have one handy…it just takes a little longer to cool and I find that the colder it is, the better cracking you will get on your image. I’ve always loved the look of Cracked Glass…I guess I just love a vintage look. LOL DH though…he just doesn’t get it! 🙂 One thing to note about Cracked Glass…the embossing on top will change up the coloring underneath a little, especially with dye inks and markers.

For the rest of the design, my new Cosmo Cricket Wonderland 8×8 paper pad was a must-use product. I was so excited to get this in the mail…love the new reduced size patterns. I had pretty much run out of the 12×12 paper as I used so much of it for design projects. Using a simple layout, I combined a few of the patterned papers together and added a little zig zag stitching for fun. The sentiment Noel is from the stamp set from Lizzie Anne Designs and is stamped and matted with ovals from my Spellbinders set. The May Arts ribbon is held on my holly with a glue dot and the little ivory photo turn is from Making Memories.

Have a fabulous day!

Designer Snaps and Eyelets {C’est Bon}

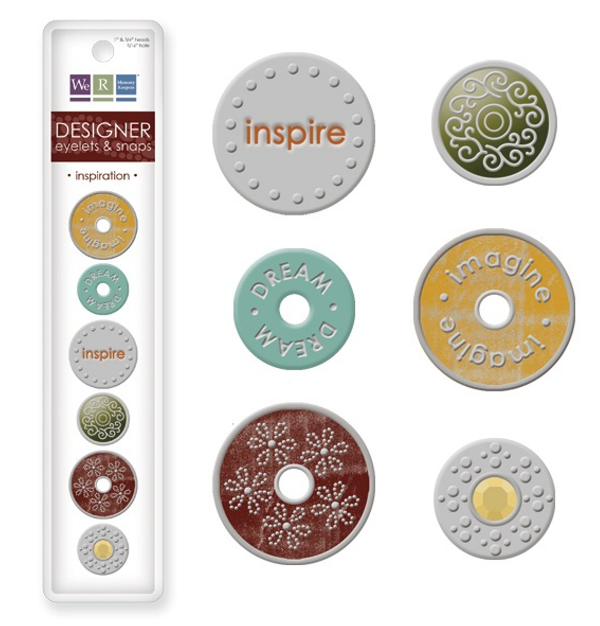
Last year I while I was shoppping I came across the We R Memory Keepers Designer Snaps and Eyelets and their Extra-Large eyelets. As I had just purchased a Crop-a-dile, I just couldn’t wait to bring them home and try them out. I was soon addicted to these unique embellishments. I’m always on the lookout for something a little different and these eyelets and snaps fit the bill. I loved them so much, I even purchased extras for Christmas gifts for some of my stamping frineds.

Designer Eyelets and Snaps

The We R Memory Keepers Designer and Extra Large Eyelets work perfectly with their Crop-a-dile. Easy to use and set, these embellishments are perfect for that special card. They hold their own well on an intricate design but I also love using them on simple designs as they add a simple elegance. What makes these eyelets and snaps so special? The Designer Eyelets and Snaps come in packages of 6 unique pieces. Some eyelets, some snaps…these are a great ensemble of beautiful embellishments. Each package has a mixture of pressed metal eyelets and snaps with additions of color, designs, an epoxy finish or a set rhinestone. I’ve become so enthralled with them that I just had to purchase one of each of their 9 sets and also bought extras to give to a few of my friends last year for Christmas.
jks-designer-snaps.png

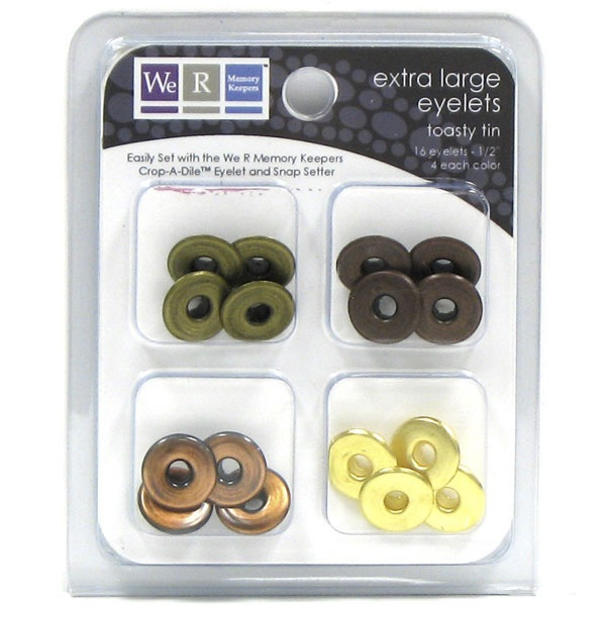
Extra Large or Jumbo Eyelets

The Extra Large eyelets have also become high on my favorites list. I love the large look and how these eyelets come in many different color combinations and finishes. While small eyelets need a grouping to be noticed in a design, one or two of these giant sized eyelets stand perfectly well on their own. My favorite set is the Toasty Tin. Recently, Stampin Up has started carrying this product and is marketed in large packages of 60 in two separate finishes, pewter and antique brass. I love this option as I particularily love using the pewter Jumbo eyelets.
jks-toast-tin.png

All of these eyelets are fabulous for stringing ribbon through because of the size of their center opening. My favorite ways of using these eyelets and snaps is for tying ribbon, attaching tags and as a flower center. The size of these Eyelets and Snaps are also fabulous for setting in coasters and chipboard where smaller eyelets may fall out because of the depth.

jks-splice.png

How to Use:

The Designer Eyelets and Snap are very easy to use with the Crop-a-dile. Suggested settings are printed on the back of the package. If you have a Crop-a-dile but rarely use it or if you are thinking of purchasing one, I wrote an entry a few months ago that you may want to take a peek at…. Crop-a-dile {C’est Bon}. If you have any questions, comments etc. about these products, feel free to leave them on this post. I’ll be happy to answer them by editing into this post.

Genuine Friend
jks-genuine-friend.jpg

This design is based on last weeks CPS sketch. I’ve been wanting to try it out all week and finally got a chance. I decided to go for a distressed, shabby look and have a little fun with the warm colors. The Genuine Designer Snap worked perfectly with the layout and the style of this Stampin Up Designer paper. A little distressing and a little stitching made a simple design so much fun.

Supply List:

Cardstock: Sage Shadow, Chocolate Chip, Groovy Guava – Stampin Up

Patterned Paper: Outlaw – Stampin Up

Stamps: FAbulous Flowers, Wanted, Carte Postale

Ink: Chocolate Chip, Groovy Guava, Black – Stampin Up

Other: screw brad – Creative Impressions, Designer Snap & Crop-a-dile – We R Memory Keepers, sewing machine, stapler,

Best Friends
jks-best-friends.jpg

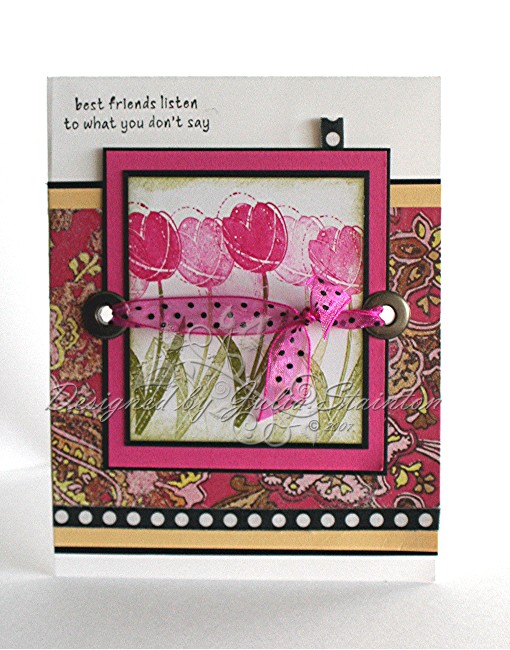
This design has a little different style. I thought I’d create a fun fresh card with colors from the gorgeous My Mind’s Eye patterned paper. After stamping my images adhering my layers, it was easy to punch through it all with my Crop-a-dile and add my pewter Jumbo eyelets. A little piece of May Arts ribbon tied through them makes a fun quick embellishment. Also on this design, I used some of my favorite Making Memories textured tape to add those little white on black dots along the bottom and also created a little tab at the top.

Supply List:

Cardstock: Pink Passion, Whisper White, Black, Barely Banana – Stampin Up

Patterned Paper: My Mind’s Eye

Stamps: Garden Whimsy – Stampin Up

Ink: Pink Passion, Old Olive, Black – Stampin Up

Other: Jumbo Eyelets – Stampin Up, ribbon – May Arts, Black and White Textured Tape – Making Memories

A few extra samples…
jks-cowboy-2.jpgjks-blue-cottage.jpgjks-bonjour-fleurs-2.jpgjks-bloom-blossom-grow.jpg

Simply Saturday… some more Daisies

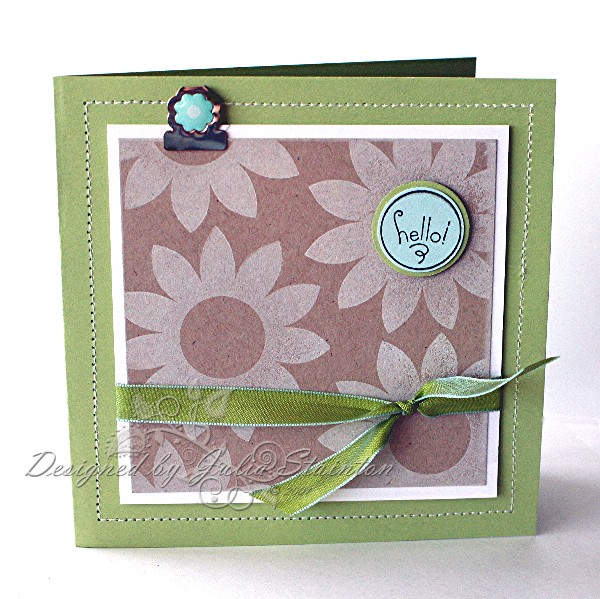
It’s Saturday again and time for another super simple design. It’s kind of funny as sometimes I love designs with lots of layers and detail but oft times lately, I’ve come to appreciate simple as well. This simple design uses the Daisy Dots stamp set from Lizzie Anne Designs. I had wanted to try out a fresh color combo of Celery, Soft Sky and Kraft and it just seems to lend itself well to a clean design.

Simply Daisy Hello

jks-simple-dasiy-dots.jpg

For this card, I created 5.25″ square card base and layered it with my kraft image panel. I love the look of white craft ink on Kraft…actually I love white craft ink on anything. I wonder why I don’t use it as much as I should! The solid daisy stamp was so quick to stamp on the kraft cardstock and then mat the layer with Whisper White. After tying a length of one of my favorite May Arts ribbons around it, I adhered it to the card front. I thought it might be fun to add the sentiment from the set in one of the daisy centers so I stamped it onto my Soft Sky cardstock, punched it and layered it with Certainly Celery. A little piece of white foam tape popped out the sentiment and made it a little more interesting.

Quick Tip: It is easier to line up a stamp in a punched shape if you first stamp the image, then punch it out by turning your punch upside-down to see where you are punching.

Lastly, two quick little embellishments on this design. A quick row of straight stitching around the perimeter of the design and a little Making Memories clip…isn’t it cute?

Wishing you a SIMPLY fabulous Saturday! Check back in tomorrow for another {C’est Bon} entry. 🙂

I’ve been tagged!

LOL I’ve been tagged three times (Lisa Johnson, Lindsey Botkin, Mary Duffek) in the past 24 hours so I guess I need to stop and play along! Fun! Although…I’m not quite sure what I’m going to say! I’m never good at these things! I can never think of anything exciting! But….I’ll try! 🙂

Here’s the deal…

Instructions:
1. Link to the person that tagged you and post the rules on your blog.
2. Share 7 random and/or weird facts about yourself (on your blog, we all want to know them).
3. Tag 7 random people at the end of your post and include links to their blogs.
4. Let each person know that they’ve been tagged by leaving a comment on their blog.

Random things about me… (try not to fall asleep 😉

1. I love to read. Books, books and more books! I’ve had to really cut back though to focus on my stamping. I used to read minimum one book a week.

2. I like being organized but alas…I fail miserably.

3. Unless under a deadline, I usually design two projects a day. I have a small corner of the family that is always overflowing with paper and goodies.

4. I love wearing skirts and do so almost every day. I have about 4x as many skirts as I do pairs of pants.

5. My favorite subjects in High School were Art, Math and Drafting.

6. I love chocolate. Favorite Dessert:Chocolate Cheesecake, Favorite Ice Cream: Chocolate Mousse Royale from Baskin Robbins, Favorite Chocolate Bar: Cadbury’s Flake (from Britain)

7. I’m a morning person. I like to get up early and my most productive time is in the morning.

I’m tagging these talented people… I’ve tried to find bloggers who haven’t already been tagged. If you haven’t been tagged and would like to play…feel free to consider yourself tagged as well! 🙂