Category Archives: C’est Bon

Robin’s Nest Dew Drops {C’est Bon}

jks-dew-drops.jpg

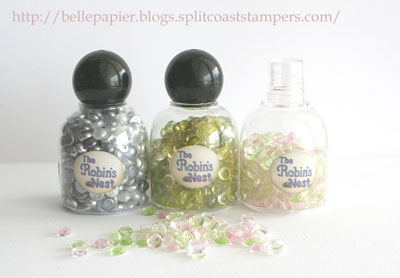
I’ve been sucked in by these tiny little Dew Drops! So sweet, now that I’ve started to use them I just can’t stop! These tiny acrylic embellishments are from The Robin’s Nest and come in clear or semi-opaque varieties. They are so easy to use and apply and I just keep finding new places to add them in! Each embellishment is approximately 1/4″ in diameter. Each bottle resembles a little nail polish bottle and I’m amazed at how many little pieces come in each package.

What I love about The Robin’s Nest Dew Drops

  • 21 varieties
  • lovely shine and subtle look
  • flat side for easy application
  • each bottle comes with a variety of colors
  • I’m amazed that there are approximately 560 dew drops per package!
  • great price – $4.99 …that is less than a penny each!

How to adhere…

The Robin’s Nest Dew Drops are super easy to adhere. You can adhere them using a couple easy methods…

  • mini glue dots…if you have the large size like I do…I actually pull my glue dot in half so that I can adhere two dew drops and reduce bulk
  • Dimensional Glaze….I use Ranger Glossy Accents but other dimensional glazes also work well such as Crystal Effects

Where to Use…

  • The dew drops are fabulous as flower centers
  • use as accents for water or ice
  • Use to “frame” a design element
  • Adhere to the center of scallops
  • Adhere them in a line as you would brads as an embellishment

Quick Tip: If you don’t have the right color of Dew Drop in your collection…you can easily color them with Copic markers for a quick fix.

Where to Buy:

  • I purchased my Dew Drops from Ellen Hutson. Ellen put these beauties on the map by introducing them to the online stamping world through her store.
  • Due to the popularity of these dew drops…they are starting to become available in local scrapbooking stores as well as other on-line sources.

Little Sheep

out-for-pub-sign-oct-07.jpg

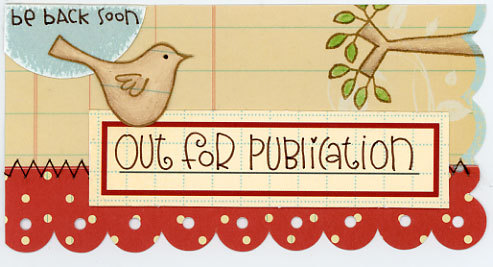
This fun little design was inspired by this week’s CPS challenge. Loved the scalloped edges to the design and I knew right away exactly how I wanted to do this. I’ve been wanting to try die-cutting a little card with my Spellbinders Nestabilities dies for a couple months now. I love how challenges always give you that little kick to take the idea in your head and get it out on paper. To cut out this little card (approximately 4.5″ across) I simply folded a piece of double-sided patterned paper in half, lined up my die so that it wouldn’t cut off the hinge and ran it through my Cuttlebug. The pink paper is actually the same paper I used to layer the design…the pretty dots one…just the reverse side. When you open up the design…you get a card with a darling dotted inside.

I wasn’t sure exactly what I wanted to do with this card design but my eyes fell on my Cornish Heritage Farms Primitive Beginnings stamp set. I hadn’t had a chance to use it yet and this darling little sheep caught my eye. I admit…I’m not using it in the primitive folk art style in which it was designed…but I love taking stamps and using them for a broad variety of ideas. I short…I love stamps that are flexible and I think this little sheep works for a shabby style baby design too. I paper pieced my little sheep on top of the dotted paper and then added the sentiment. A little Creative Impressions mini paper clip “holds” it there and again…for embellishment, my brown dotted Creative Impression’s ribbon. Lastly…to add in all my little dew drops…I adhered them with Ranger Glossy Accents to each scallop of the card. It was so super quick to do and I was really impressed with how fast it dried.

Hope you enjoyed this product review and tutorial. ) For other {C’est Bon} products just click on the C’est Bon tab in my category section of the sidebar. All {C’est Bon} products are ones I love to use and are my own opinion based on my experience with that product. I love hearing from you. If you have any questions or comments on this product I’ll do my best to answer by editing this post.

Terrifically Tacky Tape{C’est Bon}

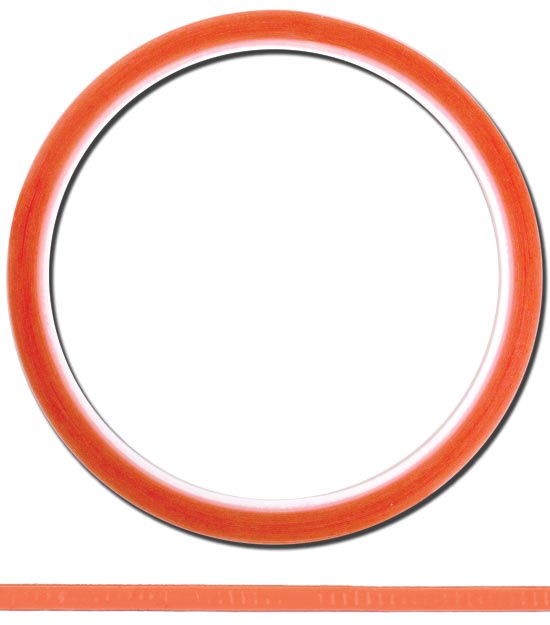
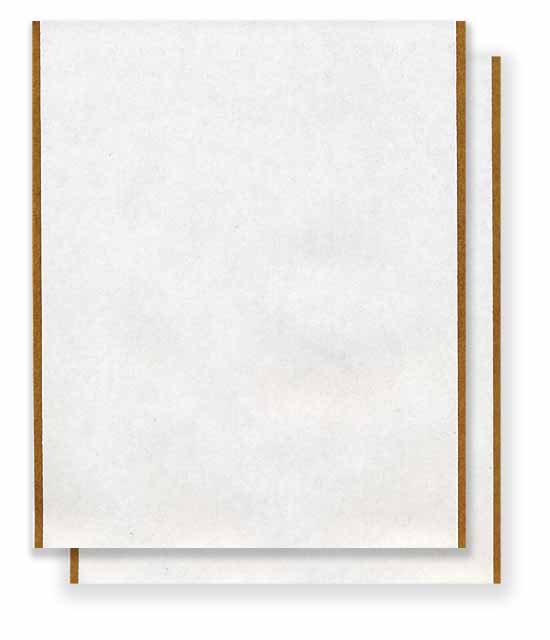
jks-tape-roll-large.jpgjks-tape-sheets.jpg

Just a quick {C’est Bon} entry from me today. This renovation is certainly taking its toll this week! Today I’d like to give a huge thumbs up to one of my favorite adhesives, Terrifically Tacky Tape by Provocraft. This adhesive is not for your usual adhesion of paper layers etc. but is fabulous for adding some special effects. Super, and I DO mean SUPER adhesive allows you to adhere almost anything to your project. If you have something hard to adhere…this is the perfect adhesive. The Terrifically Tacky Tape comes in sheets 6.75″ x 9″in size and has two sheets per package. Also, this super adhesive comes in a roll of narrow tape that is perfect for adhering difficult altered projects as well as creating borders of embellishments. The tape rolls come in a variety of sizes to meet your particular needs… 1/8″, 1/4″, 1/2″, 1 1/16″

What to do with it…

  • adhere over layer, cover with clear microbeads
  • adhere heavy metal embellishments
  • die cut shapes and apply small loose embellishments over top
  • punch it
  • apply beads
  • apply flocking
  • adhere cardstock to altered project
  • adhere glitter
  • the strip adhesive is perfect for holding together journals and wrapped candles as well as other projects

How to apply…

  1. Cut, punch or die-cut to desired size or shape.
  2. Remove one side of protective backing. Apply to surface.
  3. Remove other side of protective backing. Apply item to be adhered.

Things to Note:

  • Make sure you are totally committed to where you want this adhesive…when it is adhered, there is no going back
  • If you are nervous about applying your adhesive staight…just turn down a tiny corner of the backing to adhere one corner, then slowly peel off the backing applying the adhesive in a smooth manner.
  • I love using my Guillotine paper cutter with this adhesive sheet. It always gives a great clean cut

This product is available at your local craft store, local stamp or scrapbooking store as well as some on-line stores. This product doesn’t look very glamorous on the shelves but if you try it…you’ll be amazed at the fun techniques and looks you can get with it.

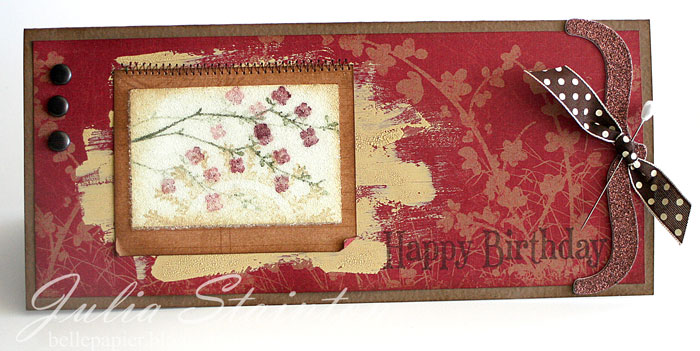
Beaded Birthday (click to enlarge photos)

jks-beaded-birthday-2.jpg

I created this birthday design for a good friend of mine whose birthday is this week. I tried to use products and a style that I hope she likes. 🙂 This patterned paper made me think of her when I saw it.

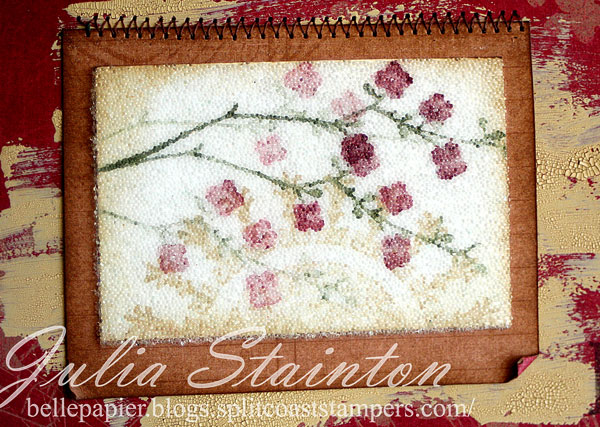
jks-beaded-birhtday-closeup.jpgTo create this design I started off by stamping my image panel using the Silhouette Blooms 2 stamp set and the Time to Stamp set from Cornish Heritage Farms. After stamping and sponging the edges, I cut a piece of Terrifically Tacky Tape sheet the same size as my image panel and adhered it over top. I then sprinkled the entire surface with my clear Microbeads and pressed them in firmly to get a nice smooth even coverage.

To add to my distressed look of this card, I added some brown zigzag stitching and lots of sponging. I decided to try out another new idea I had by added a brushed on “frame” of Ranger Distress Crackle paint. I love how it slowly cracked as it dried adding to the shabby vintage look.

Supply List:

Stamps:Silhouette Blooms 2 (flower), Time to Stamp (ornamental circle), The Art of Framing (birthday sentiment) – Cornish Heritage Farms

Cardstock: Natural Smooth, Tawny Medium – Prism

Patterned Paper:

Ink: Antique Linen & Brushed Corduroy Distress Ink – Ranger, Burnt Umber Palette Ink – Stewart Superior, markers

Other: sewing machine, ribbon & Brads – Creative Impressions, glitter chipboard and pin – Making Memories, Terrifically Tacky Tape sheet, Clear Microbeads – Provocraft, Antique Linen Distress Crackle Paint – Ranger

Hope you enjoyed this product review and tutorial. 🙂 For other {C’est Bon} products just click on the C’est Bon tab in my category section of the sidebar. All {C’est Bon} products are ones I love to use and are my own opinion based on my experience with that product. I love hearing from you. If you have any questions or comments on this product I’ll do my best to answer by editing this post.
Curvy Cutter Circle Template {C’est Bon}

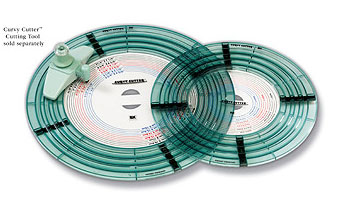
jks-curvy-cutter.jpg

I just love my new circle cutter. I’ve been wanting to post this review & tutorial since I first bought it but time has been in short supply. It didn’t take me long to fall in love with it…from the first perfect cut with it…I’ve been so enthralled. The EK Success Curvy Cutter Circle Template is so slick and easy to use and I’m so impressed with its abilities. I’ve always loved circles and they are so hot and trendy right now in design. Usually I’d tend to stay away from circles as I just wasn’t happy using the shape cutter I had. It would leave spots where I had to trim. I do love the Nestabilites circles but I found I was limited in size of what would run through my die cut machine. With my new Curvy Cutter Circle Template, I’m just loving adding circles of all sizes as they are so quick and easy to incorporate. I just had to have this circle cutter template after falling in love with all the cool ways Nancy uses circles on her blog, Scrap This. Take time to check it out…her layouts are so fun and fabulous!

What I like about the Curvy Cutter

  • easy to use
  • easy to position
  • very quick to set up
  • huge size variety of circles from 2.25″ to 7.5 inches …you can also cut outside the circles for greater flexibility and a full 12″ cut
  • 1/8″ increments mean you can cut and mat with great flexibility
  • two circle positioning templates make it easy to position your photo or paper in just the right place
  • ergonomic handle swivels easily for cutting in a single motion
  • no torn or ragged edges….a crisp perfect circle
  • gripper feet keep the template easily in place
  • works well on cardstock, photos, vellum etc.
  • double sided blade means you can cut in both directions
  • expandable….you can use the Curvy Cutter part with other templates such as the Oval Template and the rounded squares
  • you can use the glass cutting mat for other applications such as free hand cutting etc.

Things to note:

  • this cutter does not work well with small scraps of paper
  • The cutter is sold in two pieces…the circle template and the Curvy Cutter blade mechanism itself…you will need both
  • this cutter works best with a glass cutting mat. Self healing mats are not recommended
  • When cutting multiple circles…start at the smallest size and work out.
  • This cutter is not inexpensive but I find it is well worth the money. Well made and flexible I know it will give me great cuts for years to come.

How to Use:

To cut thin circles…

jks-circle-1a.jpg

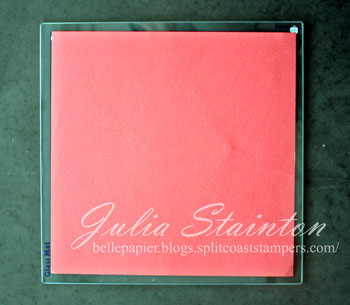
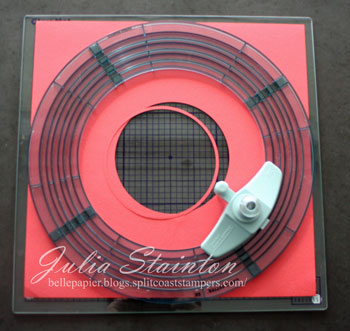
1. Lay cardstock on glass mat.

jks-circle-2a.jpg

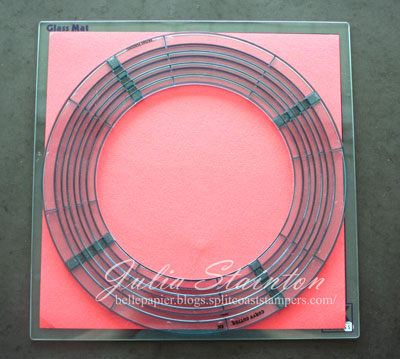
2. Position circle template on top. Remove guide and place cutter in desired track.

jks-circle-3a.jpg

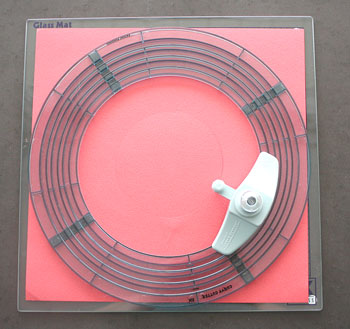
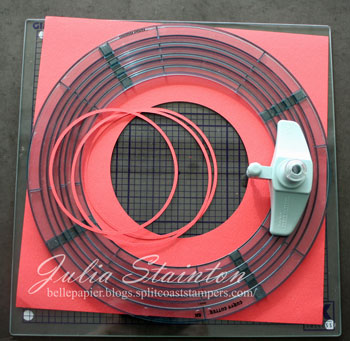
3. Swivel blade around track.

jks-circle-4a.jpg

4. Push blade in until it clicks at the next increment. Cut circle.

jks-circles-5a.jpg

5. Repeat.

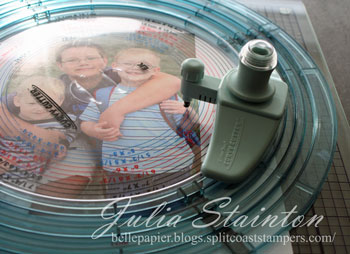
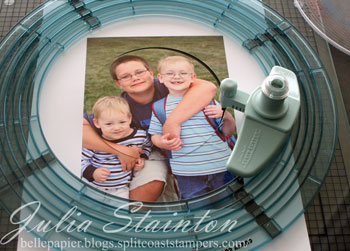
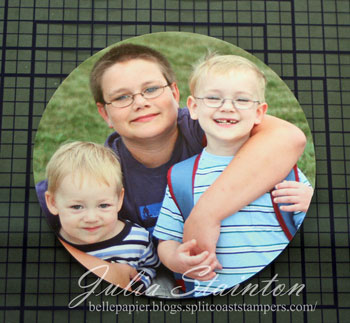
To position on photo and cut out…

jks-circles-1b.jpg

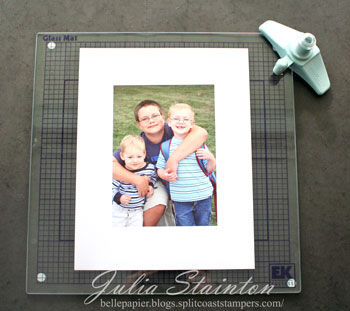
1. Place photo on glass cutting mat.

jks-circles-2b.jpg

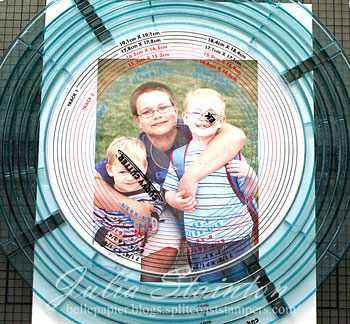
2. Position circle template with positioning insert where desired on photo.

jks-circles-3b.jpg

3. Adjust blade to correct size. Remove insert and place blade in track.

jks-circles-4b.jpg

4. Press down on template to hold steady and swivel blade with other hand.

jks-circles-5b.jpg

Quick Tip: When cutting rings of circles…I often cut out a full sheet of circles at once. This allows me to have some precut circles on hand and play around with which size best suits my design.

Where to find it…

  • I purchased my cutter from my local scrapbook store.
  • You can also find it at Michael’s and other craft stores
  • On-line stores

Things to do with it…

  • make a circle card
  • make thin 1/8″ circles
  • cut circle spotlights
  • make circle windows
  • cut out off-set circles
  • line up the side of your card to create a semi-circle edge

Samples…(just click on image to go to design and instructions in original post)

jks-hey-tweetie.jpgjks-ladybird-hello.jpgjks-oh-happy-day-edited.jpgjks-unique-layout.jpg

If you have questions about this product…please feel free to ask. I’ll do my best to answer by editing in the answers into this post. All {C’est Bon} entries feature products that I love to use and are my personal honest opinion. 🙂 If you’d like to check out other {C’est Bon} entries that I’ve written…just click on {C’est Bon} in the Category section of my sidebar.
Edited to Add….

From Rachel….

I’ve had the circle cutter for about a year and never use it because the directions were very confusion. Your tutorial helped a lot! I do have a question for you. What kind of adhesive to do for the thin 1/8 circles?

I’m so glad it helped you out Rachel! I’ve found that using a Mono type adhesive leaves a gummy mess all over so I usually use one of two liquid glues… the Scotch Quick Dry Adhesive or the Sakura glue pen. Both of these adhesives are easy to apply in a thin line and hold well. Hope this helps!


  • Many of you have also mentioned to me that the Curvy Cutter was originally packaged with the cutter and oval templates together. They are now marketed separately and I purchased the Curvy Cutter, the Circle Templates and the glass cutting board as separate items. I can’t say for sure what the original packaging said about the cutting surface but the Circle Template instructions now read that a glass cutting surface is definitely recommended for a clean cut. Hope this helps!

Flocking {C’est Bon}

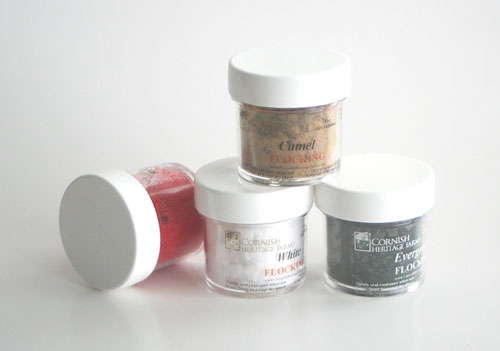
jks-flocking.jpg

I love flocking. It must be that texture. So warm, fuzzy and it is so fun and trendy right now. Flocked paper, flocked sweatshirts…it just begs you to reach out and touch it. Yes I agree…it can be a little messy but it is quite easy to use and the results are fabulous! A little flocking really goes a long way and when I purchase a little jar of it…I’m always amazed.

How to Apply Flocking

Flocking needs a little pressure to get it to stay on well. Unlike glitter that you just sprinkle on and tap off…flocking needs to be pressed well into your adhesive. After applying a liberal amount of adhesive where you want your flocking, simply sprinkle the entire area with flocking. Press well into the adhesive and allow to dry before tapping off the excess. You can apply flocking using…

  • Glue Pens – I love the one that Sakura makes for adding spot touches to a design
  • The Essential Glue Pad by Tsukineko
  • Heat and Stick Powder – an embossing powder type adhesive

Places to Use Flocking

  • add fur or feathers to animal images
  • fluff up a snowman image
  • texture up a background
  • flock a flourish stamp for a trendy fashion look
  • add flocking to images of sweaters, mittens, hats
  • add it anywhere you want to add a little texture
  • make your own flocked patterned paper using a glue pen to highlight flocked areas

Where to Find It

Quick Tip: When flocking your design sprinkle it over a sheet of scrap paper. This is easy to fold and pour your flocking back into the jar. Dispose paper so that it does not dust up your work space.

Coneflower Friendship

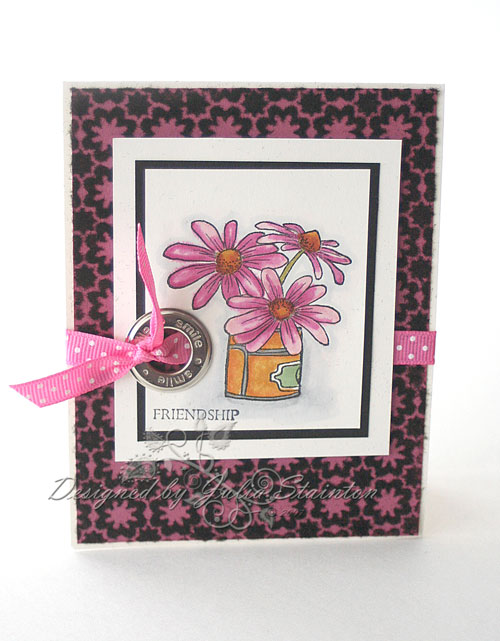
jks-coneflower-friendship.jpg

This design is a Coneflower image by Asela Hopkins colored with Copic Markers. Geometric Flowers Backgrounder stamped was well inked with The Essential Glue Pad before stamping on the cardstock. After sprinkling with black flocking, & pressing it into the glue, I allowed it to dry before tapping off the excess. Smile grommet is a Making Memories embellishment and I love the fun bold eyelet look.

Wishing you a fabulous day! Check back in tomorrow for a layout and paper review 🙂

Supply List:

Stamps:
-Coneflowers stamp(Asela Hopkins) by Cornish Heritage Farms
-Geometric Flowers Backgrounder by Cornish Heritage Farms
-Classic Essential Expressions (Mona Lisa Moments) by Cornish Heritage Farms

Ink:
-Black Adirondack Ink by Ranger
-Essential Glue Pad by Tsukineko

Cardstock:
-Natural Smooth cardstock by Prism Papers
-Black & Pink Prismatic cardsotck by Prism Papers

Tools:
-grommet setter – Making Memories

Accessories:
-grommet from Making Memories
-ribbon from Michael’s
-makers from Copic
-Black Flocking from Cornish Heritage Farms

Technique:
-flocking
-Copic Markers

Basic Grey Rub-on Roller {C’est Bon} … a tutorial and review

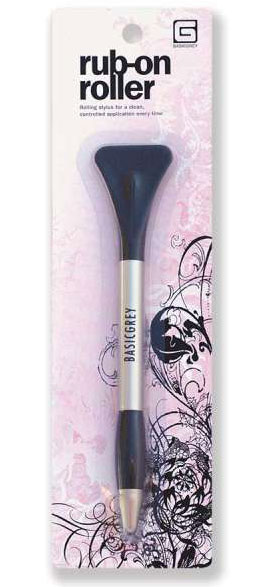
jks-rubon-roller-narrow.jpgWhen I first saw the Basic Grey Rub-on Roller advertised just before it was released…I just knew it would be one of those things I would have to try out. I love using rub-ons in some of my designs and they are great for applying to a variety of surfaces. Depending on the manufacturer…some rub-ons can be more difficult to apply than others. Most companies include a little popsicle sticker to burnish on your rub-on transfer but these can be hard to hold and sometimes, do not rub smoothly. While Basic Grey rub-on transfers are one of my top faves for ease of use and application…I decided to try it out and was so pleased with the results.

On one end of the Basic Grey rub-on roller is a rolling steel ball end. It works fabulously for applying the transfers smoothly and it rolls very well. I had previously tried my Empressor embossing tool but found the rolling ball on that really did not roll well with rub-ons…better than a popsicle stick but still left something to be desired. The Rub-on Roller was easy and comfortable to hold and is of sturdy construction. I love tools that are functional, take up little space, are well made and yes…well-priced. On all four…this rub-on roller takes top marks from me. I’d definitely recommend it if you frequently apply rub-ons.

How to Use It (pics to be edited in shortly)

1. Carefully cut out rub-on transfer and remove backing.

2. Place transfer on desired surface.

3. Roll ball end of of Rub-on Roller over rub-on until transfered.

4. Flip rub-on backing (you didn’t throw that out did you?! ) and place over rub-on. Smooth and burnish gently with flat end of Rub-on Roller for secure application.

Where to Buy…

  • I purchased my Basic Grey Rub-on Roller from Jacksonbelle’s ebay store.
  • You can also purchase it on-line at other stores if you search
  • Your local scrapbook supply store may carry this product.

{heart} U Forever

jks-heart-u-forever.jpg

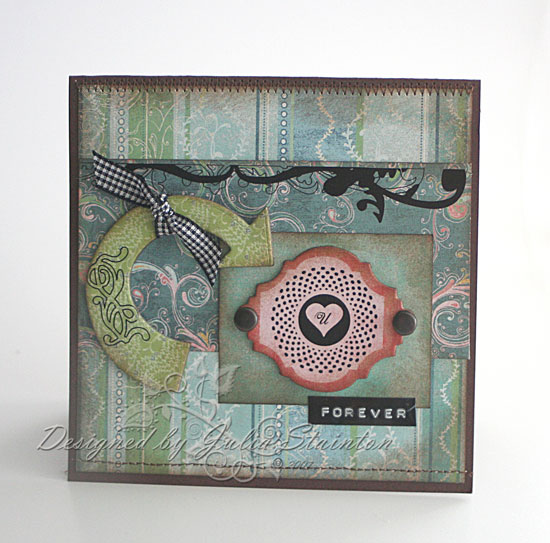
Actually while I was writing up this design…the sentiment got me thinking. I love your forever…reminds me of a darling childrens’ book that I used to read to my oldest children. I’m going to have to do some digging as I’m sure we still have it. I can’t remember the title but a beautiful rhyme in the story went like this…. I’ll love you forever, I’ll like you for always, As long as I’m living …my baby you’ll be. I know this is totally off topic…lol…this valentine is for my hubby. Notice how I tried to take a very pink paper line and make it more masculine by including lots of brown, black rub-ons and very green papers from the line.

This design uses the new Basic Grey Two Scoops 6×6 paper pack. Love those scaled down prints and other Basic Grey papers has that fabulous distinct look. A little distressed, a little fun, a little vintage, a little trendy. My first rub-on was placed along the top of my horizontal panel and is from the Basic Grey rub-ons line. I also purchased the new matching Two Scoops printed chipboard. This chipboard is so fun…already printed you can use as is, just punch, remove backing and adhere to design. No mess, no fuss. I decided to see how the rub-on roller would work for applying rub-ons to chipboard. Fabulous and fun…I added the black heart rub-on to my pink frame chipboard and a little fun flourish to my arrow.

Quick Tip: Don’t forget you can alter your printed chipboard if desired. I sponged this chipboard and applied rub-ons to it. You can also add glitter, bling, punch holes, stamp it, sand it…even cover it with paper if you don’t like the tones.

To finish off my design…some large antique copper brads from Creative Impressions anchor the pink chipboard and a little scrap of black gingham ribbon is tied to the arrow. I love my Dymo Label Maker for a quick sentiment addition…this time I added the word forever.

As rub-on transfer keep gaining in popularity with paper crafters… I know this is a fabulous tool that will be getting lots of use in the future. If you have any questions…feel free to ask them in the comment section and I’ll try my best to answer them by editing the answers into this post. Wishing you a wonderful Sunday!
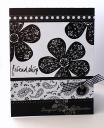
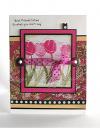
Making Memories Textured Tape {C’est Bon}

jks-textured-tape.jpg

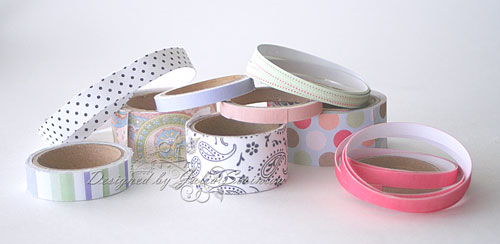
I love these packages of coordinating textured tapes by Making Memories. Now you may be wondering…exactly what is this tape. After all…it can be a little difficult to see the texture in a photograph. Making Memories had a fabulous line of these darling printed fabric tapes that are so easy to use. They are adhesive backed and come in packages of four coordinating rolls of fabric tape. These little rolls are perfect for adding texture and patterned to a design quickly. I love how they are easy to use and easy to trim off the excess. You can use them just like strips of patterned paper if you wish…they addition of a woven texture being a little fun and there is no need to get out the paper trimmer and adhesive…it’s all done for you.

What can you do with them? Adhere them as stripes, adhere them right together, wrap them around a jar or altered item. You can also make tabs with them, weave them, stitch them, punch them…just have fun with them! The Making Memories Textured Tapes come in a variety of patterns and are available at your local scrapbooking store, Michael’s and on-line crafting stores.

Girl’s Night Invitation

jks-girls-night-invitation.jpg

This is a quick fun girls night invitation card design. I’ m having so much fun with this It’s a Party stamp set by Lizzie Anne Designs lately, I thought it would pair up well with these fun textured tapes for a quick design. To highlight the fun colors and texture of the tapes, I kept the cardstock a simple plain white and accented with a touch Rose Red and Close to Cocoa paper and ink. Some buttons and stitching embellish the circular sentiment and to make a fun check for the girls night…a tiny Making Memories flower brad adds to that girlie look.

Hope you enjoyed this little product review. I don’t know about you but I could use a little girl’s night right about now. Amidst a winter cold snap and a dusty renovation…some fun would be really welcome! To my American friends…enjoy your holiday tomorrow! We don’t have the day off tomorrow here in Canada so it will be work and school as normal here. If you have any textured tape and wish to share your designs with me…I’d love to see them. Feel free to link in the comments below! 🙂

Some more thumbnail samples…just click to enlarge…

jks-best-friends.jpgjks-boho-blossoms-friendship.jpgjks-flourishes-baby-best-wishes.jpgjks-rainy-day-thinking-of-you.jpgjks-best-friends-resized-3.jpg

Tonic Scissors {C’est Bon}

jks-scissors.jpg

For unmounted rubber stamps…an essential part of the process is cutting them out well. I must admit…I struggled through cutting and mounting rubber stamps for quite a few years with just a pair of old kitchen shears. I knew they weren’t ideal but there always seemed to be something else higher up that I really needed on my wishlist and just kept putting it off.

Fast forward to a couple months ago I discovered this pair of scissors from Tonic Studios designed by Tim Holtz. When I saw the names I associate with very high quality merchandise on this product I very much needed…I looked right at the price tag. I was extremely surprised and it wasn’t more than a few minutes before I had my order in.

I’m so happy to say that these scissors have really lived up to my expectations and more. I wish I’d had these scissors throughout all those years I struggled with cutting out my rubber.

What I love about these scissors…

  • easy to hold
  • extremely strong construction and high quality
  • the position of the fulcrum (the point were the scissors swivel) makes it easy to cut through the rubber with little resistance….basic physics people! 🙂
  • large handles with Kushgrip soft coating…the same as the Tonic paper cutter
  • non-stick blades…keeps that adhesive that attaches the foam from gumming up your blades
  • serrated blades easily cut through rubber and prevent slipping
  • protective cap cover to safely store the scissors
  • Price $$$ – 11.79 US …I’m still pinching myself!

Where to buy…

  • Cornish Heritage Farms: I purchased my scissors from Cornish Heritage Farms on-line
  • Local Stamp Stores: Many local stamp supply stores as well as scrapbooking stores carry Ranger products.

Hope you enjoyed the return of my {C’est Bon} entries. I’ll be posting my next one next Sunday so stay tuned. 🙂 If you’d like to check out my past entries…just click on {C’est Bon} in my category section in my sidebar. All {C’est Bon} products are my own personal favorites and honest opinion.