Category Archives: C’est Bon

Copic Sketch Markers {C’est Bon}

In my {C’est Bon} entries, I love writing about products that I enjoy using and I feel are well worth-while investing in. Copic markers, while a big investment, are a wonderful tool that I’m so glad I purchased. As the months go by, I find myself learning more and more about this favorite product. A quality artist’s tool, I know I’m just beginning to scratch the surface of all the wonderful techniques that I can use them for. Copic makes a variety of fabulous markers but I chose the Sketch version as I really wanted to try out the airbrush capabilities. The fabulous ways these markers blend together by their alcohol ink properties make them an incredible product. I initially invested in a set of 48 markers and since then have slowly added to my collection bringing it to a total of 80. Of course…with so many wonderful colors…I’ll still be adding more as I can. 🙂

What I love using them for…

  • coloring bold images
  • coloring soft and detailed images
  • changing the color of ribbon
  • airbrushing soft backgrounds
  • coloring flowers as well as hard acrylic and metal embellishments to personalize them

I recently discovered a fabulous way of using Copic markers in a tutorial written by Lisa Silver…watercoloring with them! I’m dying to give this a try! You can check out the tutorial here.

Recently I wrote a review for Craft Critique on the Copic Sketch Markers and thought I’d share it here again as part of my {C’est Bon } entry. Here it is….

*****

Copic markers have been taking the papercrafting world by storm. It seems that almost everywhere you look these days, Copic markers are the coloring tool of choice. Copic actually created these markers 25 years ago with the professional designer in mind. What makes these markers so special, how do you use them and the big question…do you really need them?

I’ll admit to falling for this trend. At first I didn’t think I really needed them. After all…I’d gotten along fine for years by mostly using watercoloring techniques to color my stamped images. My chalks and colored pencils were languishing on the shelf and I already owned a rarely used set of dye markers. Due to some great samples I’d seen while blog-hopping and my very inquisitive nature…I decided to invest in a set of 48 markers. I think it may have been the airbrushing capabilities that really threw me over the edge. An art teacher from way back when had an airbrush system I had never gotten a chance to use and I was dying to try one out.
Copic has four different types of alcohol based marker. The COPIC, Sketch, Ciao and Wide versions all use the same ink. The difference of features lay in the features of the barrel and nib itself. While the Sketch version is one of the most expensive, I chose it for its versatility and it was the one that best suited my needs. For the purpose of this review…I’ll be focusing on the Copic Sketch marker for ease and because that is the one I am familiar with.

The Copic Sketch marker has some fabulous features. When you pick one up you’ll discover it is very easy and comfortable to hold. Because the barrel is flat on two sides, it is easy to put down and not have it roll off your work surface. These markers have two capped ends with different nibs inside to maximize your flexibility. I love the brush end of the marker and it is the one I used for most of my coloring applications. The chisel-tip end is perfect for a more graphic style coloring and is the end you use in the airbrush system. The great thing about these markers is that they will last for a life-time. With much use you may run out of ink but the barrels are refillable with Copic ink refills. If you mistakenly leave out a marker uncapped…the nibs can also be replaced. Either the Superb Brush or Medium Broad nibs can also be replaced with the optional Medium Round nib for finer work or writing with. These nibs are extremely long-lasting and hold up better than any marker nib I’ve seen.

The alcohol based ink in these markers are what makes them so special. Have you ever colored a solid image with regular dye markers and gotten streaky lines. You just can’t help it. The alcohol formulation in the Copic ink allows colors to blend with no streaks. This is fabulous for large solid images and in instances where you want to blend colors. This ink is also acid free once the alcohol has evaporated, making them perfectly safe for scrapbooking. You can create many looks with these markers. Designed for use by graphic designers and professional artists as well as Manga Art…these markers give a beautiful professional look. Available in 332 colors, these markers provide and incredible selection to suit every need.


There are a few key techniques to using the Copic Marker system. First of all it is best to have two or three tints of the same shade. This means a light, medium and dark blue that is essentially the same color…just a variation. This allows you to color the section with the light color first…then add in the darker shadows. To blend simply take your lightest Copic marker and blend them together. If you find that you have too dark of a color…simply bring back in that lightest tint and go over it until you get the lightest color back. With most markers…if you add more color, you add color…the Copics allow you to move it around a little even after the marker is dry.


There may be occasions when you do not have the exact color you need. One very easy way to get a mid-tone is to dab your lightest tone onto the nib of a darker one. This will blend color right on your brush nib. As the color runs lighter…simply touch nibs again until you get your desired amount of color. This does not affect your marker in any way. To prevent staining of your nib just rub on a scrap sheet of paper until the nib is back to its original color. You can also blend colors with these markers, just like you would on a palette. Take a piece of acetate or plastic and scribble some ink onto it. You can pick up color with another marker in this fashion as well. This works really well if you are working with two different colors.

The Colorless Blender Pen is one marker from this set that you won’t want to be without. This blender pen is fabulous for blending colors. If you need to lighten an area to add a highlight…simply dab on the pen and watch the color lighten. The Colorless Blender Pen is also fabulous for fading off a background. Soften the edges of your color by running this pen along them.

While there are some purists out there, mixed media art and designing is a very accepted design style. No one medium can be the ultimate in artistic expression. The Copic Sketch Markers are very compatible with other art products and techniques. Combine the Copic markers with colored pencils to get fine precision detail after coloring. The soft, subtle properties of watercolor are beautiful with some styles and images. The Copic markers are easily combined with this medium as well.

If you are going to use these markers for coloring rubber stamped images, you’ll want to look into getting the correct ink for these markers. As some inks may run or bleed with the alcohol..using the correct ink with them is essential. There has been a lot of testing done on inks with the alcohol pens and my favorite to use is Ranger’s Pitch Black or Espresso Adirondack inks. Other inks that will work well are Tsukineko’s Graphite Black Brilliance Ink if heat-set and their Memento ink as well. Paper is not as critical a choice as ink but a smooth tight finish on the paper is your best bet to prevent bleeding. Prism’s Simply Smooth White cardstock, the Neenah Classic Crest Solar White and even Staple’s Cardstock all work well with this product.

One of the things that sold me on these markers is the ability to use them to alter other products and embellishments to get a custom look. You can use them to color on fabric, color ribbon and silk flowers to the color you wish…even brads and acrylic items such as Dew Drops or Tim Holtz Fragments can be colored with these markers.

If you’re looking for more information to help you expand your knowledge of this marker system, there are a lot of on-line links that are worth checking out. At the Copic site, their FAQ page has a wealth of information. I first learned about these markers from Ellen Hutson and she has some fabulous articles on the use of this product. Cornish Heritage Farms has a great tutorial on coloring detail images. For continued inspiration, Marianne Walker, The Copic Certification Instructor has a fabulous blog called I Like Markers. A wealth of techniques, concepts and art instruction with both beginner and advanced applications.

Pros

  • Professional Artist Quality product
  • Permanent…will not run with water
  • The alcohol based markers don’t give you lines when coloring and are easy to blend
  • This product will last you for a lifetime
  • Love the versatility of these markers and the fabulous airbrush system
  • Extremely portable

Cons

  • These markers are not inexpensive
  • For proper blending of shadows and highlights you need a good variety of markers
  • For optimal quality, you need to be careful what inks and papers you use with these markers
  • Quite a high learning curve for this product if you are wanting to achieve expert coloring and shading

Online Sources

The Copic Sketch markers retail at $4.99 US per marker. While this can be rather expensive to invest in a large set, some retailers sell pre-designed sets for you. These sets are a better value and often come with a storage system included such as a marker wallet. This is a great way to start as they have done the hard work for you choosing a very workable set of colors to start with. The Copic Sketch Markers are extremely easy to use…simply uncap and start coloring. The markers do need practice if you are expecting to achieve professional blending and shading. If you are not a good colorer…these markers will not make you one. Only practice and instruction will do that. While the price of collecting these markers can be expensive….I feel that the longevity and flexibility of this product make it a worthwhile purchase and good value. I rarely rate products a 10 out of 10 but these markers are so well-designed, I can’t imagine how they could be improved upon.

Copic’s by-line is…”the markers created for creative people.” If you’re someone who loves to explore your creativity through coloring and art…I know you’ll love them. I’m thrilled with my Copic marker purchase and love using them. I enjoy sitting down to relax with them and am excited about all the skills I have yet to learn.

*****

If you have any questions about this product, I’ll do my best to answer by editing my responses into the bottom of this post.

Thanks so much for stopping by. Wishing you a safe and happy Labour Day weekend!
Julia

Creative Impressions Brads {C’est Bon}

I love using Creative Impressions brads. For quite a few reasons actually. They have a great variety, beautiful shapes and finishes and I know this may seem like a really strange reason…but I love the prongs on these brads! The prongs are long, slim and easy to bend. I hate getting stabbed with ornery prongs that will not bend! The Creative Impressions brads are so easy to insert and so easy to bend back so that they aren’t hard on your hands.

jks-creative-brads.jpg

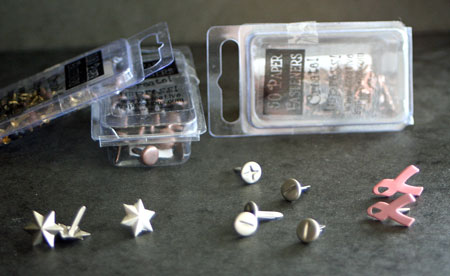
The Creative Impressions brads come in a variety of shapes and sizes. From really mini brads to larger embossed snowflake brads, you are sure to find ones to fit your style. I do have a few favorites! If you look on their site…you want to look under the heading paper fasteners. My absolute favorite that I would use for almost every application is the Antique Bronze or Pewter Rounds. They are a beautiful size and are great for adding to the centers of flowers, or paired up at the edge of a layer.

The Creative Impressions shaped brads are also fabulous. I particularly love their snowflakes. Elegant and a beautiful shape and size, these brads come in different finishes such as Pewter, Silver, Pearl, White and Winter. If you are interested in more Christmas…try out the bulbs, stars or Trees. For masculine designs, I love using the Screwtop brads. With a family working in construction…these are particularly useful for me.

jks-creative-brads.jpg

Price: Most of the Creative Impressions shaped brads retail at approximately $3.00 for 50. The plain rounds are 50 for $2.00 and the fun glitter rounds are 25 for $3.00

Where to Buy:

  • Creative Impressions – you can buy your brads and other CI embellishments direct on-line
  • Scrapbook and Stamping Stores – many local stores will carry this product

Some Samples….

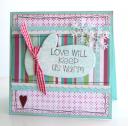
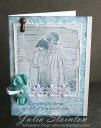
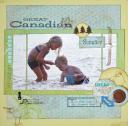
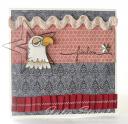
jks-my-dear-friend.jpgjks-merry-kissmoose.jpgjks-love-will-keep-us-warm.jpgjks-special-to-me.jpgjks-great-canadian-summer.jpgjks-freedom.jpg

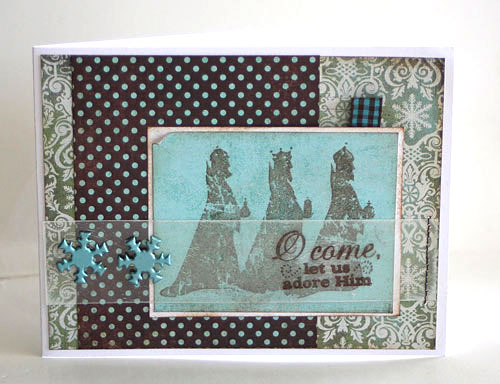
O Come Let Us Adore

jks-o-come-2.jpg

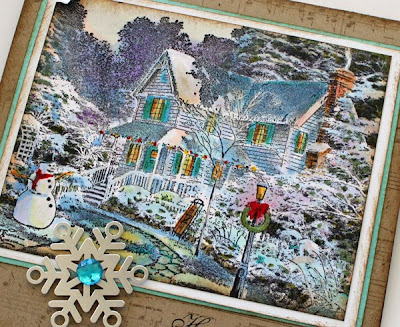
This design uses the beautiful pearl snowflakes brads by Creative Impressions. I just love this aqua color! Paired up with the blues, greens and browns of the Basic Grey Fruitcake paper and some very elegant Three Wise Men , this was a fun Christmas Card to make. The brads hold down one end of the Clear Card Sheet strip that is stamped with the sentiment.

Hope you enjoyed this {C’est Bon} entry! If you have questions about this product, I’ll try to answer them for you the best I can by editing in this post.

Happy Christmas in July!
Julia

Zots Glue Dots {C’est Bon}

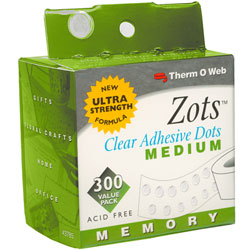
zots.jpgA humble little product I’d like to feature today…Zots glue dots by Thermoweb. I love these fabulous little bits of extra sticky adhesive and use them on almost every design I create. You never see them but …hope you’ll allow me this simile…like good undergarments, they keep everything right where it should be, pulled together and looking great.
Sometimes I move when I create…strange I know 😉 …from my stamping desk in the family room, to the dining room where my sewing machine sits, to the computer desk in another area and they often travel with me. That being the case…there are times when I have up to 4 boxes of them in the house at once. I DON’T want to lose them! I’ve been meaning to write this entry for a while but life sometimes gets in the way. As a friend asked me the other day how I adhered all my goodies…I thought it was long past time to write about it!

Why I Like them…

  • super sticky…will hold almost anything
  • permanent
  • easy to use
  • no messy liquids…just one precise little dot
  • the glue dots come in a variety of sizes to suit your needs: small, medium and large as well as well as options. I love the medium size
  • fabulous for adhering embellishments, even layers of them
  • clear
  • small and discreet
  • acid free
  • great value – 300 dots for approximately $4.30 US… less than 1.5 cents a piece

Things I Adhere with them…

  • buttons
  • lace trims
  • chipboard accents
  • Maya Road Office Sheers
  • Transparencies
  • Flowers, flowers and more flowers
  • felt shapes…as felt can be difficult to adhere…I love using these glue dots!
  • knotted bits of ribbon
  • die-cuts
  • foam embellishments

A Couple Fun Tricks

  • Tear off a strip of glue dots and leave them on the original wax paper. Sprinkle with embossing powder. Remove excess and heat. You end up with fun little dots of embossing powder embellishments
  • I just came up with this idea for this entry….Flocking is particularly difficult to adhere to projects. Simply add your glue dots where you wish, sprinkle with flocking you have custom flocked dots

Hint: Place glue dot directly from packaging onto desired surface…you don’t have to pick them up with your fingers

Where to Buy:

  • I purchase mine at my local scrapbooking store
  • Michael’s carries them
  • many on-line stores…just google

Flocked Deer

jks-flocked-deer.jpg

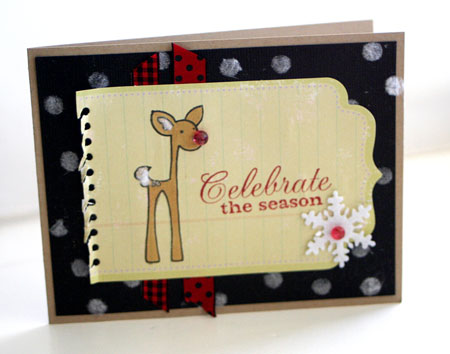
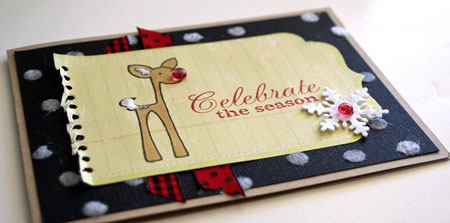
This simple design was sooooo much fun to make. To make my snowy background, I simply applied glue dots all over the black paper and then pressed in some white flocking. My darling little deer is from the Christmas Critters set by Kim Hughes. I made him into a little Rudolph by applying my Dew Drop right over his nose using another glue dot. Creative Impressions Felt Snowflake is also adhered using a glue dot.

jks-flock-deer-down.jpg

Thanks for stopping by! Hope you enjoyed this entry. If you have any questions…feel free to ask and I’ll do my best to edit in the answers in this post.

Have a great day,

Julia

Supply List:

Stamps: Christmas Critters (Kim Hughes Line) & Christmas Expressions (Mona Lisa Moments line, set to be released Thrusday) by Cornish Heritage Farms

Ink: Black Palette ink by Stewart Superior, Cranberry Adirondack by Ranger

Paper: Kraft by Prism, Black by Bazzill, Journaling pad by Making Memories

Other: Dew Drops by The Robin’s Nest, Glue Dots by Thermoweb, White Flocking by Cornish Heritage Farms, ribbon and felt snowflake by Creative Impressions

Prism Papers Cardstock {C’est Bon}

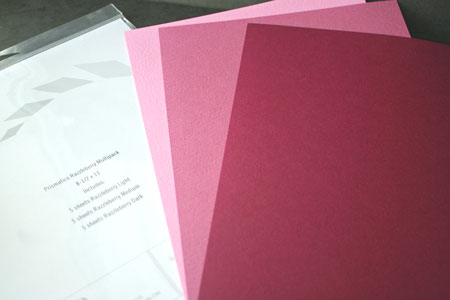
You may have noticed that I’ve been using Prism Prismatic cardstock for my designing lately. Prism Papers sent me a gorgeous huge block of their cardstock last December and I’ve been hooked ever since. An incredibly large palette of beautiful colors, I love how Prism has their color line organized. Each color has three variations to it. Take for instance, the Spring Willow colors….there are three variations of it. Spring Willow Light, Spring Willow Medium and Spring Willow Dark. I love how easy it is to match up and coordinate. The concept this cardstock line is developed around is that you should be able to put together color combos by combining any of the colors. They are all designed to work well together. Here’s a photo of how the RAzzleberry Light, Medium and Dark work together.

jks-prism-razzleberry.jpg

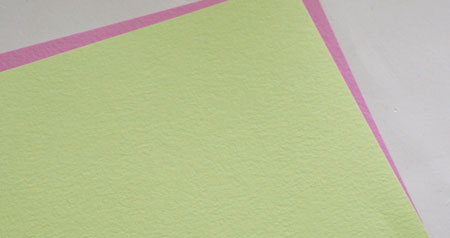
Prism Prismatics cardstock is a high quality cardstock in a wonderful weight. Strong enough to hold up for card-making but light enough to fold easily and not bulk up the design too much. One of the unique features of this cardstock is its texture. One side of the cardstock is smooth and beautiful for stamping on, the other side is a beautiful texture. You can still stamp on this lightly textured side if you want a textured look to your image.

jks-prism-texture.jpg

The Prism Prismatics line features 113 gorgeous colors…I’m loving the selection! It makes it so easy to match up with patterned paper when you have a large number to choose from. Each color is designed to work with the other colors in the line. Prism carries their cardstock in two sizes for ease of use, depending on your needs….8.5 x 11 and 12 x 12″. I love their great swatchbook for choosing my color combo and for keeping me organized. Prism cardstock is great for embossing, stamping on, using to mat and layer. It also tears well, scores well and is easy to adhere.

Simply Smooth White and Natural Smooth cardstocks by Prism are my favorite go -to’s for stamping on. I love using my Adirondack ink pads but found some white cardstocks didn’t absorb them well enough to dry quickly. I never have this problem with these smooth cardstock. The surface is just so smooth and perfect…I love working with it. Lisa Strahl worked with Prism extensively to find the perfect white cardstock…you’ll love it!

Another Prism cardstock I really like it their Cardstock Vellum. Thick and stiff for making vellum cards and a great weight for embossing or heat embossing in a beautiful clean white.

Where to buy:

  • Cornish Heritage Farms – Prism has paired up with Cornish Heritage Farms to package their cardstock in a fabulous new way. You can now purchase 8.5 x 11 multipacks. Each package contains 15 sheets, 5 of each variation of the color. I love how convenient this is!
  • Scrapbooker’s Haven sells Prism cardstock in single sheets of the 12×12 size…perfect for scrapbook layouts

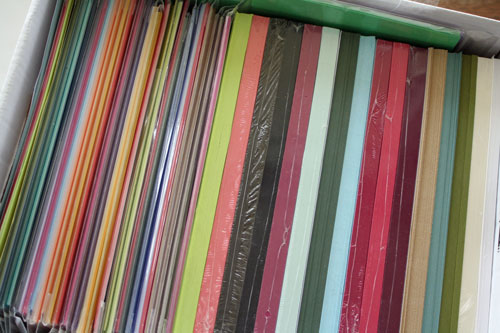
Not too long ago I had myself a nice cardstock shopping spree. 🙂 Now most of it is still packaged until my craft room (still on hold, thanks for asking 😉 ) is completed. How’s this for a nice variety?! Prism cardstock is a great, reasonable price and I love how I can order it on-line, whenever I wish and not wait for demonstrator to put in an order. Obviously not the best storage solution but its what I’ve got until my cardstock storage shelves are built.

jks-prism-stash.jpg

Some of my Favorite Prism colors…my must-haves 🙂

  • Kraft
  • Simply Smooth White
  • Natural Smooth
  • Suede Brown Dark
  • Blush Red Dark
  • Iced Teal
  • Spring Willow Light
  • Intense Pink
  • Baby Blue Light
  • Black

You can check out the entire line of colors here.

Here’s a card using some of those favorite go-to colors.

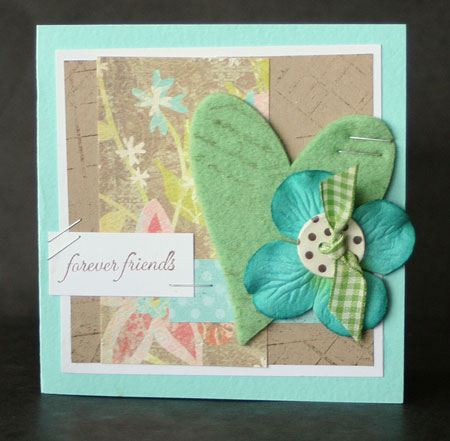
Forever Friends

jks-heartfelt-friends.jpg

I put this card together Friday night…just wanted a quick little design to have some fun! These papers and felt were already on my desk and I thought this hodgepodge of different products just might work together. My kraft layer is stamped with my Vintage Ledger Scrapblockâ„¢ and the felt heart with the Spanish Script Backgrounder.

Take care and have a wonderful Sunday!
Julia

Avery Shipping Tags {C’est Bon}


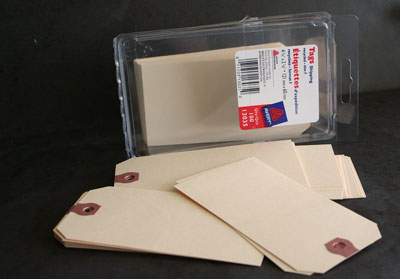
Today’s {c’est Bon} entry is really one you can get a lot of mileage from without breaking the bank. After being given a couple of these tags by a friend, I quickly fell in love with them. So easy to use…so quick to embellish or alter, these tags work perfectly on layouts, cards and altered projects. I love the manilla paper look and their smooth surface is perfect for stamping on and distressing. Best of all…the price. One hundred tags for less than $5 CDN…that’s $.05 per tag. That is one pretty cheap embellishment!

jks-avery-tags.jpg

A Few Quick Details

  • manila paper tags
  • nice plastic storage box
  • made from recycled paper
  • 4 3/4″ x 2 3/8″
  • punched hole comes reinforced…perfect for tying
  • this product is not acid-free …if you scrapbook…this may be something you want to bear in mind

What you can do with them…

  • stamp on them
  • emboss them
  • distress them
  • journal on them
  • they are a great backdrop of clustering embellishments on
  • tie them on a gift bag or present
  • make a tag book
  • mat photos or layers with them
  • tear them…tear off the bottom to make them fit your design
  • perfect for vintage, shabby and eclectic designs
  • tie in perfectly with the office supply look
  • make a card folder and insert the tags into the openings
  • make a banner

Where to Find them…

A Few Project Ideas…

jks-paradise-found-tag-book.jpgjks-crazy-for-rubber-2.jpgeach-day-a-masterpiece.jpg

Friendship Tag

jks-friendship-tag.jpg

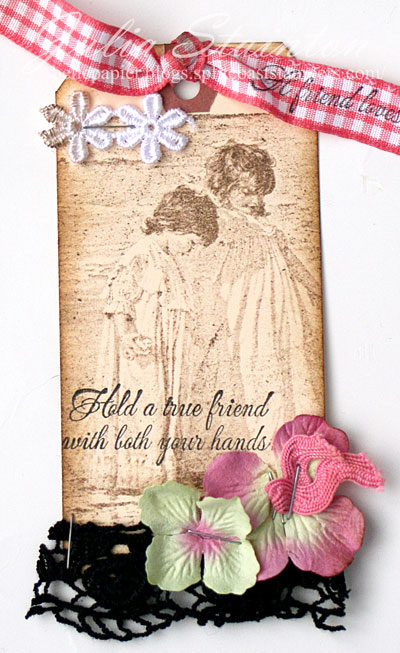
This design is a simple tag done in a shabby chic style. I love this style…you can be as simple or as lavish as you wish and it never has to be “perfect”. A little extra ink is a good thing. 🙂 This design uses super quick stamping for that beautiful Sandra Kuck Sisters image and how quick is it to staple on those embellishments?! Staples go great with the office look of shipping tags but if staples are not your thing, this design would look lovely without them. Some glue dots under that lace and those flowers and you would be all set. Tie this tag on a simple gift to make it extra special.

jks-friendship-tag-ribbon-c.jpg

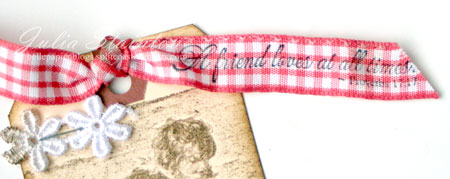
The sentiments on this tag come from the Friend Centers set that Lisa Strahl designed. I love the fabulous sentiments that make up this set. One of the sentiments is stamped directly over the image in black ink…another of the sentiments is stamped right on the gingham ribbon at the top of the tag.

Quick Tip: Palette Hybrid ink by Stewart Superior is a fabulous ink for stamping on fabric. After some testing with the inks I own ( I have quite a lot 😉 ) this ink is the one I turn to for stamping on ribbon, twill and felt.

Hope you enjoyed this {C’est Bon} entry! I’m taking tomorrow off but will be back Tuesday with a tutorial for you.

Julia

Supply List:

Stamps:

-Sisters from Sandra Kuck line by Cornish Heritage Farms
-Friendship Centers from Mona Lisa Moments line by Cornish Heritage Farms

Ink:
Burnt Umber and Black palette ink by Stewart Superior
-Antique Linen Distress ink by Ranger

Other:
tag – Staples
lace by Prima
ribbon by Making Memories
stapler
flowers by Prima

Autumn Leaves Buttons {C’est Bon}

buttons-close.jpg

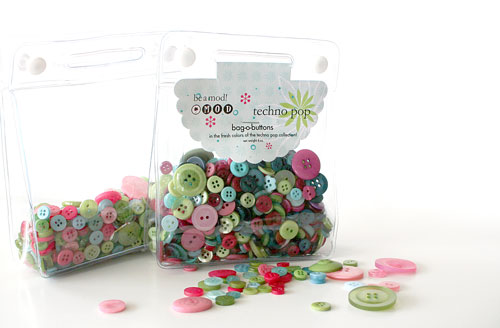
If you look at most of my work, you’ll know that I seem to have a fixation on buttons. All shapes and sizes and colors. My favorite source for buttons is the Autumn Leaves bags. Why? I think it must be the variety of colors, shapes, styles and sizes in each package, the way the colors coordinate and of course…there are LOTS in each package meaning I won’t run out for a very long time!

jks-buttons-autumn-leaves.jpg

Great things about Autumn Leaves Buttons…

  • inexpensive – at over 500 buttons per large package your buttons cost just over a penny each!
  • variety of colors in each bag – well coordinated
  • variety of shapes and sizes
  • large quantities in each bag
  • buttons are great for embellishing projects that will get use as they are sturdy and hold up well
  • depending on the line, these buttons come in one of two sizes of bags… a mini bag or the larger 6 oz bag
  • Storage bags are clear, easy to see what’s inside, easy to store and easy to access the buttons

Ideas for using buttons…

  • group together with other embellishments for a special look
  • use with stitching for a great shabby or vintage look
  • buttons are great for cute projects
  • cover a shape
  • dot an i
  • buttons make fabulous flower centers
  • decorate a snowman image
  • embellish paper piecings
  • tie with different fibres such as ribbon, embroidery thread, hemp, leather cord, raffia
  • decorate scallops – see below design
  • use them on cards, layouts, home dec projects
  • use buttons anywhere you might use a brad
  • sew them on fiber projects

Adhering Buttons…

  • glue dots are one of my favorite ways to adhere buttons …simply press button on glue dot, remove from sheet and apply where you want it
  • a dimensional liquid glaze such as Ranger Glossy Accents works fabulous for adhering buttons to projects
  • hand-stitch them right to your project
  • Sticky Strip Tape

Price: approx. $6.00 US or $7.50 CDN for the large 6 oz bag
Where to Buy:

Quick Tip: Buttons look best when grouped together in a cluster or line…the more the merrier 😉

Laughter and Sunshine

jks-laughter-sunshine.jpg

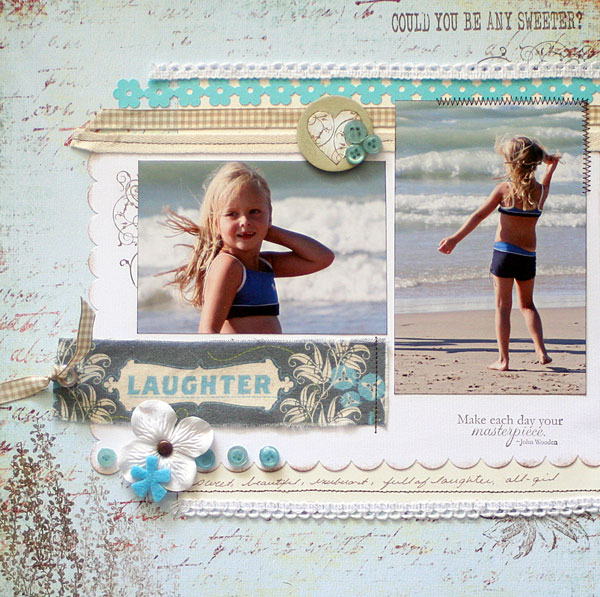
I love scrapping in a shabby style. It seems to work so well with my photos, colors and embellishments. I love how buttons coordinate so well with the trims and elements of this style. I love using them to add subtle touches of texture without overwhelming the design, pairing them up with stitching and even embellishing the embellishments. On this scrap layout, I used buttons to embellish some of the scallops on my white layer as well as my painted and stamped chipboard heart.

This layout is of my friend’s daughter. I designed one for her sister a few weeks ago and of course, she needed one to match. I incorporated the same colors and style and some similar embellishments to tie them both together. One of the similar elements is the stamping. I used stamps from the same line (The Rummage Bin and Kim Hughes by Cornish Heritage Farms) and stamped in the same Burnt Umber Ink.

Check back in tomorrow for a challenge I know you’ll love!

jks-make-wish-peek.jpg

Wishing you a wonderful day,

Julia

Supply List:

Stamps:

-branch flower from Silhouette Blooms 1 (Kim Hughes line) by Cornish Heritage FArms

-partial daisy and flourishes from Beautiful stamp set (The Rummage Bin line ) by Cornish Heritage Farms

-Could you be any sweeter? from For the Men stamp set (The Rummage Bin line ) by Cornish Heritage Farms

-Make each day quote from Motivational Centers (Mona Lisa Moments line ) by Cornish Heritage Farms

Ink: Burnt Umber Palette ink by Stewart Superior

Cardstock:

-natural smooth by Prism

-Scalloped White by Bazzill

– patterned paper by My Mind’s Eye

Accessories:

-buttons by Autumn Leaves

-flower by Prima

-felt flower by Fancy Pants Designs

-Brad by Creative Impressions

-tan gingham ribbon by Creative Impressions

-fabric tag by K & Company

-chipboard by Maya Road

-sewing machine

-Distress Crackle Paint by Ranger

Basic Grey Magnetic Precision Mat Kit {C’est Bon}

magnetic-precision-mat.jpg

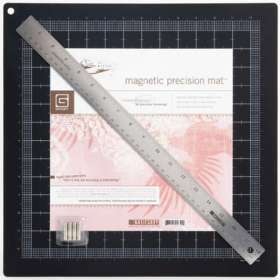
My latest tool purchase is one that I’m super excited about. I’ve seen it on-line before but not in person until a few days ago. While shopping at my local scrapbook store, trying to use up my credit from that super wonderful garage sale in March, I spotted this cutting mat while lined up at the checkout. I’m really glad I took the time to check it out. While it doesn’t look like a glamorous tool, my new Basic Grey Magnetic Precision Mat Kit is my new best friend. “Instant Attraction…for precision trimming.” Yes…that sums it up!

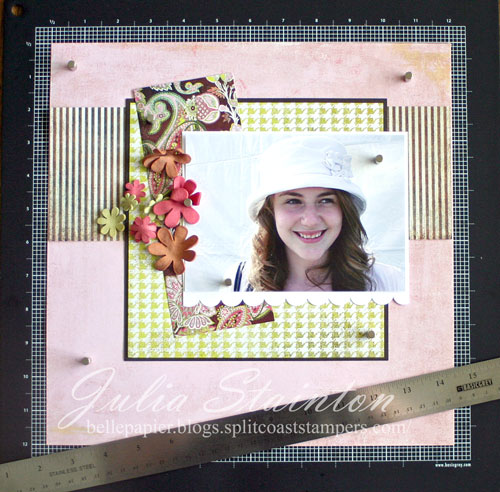
jks-basic-grey-magnetic-pro.jpgAs I’ve started back designing more layouts lately, I often find I have to leave them while creating as they DO take longer. I love planning them out on my magnetic mat and using the great super-duty magnets to keep everything in place. These magnets are so strong I can even prop the mat upright and not have any of the layers slip. This is great for taking a step back and making sure your layout is well-balanced.

One of the best features on this mat is its wonderful grid. The grid is marked out in 1/8″ intervals and makes it so easy to keep all my layers lined up perfectly. I find it much easier to line up a small design such as a card by eye but when it comes to layouts with lots of elements…it can be a little trickier.

Now if you don’t scrapbook…is this still a good product for card designers. I plan to use mine for every project I make from now on. Actually…I may actually invest in another one. Does that sound crazy? I love how it holds everything together. I often have more than one project on the go at once and if it will help me hold it all together…I’m thinking that’s a good thing!

Another part of the kit I haven’t mentioned yet is the metal ruler. This ruler has a magnetic backing. This helps prevent loss as well as movement when you are cutting. The metal edge is perfect straight edge that works perfectly with a craft knife. Every tried cutting a straight line with a plastic ruler? If you haven’t… well….it doesn’t work that well. I ended up with quite a few nicks in mine and a less than perfect cut. While you may still want to use your paper trimmer for cutting large straight layers, how about those projects where you’d like to cut out a window. The long ruler combined with the grid lines makes this simple. I’ve come across designs where I’d love to cut on a perfect angle. It can be very hard to do with a regular paper trimmer. Lining the ruler up with points on the grid works well every time.

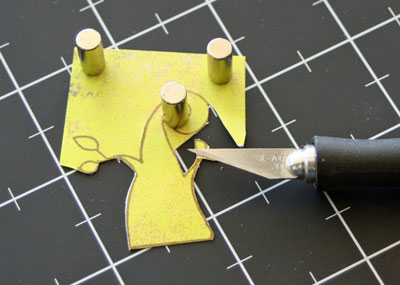
jks-basic-rey-cuts.jpgEven if you don’t use the ruler, this mat is still great for cutting on. The self-healing mat and magnets work perfectly together for cutting fine areas of your design. If you do a lot of paper-tole and paper piecing type work, this is a great plus.


Things I like…

  • magnetic ruler – in metric as well as imperial
  • metal ruler gives a perfect straight edge each time
  • The beveled edge on the ruler reduces slipping
  • it’s 15″ x 15″ square size makes for a perfect workspace
  • fabulous grid that is very easy to use
  • self-healing mat that is also magnetic
  • love the black surface…easy to read the white grid and doesn’t clash with colors in my layout design
  • super heavy duty magnets hold everything in place
  • you can purchase replacement magnets in case your children steal them to use for science experiments
  • like all Basic Grey tools I’ve tried, this product is well-made and built to last
  • there is a hole in the ruler and mat so that you can hang them for easy storage
  • Price

Where to buy:

  • local scrapbook store – I love supporting my local scrapbook store. They carry them for $31.95 CDN
  • Ellen Hutson carries them in her on-line store for $22.95 US While I didn’t purchase this particular product from Ellen, I highly recommend her service.
  • Two Peas in a Bucket – $25.00 US

Things to Note:

  • This product is not intended for use with hammers, punches or other high-impact tools as they may damage the mat’s metal core
  • If using messy paint or adhesives, protect your mat by overlaying it with a craft sheet or some scrap paper
  • Tip courtesy of Beth – Be careful transporting your mat, you can bend the inner metal core.

jks-bg-mat-close-up.jpg

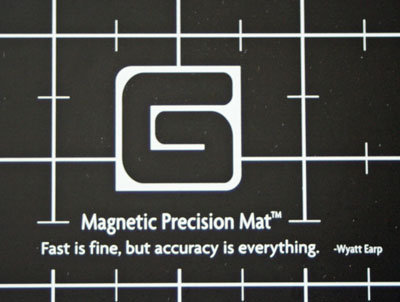
I love the quote that comes on the package of the Basic Grey Magnetic Precision Mat…

Wyatt Earp once said, “Fast is fine, but accuracy is everything.”

I think that pretty much sums it up. Accuracy takes your project to a more professional level. I love mine!

Have questions? Feel free to ask and I’ll try to answer by editing into my post.

Wishing you all a wonderful Mother’s Day! To all moms…enjoy your special day and to everyone able to spend today with their mom, cherish each moment.

Julia