Category Archives: C’est Bon

Fancy Pants Fashion Sense Pins {C’est Bon}

fancy-pants-pins.jpg

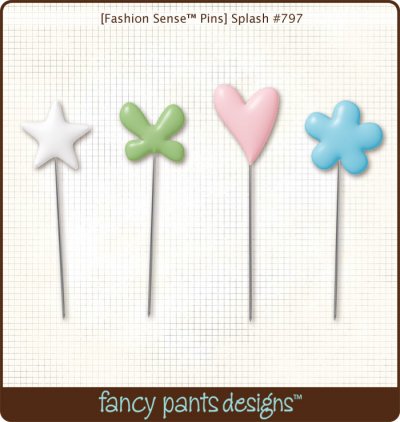
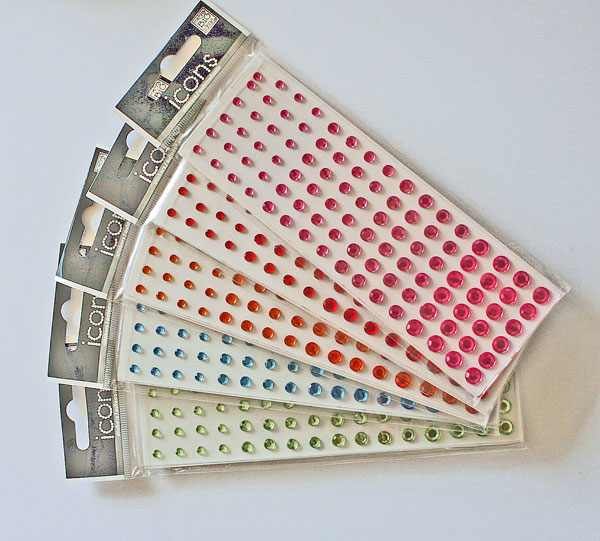
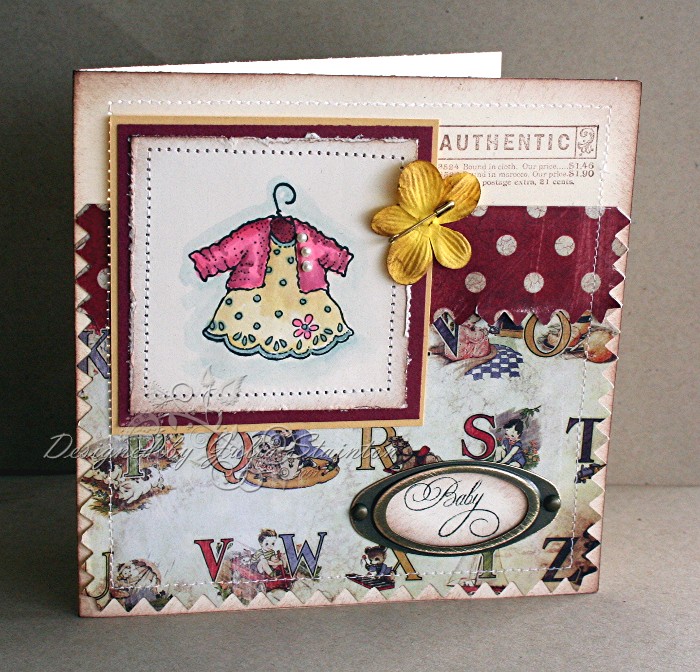
I think these must be among my top favorite embellishments that I have discovered in the past few months! I just adore these little pins! So fun and easy to work with…they make a great addition to most projects. I love their fresh look! The new Fashion Sense Pins from Fancy Pants Designs are so darling…I just want to have them all. Each package comes with 32 pins. There are 6 different selections available and in each one…4 pin-head designs and 4 different colors. The Sassy, Playhouse, Harvest and Splash pins have color combos to span the seasons. Tis the Season and With Love Pins are more seasonal in nature and have darling little shapes and colors to their packages.

How to Use

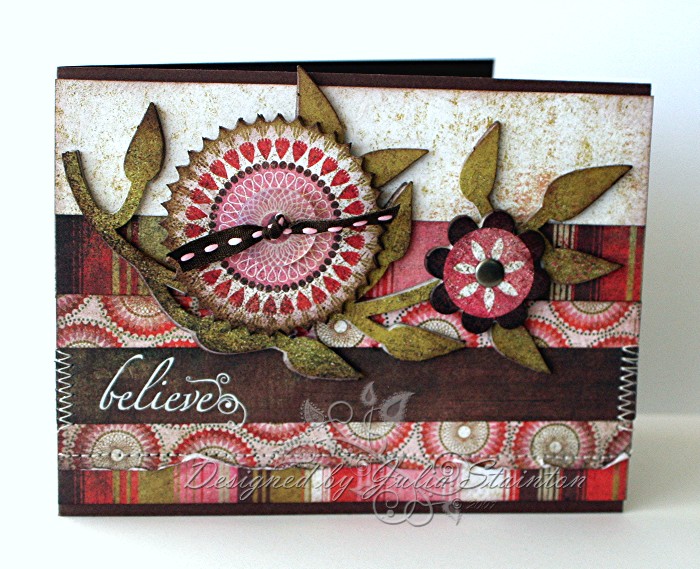
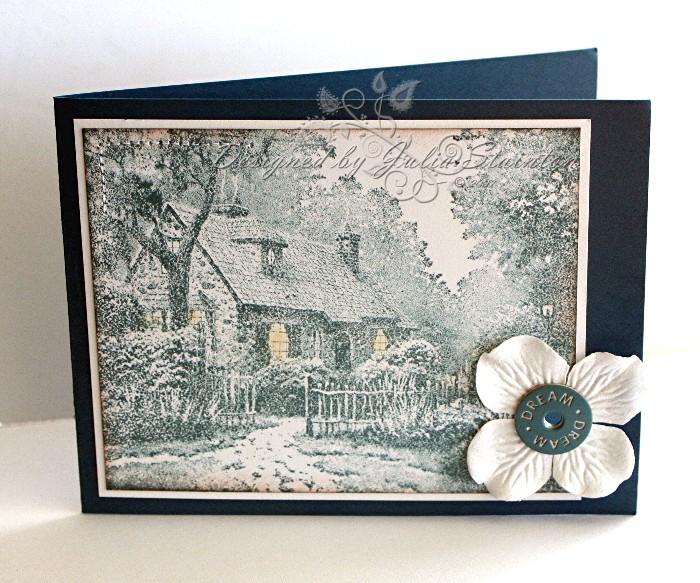
If you’ve never added pins to your designs, they are very easy to use. The pins can be held with ribbon, buttons, slid into chipboard or through felt, and are a great embellishment to work in with other types of embellishments. A cluster if you will. These pins sell for around $5.99 US and I know if you buy one package, you’ll definitely be back for more.
Where to Find

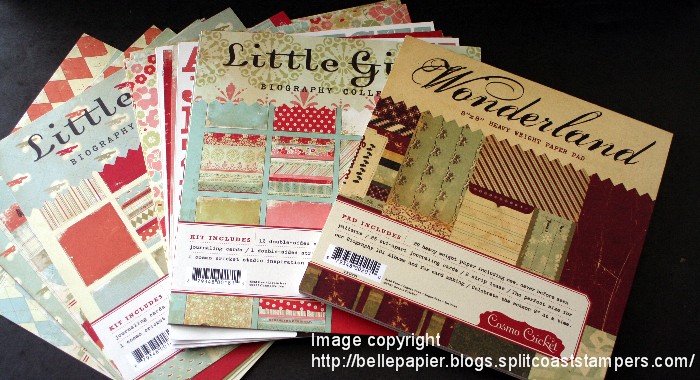
  • I purchased my pins at my local scrapbook store… The Scrapbook Studio. I love their great selection.
  • You can also purchase these Fancy Pants Fashion Sense pins on-line at various retailers

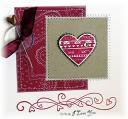
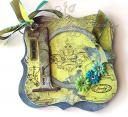
Holiday Wishes, Loving Kisses
jks-holiday-wishes-loving-kisses.jpg

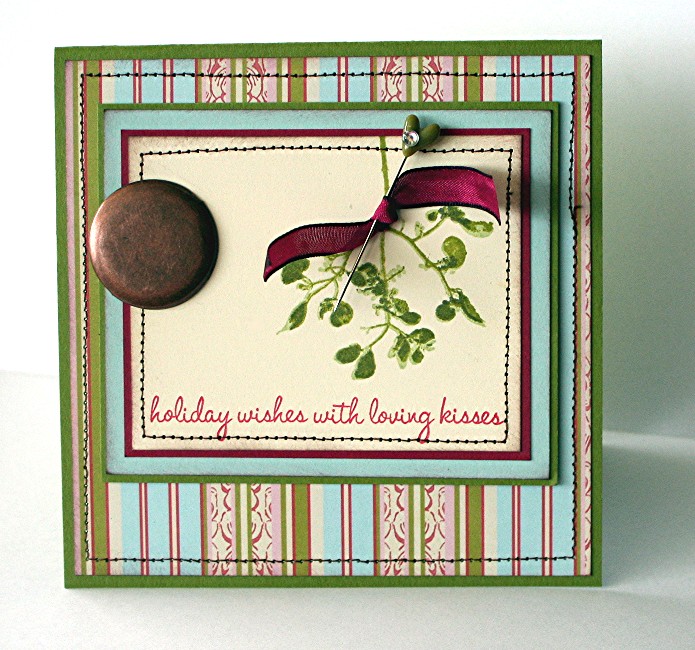
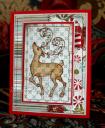
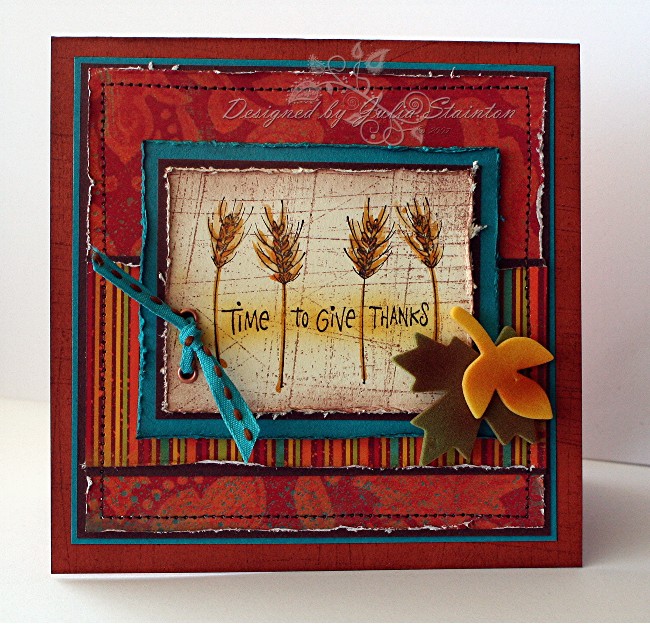
I started off this design by wanting to try out a new stamp set from Kitchen Sink Stamps. I love this darling Three-step Mistletoe. What a great, flexible Christmas set and it has darling sentiments to go along with it too! The Purely Pomegrant, Bashful Blue and Old Olive color combo is pulled from this darling Striped Christmas paper from Webster’s Pages. I just love it!

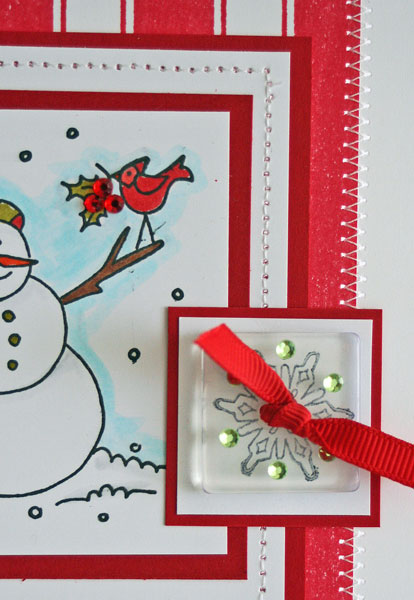
After stamping my three-step mistletoe with …you guessed it…three layers of stamping, 😉 I added a little knotted piece of May Arts ribbon. I find it easiest to add the pin by first knotting the ribbon how you want it and then sliding the pin through. To add a fun touch to the pin, I added a little rhinestone sticker embellishments.

Quick Tip:  Have fun embellishing your embellishments for a fun, unique touch. Embellishments can be sanded, painted, inked or have stickers or rhinestones added to make them that extra bit special

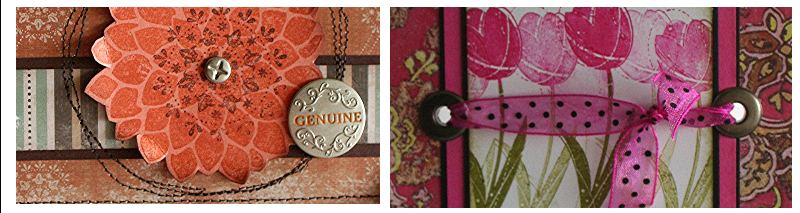
To add a couple extra touches, I stitched around my layers with brown thread and then added one super huge copper brad from Karen Foster Designs.

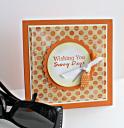
Wishing you holiday wishes and may you get lots of kisses! 😉

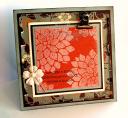
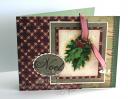
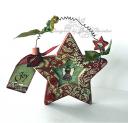
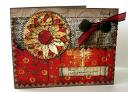
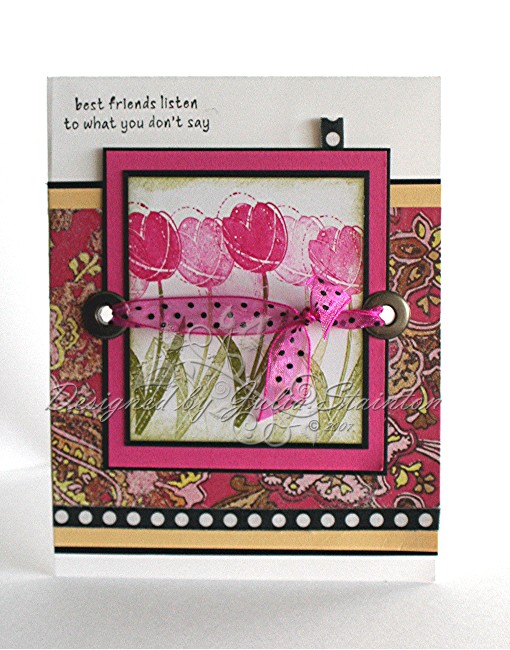
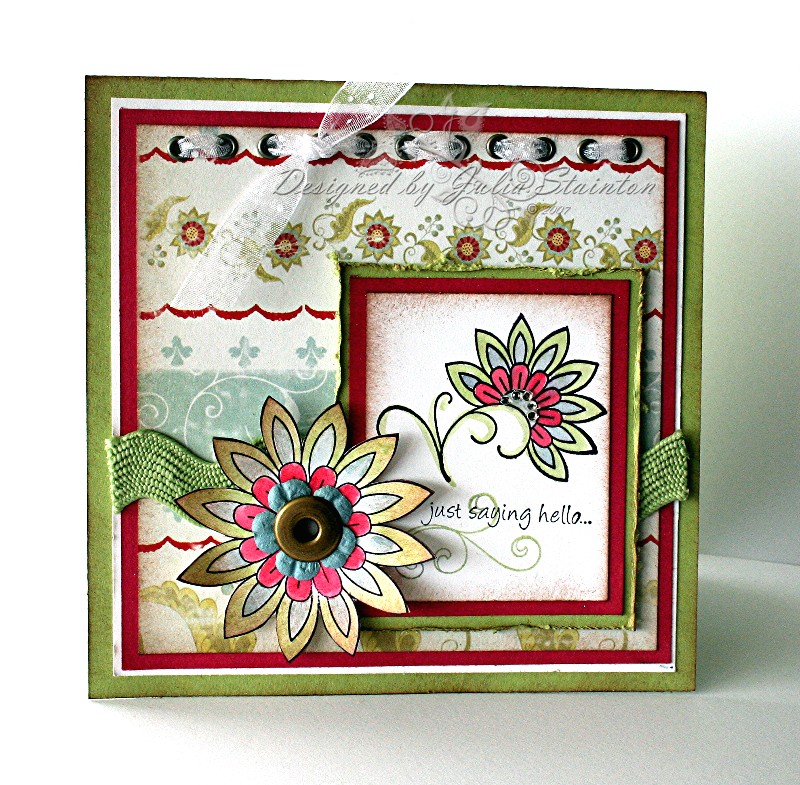
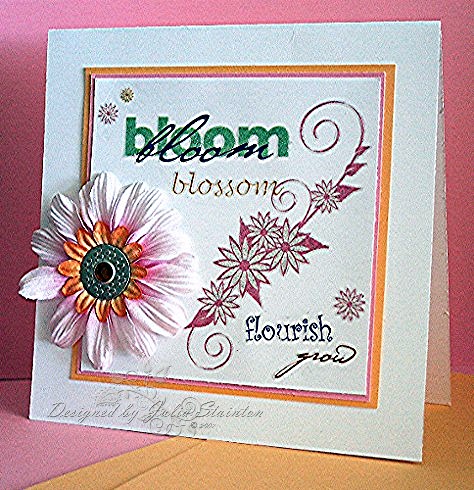
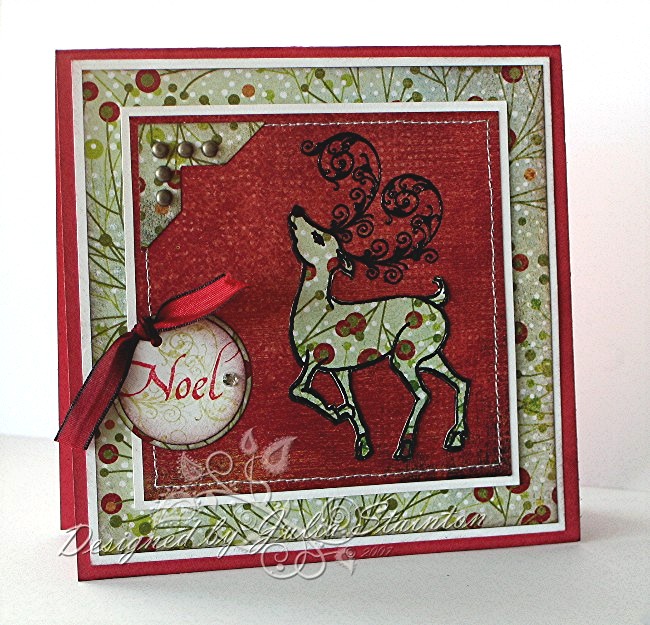
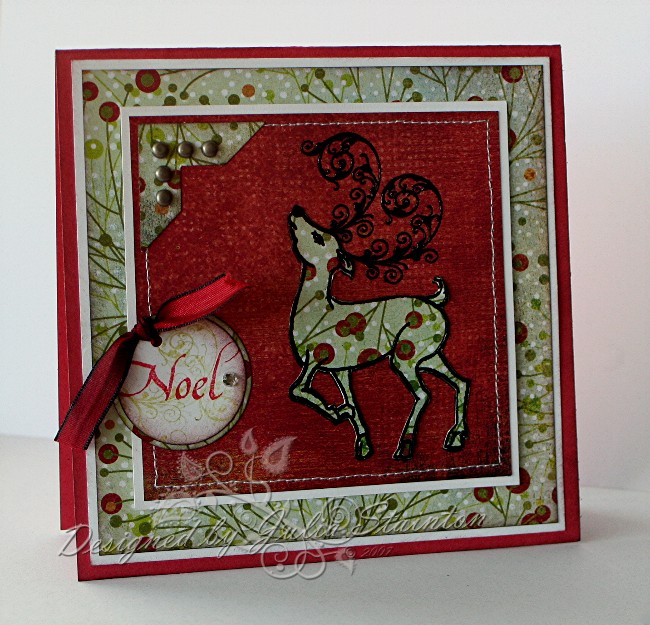
Some other designs… (click on image to go to original post instructions)

jks-thanks-for-all-you-do-2.jpgjks-wanted.jpgjks-a-precious-gift-2.jpgjks-sunny-days-resized.jpgjks-thanksgiving-cornocopia.jpgjks-heart-to-heart-closeup.jpg

Rhinestone Singles {C’est Bon}

Bling. Who doesn’t like it?! I love to add a little to my designs. I’m not an over-the-top sparkley kind of girl but a small touch…absolutely! A rhinestone to dot an i, some sparkle in the middle of a flower, to accent a holiday card, use as a faux brad to balance the design…there are lots of ways I love to use it. I’ve tried a lot of different brands of rhinestone stickers. I have many faves for various applications, but I must say, I am completely enthralled with these new Me and My Big Ideas Icon package of Rhinestone Singles. Very sparkley…they are very classic looking and are very good quality for crafting with.

jks-rhinestone-for-web.jpg

What I like about Me and My Big Idea’s Rhinestone Singles..

  • High quality shine
  • variety of sizes
  • sized perfectly for cardmaking…nothing too huge and the smallest is perfect for those tiny spaces
  • variety of colors
  • adhere well to many surfaces…paper, paint, plastic, transparencies
  • depth – perfect without adding a lot of bulk to your design
  • neat and tidy packaging stores well
  • prices – extremely reasonable – works out to approximately $.04 per rhinestone!
  • easy to purchase colors that you regularly use
  • with names like Iris, Fern, Freesia, Hibiscus, Dahlia, Poppy…who can resist?

Where to Buy…

Me and My Big Ideas products can be found in many scrapbook supply stores and on the web. I love to buy mine from Jacksonbelle Embellishments.

Snowman Sparkle

jks-snowman-sparkle-resized.jpg

For this design, I pulled out some new stamps that were really calling my name. The brand new Broad Stripe backgrounder from Cornish Heritage Farms really reminded me of a candy cane stripe so I inked it up with some Real Red ink and love the clean bold look it creates! I paired it up with this darling Snowman and Cardinal stamp by the same company. Isn’t that cardinal just darling! I knew if would work great with these rhinestone stickers I wanted to highlight today.

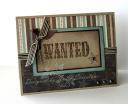
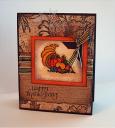
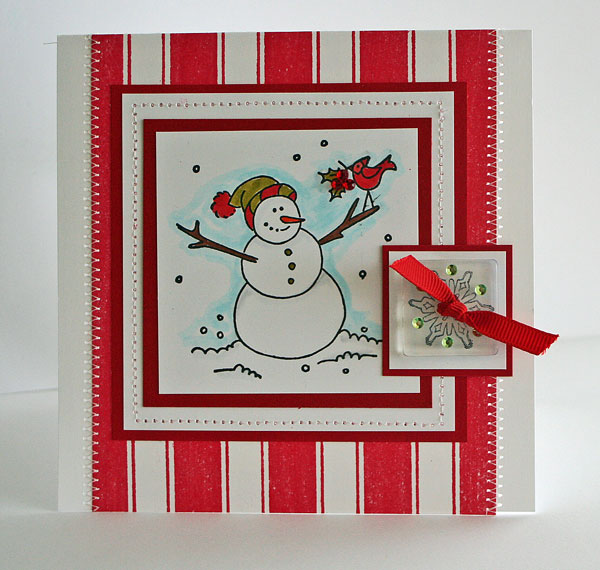
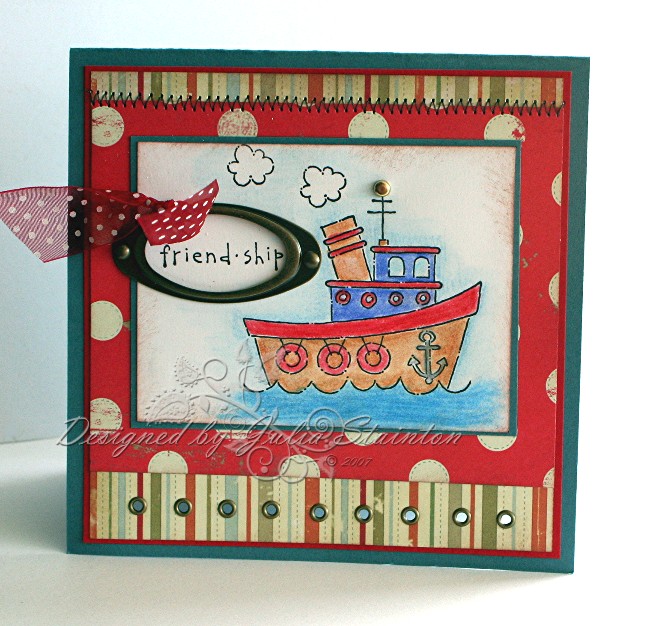
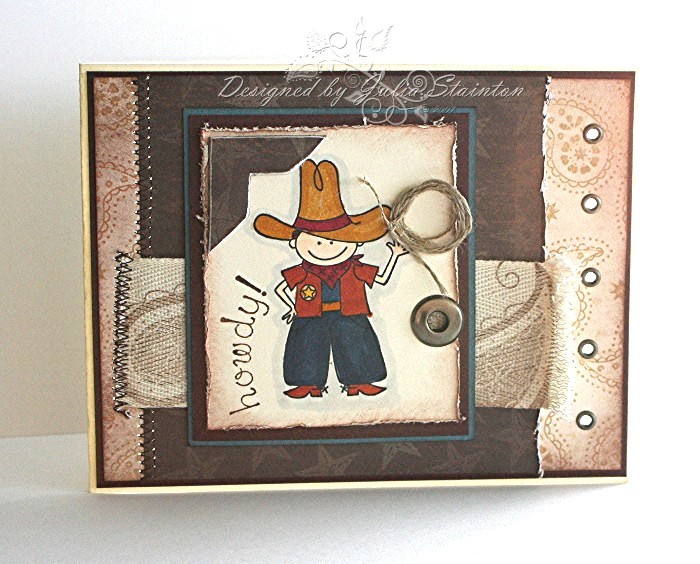
After stamping my main image in black ink, I colored him in with my Copic markers and added three of the tiniest rhinestones as the berries for the holly. It is always fun to use the for tiny accents to decorate a stamped design and to draw attention to a little area. As the cardinal is my favorite part of this stamp, it worked perfectly here. After matting my image with Real Red and Whisper White cardstock, I added a couple stitching details. A vertical zig zag stitch runs up the sides of my background panel and straight stitch stitches down my white square layer.

I still wanted to add another accent to this design and was unsure what to do until I saw this little package of clear buttons on my desk by Stampin Up. I chose a large square shaped button because of its surface area and it also worked well with all the bold lines and square shapes of my design. The snowflake is actually the smallest snowflake from the CHF Snowflakes Large stamp…a gorgeous mix of snowflakes that measures 3.5″ x 4.5″. I was actually surprised when I got this stamp…it is larger than I expected and I just love it! After inking that up with Black Stazon ink, I stamped it onto my button and then added 6 tiny Fern colored rhinestones to the dots of the snowflake. I love the sparkle and how it makes a great embellishment. After tying it with some red grosgrain ribbon, I added it to a matted cardstock layer with a glue dot. Voila! Another fun festive Christmas design! 🙂

Have a fabulous day!

Christmas is Coming… {C’est Bon}

Christmas is coming and I’m starting to get ready for it. Over the past week, I’ve started Christmas shopping…with large families…a huge job! I’ve also taken some time to pull out my favorite holiday baking recipes and think ahead to what I need. I love holiday baking. It just doesn’t seem to be Christmas without it. As I’ve been super busy over the past week, today I thought I’d share some of my favorite cookie and bar recipes. You know how is it always great to try out something that comes recommended by a friend? 🙂 Also, if you want a bunch of great recipes and ideas…make sure you scroll through the comments on this post….Spreading a little Christmas Cheer. So many of you were so kind to share some awesome ideas, traditions and recipes and they are really fun to look through!

Shortbread

3 cups flour

1/2 cup sugar

1 dash salt

1 1/2 cups butter, softened

Mix ingredients together in a food processor…should form a thick stiff dough. Pat into 2 8″ round pans. Mark each into 12 wedges and prink with fork. Bake at 350°F for 30 minutes. Sprinkle with sugar and cut into wedges. Remove when cool. Store in tightly sealed container.

Peanut Butter Cookies

2 cups all-purpose flour

3/4 teaspoon baking soda

1/2 teaspoon of baking powder

1/4 teaspoon salt

1/2 cup butter

1 cup peanut butter

1/2 cups brown sugar

1/2 cup sugar

1 egg

Sift flour, baking soda, baking powder and salt together. Cream butter and peanut butter together. Gradually beat in sugars. Add egg and beat until fluffy. Stir in drey ingredients. Toll dough, a teaspoonful at a time, into balls; place 3 inches apart on greased cookie sheets.. Flatten with fork and top with cut up candied cherry if desired. Bake at 375°F for 12 minutes or until golden brown.

Eggnog Cookies – Mrs. Fields recipe

2 1/4 cups flour

1 teaspoon baking powder

1/2 teaspoon cinnamon

1/2 teaspoon nutmeg

1 1/4 cups sugar

3/4 cup margerine

1/2 cup egg nog

1 teaspoon vanilla

2 large egg yolks

1 tablespoon nutmeg

Preheat oven to 300°F. In medium bowl, combine flour, baking powder, cinnamon and nutmeg. Mis well. In large bowl, cream sugar and butter with an electric mixer to form a grainy paste. Add eggnog, vanilla and egg yolks and beat at medium speed until smooth. Drop by rounded teaspoons onto ungreased cookie sheet one inch apart. Sprinkle with nutmeg if desired. Bake for 23-25 minutes. Immediately transfer to cool.

Quick Tip: Use the leftover egg whites from the above recipe to make the meringues below…

Holiday Meringues – so pretty and festive with colored sugar on top

3 large egg whites

1/4 teaspoon cream of tartar

3/4 cup sugar

1 teaspoon vanilla

Preheat over to 200°F. Line 2 cookies sheets with foil or waxed paper, wetting corners of cookie sheets to hold linings in place. Beat egg whites with mixer on medium speed until frothy. Add cream of tartar and beat until soft peaks form when beaters are lifted. On high speed, gradually add sugar one tablespoon at a time. Beat until stiff, very white and glossy. Beat in vanilla. Spoon into pastry bag fitted with large star shape tip. Pipe small mounds one inch apart on cookie sheets. Sprinkle with decors if desired. Bake 3-4 hours until meringues are dry and crisp all the way through. Cool on sheet on a wire rack. Peel off liner. Store in an airtight container at room temperature for up to 2 months.

Gingersnaps –  these melt in your mouth…one of my faves

2 cups sugar

3/4 cups margerine

3/4 cup lard

1/2 cup molasses

2 large eggs

4 cups flour

2 teaspoons ginger

2 teaspoons cinnamon

1/4 teaspoon salt

4 teaspoons baking soda

Cream and beat first four ingredients. Stir in remaining ingredients. Roll into balls. Coat with sugar and place on an ungreased cookie sheet. Bake at 350°F for 10-12 minutes. Remove from cookie sheet and cool on rack.

Happy baking! Wishing you a fabulous holiday season with lots of treats to enjoy!

Scaled Down Paper Pads {C’est Bon}

I just ADORE these scaled down paper pads! The perfect size for cardmaking…these designs are the 12×12 papers perfectly scaled down to approximately 1/4 the size and come in great manageable sizes to work with for smaller projects. Now this entry is a little different than most of mine. It is actually going to focus on a few different companies instead of just the one product I usually do. Why? Because lately their have been quite a few fabulous paper companies releasing there designs in this way. It is such a brilliant idea and makes so much sense.

Have you ever found a gorgeous 12×12 patterned paper and found it just did not work for a small project or card design. For the past few years, I have mainly been designing cards and small altered projects. Being a patterned paper addict…I just love the stuff… it would be so frustrating when I found I could not make that large paper work. If you have a beautiful 12×12 paper with a large image on it…using it on a smaller area…you need to crop most of the design off. Of course…the image is no longer recognizable and so it just doesn’t work. These papers were designed specifically for the scrapbooker in mind. Now take this same paper and scale it down for 1:4 scale and see what happens! A paper that works perfectly for designs for cardmaking. Yay! It didn’t take me long to be sold on the idea!

Now I must admit…the first time I saw a 6×6 patterned paper pad it was about 4 years ago in Michael’s. K & Company had released it for cardmaking in their Life’s Journey line. Beautiful vintage style papers in a 6×6 size. Now I was a scrapbooker at the time and he he…I thought to myself…what on earth would you do with that?! Who would want to make CARDS?! LOL Unbelievable, right?! 🙂 Never say never, girls! It always comes back to haunt you!

I actually didn’t see 6×6 paper pads on the market again until last year. Now I’m not saying they weren’t there…I’m just saying if they were there…I didn’t see them. Last year Basic Grey started releasing some of their fabulous newer paper lines in a 6×6 format. Loving Basic Grey…I was instantly hooked! They were perfect for me! I quickly bought up Romani, Perhaps, Lilly Kate, Scarlet’s Letter, and other, right up to their newest release, the absolutely fabulous Figgy Pudding.

jks-basic-grey-6×6.jpg

jks-basic-grey-chipboard-believe.jpg

Over the past few months, other companies as well have been releasing scaled down paper pads. Daisy D’s has a fabulous line of 5.5″ square swatches. These swatches are double-sided with a fabulous pinked edge to resemble fabric swatches. Hence the name. 😉 Also from Daisy D’s, the just released Holiday 8×8″ paper packs of Snowflakes and Holly, and Paisley’s and Sugarplums are fabulous to work with as well!

jks-daisy-ds.jpg

jks-vintage-baby-girl.jpg

Cosmo Cricket, another of my favorite paper companies, released some beautiful 8×8″ packs of paper in the Little Boy and Little Girl lines. These were fabulous to design with and very flexible. You don’t need to limit these papers to little boy and girl design…I’ve used them with just about any kind of project you can think of. Last week, I just received my order of their latest 8×8″ release, Wonderland. I just flip for this paper. Last year Cosmo Cricket released this lien in 12×12 format and I just loved it. I was so excited to have quite a few designs published using this line. This season, the 12×12 format is no longer available but it IS available in this 8×8 size. With even more patterns added to the package, I couldn’t be happier! A few extra great features of this paper…this patterned paper is extra thick and double-sided. I love how the packs come with stickers and journaling cards as well. Beautiful!

jks-cosmo-cricket.jpg

jks-friend-ship.jpg

Soooo….what exactly can you do with this smaller sized paper? It is perfect for many things. Here are a few I’ve used it for…

  • Cards, cards and more cards!
  • covering mini frames
  • matting in scrapbook layouts
  • smaller size scrapbooks and gift albums…Basic Grey’s 6×6 paper covers their new chipboard min-albums perfectly!
  • altering Christmas ornaments
  • background mat in frames

If that hasn’t enabled you…

  • the pads are so easy to store and work with
  • less waste than cutting into a larger sheet
  • shipping is less
  • very inexpensive…affordable to have many different lines

Where to get them…

You may be able to purchase these scaled down paper packs at your local scrapbooking stores. Unfortunately, because of a limited ability to store inventory, many of these stores only carry the 12×12 format. I have purchased all my Basic Grey, Cosmo Cricket and Daisy D’s scaled down paper packs from Jacksonbelle Embellishments. Other on-line stores may also be a good source such as Flourishes which carries some of the 6×6 Basic Grey paper pads.

Have you used any of these great scaled down paper packs? What do you think? I’d love to hear from you! If you liked this {C’est Bon} entry, you may want to check out others that you have missed. Just click on the C’est Bon category at the top under the title. Please note: I am not affiliated with any of these paper companies. This entry is just to share some of my favorite products…ones I think are good, {C’est Bon} 🙂

Thanks for stopping by and have a fabulous week!

Some more samples using scaled down paper packs…
jks-copper-reindeer.jpgjks-noel-holly.jpgjks-basic-grey-mni-album.jpgjks-wood-star-ornament.jpgjks-la-sunflowrs.jpg

Designer Snaps and Eyelets {C’est Bon}

Last year I while I was shoppping I came across the We R Memory Keepers Designer Snaps and Eyelets and their Extra-Large eyelets. As I had just purchased a Crop-a-dile, I just couldn’t wait to bring them home and try them out. I was soon addicted to these unique embellishments. I’m always on the lookout for something a little different and these eyelets and snaps fit the bill. I loved them so much, I even purchased extras for Christmas gifts for some of my stamping frineds.

Designer Eyelets and Snaps

The We R Memory Keepers Designer and Extra Large Eyelets work perfectly with their Crop-a-dile. Easy to use and set, these embellishments are perfect for that special card. They hold their own well on an intricate design but I also love using them on simple designs as they add a simple elegance. What makes these eyelets and snaps so special? The Designer Eyelets and Snaps come in packages of 6 unique pieces. Some eyelets, some snaps…these are a great ensemble of beautiful embellishments. Each package has a mixture of pressed metal eyelets and snaps with additions of color, designs, an epoxy finish or a set rhinestone. I’ve become so enthralled with them that I just had to purchase one of each of their 9 sets and also bought extras to give to a few of my friends last year for Christmas.

jks-designer-snaps.png

Extra Large or Jumbo Eyelets

The Extra Large eyelets have also become high on my favorites list. I love the large look and how these eyelets come in many different color combinations and finishes. While small eyelets need a grouping to be noticed in a design, one or two of these giant sized eyelets stand perfectly well on their own. My favorite set is the Toasty Tin. Recently, Stampin Up has started carrying this product and is marketed in large packages of 60 in two separate finishes, pewter and antique brass. I love this option as I particularily love using the pewter Jumbo eyelets.
jks-toast-tin.png

All of these eyelets are fabulous for stringing ribbon through because of the size of their center opening. My favorite ways of using these eyelets and snaps is for tying ribbon, attaching tags and as a flower center. The size of these Eyelets and Snaps are also fabulous for setting in coasters and chipboard where smaller eyelets may fall out because of the depth.

jks-splice.png

How to Use:

The Designer Eyelets and Snap are very easy to use with the Crop-a-dile. Suggested settings are printed on the back of the package. If you have a Crop-a-dile but rarely use it or if you are thinking of purchasing one, I wrote an entry a few months ago that you may want to take a peek at…. Crop-a-dile {C’est Bon}. If you have any questions, comments etc. about these products, feel free to leave them on this post. I’ll be happy to answer them by editing into this post.

Genuine Friend
jks-genuine-friend.jpg

This design is based on last weeks CPS sketch. I’ve been wanting to try it out all week and finally got a chance. I decided to go for a distressed, shabby look and have a little fun with the warm colors. The Genuine Designer Snap worked perfectly with the layout and the style of this Stampin Up Designer paper. A little distressing and a little stitching made a simple design so much fun.

Supply List:

Cardstock: Sage Shadow, Chocolate Chip, Groovy Guava – Stampin Up

Patterned Paper: Outlaw – Stampin Up

Stamps: FAbulous Flowers, Wanted, Carte Postale

Ink: Chocolate Chip, Groovy Guava, Black – Stampin Up

Other: screw brad – Creative Impressions, Designer Snap & Crop-a-dile – We R Memory Keepers, sewing machine, stapler,

Best Friends

jks-best-friends.jpg

This design has a little different style. I thought I’d create a fun fresh card with colors from the gorgeous My Mind’s Eye patterned paper. After stamping my images adhering my layers, it was easy to punch through it all with my Crop-a-dile and add my pewter Jumbo eyelets. A little piece of May Arts ribbon tied through them makes a fun quick embellishment. Also on this design, I used some of my favorite Making Memories textured tape to add those little white on black dots along the bottom and also created a little tab at the top.

Supply List:

Cardstock: Pink Passion, Whisper White, Black, Barely Banana – Stampin Up

Patterned Paper: My Mind’s Eye

Stamps: Garden Whimsy – Stampin Up

Ink: Pink Passion, Old Olive, Black – Stampin Up

Other: Jumbo Eyelets – Stampin Up, ribbon – May Arts, Black and White Textured Tape – Making Memories

A few extra samples…

jks-cowboy-2.jpgjks-blue-cottage.jpgjks-bonjour-fleurs-2.jpgjks-bloom-blossom-grow.jpg

Heidi Swapp Edge Distresser {C’est Bon}

jks-hs-edge-distresser.jpg

I’ve been thinking about how much I love my little, pink Heidi Swapp Edge Distresser lately. Perhaps because of the amount of distressing I’ve been doing lately, perhaps because I never seem to put it away as I use it so much, perhaps that pink color is registering as I have Think Pink on my mind lots because of Breast Cancer Awareness month…I just had to write this entry on my humble little tool. Actually it is one of the least expensive tools I own, very simple but one I definitely wouldn’t want to be without!

The Heidi Swapp Edge Distresser is really easy to use! Simply insert the edge of your paper into the slot and run it along the edges of your paper. A lot of the time, I’m very into a vintage look and I love the quick texture it adds to the design. It is a great way to embellish your design…without using any embellishments at all! I find it works best if you distress in the same direction each time. Usually I start near the middle of the edge and work out and then distress the other way. Run the distresser over the edge repeatedly until you get the look you desire.

Great Things about the Heidi Swapp Edge Distresser

  • easy to use
  • safe to use – blade is well protected by the edges
  • easy to hold
  • small and takes little space
  • easy to pack for a crop
  • works great on cardstock or patterned paper
  • its cute…looks little a little pink pacman 😉
  • PRICE! So reasonable! $1-2
  • lasts well…I’ve had mine for a couple years

Where to Find It?

I purchased mine at my local scrapbooking store. You can also find them on-line just do a search on Google or eBay and you are sure to find one.

My card sample is a design I’ve worked up to give to my mother-in-law tomorrow. It is Thanksgiving tomorrow here in Canada and we are going to be celebrating with my husband’s family and loads of good food. 🙂 I thought this card would be nice to bring to tell her that we are thankful for her.
Give Thanks

jks-give-thanks.jpg

Lots of distressing on this design…I think it is such a great look, especially for fall designs. I pulled out my patterned paper for this design to show distressing on both cardstock and patterned paper…it works equally well on each. I love how it looks with the patterned paper as its inner white core highlights the edges so well.

Quick Tip: Be careful when distressing the edges of lighter weight patterned paper, it requires a lighter hand and can tear if you don’t distress a little more gently.

For my main image, I pulled out this darling Hero Arts Time to Give Thanks stamp I bought last year for a design I created for the Dirty Dozen gallery. I just love the heads of wheat and the way the sentiment is spaced between them. After stamping my image in Black Palette Noir Ink, I colored the wheat with my Copic Markers using three different golden and rust markers to build up the color. I always start with the lightest color and to get the realistic look for this design, used a quick sketch-style stroke. To highlight the sentiment, I decided to have a little fun with my airbrush kit. I simply inserted a warm golden color and lightly sprayed the words to make them glow. It only took about 30 seconds to insert my marker and spray them all. Love it!

I’ve been loving my new Sanded background stamp from Stampin Up. The main image was stamped with taht before distressing and matting with chocolate chip and Taken with Teal. The eyelets were then set with my Crop-a-dile and tied with some Teal May Arts Ribbon.

My background was quickly layered onto a Real Rust cardbase and then stitched with brown thread on my sewing machine. For embellishment I added some of the new American Crafts foam fall leaves. LOVE them! AND when adding them to my design, came up with another fun idea. For a project I was working on the other week, I had tried sponging them with dye ink…it just wouldn’t dry! And sooo…while my Copic Marker airbrush system was out I thought hmmm…. It was so quick to spray them with a rust color marker and I love the more natural results! The best part….it dried almost instantly. Love it! Happy, happy dance!

Hope you enjoyed this entry and design. 🙂 Wishing my fellow Canadians a wonderful Thanksgiving. This year, I’m missing my mom but I’m taking the time to be so thankful for the many blessings I have. My husband, my family, my health, freedom, the opportunities the past year has brought, my home, my friends. Thanks be to God from whom all my blessings flow.

And just in case you missed it… scroll down to the previous post for a chance to win a My Favorite Things Stamp set. 🙂
Supply List:

Cardstock: Taken with Teal, Real Rust, Very Vanilla, Chocolate Chip – Stampin Up

Patterned Paper: Daisy D’s

Stamps: Sanded – SU, Time to Give Thanks – Hero Arts

Ink: Close to Cocoa – SU, Black Palette Hybrid ink – Stewart Superior

Other: Copic Markers and Airbrush System, ribbon – May Arts, Eyelets – Making Memories, Crop-a-dile – We R Memory Keepers, Edge Distresser – Heidi Swapp, sewing machine, Foam Shapes – American Crafts

Fiskars Mini Precision Scissors {C’est Bon}

jks-fiskars-scissors-2.jpg

I just love my Fiskars Mini Precision Scissors. I just wouldn’t want to do papercrafting without them. They’re not very fun or glamorous…just a bright orange work-house type product I use everyday. Actually, what got me thinking about them was a question I was asked about what product did you not think you needed at first but could not do without now. I managed to think up a few and this was one of them so I decided to feature it on today’s {C’est Bon} entry and I used my pair of Fiskars scissors in both of today’s designs.

I originally didn’t think I needed them. I thought they were just scissors, I can manage with those I already have. And I did. I managed with my old kitchen scissors for quite a while as I learned papercrafting. And then, I tried a pair of my friend’s scissors out at a crop a couple years ago. I was sold. I went out and purchased my pair that same week. Actually, I use them so much. At my craft desk, at the sewing machine…they’ve managed to make it to the computer desk many times as well. I must admit. I now own THREE pairs! LOL When one pair wanders off, I still have more to fall back on till they all make their way home to my craft desk.

What I like about the Fiskars mini scissors…

  • small
  • affordable
  • great precision blades
  • light
  • durable and long lasting
  • sharp pointed ends for tiny cuts
  • comfortable to hold and use

What I use mine for…

  • trimming small pieces of paper
  • threads
  • closely trimming around chipboard
  • paper piecing
  • cutting out designs to pop up and layer
  • making fringes

Where can you find them?

Where can’t you find them?! LOL Michael’s, Office supply stores, Craft Stores, scrapbooking and stamping stores…I guarentee you, you won’t have to look too far! 🙂

As for my samples…below you will find my Noel Reindeer design. I used my scissors for carefully trimming out my paper pieced reindeer. In my previous post…just scroll down an entry, I used my scissors to cut out my flower and then after matting it with white, cut it out again. I love how fine and close I can get with my Fiskars mini scissors. 🙂

Noel Reindeer

jks-noel-reindeer-2.jpg

For this design, I started out with my new reindeer stamp from Flourishes! I tell you, I gasped when I first saw it. It is soooo pretty! I just adore those flourishes for the antlers. I just couldn’t wait to make a card design with it. And I KNOW you’ll be seeing this stamp again soon in the future. This new stamp set is called Flourished Christmas is soon to be released on October 3rd along with 2 other beautiful sets. I just know you are going to love them all!

I decided to try paper piecing my reindeer by stamping it on this beautiful Fruitcake Basic Grey patterned paper. I acutally only used one 12×12 piece. The textured red you see as the main image background is the reverse side of the green winter spray paper. The reindeer was stamped first onto my red square layer with Versmark and embossed with Black embossing powder. Now, I’m not a big embossing powder user BUT this black really makes the antlers pop and shine and looks soooo festive. The reindeer was stamped and embossed again in the same manner onto the more patterned side of a scrap of the patterned paper.

And this is where my scissors come in…cutting out that detailed reindeer. Just cut very carefully just to the outside of the that black embossing and then adhere over the stamped deer on the red square layer. Very easy and a beautiful look for this card.

For the rest of the card design, a simple layout you see a lot from me. I just love square cards and the area available for enhancing. My main card base is made from Ruby Red cardstock and is 5.5″ square. I layered it with whisper whtie cardstock and then my patterned paper. All edges were sponged with my Close to Cocoa ink. On the center panel, I stitched the edges with white thread on my sewing machine before adhering that panel to the card design.

For embellishments and sentiment…the last things I always add… a little corner treatment created from my photo corner punch from Stampin Up. I set it with five mini pewter brads for definition. The sentiment was stamped in Ruby Red with the lovely Noel sentiment (one of many in this set) and then punched with my 1 3/8″ circle punch. It looked a little plain and so hmmmm….what to do?! I looked at my flourished antlers and yay! They made a beautiful flourished background when stamped in Old Olive. After punching a hole for the tag, a beautiful scrap of May Arts ribbon was the perfect finishing touch.

So of my designs, I think hmmmm, others I like and some I just love. This is one of those times. I’m saving this Christmas design for someone special. 🙂

A Note: This {C’est Bon} article is my honest opinion and is written just to share with you. I have no affiliation with the Fiskars company in any way. If you have a question about this product, I will try and answer it to the best of my ability by editing an answer into this entry. If you like these {C’est Bon} entries, you may want to check out some you missed. Just click on the {C’est Bon} category heading under the title and it will bring up them all. 🙂 Wishing you a wonderful week!