Monthly Archives: November 2011

Paper Crafts magazine Presents: 365 Cards Blog Hop

Paper Crafts Magazine has a brand new special issue just released and wow, I’m lovin’ it!

365 Cards is chock full of fabulous card ideas…one for every day of the year. Obviously! 😉 What’s not to love about that many card ideas? I love that is takes you through the entire year for all those special holidays, some fun and unique celebrations and all those every day thank you’s and hello cards too. 365 Cards has it all.

I was thrilled to work on this special issue. It was so much fun creating for such a wide variety of events. I love it when I can create absolutely anything that is inspiring me at the time for an issue. Fun! If you’re looking for this fabulous issue, you can find it here.

Today 12 of the designers in this issue have been asked to create a card to share with you for the 365 Cards Blog Hop. 12 hmmmm…. wonder where they got that number? Perhaps the twelve months of the year?

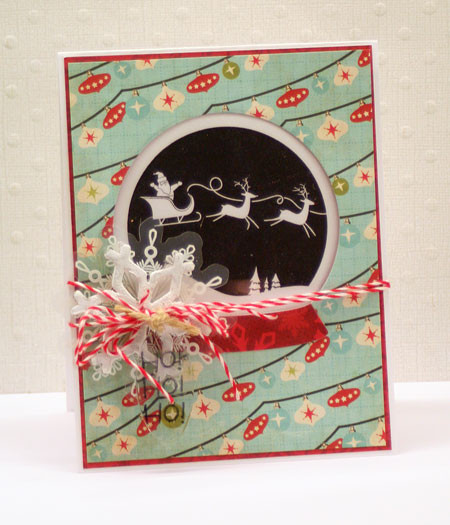
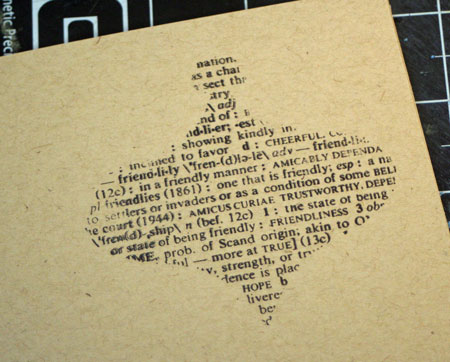
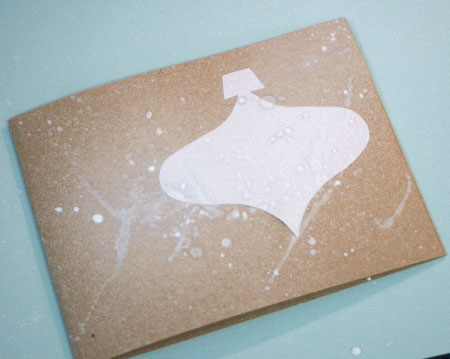
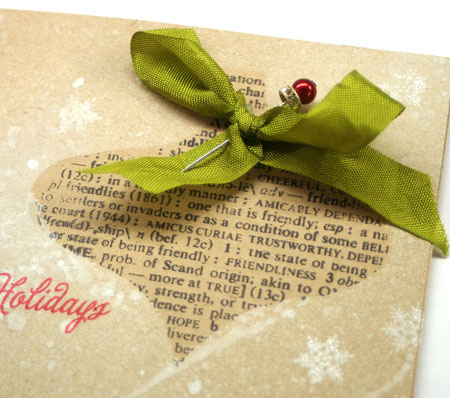
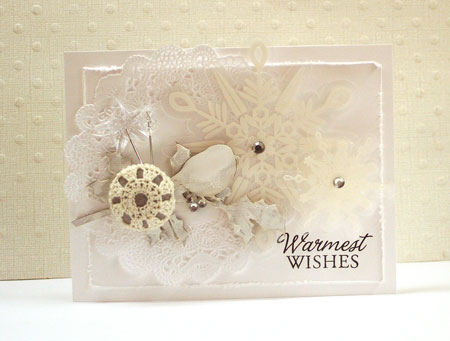
Of course you’re right and as my assigned month is December, I decided to create a winter wonderland design…

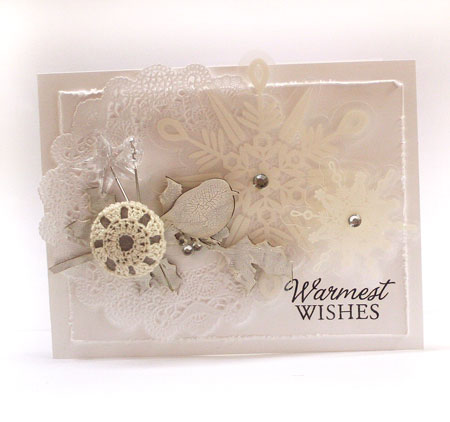
I saw my first snow flurries of the year yesterday and it was easy to get into a wintery mood.

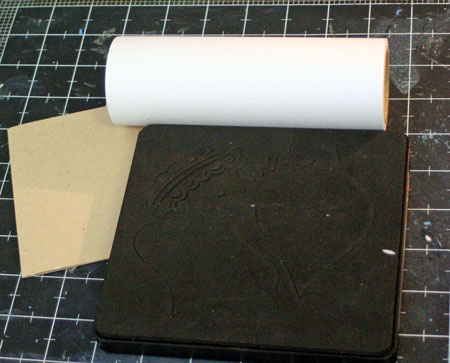
I’m a big fan of white on white cards. They key to creating them it to use lots of different sizes and textures to differentiate the elements and keep things interesting.

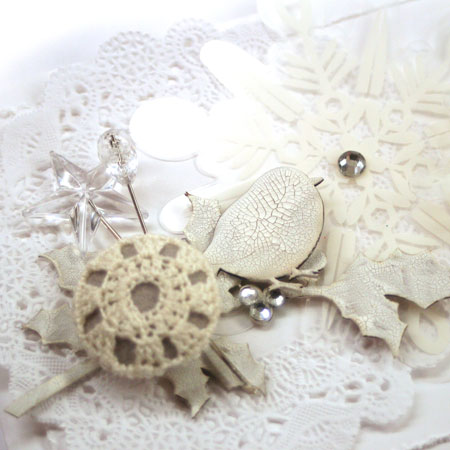
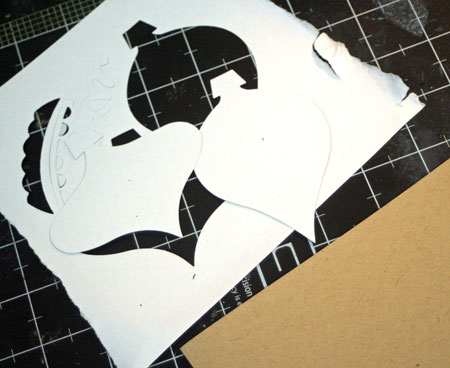
The sweet little bird and holly branch are laser cut chipboard elements. To make them white and give them a frosty appearence I’ve painted them with Picket Fence Distress Crackle Paint.


Supplies:


Have fun hopping through the rest of the year with a design to highlight each month…

I love a giveaway with a blog hop, don’t you? How about one today? I’m giving away a copy of 365 Cards so please leave a comment on this post by midnight (MDT) on Sunday, November 13th. I’ll be randomly choosing a winner and posting the winner on Monday morning. Good luck!

As you hop along, be sure to leave a comment on each of the inspiring cards for more chances to win this issue. Just click on the designer links above!

Last, but CERTAINLY not least…stop by the Paper Crafts Connection for a super fabulistic prize. Don’t miss it!!!

And just before I go, I would be terribly remiss if I didn’t mention Remembrance Day…

To the fallen, those who serve and those who have served…thank you. I will not forget your sacrifice.

Thanks so much for stopping by and have an uber-wonderful weekend!

i’ve fallen.

I’m ready for a change of pace from Christmas. How about a love-themed card? Love always warms things up and with the temperature dropping, I’m more than ready for that.

To get the distressed look around the edges of the card, I’ve actually used a Hero Arts stamp. I gives a great look and keeps my fingers from getting all inky. The rest of the card is a collage of all sorts of my favorite goodies.


Happy creating!

sing we now of Christmas

I’ve been busy here getting into the Christmas spirit. Sorry for the long posting delay but my life has been spinning. I also needed a little break to charge my creative batteries, and yesterday I made a huge stab at starting my Christmas shopping. I like starting my shopping early before the stores get crowded.

So while I’m in the holiday mood, how about another Christmas design. I actually designed this earlier in the year and just found it the other day.

This card has a very neutral palette with just a touch of color from the embellishments. Soft, pretty and vintage.

Supplies: sewing machine, white cardstock, Oatmeal patterned paper from the Stationery Line by Lily Bee Design, rub-on by Lily Bee, button, tinsel and pin by Jenni Bowlin, transparency by Hambly Screen Prints

Thanks for stopping by!

ho ho ho

ho, ho, ho…I’m back with another holiday card design. I’m lovin’ this little Santa and his sleigh stamp and making it into a snowglobe was so sweet.

Today I’m back in the CLASSroom with this project so why not stop by and join me?

Have a fabulous weekend!

family of hearts

When I think back over the past year and the projects I’ve made, there are couple that really pop out in my mind as bringing me the most joy in creating them. While differing in style, they both are really very similar in that they are both very personal projects. They are both mini albums that I will keep and treasure.

Today I’d like to share one of those albums. It was created for the Moxie Fab World column in the September/October issue of Paper Crafts Magazine. Because of space and so many fabulous projects in this column, there’s only a couple pages of the album shown. I’ve had a few requests to see the rest of the album and so with Cath’s blessing, here it is…

I think the thing that I really loved about creating this album is that it’s of my family but also, it’s a quirky little album using playing cards and it is so small and cute. This album uses the Echo Park Paper Co. For the Record line and it makes it really easy for everything to coordinate.

Each card was chosen for a reason. The front cover card is a 7 for the number of people in our family.

Of course, my sweet hubby just had to be the king…

…and I’m his queen.

My oldest child, James, is the Jack.

My daughter comes next and as second child, she is on the 2 of hearts.

Next in line is of course, on the 3 of hearts.

And then comes number four.

I thought about using a 5 of heart for my last child but he’s such a little bundle of personality, I just had to make him the joker.

After creating my little album and covering the pages with papers, photos and embellishments, I punched holes with my Crop-a-dile and then bound it together with some clips from the office store.

I hope you’ll make your own little mini album now. This one was super quick and fun to put together and you can make the pages from almost anything.

Happy creating!

double masking…a tutorial

Last week I promised you a tutorial and finally, here it is! Thanks so much for your patience on the wait. You know how it is….”the best laid plans of mice and men”. I had great plans for last week but life happened. I did really enjoy having my daughter home for the week and I think you’ll agree with me that family comes first.

If you’re just joining me and wondering about the tutorial, I created a double masking technique for a card that I submitted to Stamping Royalty 2011. You can find the original design here. I’ve had some requests on how to do this and so I decided to recreate the original card but with a holiday spin on it.

Double Masked Ornament Card

As you can see, the above card uses the exact same technique. Double Masking is great for using background stamps and also for using for your dies for more than just die cuts.

To start off with you’ll need your die (I’m using the Sizzix Ornaments #3 die) some Eclipse Tape or other masking material and your card base and some stamps and inks.

Eclipse Tape is a super light paper with a low tack back are is high on my favorites list for very easy and precise masking. To die cut it, I placed it on a piece of patterned paper so that it doesn’t stick to the die. You can use scraps or whatever you have on hand. I just decided to use this sweet dotted paper and keep the die cuts for another project. Multi-tasking at its best!

The the paper and Eclipse Tape through your die cut machine.

You’ll end up with both the reverse and positive images. Don’t throw anything away. You’ll need both pieces.

Place your die cut mask onto your card where you wish to stamp your image. As you can see, this die cuts more than one ornament at once. I just cover up those extra space with more tape so that I don’t stamp them by mistake.

Stamp your background stamp onto the card and remove the mask. You’ll end up with something like this.

Next take the positive piece of mask and place it OVER the stamping.

Mist area around ornament. I’ve used Mr. Huey’s White Mist by Studio Calico.

Remove the mask and you are done double masking your design.

To finish it off, stamp the sentiment and add a few embellishments to make your card sparkle.

Supplies:

holiday cheer

So now we’re officially into November and it’s  time to start gearing up for the holidays. I’ve been busy making some holiday cards and gathering those I’ve made throughout the year. I’m determined to get my cards sent out early this year!

Today I have a fun and festive card that features a stamped envelope on the front. I love these little Maya Road envelopes as they are perfect for holiday gift cards, love notes, or whatever else you can think up. This envelope has gotten into the holiday spirit with some fun stamping details from the latest Avocado Arts release, Bring on the Holiday Cheer.

Stamping is a great way to alter supplies you already have on hand. Here I’ve mixed up some image and word stamps for a festive look.

The Avocado Arts Design Team has some great ideas for using this stamp set. Stop by and check them out…

Supplies:


Wishing you joy…