Monthly Archives: September 2011

i {heart} moxie fab world

Since Moxie Fab World first hit the internet, I have been a huge fan.

HUGE.

Actually, it’s one of the few sites I check out daily.

Moxie Fab World is a wonderful creative space that’s always full of inspiration. I love the photos, the challenges, giveaways, getting to know designers and especially Cath herself. It’s just a happy place.

I particularly like a challenge and MFW always is sure to have a good one. When I have free time, it’s where I go to have some creative fun. A few weeks ago I was so thrilled when Cath asked if I could be an upcoming Moxie Fabber of the week. I am so honored.

I just have to thank you all for all the kind and lovely comments left on the Moxie Fabber post on Monday. I am so blessed.

And Cath, I don’t know what to say. Thank you, thank you, thank you. You made me cry.

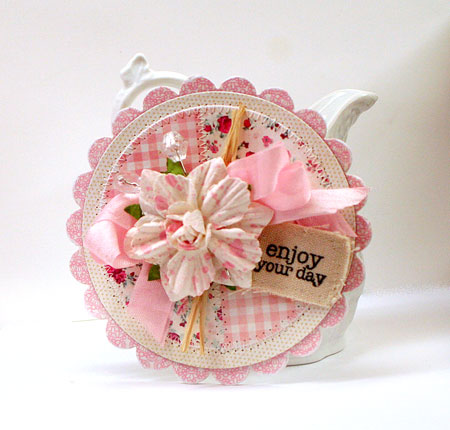
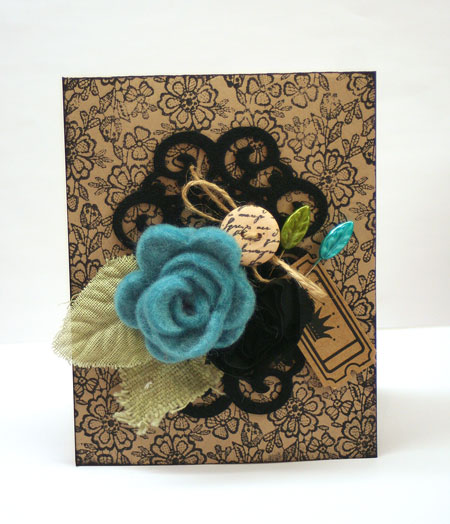
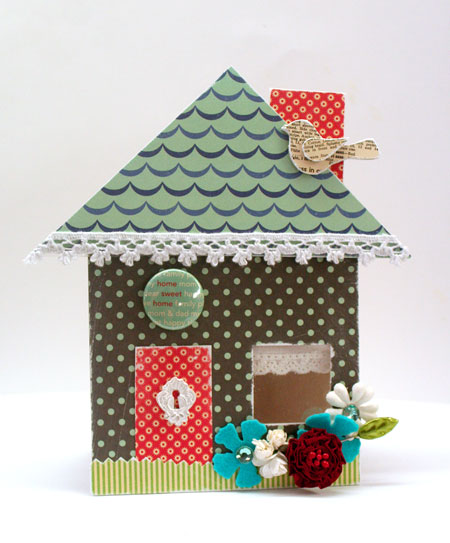
Today my card is created for another Moxie Fab World Challenge, a sketch challenge. It’s such a pretty one isn’t it? There is still time to play along and you can find out all the details on this Moxie Fab challenge here. Shaped cards are really easy to create, especially when you can use basic shapes to make them. This circle card has all it’s layers cut out using Spellbinders circle and scalloped circle dies.

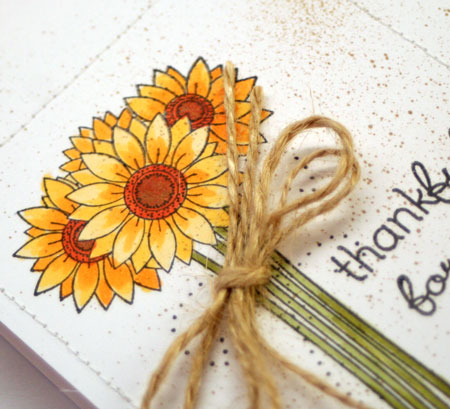
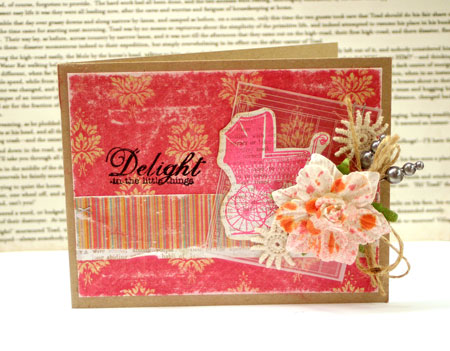
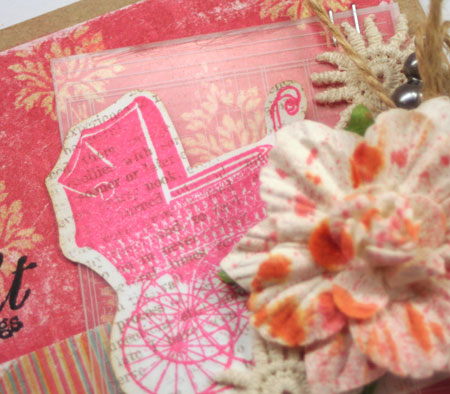
I think I must be in a super girlie mood today as this is oh so pretty in pink, pink, pink.


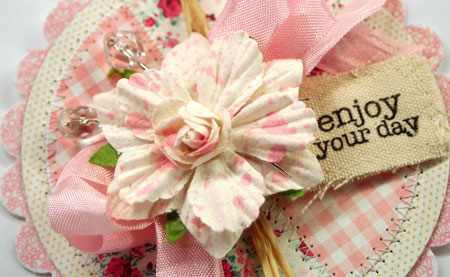
The layers are stitched on my sewing machine and the sentiment is stamped onto a tiny canvas tag.

Supplies: white cardstock by Neenah, Lost & Found 6×6 paper pad by My Mind’s Eye, Strawberry Shortcake Glimmer Mist by Tattered Angels, flower by Prima, Canvas Tag by Maya road, Crystal Trinket pins by Maya Road, sewing machine, Jet Black Archival Ink by Ranger, Hem tape, circle dies by Spellbinders, Sunshine and Smiles stamp set by Avocado Arts

Have a Moxie Fab day!

i like it…

From some humble beginnings… a cardboard lid, comes a little mini album that is near and dear to my heart. It’s a little album about things I like, right now in 2011.

It’s messy and stampy, out-of-my-box and is all manner of things all hodge-podged together.

And do you know what?

I had the most fun creating this album than I have anything in a long time.

I love the randomness.

The imperfection.

I love it for all the ink and paint on my fingers creating it.

Today I’m super excited to be the first guest designer at the brand-new Lessology Blog. Lessology is a new challenge blog dedicated to altered things. It’s all about the beauty and artistry of using less. OK, OK, When you look at this album you don’t see “less”. I have fun putting everything and anything that appealed to me on it. But the basic album was created with upcycled cardboard and everything you see on it I had in the house. A lot of it is bits and pieces I had laying around that needed used up.

I hope you’ll stop by and join me today at Lessology for photos, all the details on this album and how to make it.

It seems like today is a busy, busy day for me. Stay tuned as I’ll be back!


Happy creating!

Going Dotty

I have a little news to share today along with a card design.

I’m pinching myself because I’m part of the new Glue Dots Design Team, a Glue Dots Dottess.

You know how much I love embelishments, right? Well to adhere them I always use Glue Dots. Always.

It’s a perfect fit and I’m so excited about it!

Today’s card uses some stamping, some fun embellishments and of course, Glue Dots. They are perfect for buttons, felt flowers and all kinds of hard to adhere items.

Quick Tip: Try stamping wood buttons for a custom look.

Supplies: kraft cardstock by Bazzill, Jet Black Archival Ink by Ranger, felt by Felt Works, Lace Background Stamp and Cling Word Pops stamp by Hero Arts, twine, Wood Button by Maya Road, Leaf Trinket Pins by Maya Road, leaves by Prima, Kraft Mini Tickets by Maya Road, die cut felt by Prima, 3D Flower die by Sizzix, Glue Dots

Enjoy the rest of your weekend!

i believe in you

Mists, stamps and canvas are among my absolute favorite products to work with. Put them all together and I’m in creative bliss.  They are perfect for this special layout I created for my daughter. She’s away at school now and I’m missing her so much.

Join me today in the CLASSroom for the tutorial and step outs on creating a misted canvas layout.

Have a fabulous weekend!

Fall Flowers

Fall is in the air. It’s definitely time to start thinking of jackets, apple picking, leaves, pumpkins and all the wonderful things that fall brings.

How about a fall bouquet of flowers today?

As I’ve mentioned before, my favorite way to use stamps is in a clean and simple design to focus on the beauty of the image. And these sunflowers are oh so pretty!

They are simply stamped on white cardstock and colored with some Copic Markers. A little frame of stitching highlights the space and adds a simple and inexpensive embellishment. Don’t always feel that you have to centre your design. An offset design with white space can add interest and vary the look.

Quick Tip: Create a splatter effect with your Copic Markers and airbrush system by putting the brush end of the marker into the airbrush nozzle instead of the chisel end.

This gorgeous stamp is from one of the latest Market Street Stamps releases, Autumn Greetings. Today on Moxie Fab World, Market Street Stamps gets the Moxie Fab “Stamp” of Approval. I totally agree. That also means a fabulous stamp giveaway so be sure to hop right over to Moxie Fab World and leave a comment for a chance to win.

Supplies: Solar White Cardstock by Neenah, twine, Autumn Greetings stamps by Market Street Stamps, Copic Markers – Y32, Y35, Y38, E44, YG93, YG95, YR18, sewing machine, Copic Airbrush System, Glue Dot

Have a fabulous day!

the little things

I needed to make a baby girl card to go with a gift and today’s rainy morning seemed like the perfect time. With the kids back in school, it also seemed like a fabulous time to get back to creating for some challenges. I love a good challenge.

I’m playing along with at Splitcoaststampers.com with the sketch and technique challenges. The patterned paper is sanded to give it a distressed look and also lighten the intensity of the color.


Supplies:Kraft cardstock by Bazzill, Happily Lost 6×6 paper pad by Lily Bee Design, Picket Fence 6×6 paper pad by Lily Bee Design, Delight in the Little Things Itty Bitty stamp set by Unity, flower by Prima, lace stickers by Basic Grey, Pearl Trinket Pins by Maya road, twine, Tiny Attacher by Advantus, Rose Bud Memento Ink by Tsukineko, Jet Black Archival Ink by Ranger, white Ledger transparency by Maya Road, Tiger Lily Glimmer Mist and Starfish Glimmer Mist by Tattered Angels, sanding block by Advantus

Enjoy your day!

home sweet home

Home sweet home.

It’s a wonderful place to be.

This morning my home sweet home was oh so quiet. Today is the first day back to school. I must admit, I’m a little at loose ends today. I have a long to do list and am not sure what to tackle first. After a crazy summer of noise and rambunctious boys, the quiet is wonderful but almost deafening. So strange.

Is your home sweet home quiet today or busy? Here’s a little house card I have to share with you today. It’s fun and quirky and made of simple shapes. Reducing an image into simple shapes is a great way to make shaped cards so easy to do. If you look at my design, you’ll find the basic square shape of the card. I’ve used some Craft-a-Board in triangle and rectangle shapes to easily make the roof and chimney. Craft-a-Board is a great chipboard alternative that is a beautiful soft white color. I love that you can cover it, paint it, stamp it, die cut it or just leave it alone.

To create the little window detail, I’ve simply punched the front of the card with a square punch. The “glass” is Crystal Clear Plastic and I’ve hung a little lace curtain inside the card for a sweet detail.

Supplies: Seaside 8×8 patterned paper by October afternoon, Craft-a-Board & Crystal Clear Plastic by Essentials by Ellen, Self-Adhesive Lace by Hero Arts, square punch by EK Success, pinking shears, sanding block by Advantus, flowers by Prima and Maya Road, Leaf Trinket Pin by Maya Road, Nottinghill Keyhole by Melissa Frances

Thanks for stopping by to visit!