Never underestimate the power of a single inch. Inchies are small but mighty and are fabulous for covering in all manner of products.
Today I’m mixing things up on the Inchie Inklings blog. I hope you’ll join me here!
Thanks for stopping by!

Never underestimate the power of a single inch. Inchies are small but mighty and are fabulous for covering in all manner of products.
Today I’m mixing things up on the Inchie Inklings blog. I hope you’ll join me here!
Thanks for stopping by!
Posted in Card Designs, Ellen Hutson LLC projects
I’m back!
No. I don’t have stamper’s block as the title suggests but I AM taking a little more time this summer to slow down and enjoy my family. One of the best ways to prevent creative block is some time away now and then to get refreshed and enjoy life. If I’m posting a little less than normal this summer, you’ll know that is what I’m doing. I’m taking some time here and there to smell the roses, sit on the beach, listen to my children laugh and enjoy the wind in my hair.
I know you’ll understand. Keep looking for me here 2-4 times a week though as I find I just can’t walk away completely. I always need a little creative therapy.
So what am I talking about with the stamper’s block title? It’s been a long time since I’ve had some time to play along with a challenge and I popped by Splitcoaststampers.com to see if something inspired me. It did! A challenge is always a great way to kick off some inspiration.
Today’s challenge is the Technique Lover’s Challenge and challenges you to twist up stamping with an acrylic block. A stamper’s block. 😉 As I’ve never done this, I gave it a whirl, had some fun and put my own twist on the technique. Here’s a link to the challenge and here’s my card…
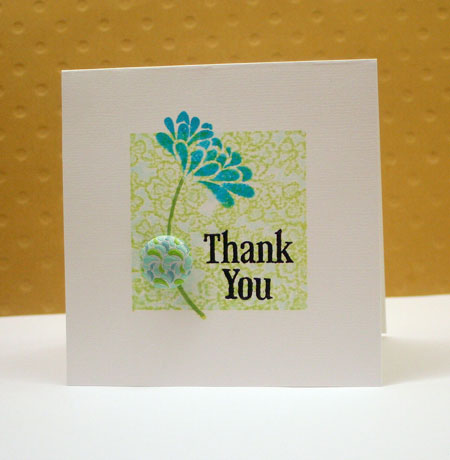
Kissed Acrylic Block Stamping
This is a combination of two separate techniques. It’s amazing how many great stamping techniques you can combine to come up with a new and fresh idea. Here’s how I did it…
It’s so easy and I love the subtle look. Best of all you can use something you already have on hand instead of buying a new stamp.

Supplies: Basic Grey Sweet Threads Thank You stamp set and Lace Background Stamp by Hero Arts, Acrylic Block, Soft Pool Shadow Ink by Hero Arts, Jet Black Archival Ink and Aquamarine Archival Ink by Ranger, Pear Tart Memento Ink by Tsukineko, brad by Basic Grey, white cardstock by Bazzill
Have a creative day!
Posted in Card Designs, Hero Arts, Tutorials & Techniques
Over the past few months I’ve been busy working on something that I’m so excited to be able to finally share with you today.
I’ve been blessed with another opportunity to product design for Lily Bee Design and am thrilled to share Head over Heels with you today. Head over Heels is a love-themed product line that will be a mid-season release for Lily Bee and ship in October. It’s designed to be a fun and romantic line that you can use all year round. With a mix of vintage prints and fresh colors, it’s a mix of all the things I love.
Here’s a peek at all the papers in the line…
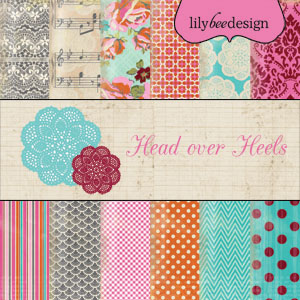
Head over Heels has six double-sided patterns, coordinating Stationary line papers, darling little ABC stickers, Mixed Cardstock Stickers, a 6×6 Tiny Tablet with 1/4 scale prints that is perfect for cardmakers, some fun new index cards…

and a stamp set I think you’ll love…
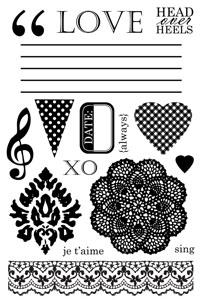
Today on the Lily Bee Blog, this line is being featured in it’s entirety and one lucky person will have a chance to win the entire Head over Heels line. Stop by this link to comment and say hello and good luck!
Finally, here’s a layout I designed for the catalogue…
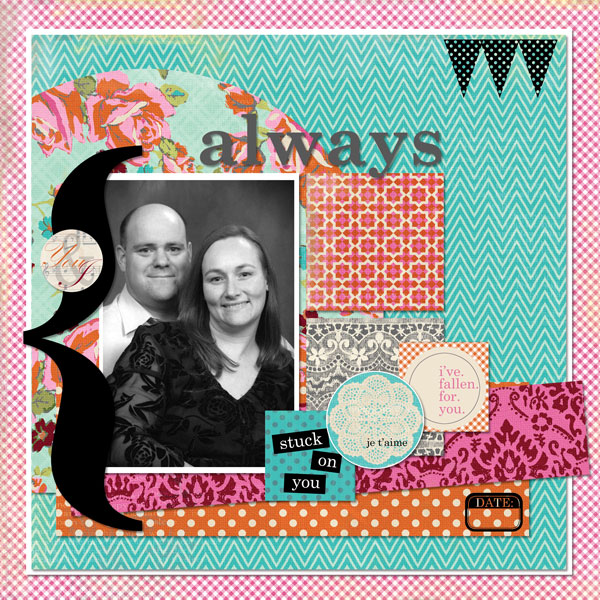
I’m hoping you’ll fall in love with Head over Heels!
Have a fabulous weekend!
Posted in Lily Bee, Scrapbooking
It’s the 15th and we’re half-way through July. Why DO the summer months always go by so quickly?
At Avocado Arts, the 15th always brings a peek into the next-to-be-released stamp set. August’s set is called Zip n By. So fun and I think it’s my favorite yet.
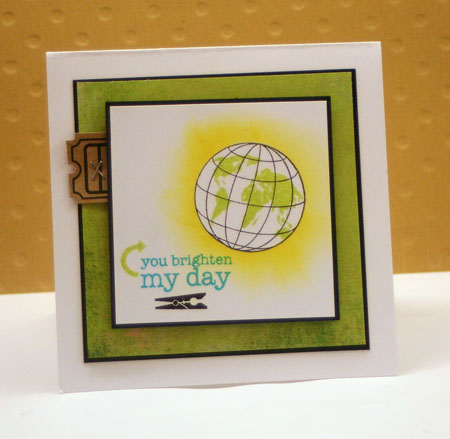
This card showcases how well Avocado Arts stamp sets work together.The Avocado Arts monthly sets don’t retire and you can still purchase them if you missed out.
All my stamping is done on a single layer and I’ve masked the earth and then sponged on some yellow ink to get the thought of sunshine brightening my world.
The rest of the Avocado Arts Design Team has a sample to share with you today so be sure to take a peek…
Posted in Avocado Arts, Card Designs
Sewing is near and dear to my heart. It’s something I’ve done as far back as I can remember and some of my first memories of both my grandmothers are them sitting at their sewing machines. The sewing trend is still going strong and it’s one that I’m hoping will never go away. We all know someone who is “sew special”.
This card was another that I created for guest designing at Maya Road. Have you seen their latest sneak peeks?! I’m in love! Check them out here.
Another company I love, Lily Bee, is sharing sneak peeks on the Lily Bee blog this week. I think you’ll love what’s coming up and make sure you stop by and comment for a chance to win!
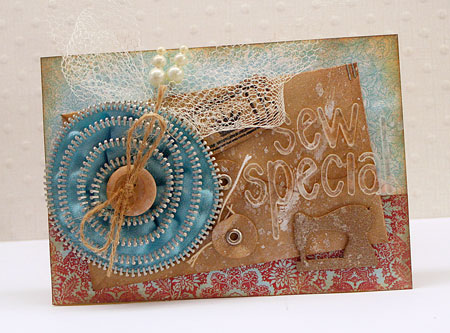
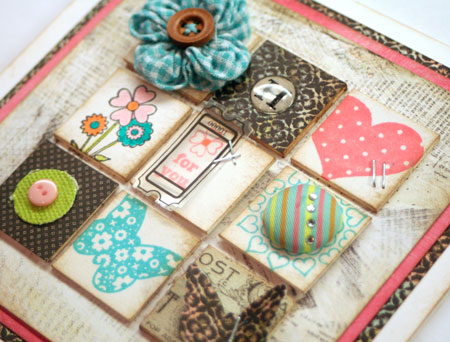
To create this zipper flower, I’ve just used a Cosmo Cricket Gluber and then spiraled the zipper trim ribbon around until I have a nice flower. The center is then covered with a button and you’re done. So easy!
![]()
Misting adds shimmer to this project and I’ve also opened the mister and flicked the dye over the project for a distressed look as well.
Quick Tip: Adhere acrylic alphabets and accents with Ranger Glossy Accents for a clear and firm bond.
Supplies: Picket Fence 6×6 Tiny Tablet by Lily Bee Design, Frayed Burlap Distress Ink by Ranger, Sky Blue Zipper Trim by Maya Road, Gluber by Cosmo Cricket, twine, Wood Button by Maya Road, Noah Mini Alphabet Acrylic Set by Maya Road, Window Kraft Envelope, Kraft Mini Ticket, Sew Cute Mini Chipboard by Maya Road, Vintage Pearl Trinket Pins by Maya Road, Maya Mist by Maya Road, salvaged netting
Happy creating!
Posted in Card Designs, Lily Bee
It’s that time again. Another 16th birthday and time to teach another child how to drive. I’m not quite sure why the job always falls to me. It’s always little nerve-racking to say the least.
Yesterday David turned 16 and I just can’t believe how quickly the years are flying by. “Guy cards” are not my forte but I’ve tried to combine a few of his favorite things together into a fun card for a 16 year old male. David loves music, wood and games and so this is what I came up with.
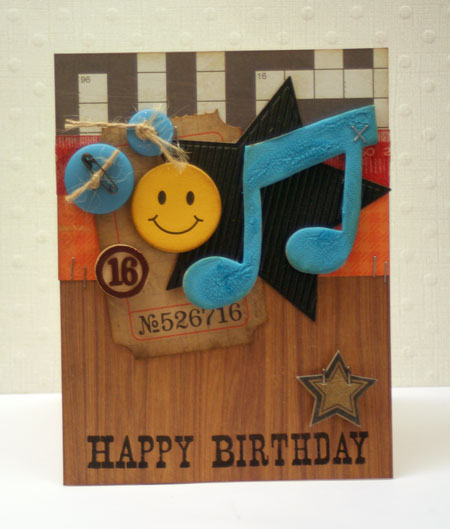
One of the elements I really rely on when creating cards for males is texture. For this card I’ve die cut a star from some corrugated paper and also used Distress Crackle Paint to alter the chipboard notes.
Quick Tip: Bingo Calendar Numbers are a great way to personalize a birthday card with the recipients age.
Supplies: kraft cardstock by Bazzill, patterned paper by Crate Paper and from Little Boy line by Echo Park, Tiny Attacher by Advantus, Brown Bingo Pieces by Maya Road, buttons by Basic Grey, twine, Nested Star Die by Spellbinders, Broken China Distress Crackle Paint by Ranger, Brushed Corduroy Distress Ink by Ranger, Mini Pin by Tim Holtz, Journaling Ticket by Tim Holtz, Jet Black Archival Ink by Ranger, Wonderful Birthday stamp set by Hero Arts, Lille Printed Paper Tape by 7 Gypsies

Lastly, here’s a fun photo of most of my crazy kids from our family party last night. I love it when they all get along!
Take care…
Posted in Card Designs, Photos
I don’t know about you, but I am seriously ready for a break. A summer vacation.
As of this morning, I have a huge load off my plate. My new line is finished. Assignment caught up. It feels good.
Like the lovely vintage lady on this card, I’m ready to relax and enjoy some summer.
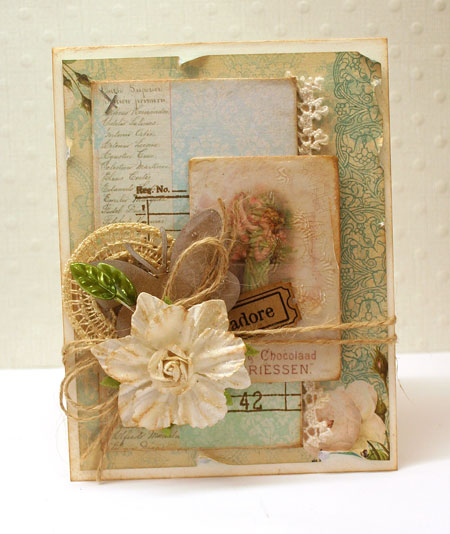
Today I’m in the CLASSroom sharing this card with detail shots and four quick and easy ways to alter premade embellishments. I hope you’ll join me!
Wishing you some summer bliss…
Posted in Card Designs