Monthly Archives: October 2007

And the winner is….

Thanks so much to all of you who took part in my Gina K Make a Wish blog prize entries. WOW! I was so inspired reading all the wonderful things you all were doing! So many people going through hard times too. Sometimes it is so easy to feel so alone in it…I’m sure all the wonderful things that everyone was doing to help out, make someone’s day or just showing you cared really made a difference. I wish I could give you all the stamp set. You are ALL winners. Unfortunately…I only have one. And so, I used the www.random.org number generator to pick a winner. The winning number was number 46… Catherine. Congratulations Catherine! Please e-mail me with your address and I’ll get this in the mail for you as soon as I can! Catherine wrote…

Catherine

HAPPY 18 ANNIVERSARY :D! The nice thing that I did today, was make a meal that would last my parents a few meals and so my mom could focus on getting some rest and getting my father back up on his feet. Thanksgiving weekend my dad had a heart attack, one of his arteries on the back of his heart was clogged 99% and so he had a balloon thing done and also a stint put in. He is at home recovering, but felt they needed help in terms of meals :)!
Thanks for this chance at a great stamp set :), have a super day :)!

I wish you all a great evening! It has been another one of those days! A car had to be dropped off at the garage this morning, some major details sorted out pertaining to the renovation. I’m so excited that my stamping room is back on plan for this addition. It had been relegated to addition phase two but now what was going to be storage is now big enough to hold a small 8×8 foot space. It will be in the new basement but….it will be ALL MINE! So I’m pretty excited!

Pinkalicious!

Pink! Today’s color challenge in honor of Breast Cancer Awareness Month was to use pink. And use it I did! Lots and lots of pink! I was pretty excited with this challenge because it worked perfectly with the design and blog post I wanted to do today! I wanted to one…make this little gift set for my Mother-in-law and two….tell you about a cool card auction with the full proceeds from this auction will be donated to the Susan G. Komen Foundation to further research toward a cure. And so…..

I’ll tell you about the auction first. The My Favorite Things Stamps Design Team wanted to do something special this year to help raise money for Breast Cancer research. Kim released the darling Think Pink stamp set with proceeds going to the same foundation. We decided to do our part too. πŸ™‚ Eighteen original hand crafted and signed cards with envelopes by the My Favorite Things designers are up for bid on eBay. I’m so excited to be part of this and can’t wait to see how much money is raised for this great cause. And so… you really need to check it out…

My Favorite Things Stamps Design Team card auction for Research

One of my designs is part of the group. You can see it HERE. πŸ™‚

Think Pink Set

jks-think-pink-set.jpg

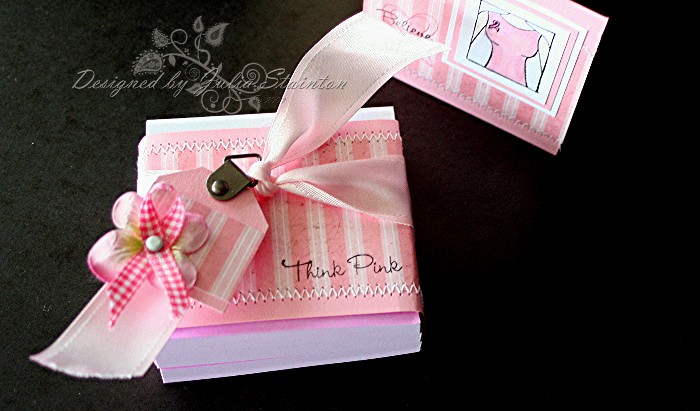
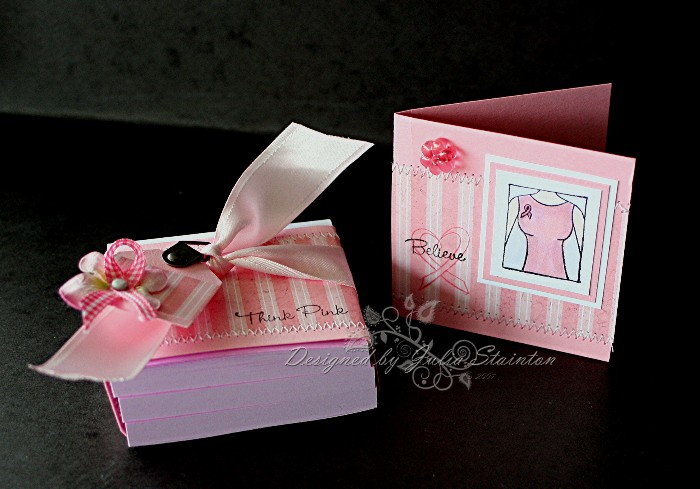
I picked up these three little white post-it note pads at my local Business Depot store. The have a pink bottom band and on the pads, is printed a pink ribbon. I thought of my Mother-in-law and thought she would appreciate having them. She just finished radiation therapy at the end of August and I decided to make this into a little gift set for her.

Lots of pink today for this pink challenge so I went searching for some of my favorite Baby Girl Daisy D’s paper. To make a band to go around the three pads, I stitched the striped pink paper to my Pretty in Pink cardstock. Some wide satin May Arts ribbon wraps around the band and ties on a darling little tag. I decorated my tag punched tag with a pretty Prima flower that is set with a brad holding a pink gingham awareness ribbon.

jks-think-pink-post-it-set.jpg

For my matching mini card, I once again stitched on a Daisy D’s paper layer and stamped a ribbon heart and Believe from my Think Pink stamp set. Also using the set to create an image, I colored it in with my Copic markers, matted it and adhere to my design. I got some new Making Memories goodies in the mail today. A darling little flower brad decorates the top left corner of the design. Very simple, very pink and oh so cute. Hope it is OK to say that. I hope she likes it as much as I do. πŸ™‚

Make sure you check back in later tonight as I’ll be announcing the winner of that great Make a Wish Stamp set from Gina K. πŸ™‚

Supply List:

Cardstock: Pretty in Pink, Whisper White -Stampin Up

Patterned Paper: Daisy D’s

Stamps: Think Pink – My Favorite Things Stamps

Ink: Black – Stewart Superior, Regal Rose – Stampin Up

Other: ribbon – May Arts, Hodgepodge Hardware & tag punch- Stampin Up, sewing machine, white brad, flower – Prima Marketing, markers – Copic, flower brad -Making Memories

Just a Quickie…

Very busy day today here….but I just couldn’t let the day go by without popping on and sharing something with you! I realized I haven’t shared all of my digital layouts with you and so, here is one of my favorites. It looks simple but uses level three techniques from the Ultimate Guide to Digital Scrapbooking in it. I love how the photographs fade one into the other… digital elements by www.shabbyprincess.com

Wow…those beautiful summer days seem so far away now. I treasure this photo I took of my oldest and youngest, together on the beach. πŸ™‚

The journaling…

You are both so different, but at the same time, so much

the same. I love to see you together.

My oldest. My youngest.

Despite the age difference,

A special bond.

Wishing you a fabulous day! And I’ll be back tomorrow with a stamped card design. πŸ™‚ And don’t forget…if you haven’t entered already…just scroll down to see how you can enter to win the Make a Wish Stamps for a Cause set from Gina K.

Together

jks-together-blog-final-border.jpg

Another Stamp Set to Share!

jks-belle-bonbons-spring-new.jpg

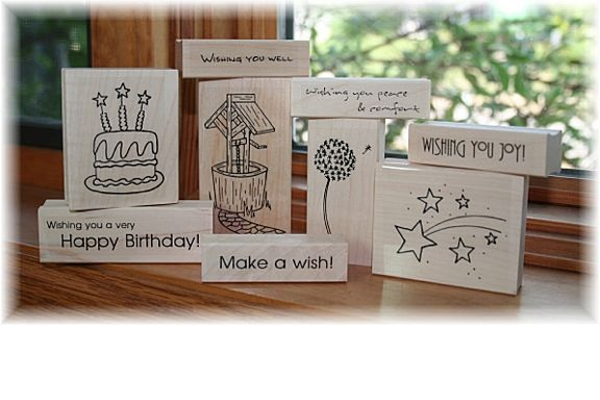
I know I just had a giveaway last week but…..I was so blessed to get two of this great Make a Wish stamp set, I’ve decided to share the wealth. It is such a darling set, so flexible! Perfect for so many occasions. Gina K released this set a couple months ago as her latest Stamps for a Cause set. $7.00 from each purchase of this set is being donated to the Make a Wish Foundation for children with life-threatening medical conditions.

I was so excited to be asked to be part of the design team for this set release. These sets are still available and will be for some time. To date over $3000 has been raised from purchases of this set. If you’d like to own this set and be part of the fundraising effort…make sure you visit the Stamps for a Cause site. πŸ™‚

The Make a Wish set I’m giving away is the full wood block set of nine stamps…four images and nine sentiments. The set comes unmounted in a plastic case and you can mount it how you wish. For this stamp giveaway, I’m going to make you work for it! πŸ˜‰ Don’t worry…not too hard. Just do something nice for someone today! Spread the love around a little. πŸ™‚ Send a card to let someone know you care, take them out for coffee, go fly a kite with a child, just pick up the phone to let someone know you care. It can be very simple…don’t stress. Leave a comment sharing what you did and you’ll be entered to win. I can’t wait to read all the comments. Just think how many people will be blessed. And you know what? Even if you don’t win, you’ll find that you will be blessed too! πŸ™‚

jks-gina-k-make-a-wish.png

Make sure you comment with what you did that was special for someone by Tuesday October 16th at 9 pm EST for a chance to win. I’ll announce the winner shortly after. πŸ™‚ Winner will be chosen by an on-line random number generator. Have a wonderful Sunday! It’s my 18th anniversary today and so, I’m taking today off! πŸ™‚ The {C’est Bon} entries will resume next Sunday. I guess {C’est Bon} that I spend today with my husband and family. πŸ™‚ LOL I just looked at this article…what a LOT of smilies! Have a happy day!

Simply Saturday … vellum daisies

It’s Saturday and time for another simple design. You’ll have to forgive me…this card is one of my faves. It is simply beautiful…unfortunately…you’re going to have to trust me on this one because taking a picture of it was NOT so simple! I’ve tried and tried….sigh…. You’ll just have to use your imagination…or better yet…try it out for yourself! πŸ˜‰

Vellum Daisies

jks-vellum-daisies.jpg

I’ve long been a fan of vellum cards….so soft and subtle…a little bit elegant and just that touch of uniqueness too. Try stamping on vellum with white craft or hybrid ink…gorgeous! I actually designed this card in September so I’m madly trying to think exactly which ink I did use. I think it was the cloud white Versamagic Ink by Tsukineko. It is specially designed to stamp on vellum.

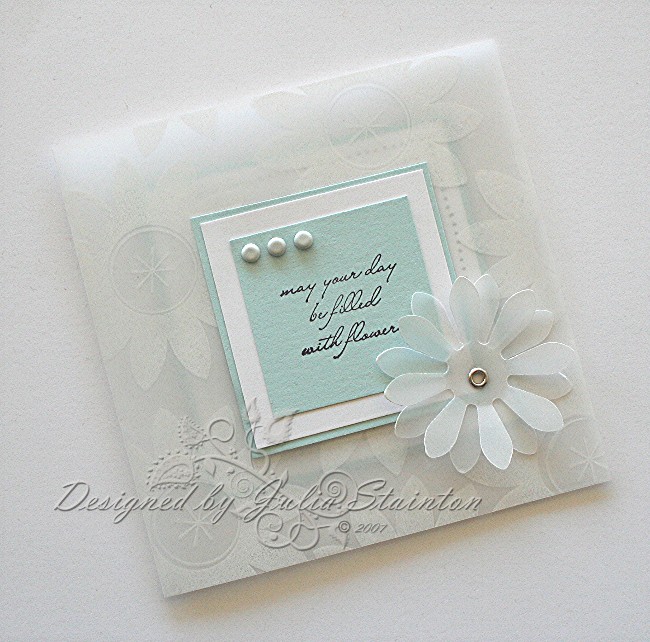
For this design I used a smaller 4.25″ square format and stamped my cardstock vellum with the solid daisy stamp from the Daisy Dots set by Lizzie Anne Designs. In the center I added the circle stamp with the starburst shape.

The sentiment panel was then added by stamping the sentiment from the Au Naturale set onto a square of Soft Sky cardstock and then simply matted with white and then some more Soft Sky. Three little white brads were inserted in the top left corner for a subtle embellishment. I punched out a double flower from some vellum cardstock scraps and attached it to my card front with a simple silver eyelet.

Quick Tip: When working with subtle colors and design, make sure you keep your embellishments subtle as well so as to not overwhelm the design.

jks-vellum-daisies-inside.jpg

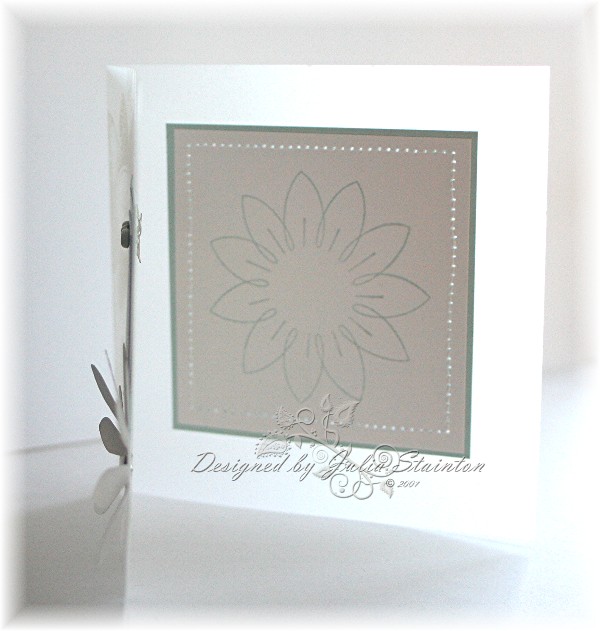
For the inside, I stamped the line daisy image onto a larger panel of whisper white cardstock and matted with Soft Sky cardstock. I stitched the panel to the inside of my card. When designing this panel…I created it just a little larger than my front panel so that when closed…the panel and stitching peeks subtlety through the vellum.

jks-vellum-daisies-flat.jpg

A Contest You Don’t Want to Miss!

Lizzie Anne Designs is having a card contest! You can check it out HERE. There is still time to enter and there are fabulous prizes to be won. Winner receives $50 Lizzie Anne Designs gift certificate, plus the new World Cardmaking Day set, PLUS your design featured in November’s newsletter. There are also going to be 10 runner-up prizes of the new WCD set so make sure you enter today. Hurry though…all entries must be received by Oct 28th. What are Meridith and Tricia going to do with all the cards? All entries will be donated to Cards for Cancer…what a great cause!

Wishing you a wonderful Saturday that is simply filled with beauty. πŸ™‚

jks-vellum-daisies-2.jpg

Some more Holiday Bling

I had started this card earlier in the week and just hadn’t had time to finish it. When I finally got on the internet last night, I checked out a few of the weekly challenges…I decided to finish off my design by incorporating the sketch challenge and the bling Ways to Use it challenge and guess what? It was just what my design needed! πŸ™‚

Snowman Christmas

jks-snowman-friends.jpg

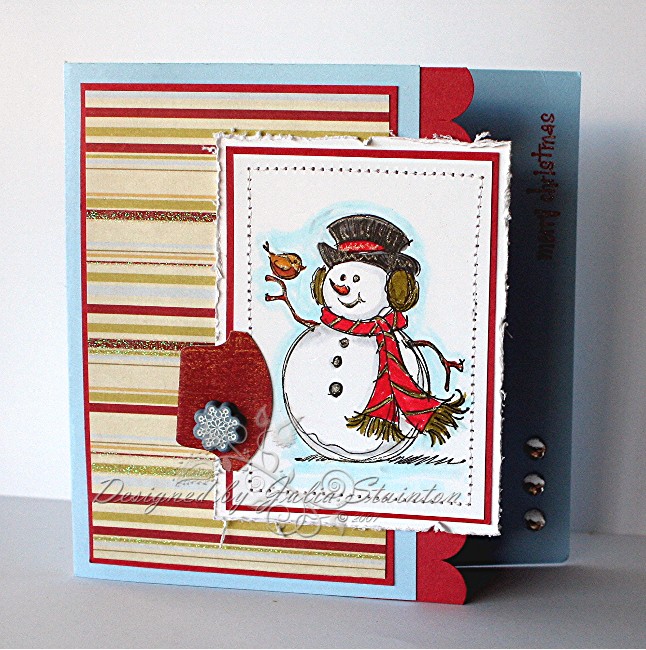
Following the sketch challenge, I cut away a little of the righ side of my front panel. I trimmed off a little more than the sketch as I was using a 5.25″ square card design. You know how I love square cards! πŸ˜‰ Behind my front panel, I adhered a strip of slit punch scallops to make the image and design pop out.

For my main image, the Inkadinkado snowman…how cute is that?!!!… was stamped in black and then colored with my Copic markers. I layered him with ruby red adn then white, distressed the edges and then stitched around him on the sewing machine. A little scrap of Basic Grey Fruitcake paper was punched with my round tab punch and then held with a Karen Foster snowflake brad. Oops…better not forget some of the bling…my image was highlighted, as well as the sentiment, with my Sakura glitter pen.

Quick Tip: It is easy to adhere your rhinestone stickers evenly in a line ifΒ  you pierce where you want them to go with your mat pack first.

For more glitter, I used this new preglitter Making Memories Christmas paper to layer on the front panel. Some clear rhinestone stickers from Doodlebug Designs are adhere to the inner panel. I love it when you can see elements from both the open and shut sections of the card. The Merry Christmas sentiment is stamped in Ruby Red at the top right of the design and is from the new stamp set by Lizzie Anne Designs.

I’m loving Inkadinkado stamps and having so much fun with them lately. In case you’ve missed it…Jacksonbelle is having a great Inkadinkado contest on her blog. Winner will get some great prizes as well as the Guest Designer Spot for Jacksonbelle Embellishments for the month of December. πŸ™‚ Have a great weekend!

Bling…

Wohoo! I love bling! Especially on holiday designs! Yesterday’s Ways to use it Challenge, posted by my good friend Jacksonbelle (thanks Linz!), was to use Bling on your designs. My favorite form of bling is gemstone stickers. I have quite a collection! πŸ™‚ Making Memories, Hero Arts, Doodlebug Designs, Imaginisce, Me and My Big Ideas…they all have some great rhinestones! And I, have some of each. πŸ˜‰

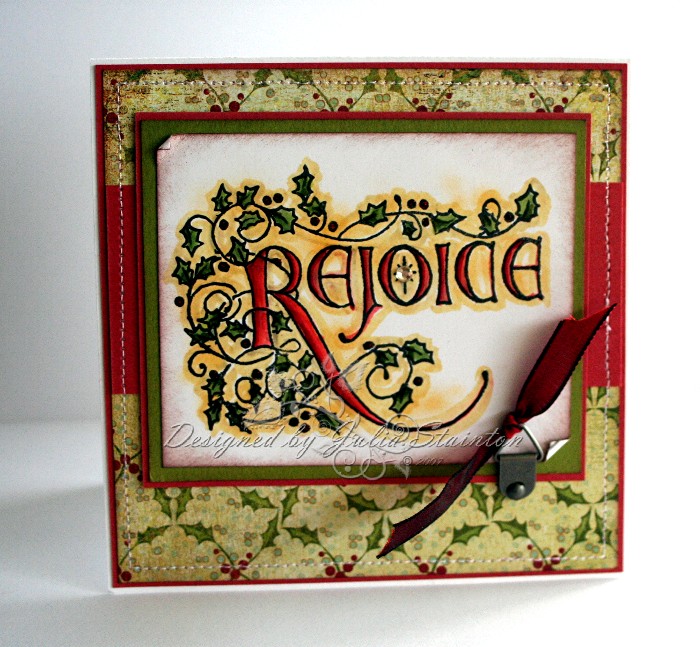
I just had to pair up this challenge with my new Flourishes Rejoice stamp set. A subtle addition of a rhinestone and some Stickles is just what my design needed.

Holly Rejoice

jks-rejoice-holly.jpg

I paired up this beautiful Rejoice stamp with this holly patterned paper. The paper is from Basic Grey Fruitcake line! They look like they were made to go together! I love how the sentiment as the holly images around it. One stamp is all you need for both image and sentiment! This stamp is now available from Flourishes and also comes with a beautiful angel and some fabulous sentiments. I colored in my rejoice with my Copic markers. Starting light, I worked up adding darker shadows as I went. The edges were then sponged with Close to Cocoa ink and light curled up at two of the corners. The added rhinestone was adhered over top of the starburst in the O and I went over my berries with some Burgundy Stickles.

For finishing touches to my design, I pulled out my sewing machine and stitched around the card base to form a subtle frame. A little Hodgepodge hardware tab was attached to the bottom fo the image panel and then tied with a scrap of burgundy Mary Arts ribbon.