Monthly Archives: June 2007

Flourishes…

I love the flourishes that are “all the rage” these days. You can tell I love them…just look up at my banner. Today, Trudee posted the Ways to Use it Challenge for me so that I could spend more time with my mom. I spent the morning there and came home for this afternoon as the babysitter had to leave. Mom no longer knows I’m there and I know it won’t be long until she is free from her disease and will be in Glory. This simple card is inspired by her.

Believe

jks-believe-2.jpg

Fancy Pants Bella Brush stamps, Primas and ribbon are from Jacksonbelle’s Ebay Store.

Supply List:

Cardstock: Whisper White – Stampin Up

Stamps: Bella Brush – Fancy Pants

Ink: Certainly Celery, Black – Stampin Up, Versamagic – Tsukineko

Other: Ribbon – May Arts, Pearl – Making Memories, Cherry Blossom Hydrangea – Prima

In Mom’s Garden…

I’ve been spending most of my time these past few days at my mom’s to be with her. Her garden is beautiful right now, as always. So peaceful and quiet. So many things to enjoy. Birds, fish, squirrels, frogs…even a family of 6 raccoons that come out in the evening. No the ideal city pet, but they’ve made their home under the deck and we don’t want to wrangle with mama raccoon. Her babies are darling!

I love the sounds of the waterfall and the birds. During the day I often go out for a little fresh air and it is a wonderful place to pray. I can see the love the Great Designer in the care and beauty of his workmanship. I took a few pics the other day and while I’m not the best photographer, I thought I’d share them with you here.

jks-flower-garden-composite.png

The Waterfall & Pond

jks-waterpond-composite-resized.jpg

There was a darling little frog I was wanting to get a pic of but he must have been off somewhere when I brought my camera. I hope you all have a wonderful day and hope you can find even a few minutes to get out-side, be quiet and enjoy God’s beautiful creations.

A Ladybug Picnic

I made this card yesterday afternoon. I had to come home from my mom’s to put Joshua down for a nap and took the time to try to relax a little…
What is it about me lately that wants to keep pairing up Cool Caribbean and Real Red?! I’ve never been much of a red person but this fun Little Lady set just keeps inspiring me! For this card, I just had to have a little fun with some other Papertry Ink stamps as well! I purchased Faux Ribbon at the same time as Little Lady but am just breaking it out now. Love it! I just had so much fun making this card. So summery and I managed to use more scallops. 🙂 Hope you enjoy it too!

Ladybug Picnic Card

jks-ladybug-picnic.jpg

This card started with the inspiration to make a frosted “glass parfait dish” ful of strawberries from Papertrey Ink. I just had to use my Little Ladybug and so the picnic theme evolved from there. The “frosted” dish is actually a piece of cardstock vellum punched with a scalloped oval punch and put through the Cuttlebug to emboss it. I used the swirl embossing folder so that you would be able to see the strawberries but still get a fun swirled glass look. The top of the oval was trimmed off . Before adhering it to the design, I stamped a bunch of little strawberries from Papertrey Ink’s Green Thumb set and cut them out. After adhering them to the central square, I stitched the “bowl” to the card.

A picnic always needs a nice red plaid or gingham tablecloth to my next step was to stamp one using Papertrey Ink’s darling Faux Ribbon set. I can’t believe how flexible this set is. It was so quick and easy to make this plaid. I simply lined up three different “ribbon” stamps together on one acrylic block and then inked and stamped. I started out with a 3×3 white square and it was super easy to eyeball where the stamping needed to go.

After adhering all my layers together, all the card needed was a few finishing touches. A fun little “celebrate” sentiment on the bottom of the image and a Little Lady flying in to check out the lucious berries. The ladybug and the trail are highlighted with a black Sakura Gelly Roll Glaze Gel Pen for a glossy dimensional look.

Supply List:

Cardstock: Whisper White, Real Red, Cool Caribbean, Vellum – Stampin Up

Stamps: Faux Ribbon, Little Lady, Green Thumb – Papertrey Ink

 Ink: Basic Black, Real Red, Old Olive – Stampin Up

Other: sewing machine, Cuttlebug & Cuttlebug embossing folder – Provocraft, Black Glaze Gel Pen – Sakura, Scalloped Oval Punch – Marvy

Jolies Fleurs…

I just adore this  Jolies Fleurs set from Lizzie Anne Designs! I just can’t stop making cards with it! This is a simple card I made a couple weeks ago. I was having fun experimenting with lots of clean space. I was actually planning on a scalloped theme this entire week…see previous two posts. 🙂 Lots of scallops there. I’ll try and pick that theme back up when I can. My mom isn’t doing very well so I’ll mostly be uploading cards I’ve created in the past few weeks that I haven’t shown you yet, if I’m able. If you could please pray for us right now, I’d most appreciate it.

Jolie Birthday

jks-birthday-jolie-fleurs-3.jpg

This card is a 5″ square card design. It is actually an Old Olive card base which looks so cute with the Real Red and the Pink Passion. Unfortunately it looks a little dark in the pic and I’ve just run out of patience trying to get it right! With the simple design, the card is very easy to make. The card base is stamped with Paisleys in Old Olive and the image is stamped in black on the Whisper White card stock. I wanted the colors to pop, so I colored with markers…something I can’t remember doing in a very, very long time. I added a couple little highlights to the dots on the flower image with my white Signo gel pen. The little bow is just a scrap of ribbon tied in a knot and then held in place with glue dots. The faux ribbon across the top is a darling stamp from Lizzie Anne Designs Shapes and Stitches set. Super cute! To add just a little more visual interest, I pierced along both edges of my “ribbon” with a Making Memories paper piercer and my Stampin Up Mat Pack.

Lizzie Anne Designs stamps can be purchased from Lizzie Anne Designs or from Jacksonbelle’s Ebay Store.  🙂

Wishing you all a very happy week!

Supply List:

Cardstock: Whisper White, Old Olive, Pink Passion, Real Red

Stamps: Jolies Fleurs, Shapes and Stitches – Lizzie Anne Designs

Ink: black, real red marker, Pink Passion marker, Old Olive marker

Other: pink gingham ribbon – Michael’s, brads – Creative Impressions, glue dot & Mat pack – Stampin Up

Scalloped Punches {C’est Bon}

I {heart} my Marvy Scalloped Punches! I held off for a long time. So hard to find them in Canada, hard to find them in on-line stores that ship to Canada and if you add taxes and shipping and duty…well….yikes! That being said, the first one I one I bought was the only one available at Michael’s…the scalloped square. Loved it! I just had to have the Giga scalloped circle. My local stamp store, Stamp Art, sold some Marvy punches and the owner was kind enough to order me one. Nancy is fabulous! If you want something, she will get it for you and she will ship it too!  Recently I just came across an on-line Canadian store in my area and I was able to purchase the scalloped oval. Too cute! I know I’m going to be trying it out soon!

jks-scalloped-punches.jpg

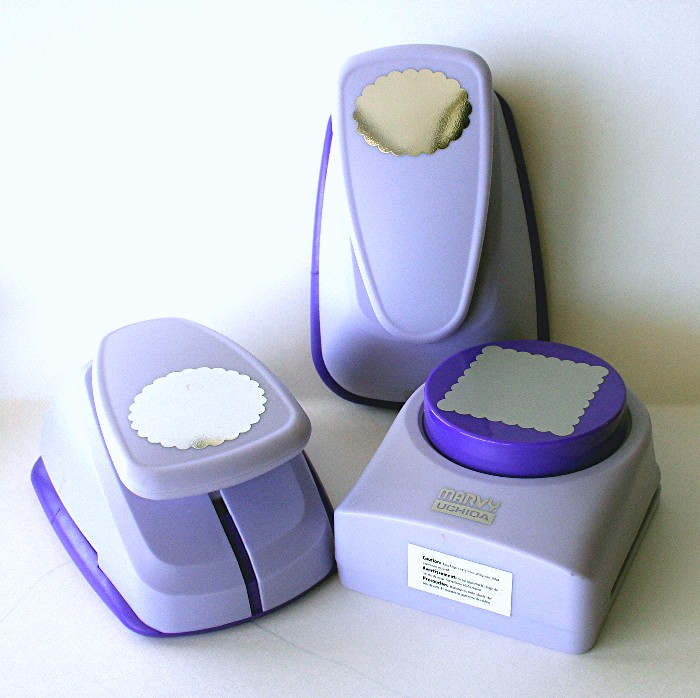
What I love about Scalloped Punches…

  • Easy to use
  • Coordinate well with each other…the mega fits perfectly with the giga…etc.
  • The new clever lever is so easy on the hand
  • Great variety of sizes for layering
  • Sizes are color coded for easy use – Giga punches are all purple, Mega are all pink, etc.
  •  Scallops are in
  • Fresh, fun look

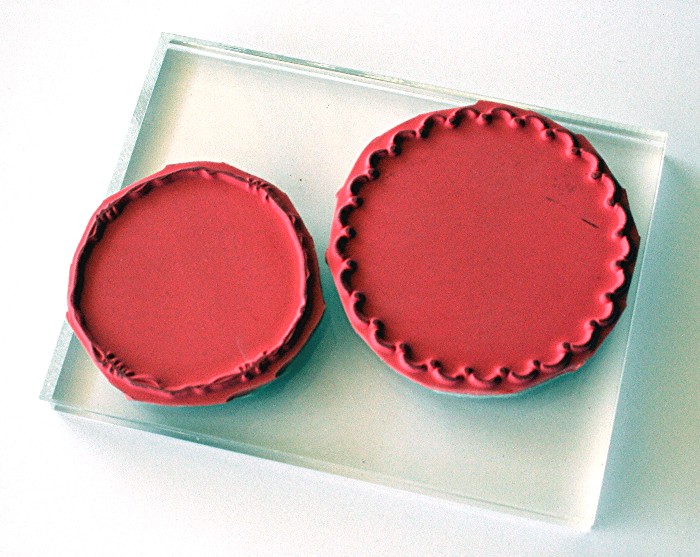
Gina K’s New Scalloped Frames and Doodles

This is just the cutest idea….Gina K stamps that perfectly fit the scalloped punches! So fun and easy to get the perfect border. Each set comes with four stamps…two to fit the outer scalloped shape and two to fit in its matching inner shape. I had the Giga Scalloped circle set and just bought the mega circle to match it so I have that set. Gina also carries sets for the Mega Scalloped Circle, the scalloped ovals and the square. I have a hunch there are more new styles on the way too!

jks-scalloped-stamps.jpg

Where to buy….

  • Gina K is now selling scalloped punches as well as her great coordinating stamps!
  • Papertrey Ink is taking pre-orders for their scalloped punches…the whole entire line!
  • In Canada, check out this on-line store I recently found…Scrappin’ Great Deals!
  • In London, Nancy from Stamp Art is excellent at ordering things in.
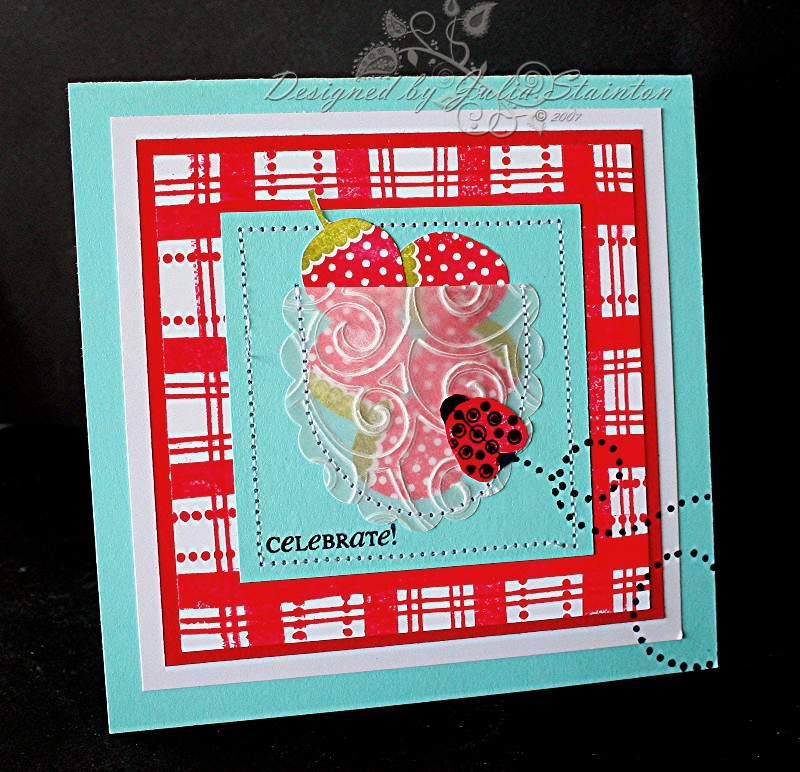
How to Use Them

  • stamp on them
  • Use as flowers
  • Punch patterned paper for a mat layer
  • use the negative space to sponge a shape
  • emboss them
  • pair them up with coordinating stamps

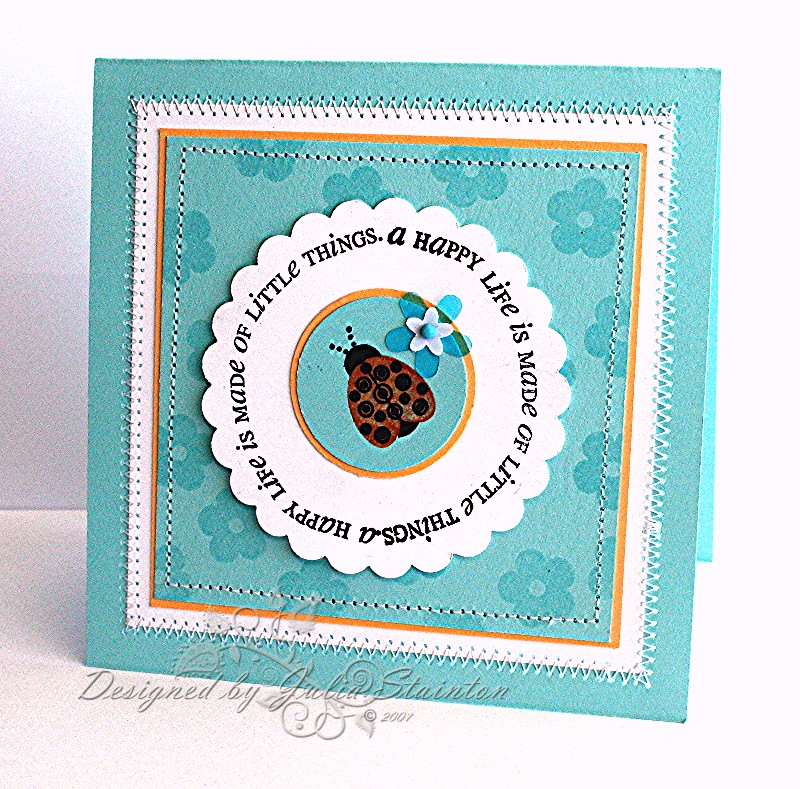
Funky Bird Card Design

jks-laugh-every-day.jpg

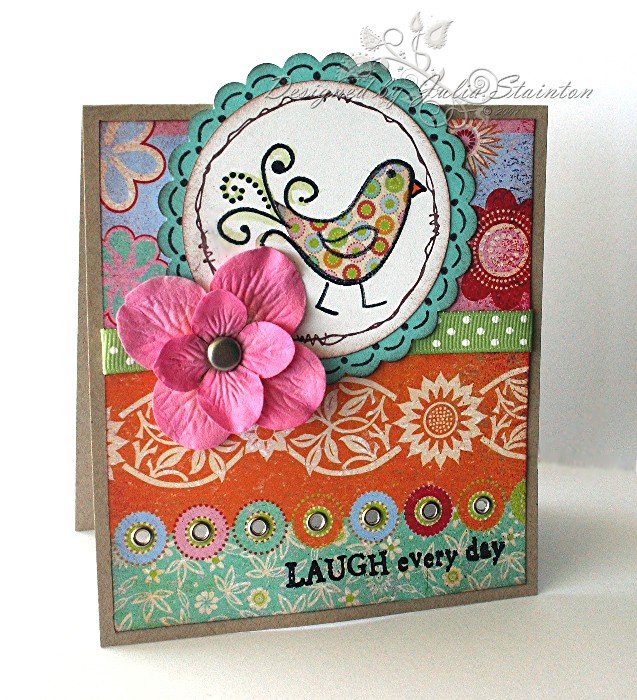
For this card design, I was inspired by quite a few things, mostly my new punches and a new stamp set. This is a fun, funky card….a little different from my usual! I just had to try out this little birdie from my new Autumn Leaves set…so fun and so in right now! I stamped the little bird on the punched circle cardstock and then again on some designer paper by Basic Grey, the 6×6 Romani paper pack. After paper-piecing the bird, I watercolored his tail and then stamped the doodled frame around it. The Cool Caribbean layer was first stamped with scalloped stamp and then punched with the Giga Scalloped circle punch.

Quick Tip: It is generally easier to stamp the design first, then punch by flipping the punch upside down to center the stamping and then punch it out.

To make the card base, I knew I wanted to have the scalloped circle pop up above the card. To do that and to still be able to put it into and envelope, you just cut down the size of your card design the amount that you want the circle to stick up. For this card, I trimmed off 3/4″ off the bottom of this card. I then added a layer of the fun Romani 12×12 size paper, taking care to get the elements I wanted at the right places. After sponging the edges with Close to Cocoa ink, I tucked a little ribbon across the design and adhered to the card base. I then attached my scalloped image layer to the front of the card, being careful to apply glue just to the bottom 3/4 of the design so that it will flip when the card is openend. A darling Cherry Blossom Prima was added for interest. I couldnt’ resist pulling out my Crop-a-dile again. My Crop-a-dile week may be over but don’t think you won’t be seeing it again! LOL I inserted silver Making Memories eyelets into the circle designs on the paper. To finish it off, I stamped a saying from a new Hero Arts stamps set I picked up today that I feel goes perfectly with the card…Laugh every day.

Supply List:

Cardstock: Kraft, Whisper White, Cool Caribbean – Stampin Up

Patterned Paper: Romani 6×6 paper pack, Romani 12×12 paper – Basic Grey

Stamps: Autumn Leaves, Giga Scalloped Circle set – Gina K Designs

Ink: Black, Close to Cocoa, pumpkin pie – Stampin Up

Other: ribbon – Michael’s, Prima Cherry Blossoms – Prima Marketing, silver eyelets- Making Memories, Crop-a-dile – We R Memory Keepers, large brad – Creative Impressions, Punches – Marvy

A Fresh Little Card…

I love Cool Caribbean. I think you probably know that by now! 😉 I wanted a fresh look for this card, pairing up my scalloped circle punch, the Little Lady stamp set and some fun new sequins. This was actually to be Saturday’s entry with my {C’est Bon} for Sunday, but seeing as I haven’t been on this blog in 48 very long hours (LOL) we are going to have to play catch up. Come back Monday for the {C’est Bon} entry and another one of my recommended things. 🙂

A Happy Life

jks-happy-little-card.jpg

For this card design, I first punched out my white giga scalloped circle. I laid a clear acrylic block on top of the circle and arranged my sentiment into a semi-circle to fit perfectly around the edge of my scalloped circle. The sentiment was then inked and stamped twice to get a circular effect.

The little ladybug image was stamped with the apricto ink onto a caribbean circle and then matted with apricot cardstock. I used a square layout format and the main Caribbean layer was stamped with the little flower from the Little Lady set and then embossed with clear embossing powder. I then stitched my layers together with my sewing machine to add interest and I love how it holds it all so neatly and firmly together. The darling little flower sequins and itty bitty brad are by Queen and Company.

Supply List:

Cardstock: Cool Caribbean, Whisper White, Always Apricot

Stamps: Little Lady – Papertrey Ink

Ink: Black, Always Apricot – Stampin Up, Versamark – Tsukineko

Other: sequins & brad – Queen & Company, Giga Scallop Punch – Marvy, sewing machine, clear embossing powder

Technology is a wonderful thing…

…when it works! I’m so glad to be back on-line! Sorry if you visited this past weekend and my blog was down. When the Splitcoaststampers site crashed, all the SCS blogs went too! Yikes! I’ve missed you all and missed two days of posting! Come back and visit soon. Hopefully I’ll have a chance to get some of my entries posted! 🙂 Thanks for your patience! 🙂

 I’ve also lost anything that was posted on Friday and part of Thursday, so I’l be reposting Fridays entry when I get some time.