Monthly Archives: May 2007

The Real Me…not! LOL

How do you like the real “me”?! LOL Check out my sidebar for my darling new Yahoo Avatar! I was surfing some blogs and came across a super-cute Yahoo Avatar on great blog by Taylor Usry.! I just had to try it out for myself.

Yahoo Avatars are free and so cute! All you need is to be registered with Yahoo which I already was for a usergroup. You can change the clothes, change the hair, face shape, skin tones, backgrounds etc. I tired to get as close to me as I could. LOL Obviously I didn’t succeed. There are no options for laugh lines and my love of chocolate. I was so excited to find a cute little Toronto Harbour background option. I’m not a big city girl but it’s pretty close in the scheme of things and it adds a little Canadian flavour, eh? 😉 CN Tower, Skydome, Sailboats, Centre Island Ferry…fun!

Try it out for yourself! It is like virtual paper dolls.:)

Edited to add….Some of you are having difficulty exporting your avatar. To do this, on your avatar page, there is a box on the top right side with Alerts, Postcard, Export, Message Board. Click on the export. From there you should be able to get the HTML code to paste into your blog. HTH! 🙂

Going, going, gone! This Week’s Ways to Use it Challenge!

Only one month left before the huge list of Stampin Up’s retirement sets is gone!  Lots of my faves are on that list…some really great sets. I’m sad to see them go but I just have to think, Stampin Up must have a really great upcoming line-up just waiting to be revealed! I’ve seen a sneak peek of the new hostess sets…way too cute!

This week the challenge is to find Way’s to Use the retiring sets. For those of you who are demos, get a little more use of them before they retire, add a little inspiration to the gallery, maybe even convince a few people that they really do need that set! 😉 If you would like to see the list of retiring stamp sets, here it is … Going Out in Style. If you dont’ have any of these sets, you may still play along by using another company’s retirement list sets. Sorry I don’t have any links for those! To play along, visit WT115. Everyone is welcome!

Spring Smile

jks-spring-smile.jpg

Now for this card, I did get a little off track on the challenge! LOL For some strange reason, I though that Lovely as a Tree was on the retirement list! NOT! I had this card half made last night and there was a LOT going on. I just did not have time to start again. So I salvaged it and made it work! My favorite French Script Background stamp is retiring…sniff, sniff. Love that one. So versatile! Also retiring is Simple Sayings 2. Works for me! I squeezed them into my design and voila…a WT115 card! 🙂 Not originally what I had intended but it works!

This card was inspired by the new gorgeous Primas I bought from Jacksonbelle. I had brought them upstairs to my desk. I still had this Tres Jolie paper on my desk and it looked perfect with the flower. Hmmm…off to find a stamp set. I came across Lovely as a Tree (which as I told you previously, thought was retiring) and thought it would be interesting to pair the cherry blossoms up with the trees and also make a more feminine card, giving it a fresh new look.

For the trees, I stamped them with Black Stazon on watercolor paper. I love how easy watercoloring is on the paper. I pulled out the cool Caribbean, Regal Rose and Old Olive colors from the print and worked them into the image. After allowing to dry, I distressed the edges with my Heidi Swapp Edge Distresser. Cute little inexpensive tool that bought last fall. So much more affordable than some tools I’ve seen.

Quick Tip: Speed up drying time when you are watercoloring by drying your image with a heat gun.

After matting the image with Chocolate Chip, I layered the background paper and adhered to a 5.25″ square card base of Old Olive. Now this is the point where I stopped and went downstairs to check on the kids. I saw my catalogue that I had inserted a couple print-outs of the retiring list into and took a peek. Yikes! No Lovely as a Tree! I frantically scanned the list. Oh! I found French Script…sentiment…Simple Sayings 2. OK..great…I’m good.

I worked the French Script into the design by stamping it in Black Stazon on a sheet of acetate. For the sentiment, I inked up just the smile part of the “you make me smile” stamp and added it to the bottom. Finally, I added on my Cherry Blossom Prima with Crystal Brad center and to tied it all together with a piece of gorgeous huge ivory ric rak. It is by Creative Impressions and I bought it at my local scrapbook store, The Scrapbook Studio.

Take Two… Be Happy with Romani!

It’s been a few weeks since our last Take Two Challenge and we’ve decided to give it another whirl. If you are new to my blog, my good friends Trudee, Michele & Lindsey have a Take Two Challenge every few weeks. It started out as an idea I had to take two products, usually a stamp set and a paper line, put them together and demonstrate how different ideas you can achieve with the same products. Lots of fun for us and every time, it is so interesting to see how different the designs are! I’m always so excited to see the other card designs. As I write this, I have no idea what the other designers have come up with and just can’t wait to see. It is so much fun when we all hit publish! This Challenge we’re decided to “Be Happy with Romani”. That means we’ve taken the Be Happy stamp set from Stampin Up and mixed it up with the Romani paper line from Basic Grey. A fun combo to be sure! To see the other designs in this Take Two challenge, check them out at Follow Your Bliss, Embellished By Jacksonbelle, & Paper Cuts. I know that is where I’m headed! 🙂

Smile & Be Happy

jks-smile-and-be-happy.jpg

This card is a little different from my usual style. It has been a long time since I pulled out my Be Happy set! It is really cute and just worked so well with this Romani paper from Basic Grey. I first came up with my color combo by picking out the white, light teal and pumpkin colors from the designer paper. I love the funky look. I decided to go with a 5″ square card base format as I find the squares, so easy to design with and it gives me more room to add goodies. You know I like goodies! LOL

Quick Tip: For fun and easy color combos, pick colors out of some designer paper for inspirations. It can be amazing to see all the interesting color combos you can find in the patterned paper…some that I would NEVER think of on my own.

The white cardstock base is layered with pumpkin pie cardstock and then my light teal color that I picked up at Michael’s. I was looking for an alternative for my much loved Cool Caribbean. While definitely not a match, I loved its fresh look. On the light teal layer, I stamped my retired Dots and Daisies background in white craft ink and added little dots to the centers with my Signo white gel pen.

Next came the Romani layer. I used the 6×6 paper pad of Romani that I purchased from Jacksonbelle’s ebay store. I love the size and ease of use for cardmaking not to mention the price. 🙂 After dotting all the little flower centers with a glue pen, I sprinkled them with glitter and allowed to dry. Along the left side of the paper, I added a row of eyelets and then tried out my Paper Tagger in one of the holes.

I’ve had my Paper Tagger from Around the Block for a few months. I bought it at my local store, the Scrapbook Studio. I was having problems with it and finally I phoned Around the Block. They were SO helpful! Fabulous customer service. So now I’m loving my Paper Tagger! It was an extra bonus that I received these darling little metal tags from Around the Block in my Cards magazine goodie box this month. This little burnt orange flower works perfectly with this paper. Fun!

For the flowers, I stamped the flower stamp twice, cut them out and layered them. It may be hard to see in the photo but I stitched little zig zag stems on the card as well. For final little touches of bling, I added small rhinestone stickers from Hero Arts to the center of the metal flower tag and to the dot of the i on “smile”.

Wishing you all a very happy day with lots of smiles! I’ve decided I’d like to give this card away as a RAK. If you need a little cheering up and would like this card…send me an e-mail, or leave a comment below saying you would like it and it’s yours. First come, first serve! 🙂 Sorry…it is now claimed!

Supply List:

Cardstock: Whisper White, Pumpkin Pie – Stampin Up, light teal – Michael’s

Patterned Paper: Romani – Basic Grey

Stamps: Dots and Daisies, Be Happy – Stampin Up

Ink: Pumpkin Pie, White Craft, Ruby Red – Stampin Up

Other: white eyelets – Making Memories, Crop-a-dile – We R Memory Keepers, Signo White Gel Pen, glitter – Stampin Up, Glue pen –

Almost Two! & a Little Monkey Business…

jks-joshua-ball.jpg 

I just can’t believe how fast the past two years have flown by. Joshua will be TWO on Thursday the 31st. He is such a little darling, but such a little rascal too! His dad gave him a haircut last week and he looks so much older…sniff, sniff. Super cute but I know my baby is growing up.

 This is a card I made for his birthday. He and Benjamin love reading Curious George together, climbing and getting into mischief too! When I saw this darling monkey paper and sticker line…I just had to make a card for him with it. I know he’ll love it. He loves cards for some reason. I have to be quite careful not to leave any design work where  he can get his hands on it as he likes to inspect my work! 🙂

Celebrate Little Monkey
jks-little-monkey-celebrate.jpg

Inside: Happy Birthday to my Little [Wild One]

jks-little-monkey-celebrate-inside.jpg

For this card, I was focusing on the patterned paper….lots of inking and I sanded the stickers, but very little stamping. I found the darling little sentiment from Love Ya Bunches and thought it would work perfectly with this card. I added it to the inside sentiment which I printed off on my computer.

Quick Tip: Sand or ink stickers to add interest and texture to them. I am not a huge sticker fan but they can be fun and easy, and with a little altering, work really well.

There were so many circular and rounded shapes on the patterned paper that I played off that feature for my layout. For some fun texture, I layered the elements over some frayed twill and attached it with eyelets set with my Crop-a-dile.

Supply List:

Cardstock: Chocolate Chip, Very Vanilla, Bashful Blue – Stampin Up

Patterned Paper: Monkey Business line – Reminisce

Stamps: Love Ya Bunches – Stampin Up

Ink: Chocolate Chip – Stampin Up

Other: Monkey Business stickers – Reminesce, eyelets – Making Memories, circle punches – EK Success, twill tape – Stampin Up, Crop-a-dile – We R Memory Keepers

Some Morning Humor…

I needed a chuckle this morning and Benjamin just provided me with one. Don’t you just love the things that kids come out with?! I love the way they think, the way they view the world, their innocence.

Mom….why do killer whales eat seals?

Well, I guess they get hungry and need something to eat too.

Oh.        I like seals…                  Can’t they eat bananas?

This is probably one of those “had to be there” things but I thought I’d share as it brightened my day. 🙂 It is always a good thing to take a few moments out of the business of life and enjoy a child or look at the world with their sense of wonder and joy. Take the time today to lie on the grass, watch a butterfly, eat a popsicle, blow some bubbles, smell the flowers. I’d love to hear back from you here if you did!

Updates & Links…

First of all an update on my mom and mother-in-law for those of you who are interested. My mother-in-law came came through her lumpectomy well. They removed a couple of lymph nodes as well but did not have to remove them all so we were quite grateful. The surgeon feels that it was very successful and after some radiation treatments, she will be healthy again.

My mom has been having a rough time. On Saturday she was hospitalized again due to complications of the Melanoma. Please continue to pray for her as she truly needs your prayers right now.

Our “little” family….Benjamin is feeling much better and over his Strep Throat. James is currently on antibiotics for Strep and Bronchitis and now Heather seems to be coming down with something as well. Yikes! If I take a while to get back to you, please bear with me…we have a lot going on right now!

Things to Check Out…

  • Kid’ Crafts: Do you have any craft ideas that are great for kids on your blog or web-site? The craft ideas can be made by kids, designed for kids to make or made for kids themselves…doesn’t matter. We just want your ideas at Craft Critique for our Kids Crafts Carnival. Share your ideas and reach the Craft Critique readers! Hurry! The Kid’s Crafts Carnival is on Wednesday so you need to submit your link by Midnight (CST) Tuesday May 29th! For more info, click on the link in this entry!
  • A Muse Art Stamps: I’m sure you’ve heard….but just in case you haven’t….A Muse Art Stamps is having a fabulous anniversary sale! Seven pages of darling stamps are on sale at 25% off and if you order 6 or more, you get an additional 15% off. I just had to get some darling beach stamps…couldn’t resist! 🙂 For all the details, check it out on Linda’s Blog…Happy Birthday News.
  • Snap Stamps are currently slanted for retirement.. If you love Snap Stamps and would like to see them continued, you CAN make a difference. Please e-mail [email protected] and let them know that you wish to support the continuations of Snap Stamps, what you like about them and what you would like to see produced. Ellen Hutson has more details about this HERE. If you’d like to read more about Karen Foster Designs Snap Stamps, I wrote a tutorial/article on them a couple weeks ago…Karen Foster Snap Stamps {C’est Bon}.
  • Lizzie Anne Designs: The new release stamps are now available! Yeah! So darling…you need to check them out HERE! While you are there, sign up for their newsletter. I got mine this morning and it looks great!
  • Gina K Designs: Gina has some very cool new stamps called Scalloped Frames and Doodles that are specially designed to fit your Marvy Scalloped Punches. How cool is that?! She also has some very fun new summer releases…all with a beach theme.
  • Cards for Shane: Shane’s birthday is just two days away. There is still time to send him a card and help make his birthday wish come true. For more info see… Shane’s Wish. His address is …

Shane Bernier
PO Box 484
Lancaster, Ontario
K0C 1N0
Canada

It is a normal sunny Monday here in Ontario Canada. We are off to work, off to school and off to the doctor AGAIN! Happy Memorial Day to all my American Friends. Enjoy!

Dymo Label Maker {C’est Bon} …includes embossed vellum tutorial

The Dymo Label Maker has been around a very long time, the Fifties to be precise. I remember my Dad owning a very basic model in the 70’s (yes, I can remember most of the 70’s LOL) that he used for labelling electrical paraphenilia on the job. I thought it was the coolest thing and was always trying to get permission to label things. Since then the label maker has gone through many changes. Electronic Models are now available and I’ve had fun playing with all the new options on those too at the office when I go visit. You can now change the fonts, colors, type size etc. and I’ve actually labelled quite a few Iris carts stuffed with craft supplies or toys to hopefully keep things where they belong.

jks-dymo.jpg

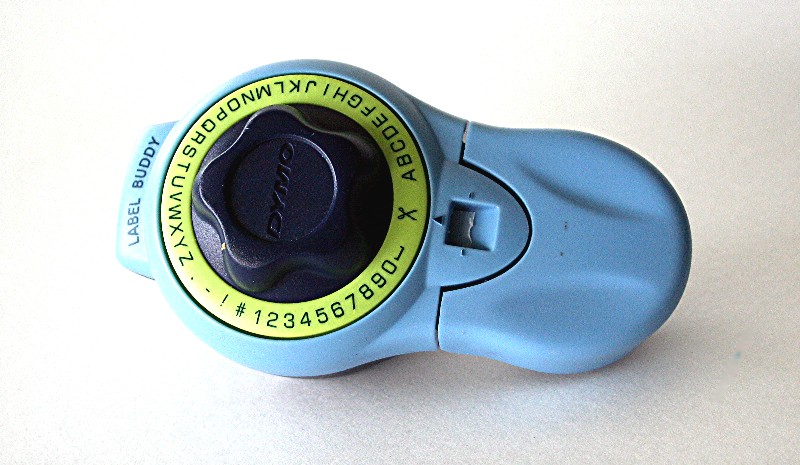
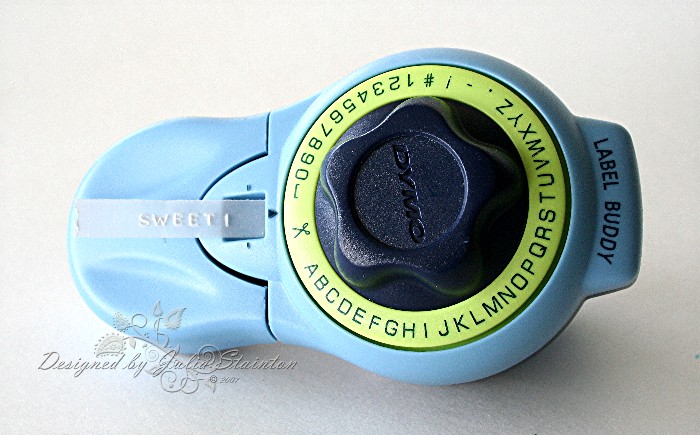
When I saw this classic style label maker at Michael’s over a year ago, I just had to buy it! It was so inexpensive and I still haven’t used up all the label tape that comes with it. I love the classic or retro look you get with it. It has a bit of an edgy or industrial feel to it, making it perfect for use on masculine or teen designs. The tapes are very sturdy and weather proof and come backed with a very strong adhesive. Easily found refills come in black, red or blue. The way the label tapes work is by hand pressure. The applied pressure presses the die into the label tape and embosses it. The raised lettering is always white because of the embossing process.

The Dymo Label Maker is extremely easy to use. You may need to hide it from your kids if you don’t want to run out of labels. 🙂 Simply turn the dial to the character you wish to print and press firmly on the handle. It atomatically clicks ahead to the next space….just turn the dial again and click. There are spaces you can click on to leave a space between words, as well as punctuation marks and numerals. A lot of stamp sets do not include numbers and I love having this to fall back on if you want to personalize a birthday with a child’s age or an adult’s milestone birthday.
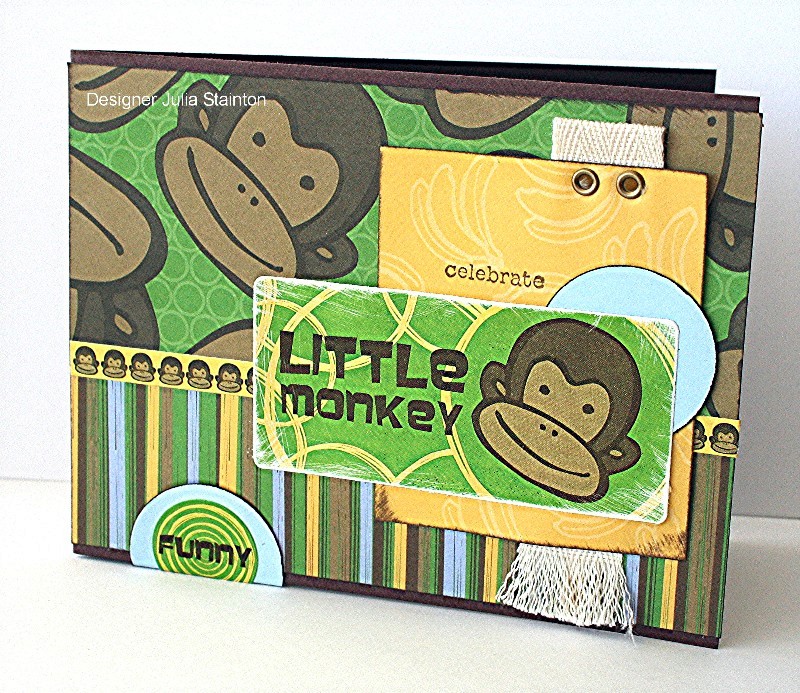
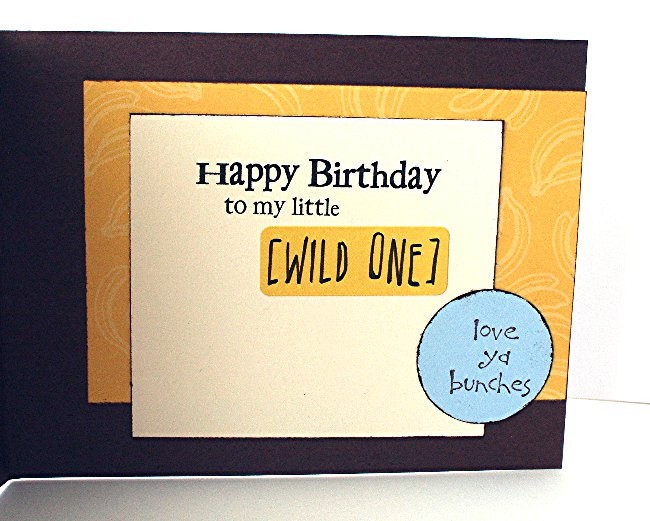
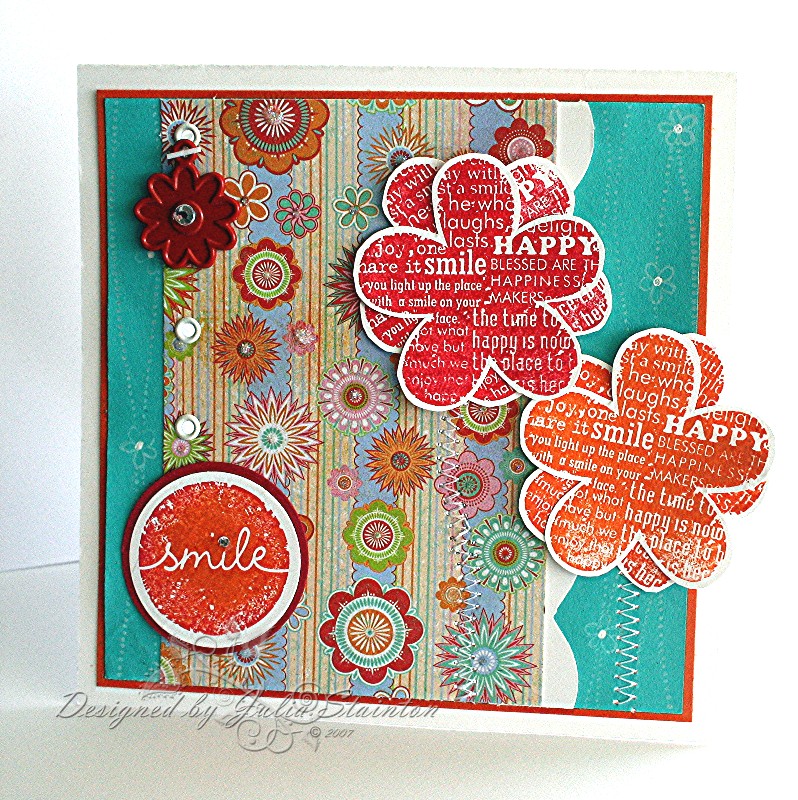
Some examples from my blogto find the instructions for these cards, just enter Dymo in my search box in my sidebar.
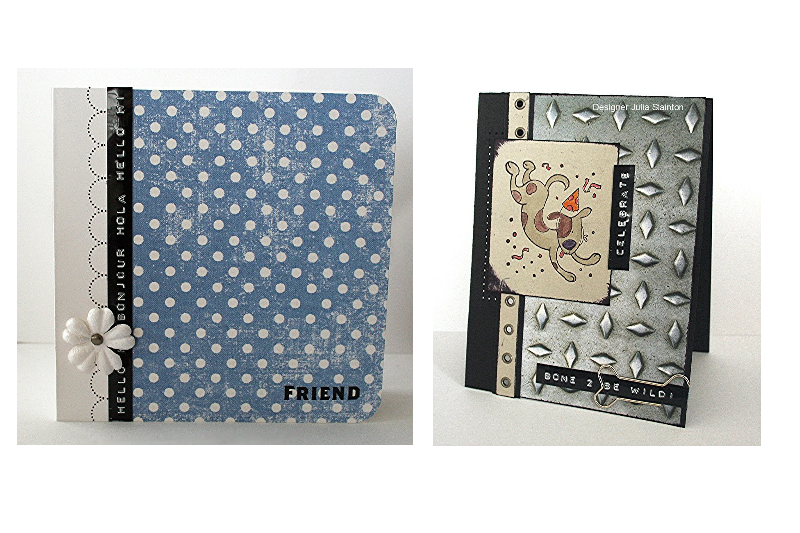
jks-dymo-cards-2.png

Use Dymo Labels…

  • to organize and label your craft products
  • as an accent
  • to write the perfect sentiment
  • as a border
  • use small strips for journalling
  • try fun phrases License Plate or Computer shorthand style to add a cool touch  {URAQT} for example
  • When journalling, print or computer generate your paragraph and highlight certain words by inserting a label printed word. Make sure you plan ahead and leave enough space for this
  • run vellum through it…see below tutorial

Embossed Vellum Tutorial

jks-vellum-dymo-closeup.jpg

A very cool idea I disovered last year is that you can emboss vellum in your label maker. I just love the look…still fun but with a fresh new look and better suited for softer looking projects. Doing this is simple….you only need one supply, Vellum cardstock. You do need the heavier weight of cardstock vellum for this, as the lighter vellum just does not feed well through the label maker.

jks-dymo-vellum-insertion.jpg

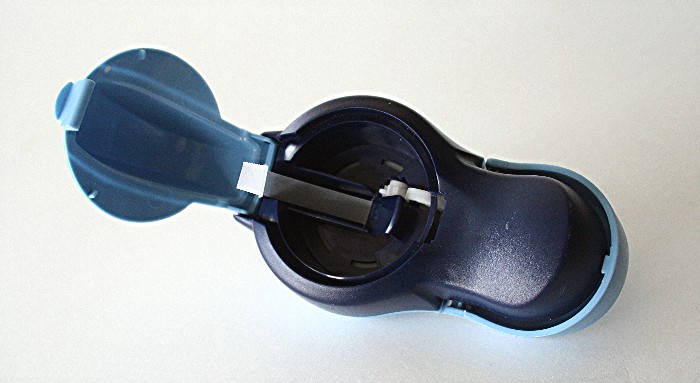
I use the Stampin Up cardstock vellum for this technique. It seems to be the perfect weight. Simply cut your vellum the long way with your paper trimmer to just under 3/8″ wide. Open the back of your label maker and remove the label tape. Carefully finsert the vellum strip into the feed. Press lightly on the vellum and click the handle until the vellum grabs and is pulled through. To get the right pressure needed to emboss the vellum may take a little more practice than just using labels. I suggest running a practice strip all the way through first until you get the hang of it. Too little pressure won’t emboss the vellum enough to read well and too much pressure will actually tear the vellum…not the look you are going for! 🙂

jks-dymo-vellum-sweet.jpg

Quick Tip: The vellum can be a little more difficult to cut with the label maker. You may need click it forward until you are able to trim off with scissors.

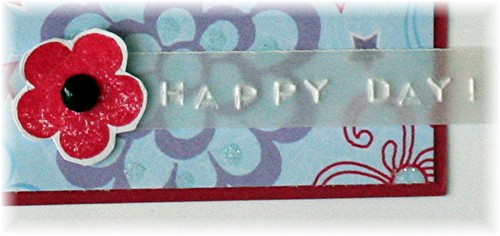
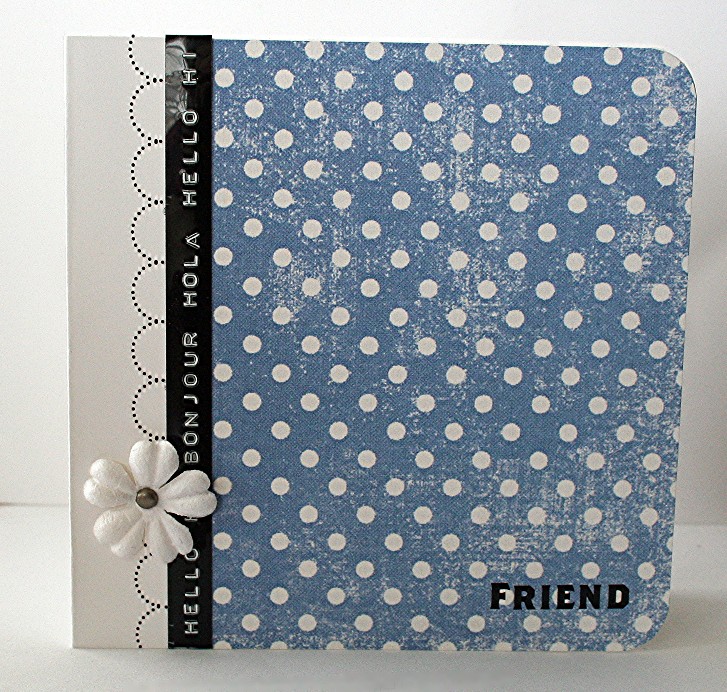
Little Lady Birthday Card (for close-up, click on card)

jks-little-lady.jpg

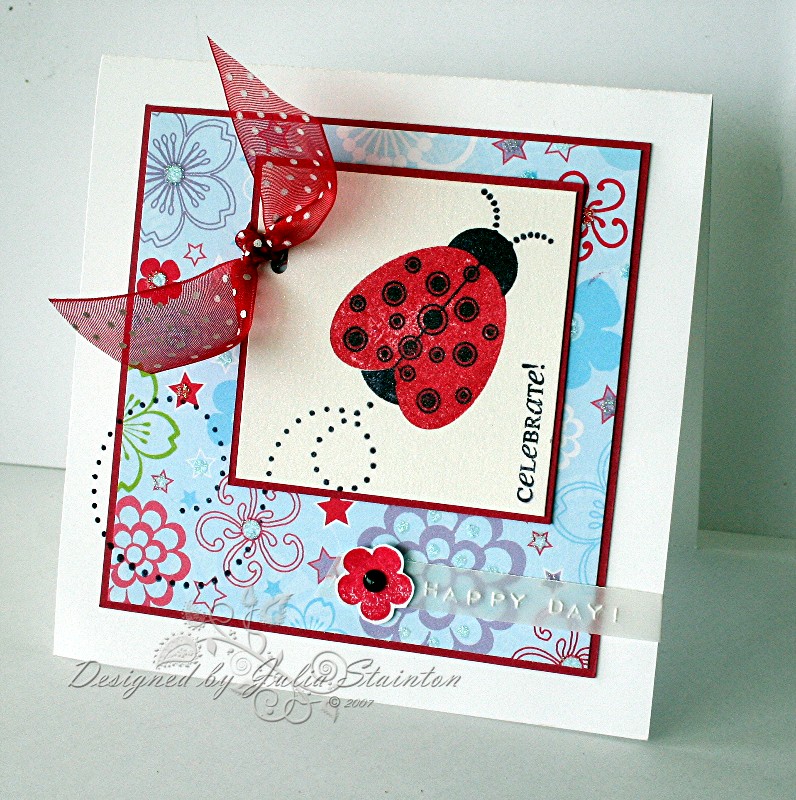
I was excited to finally get my new Papertrey Ink sets in the mail on Friday. It seems they got caught in Customs at the border…the joys of living in Canada! This is the sweetest set (Little Lady) and I just love it! For the main image, I inked up my new Ladybug with Rose Red ink and stamped it onto SU Shimmery White cardstock. I then inked up the second dotted stamp and stamped it over with basic black ink. After stamping the trail, sentiment and the little antenna, I matted the image with Rose Red.

For the main part of the card design, I created a 5″ square card base with Whisper White cardstock. I then layered on the darling pre-glittered, patterned paper from Provocraft. I don’t think the camera picked up the fun glitter on this paper, but it is so pretty in person. The layer was once again matted with Rose Red cardstock. I then lined up where my main image would go and then stamped the remainer of the trail across the layers of the card. I loved how easy it was to do this with the clear stamps.

For finishing embellishments, I punched the image layer and tied on a red dotted organdy ribbon. The color and the dots seem to go so well with the image. Lastly we come to the vellum punched label strip. I punched out Happy Day, leaving enough vellum on either side for attaching to the design.

Supply List:

Cardstock: Whisper White, cardstock Vellum, Rose Red, Shimmery White – Stampin Up

Patterned paper: Provocraft

Stamps: Little Lady – Papertrey Ink

Ink: Basic Black, Rose Red – Stampin Up

Other: Dymo Label Maker: ribbon – Michael’s, brad, punch

Each week I write a {C’est Bon} article about things that I like, products I love to use, good things I want to share with you. All {C’est Bon} articles are my own opinion and I am in no way affiliated with any company featured in this article.