Category Archives: Holiday

Noel

Christmas is coming!

Just 45 more days. Can you believe it?

I have to say it boggles my mind. I seriously need to get organized and get busy!

Noel

Looking for a fun card idea that uses just one piece of paper?

  1. create a square card
  2. grid off four sections and sketch in block letters.
  3. cut out with craft knife.
  4. ink edges
  5. tie buttons with twine and adhere

Quick Tip: use double-sided patterned paper so that you have a print on both the inside and outside of the card.

Now that I’ve scared you all. Go now and make a holiday list. Go, go, go…

🙂

a little holiday spirit

I know it’s not even Halloween yet, but is anyone ready for a little holiday spirit?

I always find the key to enjoying the Christmas season is starting to prepare early. It can be such a wonderful but chaotic time! I’m happy to say that I’ve started my Christmas shopping. A little at a time is also easier on the budget.

I’m excited to have the latest issue of Paper Crafts Magazine, November/December 2010, on my desk to get some holiday ideas spinning. There are some really fabulous ideas! One of the columns, Designer Challenge, is all about using non-holiday product to create your holiday cards. Love the ideas here! So fun and they use things you may already have on hand.

I had a few fun cards picked up for this column and have one of them to share with you today. All you need is some cardstock, a computer and a few accents.

Christmas Text Message Card

Want another idea? One of my cards is an on-line feature and you can find it here.

Have a creative day!

Boo!

Do you love decorating for the season?

How about a fun Halloween Banner that can be restrung from year to year?

I had an absolute blast creating this Boo Banner for the CLASSroom. As this is my first project after not creating for two weeks, I’m not sure if it’s the fun details or the fact that I’m creating again that has me so thrilled with this project.

A little masking, stamping, glitter, collage, paint and some fun goodies all mix together for this large banner. I know the above photo is small (click to enlarge if you wish) but each pennant is 5″x7″ in size and makes a great wall hanging.

I hope you’ll join me today here in the CLASSroom for some fun techniques, lots of closeups and design details.

Thanks for dropping in!

Thanksgiving Leaves and Making the Grade

This week has really gotten me down. A nasty cold/flu/whatever has had me sick all week and I haven’t done the slightest bit of creating. Sigh. Hopefully I’ll be back to normal soon.

I was thinking what I could share today and I came up with two things. Some photos from our Thanksgiving on Monday and a new class I’ll be teaching next week. I’m hoping I’ll have my voice back by then!

Getting into the fall theme was quick and easy for decorating my table on Monday. Sometimes it’s best to go simple, especially when there is a turkey to be stuffed and some pies to bake.

These sweet leaves were die cut using the Tattered Leaves die and the new Lily Bee Design Catching Fall line of papers. To add in a little texture I die-cut some canvas and some kraft cardstock. I thought it would be fun to write names on the kraft leaf at each place as a place marker. It ended up not happening but maybe next year!

Quick Tip: Save the die cut leaves for another project when finished using them. Stay tuned as I plan to do that!

My next class is called Making the Grade. Some beautiful Crate Paper makes up a 12×12 layout and we’ll be creating a little gift bag as well.

scrapbook-memories.jpg

Scrapbook Memories
1890 Hyde Park Rd.
London, Ontario

519-474-2665

Wednesday, October 20th
6:30 – 8:30

Have a great weekend!


do you see what I see? a challenge.

So this card is a little out there for me. A little “cuter” than I tend to create but oh so fun to play with all the same.

One day I was in my studio creating with some Zva Creative bling and I started seeing wings in the flourishes. Add some doilies, a couple buttons, a felt flower for the hair and a tiny crystal “O” for the halo and I had an angel. Fun!

I thought this would make a fun challenge. Pull out those embellishments and see what you can create. What do you envision your embellishments becoming? I’d love to see.

And thus another Ways to Use It Challenge is born.

Want to play along? Be creative and use your imagination! Please join us here for the challenge.

Doily Crystal Angel Card

Supplies: kraft cardstock by Bazzill, Jenni Bowlin cardstock by Coredinations, sewing machine, doilies by Little Yellow Bicycle, buttons by Basic Grey, felt flower, crystal clear alphabet and crystal flourish frame by Zva Creative

I also wanted to give a huge thank you to everyone who has taken the time to nominate me. (see below post if you missed it. It’s open until Monday) I have my fingers crossed.

{friends} You rock!

Hugs,

Is It Too Early?

For a little Christmas?

I thought it would be fun to get a little head start on the holidays. I know how quickly time flies and why not save myself a little stress later on. Now that summer is officially over, I’m having a wonderful time settling back into a routine, getting all those home jobs caught up after a summer of having fun on the water and generally, just enjoying being at home. I’ve even pulled out a recipe I haven’t used in 10 years and am making pickles!

As today is Thursday, it’s time for another Ways to Use It Challenge. Want to play along? This week pull out some holiday supplies and get creating. It feels so good to be ahead of the curve and have a good start underway. Here’s the challenge link.

Rustic Noel

rustic-noel.jpg

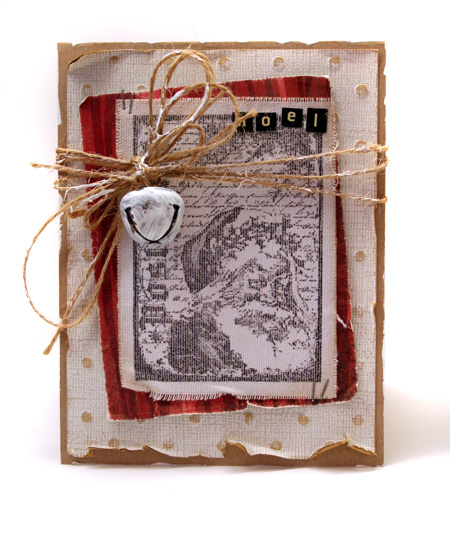
By stamping on Sticky Back Canvas, you get a lot of fun texture on your image. To get the cleanest impression, make sure you stamp your image before adhering the canvas to the project. Ink your stamp well and test your ink on a scrap. I particularly like the Jet Black Archival Ink by Ranger for stamping on difficult surfaces. Actually, I love this ink for stamping everything except images I want to color with my Copic Markers.

There is a lot of texture on this card but it ties it all together. If you want to add a lot of texture, don’t overdo the rest of the design to keep it from getting too busy.

Supplies: Santa Letter stamp by Stampers Anonymous, kraft cardstock by Bazzill, Jenni Bowlin white cardstock by Coredinations, Claudine Hellmuth Sticky Back Canvas, edge distresser, Tiny Attacher by Advantus, Brushed Corduroy Distress Ink by Ranger, twine, Jet Black Archival Ink by Ranger, jingle bell, Studio Line Gesso Paint , 6×6 paper pad by Basic Grey, Black Tiny Type by Cosmo Cricket

Happy creating!

Adore Him…A Christmas Day Wish

Merry Christmas! Thanks so much for stopping by to visit. I truly appreciate each one of you who do.

Today I just wanted to share a card with you that remembers the true meaning of Christmas.

O Come let us Adore Him

o-come-close-up.jpg

I’ve written a tutorial for this card on the CLASSroom today. Check it out here if you’re interested.

I also want to wish you and yours, the merriest of Christmases and a year of blessing to come.

With love,