Monthly Archives: May 2010

forever & ever

Hooray for Friday! It’s the Victoria Day long weekend in Canada and the first long weekend of the summer is something to celebrate.

I’m actually in Buffalo this morning at the Creating Keepsakes Convention with my sweet friend Becky Olsen. I can’t believe I finally got to meet her after all the hours we spend on the phone. Do you have any long distance friends you haven’t met before? I find it just amazing how the internet can bring people together. I’ll have some photos to share after I get home. We are having FUN!

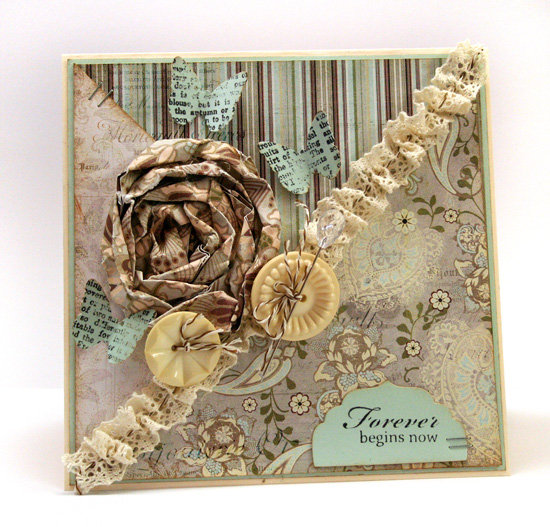
Today I’m back in the CLASSroom with a tutorial on ruffled lace and rolled paper flowers. I hope you’ll join me here.

forever-begins-now.jpg

 Thanks for stopping by! Have a wonderful Victoria Day weekend!

Getting Creative

I love creativity. Love, love, love it! Finding a little time each day to do something creative just makes me happy.

A few exciting creative things are happening for me today and I’m seriously bouncing.

First…I’m off to CKC Buffalo! (check out the link…there may be one in your area) With a large family I don’t often get away and I can’t wait to have some creative fun. CKC is the Creating Keepsakes Convention with lots of fun classes and shopping and friendship. The best thing about this short little trip is getting to meet my very talented and wonderful friend Becky Olsen. I can’t believe that after all the countless hours on the phone I’ll finally meet her in person. Something tells me I’m not going to get much sleep tonight. 🙂

The other  exciting thing for me is I get to announce that starting June 1st I’ll be designing for the Creative Scrappers sketch blog. I’m really looking forward to it as I’m a huge fan of their sketches and love using them each week. I get to do what I’m already doing only as part of the team. How cool is that? I’m loving being back at scrapbooking in addition to creating cards, having some creative fun and preserving beautiful memories for my family. Congrats to the other designers! I’m looking forward to working with you.

csdesignbadge.png

You can see my Creative Scrappers layouts here.

Now if you’ve come here looking for the Ways to Use it Challenge…yes, it is Thursday and no, I haven’t forgotten about it. Because of my super busy adventure today, I’ve asked a guest hostess to host the challenge for me. Thanks so much Beverly! She’ll be posting the challenge here.

Lastly…if you’re looking to get a hold of me, with the long weekend etc. I’ll catch up on emails Tuesday.

Happy creating!

Boxed Up

What makes a simple gift special? A lot of the time, it’s the thought that counts…isn’t it? The gift may be humble, but for me, the time it took and the thoughtfulness of the giver makes it special. After all, you may get an expensive gift but if there is no love in it, it really doesn’t mean that much at all.

I thought it would be fun to box up a humble little gift of paper crafting embellishments for a friend of mine… just to make them a little more special. I’ve used the bright, fun and vibrant papers from the Hello Sunshine line by Lily Bee Design. Doesn’t this line make you think of summer?

friendship-box.jpg

I love the Lily Bee die cut frames. This one reminds me of a big flower and I’ve adhered it to the top of a scalloped round box. The box measures approximately 6″ in diameter.

edited to add…The tulle flower is a Lilly Bee Design embellishment. Thanks so much for the comments but unfortunately I didn’t make it.

friendship-box-side.jpg

Quick Tip: When adhering paper to a box or other altered project, make sure you use a really strong adhesive. I’ve used a liquid adhesive here.

friendship-b-close.jpg

Supplies: Hello Sunshine patterned paper, chipboard flowers, die cut frames and tulle flower embellishment by Lily Bee Design, Thickers Fabric letters by American Crafts, pin by Maya Road, twine, sandpaper and ink

Wishing you sunshine today!

Tweet Wishes

Some more Zva goodness today…this time paired up with October Afternoon. Some yummy felt flowers and half a flourish frame add some sweet embellishments to this vintage themed card. I just love those little birdies, especially for Spring. I’m so glad that nice weather has finally hit and it feels wonderful!

tweet-wishes.jpg

Supplies: Pearl flourish frame , rhinestone and felt flowers by Zva Creative,  stickers, Fly a Kite 8×8 paper pad and Wild Card by October Afternoon, Frayed Burlap Distress Ink by Ranger, sewing machine, button by Jenni Bowlin, lace, Pearl Pin by Maya Road, Tim Holtz Brackets Die by Sizzix

Have a beautiful day!

always have, always will

Another week, another card sketch. I know you’ll love this one as it’s super easy to use. This week’s sketch is sponsored by Gina K Designs. I was excited to be able to choose a stamp set for this sketch and chose Love Notes. The beautiful sentiments are timeless and will be used time and time again. Play along this week here for a chance to win a couple great stamp sets from Gina K….. or a guest designer spot at Card Patterns. Good luck!

always-have-always-will.jpg

I like to work ahead when possible so I actually made this card weeks ago. Isn’t this Girls’ Paperie line positively stunning. Makes my creation effortlessly beautiful. The beautiful bling and felt flowers are from Zva Creative. If you’re familiar with Zva flourishes, you’ll notice that I cut apart a flourish to create my own and better suit the layout of this card.

Supply List: cardstock, the Girls Line by Girls’ Paperie, Love Notes Stamp set by Gina K, Frayed Burlap Distress Ink by Ranger, trinket pin by Maya road, felt flowers and Ice and Fire Crystals by Zva Creative

Have a beautiful weekend!

capture the moment

Don’t you love all the possibilites of crafting. Seriously…the sky is the limit. There are always new ideas to use your supplies on and I love trying something new.

I was super excited to try altering this Prima Canvas Camera bag. It was a originally a canvas color. Shocking I know. 😉 This project was created for the CLASSroom and you can check out the step outs and how to’s here.

canvas-camera-bag-prima.jpg

While my camera is an SLR, my daughter’s is a point and shoot so I created it for her in a style that she will use. A fun way to capture the moement.

I love useful and super fun to create projects!

It’s Friday! Enjoy!

a little distressing

Whether it’s inking, sanding, punching or stitching, I love adding definition and interest to the edges of my papers. One of my favorite ideas for this is distressing the edges. It’s so simple to do. You can use a pair of scissors, an edge distresser or even your fingers. Today it’s time for another Ways to Use It Challenge and I’m challenging you to pull out your edge distresser and find ways to use it. Here’s the challenge!

For this project I’ve  used a Tonic Edge Distresser to add texture and interest to each of my panels. I’m loving this Girl’s Paperie paper and had to use up my scraps…every last inch. With all the pretty fabric-inspired prints, I think it looks a little like a tiered skirt. The dressform stamp is also from the Girl’s Paperie line. It’s a clear stamp and I was impressed how cleanly it stamped.

Sew Special

paperie-sew-special.jpg

Quick Tip: Cut your bling flourishes apart to fit into smaller spaces and make them go further.

Supply List: cardstock by Bazzill Basics, patterned paper and stamp by The Girl’s Paperie, edge distresser by Tonic, Tiny Type by Cosmo Cricket, flourish by Zva Creative, Pin by Jenni Bowlin, Tiny Attacher by Advantus

Happy creating!