Monthly Archives: April 2008

An Eye for Eyelets…

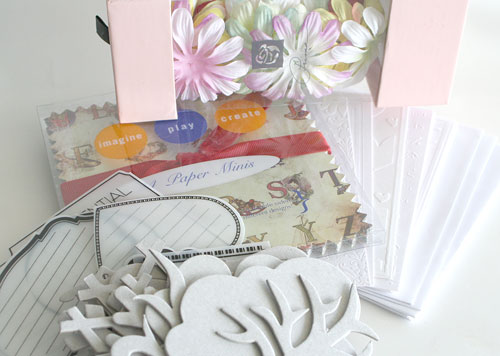
Do you like eyelets? I love them! I actually used to hate them before I bought my Crop-a-dile. They were noisy and so much work. I just had to get the new Big Bite because I really wanted to have the flexibility of getting those eyelets in with a longer reach. Of course…the sale helped enable me too! LOL Well…after sitting there for a couple weeks, waiting patiently for me to find some time…I finally pulled it out and used it. Now, the jury’s still out on how much I like it. It was trickier to use than the original so I’ll need to give it some more play-time before I can give you an honest opinion. I DID really like the reach on it though!

Now after all that…I’m sure you can guess today’s challenge. It’s a rerun right back from the beginning more than three years ago. Eyelets… of course. Pull yours out and have some fun with them today. I challenge you! Find some fun ways to use them! Check it out at WT161

Just a quick note as well…because of some blog update issues from the blog host…I seem to have lost my categories and my blogroll. I’m hoping it will be fixed soon but please know…I am aware of it and I haven’t deleted the blog list…I can’t wait until its back up again. ๐Ÿ™‚ Oh…and one more thing to add…just a quick reminder. If you haven’t entered my birthday celebration giveaway…you have until 10 pm EST Thursday the 10th (that’s tonight) to do so here.
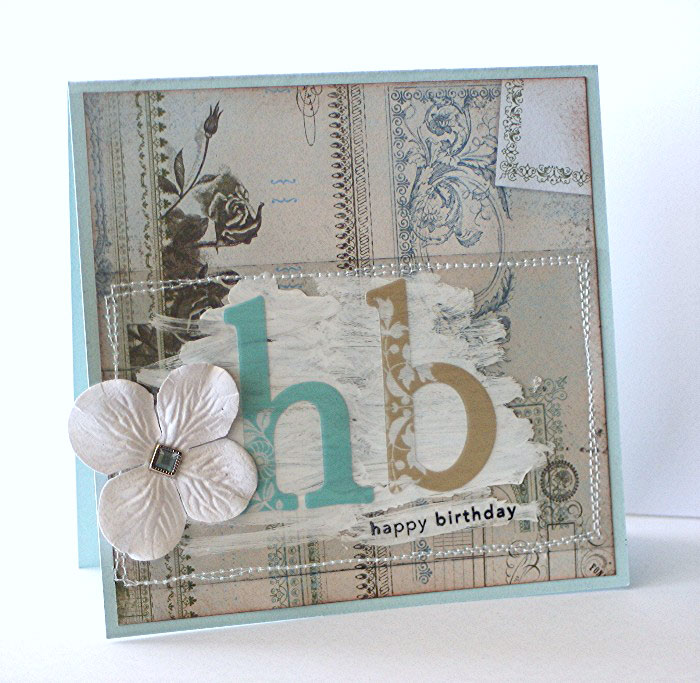
Funky Spring Hello

jks-hello.jpg

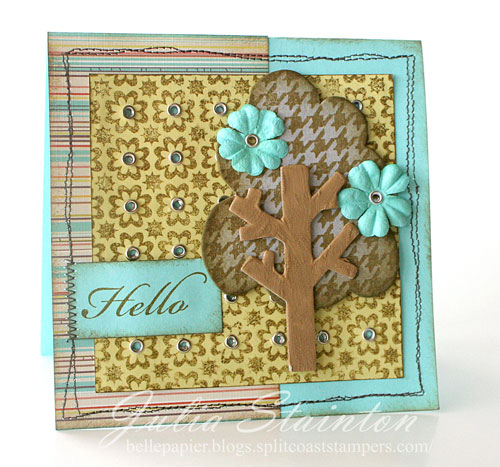
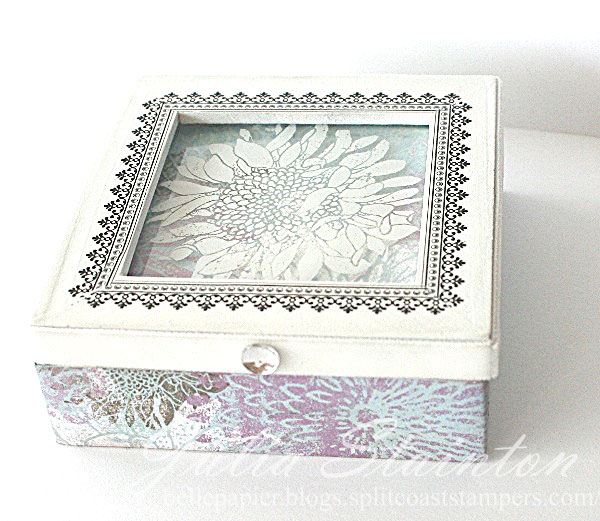
For my design…I decided to pair up my eyelets with some backgrounders and some new chipboard. I thought this Geometric flowers Backgrounder from Cornish Heritage Farms would look really fun dressed up with an eyelet in each flower center. After stamping the backgrounder onto Spring Willow Light cardstock with Oregano Adirondack ink, I tried out the Big Bite and set an eyelet in each flower. The photo doesn’t do it justice…it looks so fun and funky in person!

jks-hello-closeup.jpg

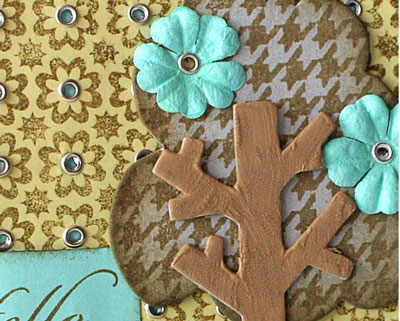
I’ve been wanting to try out my new Maya Road chipboard trees so I stamped on them using my Houndstooth stamp using Oregano ink again and then sponged the edges. Every spring tree needs some blossoms…I haven’t seen any blue ones before but this is a creative design. ๐Ÿ˜‰ To add texture and dress up my tree truck, I brushed on Distress Crackle Paint in Brushed Corduroy. The sentiment is from the Garden Friends stamp set. To frame my design, I stitched around it freestyle after adhering all my layers.

Quick Tip: Plan your design first and add in eyelets only where they will be seen to save time! ๐Ÿ™‚

Hope you’ll join in today and have some eyelet fun. Have a fabulous day!


The Beautiful Time…. a layout

Do you have a favorite time? I’m mostly a morning person and am most productive in the morning. One of my favorite times of the day, especially in summer is the evening. Things are cooler, the light softer and I especially cherish the evenings spent walking on the beach. I can’t wait for those lovely times to come again. For the layout below, I put together a design using moments captured from a walk last summer with my family.

This layout was created for a Craft Critique review that I wrote about Creating Keepsakes Magazine. Creating Keepsakes is one of my favorite scrapbooking magazines. Although I don’t do many layouts these days…I’m hoping to get back into it more. Scrapbooking is how I got into stamping and card design and I love creating beautiful layouts. Even if you don’t scrapbook, Creating Keepsakes is a fabulous resource of designs, colors, products and techniques for any papercrafter. To create this layout, I used three different sources of inspiration from April’s issue…a layout design from the sketches pages, stapler inspirations from a Tools and Techniques article and from Alli Edward’s scrapbooking advice article…I used some hand-written journaling. Now I’m not so sure that anyone will be able to read it but hey… I tried and my descendents WILL have a copy of my handwriting. ๐Ÿ˜‰

While not used on this layout…my stamps seem to have found the postal black hole… I just wanted to let you know about a new release from The Rummage Bin line. Lesley has been hard at work and has two beautiful new offerings this month. Photo Op is a gorgeous fun scrapbooking set that can also be used in cards as well and a new backgrounder stamp called Shady Daisy. You need to check out the samples with these sets…some great fresh ideas! Scroll down to the end of the post to check out these new sets!

The Beautiful Time

jks-the-beautiful-time.jpg

I designed this page around a Sophisticated Swirls backgrounder stamp and some stamps from the beautiful Rummage Bin line by Cornish Heritage Farms….Beautiful, Time to Stamp, The Ticket jks-the-beautiful-time-crop.jpgCounter and Story Book. It is a bit hard to see in the photo but I painted the chipboard flourish with Old Paper Crackle Distress Paint to add texture. The Jumbo rick rack and brads are from Creative Impressions. Just in case you actually want to read the journaling but can;t…

Sunset. The glorious end to a blissful day.
Soft warm light, sand between my toes,
and the waves singing their lullaby. There’s
no place I’d rather be than with my family
at the beautiful time.

Wishing you a beautiful day…

Supply List:
Stamps:
-clock and time sentiment from Time to Stamp(The Rummage Bin line) by Cornish Heritage Farms
-flourishes and Beautiful sentiment form Beautiful stamps set(The Rummage Bin line) by Cornish Heritage Farms
-The sentiment from Story Book stamp set(The Rummage Bin line) by Cornish Heritage Farms
-Sophisticated Swirls backgrounder by Cornish Heritage Farms
-ticket from The Ticket Counter (the Rummage Bin line) by Cornish Heritage Farms

Ink:
-Burnt Umber Palette ink by Stewart Superior
-Tea Dye, Brushed Corduroy & Antique Linen Distress Ink by Ranger

Cardstock:
-Prism Papers

Patterned Paper:
-Basic Grey

Accessories:
-paperclip from Creative Impressions
-brads from Creative Impressions
-rick rack from Creative Impressions
-Old Paper Distress Crackle Paint by Ranger
-flowers by Prima Marketing
-journaling Office Sheers by Maya Road
-flourish chipboard by Maya Road

Tools:

-stapler

Shady Daisy

shady_daisy.jpg

Photo Op

photo_op_.jpg

Celebration Time

Well…yesterday was my birthday and I’d like to celebrate.ย  Another year older and hopefully, another year wiser. ๐Ÿ™‚ I had planned on posting this last night but it just didn’t happen. Things got kind of crazy. The renovation doesn’t stop at this point as there is too much scheduled to take a night off. We were really busy grouting the tile until 11:30 before we called it a night. Sad thing is….we’re only half done so that will be tonight as well. But enough rambling. ๐Ÿ˜‰ I’d like to celebrate with you today by sharing some goodies with you. ๐Ÿ™‚ You have until Thursday April 10th at 10 pm EST to comment on this thread to be entered to win. What to ask me a question…now’s a perfect time. Winner will be randomly chosen by an on-line number generator and will be announced Friday morning.

So what am I sharing? Some of my favorite things! ๐Ÿ™‚

jks-birthday-gifts.jpg

– package of 5×5″ Daisy D’s swatch papers

– one package of Prima flowers – Martini collection

-8 white embossed cards with envelopes

-a great misc. sampling from all my favorite Maya Road embellishments

Good luck!

Julia

Challenge Chicks Get Distressed….

This week the CHF Challenge Chicks get distressed. Not in a bad way of course…at least I don’t think anyone was in distress! ๐Ÿ˜‰ This week our challenge was to use Tim Holtz Distress Inks on a project. I love these fun inks with their beautiful colors and wicking properties. I haven’t been using them more than a few months so I’m especially excited to be taking a course on them this weekend. You may know how I often lament about never meeting any of my on-line designing friends. I’m so thrilled to be taking the course at a scrapbooking show with Lesley Langdon, one the illustrators and design team members for Cornish Heritage Farms. How cool is that?!

In the meantime, I had a little fun with my Distress Inks by sponging them together to make a background in beautiful warm tones. We’d love you to play along too! If you own some distress inks, consider yourself challenged. Our CHF General Stamping Forum has all the deets. ๐Ÿ™‚ If you’d like to know more about Tim Holtz Distress Inks by Ranger…I’ve written a Product Spotlight on them here. You also won’t want to miss the Distress Ink Challenge designs by the other designers…

Lisa Silver
Kim Hughes
Dawn Lusk

Kristine
Sherrie Siemens
Alli Miles
Julie Campbell
Lori Craig
Lisa Strahl
Lesley Langdon

Cherish Every Moment

jks-cherish-the-moment.jpg

For this design, I decided to go with more of a vintage/art style approach. I love playing around with different styles. ๐Ÿ™‚ I first stamped my Little People Collage stamp from The Rummage Bin line by Cornish Heritage Farms in Burnt Umber ink on white cardstock. I then dampened the jks-cherish-the-moment-clos.jpgpanel with a little water and sponged on Tattered Rose, Worn Lipstick, Tea Dye and Brushed Corduroy Distress inks until I had the effect I wanted. For my card base, I stamped the design with the Spanish Script Backgrounder and then clocks and the ornamental image for the Time to Stamp set. The background is simply white cardstock again, this time sponged with Antique Linen and Brushed Corduroy inks. A little freestyle stitching holds it all together. ๐Ÿ™‚

To embellish my design, I used a little pewter book plate from We R Memory Keepers and tied on some Creative Impressions ribbon. This ribbon is originally ivory and black but I sponged it with Worn Lipstick Distress ink to make it tone in with the design. I also did the same with my Prima flower to distress it.

Wishing you a great start to your week,

PS….Stop by for a visit tonight. I’m going to have a little surprise. ๐Ÿ™‚

Edited to add…Ummm yikes! It’s 11 pm and we’re STILL grouting the tile. I’m sorry but the surprise is just going to have to wait until the morning.

From the Heart…

Paper Crafts Magazine’s latest special issue has been released...Gifts from the Heart. I just love this theme as so much of paper crafting is like that. Little gifts from the heart. I love creating things to give to my loved ones. One of the designs that I have published in this magazine is a little trinket box. The box is altered with My Mind’s Eye patterned paper and heavy acrylic transparency and embellished with rub-ons and velvet ribbon. My daughter’s room is in these colors and I believe it has been spoken for when it returns. A lot of the projects I design are created with special people in mind. ๐Ÿ™‚

Floral Trinket Box

jks-floral-trinket-box-side.jpg

This latest magazine is available on craft or bookstore shelves and is also available from Paper Crafts Magazine.

I once again had the best of intentions of having a {C’est Bon} entry for you today. As we were up to midnight both Thursday and Friday working on the tile and yesterday a few of the cupboards arrived, it just didn’t happen. Life IS going to get easier, right?! ๐Ÿ™‚ In the meantime, I have a little peek at my new kitchen. Notice the tightly cropped photo! LOL The window needs trimmed and there is still construction everywhere. Some of the upper cabinets will be arriving Wednesday night and we’re hoping to get the tile grouted soon as well. Slowly but surely….. ๐Ÿ™‚

jks-new-cupboards-and-sink.jpg

Have a wonderful day…

Simply Saturday…a little shabby

A super quick shabby design for today’s post! We’re still working hard on the kitchen here and I just can’t wait until some of my new cupboards arrive today! I’m pretty much bouncing! I’m thrilled with the paint color we tried out on one little wall and really love the tile. I can’t wait to see my cupboards in person. Believe it or not, I just can’t wait to bake again!

Shabby Painted Birthday

jks-shabby-painted-birthda.jpg

For this design…well…just a tiny bit of stamping on it. When I created this card I wanted to use this beautiful Making Memories letters that I’ve had for ages and yes….I’ve been hoarding them. I just love the flourish on them and thought they’d pair up beautifully with this Basic Grey paper. This paper was too pretty to cover up so I adhere the letters to a transparency to give them definition without covering up much of the design. To make them pop a little, a little white acrylic paint on the reverse goes a long way to adding interest. The Happy Birthday sentiment was then stamped on in Black Stazon and then I stitched the transparency to the design. Be careful when stitching transparencies…they have a tendency to slip and slide a little. Just stitch slowly and hold your layers and it should be fine. A white Prima finishes it off and adds a fresh spring look.

I hope you have beautiful Spring weather this weekend and enjoy a simply wonderful day!

Slowly and surely…an update

Slowly but surely we are getting somewhere with this renovation. Wow it has been busy. I spent 12 hours yesterday helping tile the kitchen floor. We’re not done yet…still have to take the tile into the back entrance but we are getting there. I’m feeling rather stiff this morning. That tile is heavy! Grout is on the agenda tonight and I actually may have a few lower cabinets in tomorrow night. Yay! Six weeks without a sink or cupboards has been a long haul. Add that to the fact we started digging the crawl space out Labour Day weekend, well….it’s been a very long haul. If you’re interested…I’ve included a couple pics at the end of this post.

For a total change of topic…the new Kim Hughes stamps were released yesterday from Cornish Heritage Farms! Yay! Have you seen the new Nature Silhouettes?! I just love this one and have been desperately wanting it since I saw the first sneak peek. I also love Baked with Love…a darling baking set that is so much fun. Kim is having a giveaway on her blog Paper Hugs, so you just might want to pop in over there and check it out. ๐Ÿ™‚

Wet tile close-up

jks-tile.jpg

Tile in the Eating Area after a long day

jks-tile-eating-area.jpg

Have a great day! I hope to be back later with a design if my day goes well. ๐Ÿ™‚