Monthly Archives: August 2010

A Little Vintage

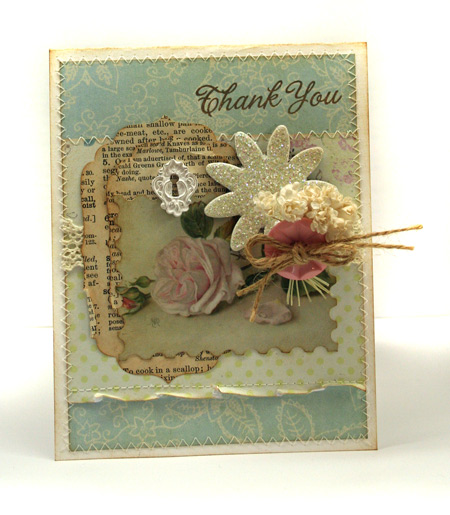
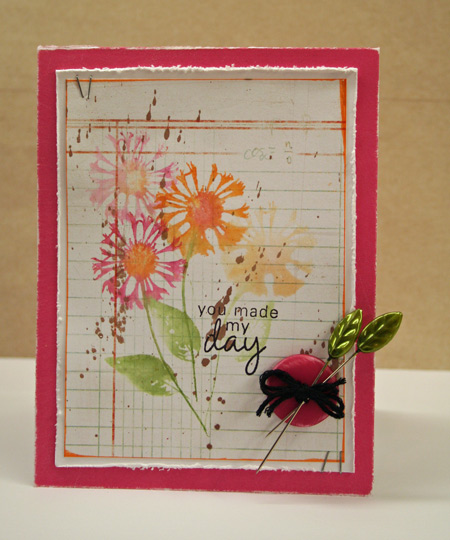
I think it’s time for a little vintage style card.

vintage-thank-you.jpg

And after finishing up a very long newsletter article for this weekend…I’m just about out of words. Hope you don’t mind the mostly visual post!

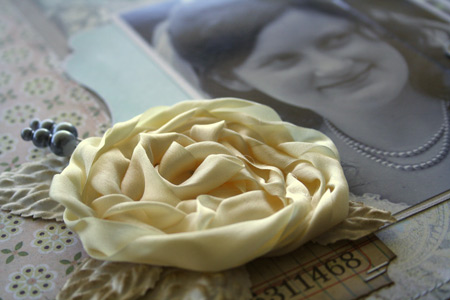
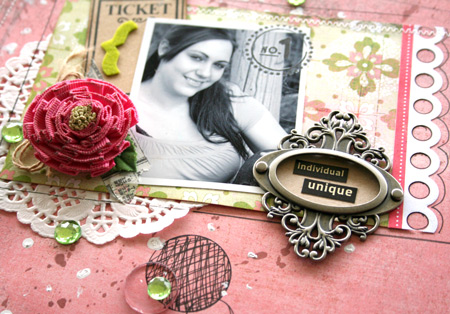
Supplies: cardstock by Bazzill, patterned paper, sticker, applique and glitter chipboard by Melissa Frances, Brushed Corduroy Distress Ink by Ranger, sewing machine, lace and flowers by Prima, button by Jenni Bowlin, stamp by Hero Arts

That’s all she wrote…

true love

 There’s nothing quite like true love is there?

I created this layout for a dual purpose… as a class to teach but also as a gift for my son’s friend who recently got married. I just can’t get enough of that beautiful classic Capella Basic Grey paper.

true-love-layout.jpg

Now, I’m gearing up for another class that is sure to be fun…

finding-joy-class-slice.jpg

It’s called Finding Joy

scrapbook-memories.jpg

Scrapbook Memories
1890 Hyde Park Rd.
London, Ontario

519-474-2665

Wednesday, August 18th
6:30 – 8:30

This class is for a 12×12 layout along with a beautiful pocket card. Die cut papers,a handmade flower, brads and distress crackle paint will let you try out some great ideas and finish with a couple lovely projects.

I’d love to have you join me. 🙂


be happy

What makes you happy? Truly, if you think about it, it’s usually the little things.

So often there are things in life that steal our joy.

Today’s card reminds us to be happy.

be-happy-card.jpg

I find that being happy is tied very much together with being thankful.

Today I’m happy…

  • I have a lot to do but my to do list is ready to go
  • that we had a great weekend at the lake
  • my scrap room is in the new Creating Keepsakes issue…take a peek here 
  • the kids are sleeping in
  • that I got some darling photos at the beach Saturday
  • that God makes all things new

I just love the colors on this card. I think this was one of my favorite papers from the Lily Bee Lovely line. The tag is embellished with some sweet Lily Bee rub-ons. I’m counting down the days until the new Lily Bee lines ship out. Yummm!

Be happy,

sweet sketch

It’s another sweet sketch from Creative Scrappers. I have to admit that this one pushed me out of my comfort zone but I love how unique it is. A very cool design with splatter marks and fun circle elements. You can find the sketch here at Creative Scrappers.

If you love the Creative Scrappers sketches, why not apply for the team? Creative Scrappers is having a new DT Call. You can find the details here and it’s a fabulous team to be on.

100% Special

julia116.jpg

This layout uses the Basic Grey Olivia line and I added some doodling to the layout. To tie the two main sections of the layout together, I cut off the bottom of the sticker frame of the title block and used it as a border along the photo panel.

Quick Tip: With doodling the first mark is always the hardest. You’re thinking what have I done?! But keep going and it will start to look fun and tie your design together. It doesn’t have to be perfect and it’s not supposed to be. To create all the circles on this layout, I traced different sizes of Spellbinders circle dies.

100-special-title.jpg

Supplies: Olivia patterned paper, Olivia Sticker Elements and black rub-ons by Basic Grey, sewing machine, Tiny Attacher, Spellbinders Circle dies, Tim Holtz Fragments, & Ornate Book Plates  by Advantus, Copic Mulitiliner 0.3 Black , felt Thickers by American Crafts, Kraft Ticket and Medallion Flower by Maya Road, twine, Doilies by Little Yellow Bicycle, Coffee Glimmer Mist by Tattered Angels, Claudine Hellmuth Studio Line Blank Canvas Paint by Ranger

Happy creating!

Easy Stamping

It’s Friday! Do you have plans for the weekend? We’re hoping to hit the beach as the weather sounds like it will be perfect. It’s easy summer fun.

Speaking of easy, adding color to stamps with dye markers is the theme of my Back to Basics post in the CLASSroom today. Want to join me?

Here’s the link.

watercolor-marker-flowers.jpg

Have a great weekend!

So Cool

Do you remember way back to February when I really started scrapbooking again? I loved those daily challenges even though 30 in 30 was a lot to taken on at once. It was well worth it as I love making layouts and finding a balance in why I started paper crafting in the first place.

The other day I was looking at my past layouts and it struck me that I hadn’t shared them all yet. This is one of those layouts and as it is a particularly steamy day here I thought it would be great to think “cool”.

so-cool.jpg

This layout was created with a Jenni Bowlin kit. You’ll notice the photos are almost identical but each have a totally different look. The top right photo is printed onto regular glossy photo paper and the large photo is actually printed onto Claudine Hellmuth Sticky Back Canvas. I love this look! You don’t need any special printer or ink either. I just ran it through my HP inkjet printer for this fabric look.

Stay cool!

Bloomin Wonderful

I admit it.

I’m a flower lovin’ girl.

I just can’t resist any floral product out there.

They. are. just. so. pretty.

I also love creating my own and one of my favorite ways to do so is with the Tim Holtz Tattered Florals Die. Love, love, love that die.

So of course, I just had to use it for The CLASSroom floral blog parade.

If you like flowers, join in our parade and have some fun here.

 Sweet Strawberry Friend

sweet-friend-card.jpg

Quick Tip: You can run Sizzix Bigz dies through your Cuttlebug by removing the heavy A plate and sandwiching the die with two B plates. I love how this opens up my die cutting options!

flower-detail.jpg

Supplies: Natural Neenah Cardstock, Garden Variety 6×6 paper pad, Garden Variety Elements paper and Black Tiny Type by Cosmo Cricket, paper clip by Advantus, Green Vintage button by Jenni Bowlin, Heart  Pin by Maya road, embroidery thread, sewing machine, Antique Linen Distress Ink by Ranger

Take time to enjoy the flowers…