Monthly Archives: March 2007

Simple Diagonal Tri-fold Tutorial

I wanted to have a little fun this morning with the color challenge. Joshua is sick again! This time a cold and fever…yesterday afternoon and evening, he did nothing but cry. Poor little guy! This spring weather is going to help right?! Soon I hope! Anyway….I decided to take some creative time for me this morning while Joshua is content on the couch watching Veggie Tales. He adores Veggies Tales movies. Joshua still doesn’t talk but he has been able to “sing” the theme song in tune for almost 6 months now!

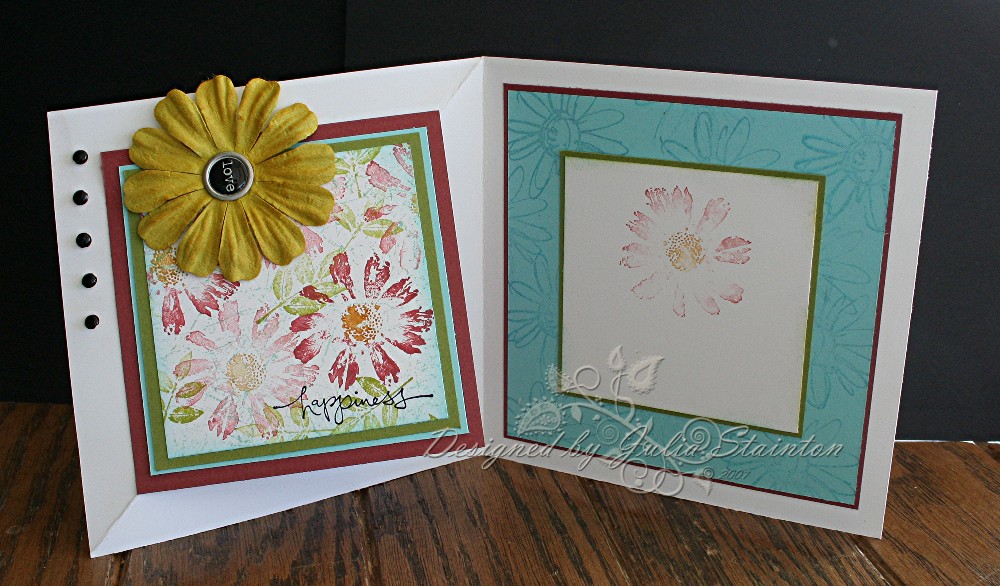
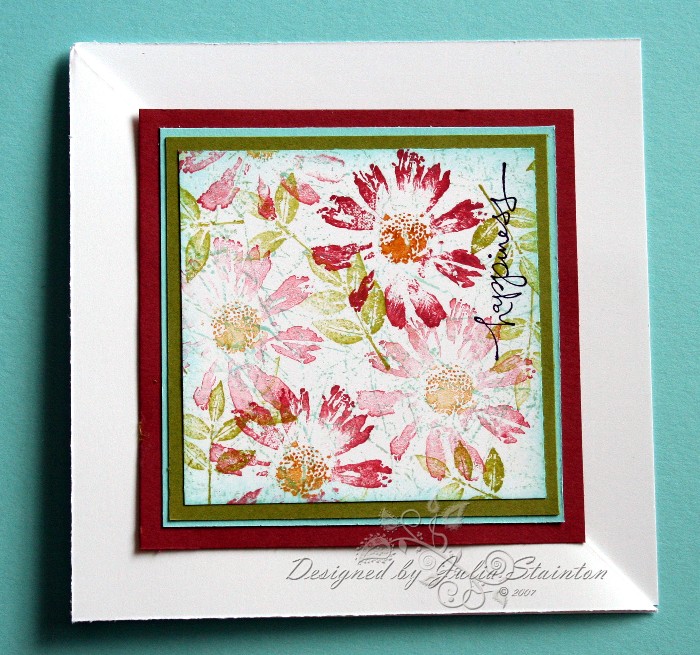
Happiness Simple Diagonal Tri-fold

jks-cc107-diagonal-trifold.jpg

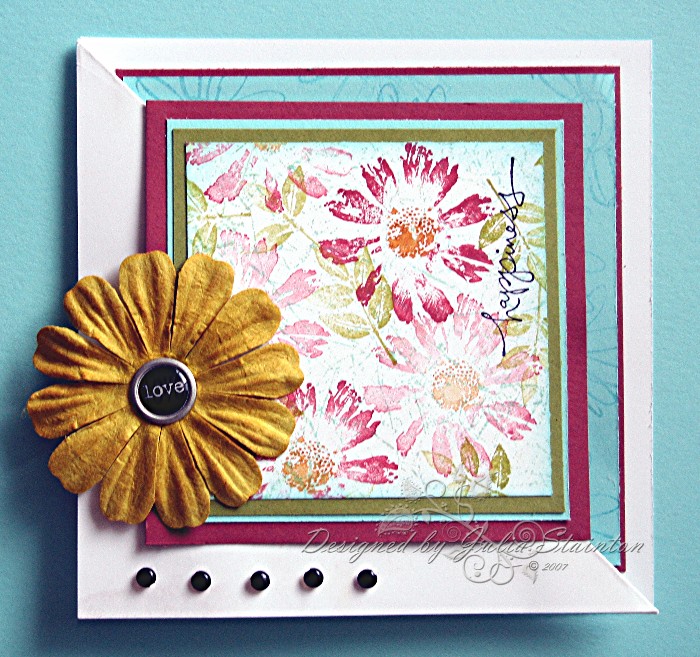
For this card I wanted to give my simple diagonal tri-fold another whirl. It is a really simple fold/card design to do once you’ve done one. I’ve had a few requests so I thought I’d combine today’s color challenge and a quick tutorial to give you a better visual.  (For the original card I made in a more traditional style click here.)Today’s color challenge was to use Cool Caribbean, Cranberry Crisp and More Mustard together with the option of adding Old Olive.  I decided to pair them up with lots of white for a fresh and fun look to these colors.  My central image panel is stamped SU’s Petal Prints stamp set. I just love how flexible these daisies are and I also wanted the image to still work well once it is pivoted. To ink up the daisies, I first colored the centres with my More Mustard marker. Because Cranberry Crisp is one of SU’s “In Colors” there is no matching marker. I really hope they change that next year! I just carefully inked the petals by inking them carefully along the side of my ink pad and turning them until totally inked. Not as fast but it works! The images are all stamped with first and second impressions…I love how this saves time but also, how it adds depth to the panel. It appears that some of the flowers are more to the background. After randombly stamping the leaves in Old Olive, I stamped the whole panel with Cool Caribbean and Magenta’s fabulous crackle background stamp. I just love this 3×3 inch stamp to fill in space, add texture and pull things together. Because of its random crinkle look…it is so easy to use and doesn’t leave obvious lines when you repeatedly stamp it over large areas. I added a retired K & Company charm to the center of the Prima flower for a touch of black “pop” and added the row of black brads to the bottom for balance and interest.

Quick Tip…If you don’t have the exact color you need of your silk or paper flower embellishments…sponge them with ink or rub with chalk. This also adds interest!

Open viewnotice how front panel has swung to the inside and turned 90° (for close up click on pic)

jks-cc107-diagonal-trifold-open.jpg

Supply List:

Cardstock: Whisper White, Cranberry Crisp, Cool Caribbean, Old Olive – SU

Stamps: Petal Prints, Warm Words – SU, Crackle Background stamp – Magenta

Ink: Cool Caribbean, Basic Black, Old Olive, More Mustard, Cranberry Crisp

Other: Prima Flower, charm – K & Company, black brads – unknown

Simple Diagonal Tri-fold Tutorial

And now finally the tutorial! This is a great square card variation as it requires no extra tools than you would normally use to make a card…just your papercutter, adhesive and if possible, a bone folder. If you need to see a picture in greater detail…just click on it!

jks-tutorial-1.jpg

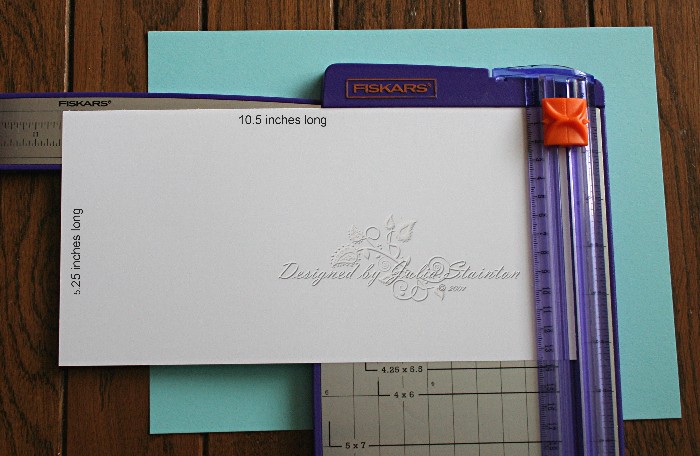
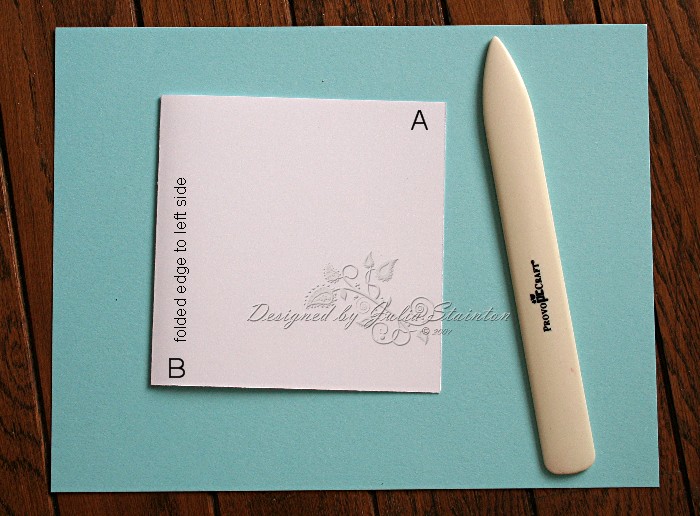
1. Cut a large 5 1/4″ x 10.5″ rectangle from your cardstock. Fold in half into a 5.25″ square. Make sure the hinged side of the card is on the left.

jks-tutorial-2-revised.jpg

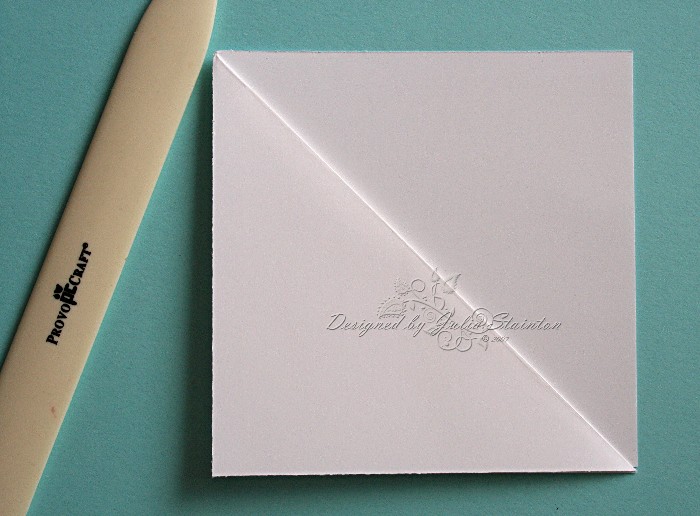
2. Take top right hand corner “A” and fold across on a diagonal to the bottom left hand corner “B”. Press with bone folder to get a crisp crease. You now have your basic card.

jks-tutoria-3.jpg

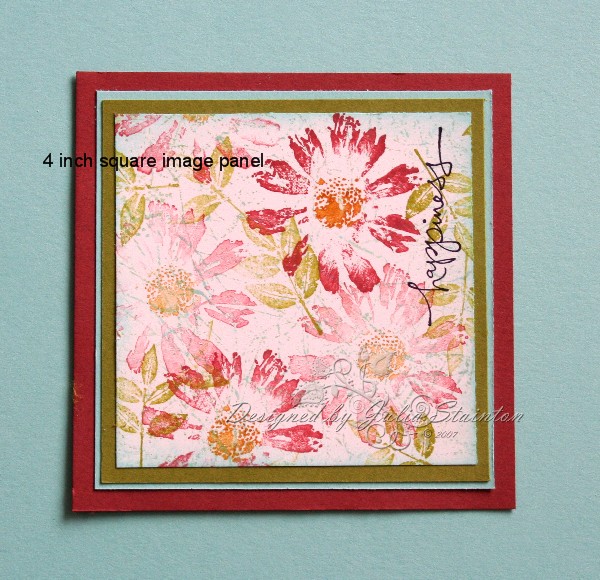
3. Make an square image panel for your card front. The largest mat on both my cards is 4″ square.

jks-tutorial-4.jpg

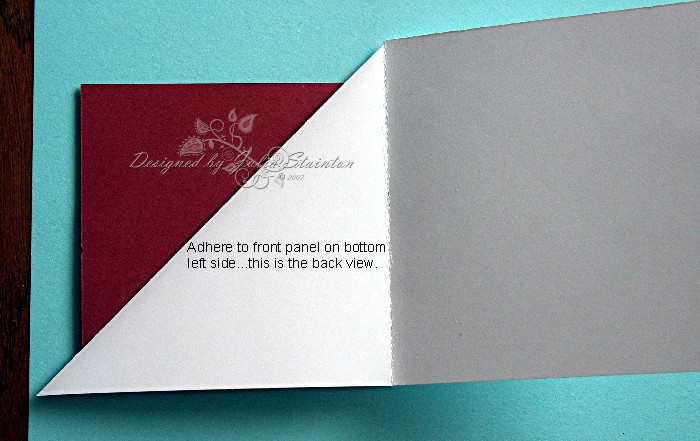
4. Apply adhesive to bottom left half of the matted image panel. Do NO adhere the entire panel…it will stick the the inside of your card. Adhere to card front being careful to line up the corners of the image panel with the diagonal fold.

jks-tutorial-5.jpg

jks-tutorial-6.jpg

5. Decorate inside of your card. This will peek up from behind your central image panel  and become part of the design so take this into consideration when you design it.  I chose a 4.5″ square panel that I matted with a 4 5/8″ mat. For ease of writing on the inside, I also added a smaller 3 1/2″ square layer with a stamped off image. This panel is smaller than the 4″ front panel and is not visible until you open the card.

jks-tutorial-7.jpg

6. Add any extra embellishments if you desire.

jks-tutorial-8.jpg

I had been hoping…

I had been hoping that my template issues were solved. Unfortunately, NOT! So I’m back to the old daisy template. If you tried posting last night and were unable, I’m pretty sure that you will be able to now. Thanks for your patience!

Bear with Me Again?

My web host changed a software installation so I’m doing a little experiment and switching back to my new template! I’m sure you guys are getting sick of this! Sorry! If you cannot comment on my below blog treat…please e-mail to let me know and I’ll go back again. My e-mail link is just to the right under my pic! Just trying to get to the bottom of the problem here!

 Many thanks!

Emerging Color Technique

When today’s Technique challenge was Emerging Color… I thought I’d have a little fun with the challenge and also make a short tutorial on the technique for you. As this is the first tutorial that I’ve written, it may come in bits and pieces till I get it right, so please, bear with me! if you’d like to play along with this challenge, here is the link. I love the kind of batik look this technique gives. Perfect for a collage look!

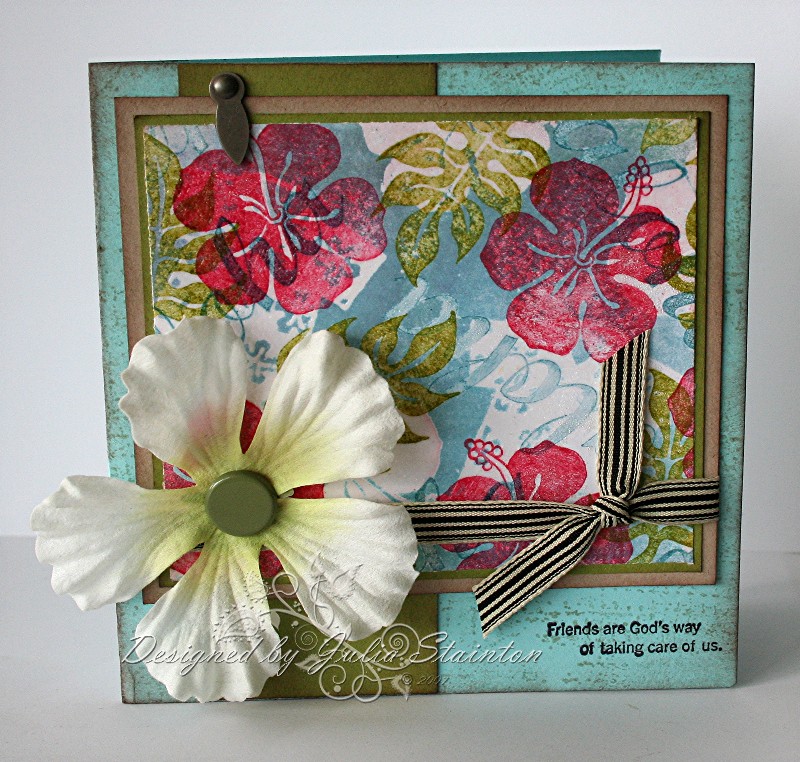
Hibiscus Friend Card

jks-hibiscus-friend.jpg

The instructions for the Emerging Color Technique panel are below. For the main card, I rolled the card with Sahara Sand ink with SU’s Rough Texture wheel. I love how you can cover large background with the Jumbo wheels easily and they are great for large square cards that background stamps won’t cover. All edges were sponged with Close to Cocoa ink. Prima flower is from Jacksonbelle. I just love the sentiment about friends that I used here. I have a friend whose favorite flower is Hibiscus and was so wonderful to our family while my mom was in the hospital. This card is a thank you to her.

Money Saving Tip – I don’t buy the ink barrels to go with my stamping wheels…I just roll them across my large ink pads and reink with each pass. This works great for cards and other small projects. If you want to do wrapping paper, you will need a cartridge.

Supply List:

Cardstock: Old Olive, Whisper White, Kraft, Cool Caribbean – SU

Stamps: Do the Hula, God’s Way, Rough Texture wheel – SU

Ink: Rose Red, cool Caribbean, Old Olive, Close to Cocoa, Sahara Sand, Taken with Teal – SU

Other: Prima flower, ribbon – May Arts, Hodgepodge Hardware – Stampin UP, Brad – Karen Foster

Emerging Color Tutorial

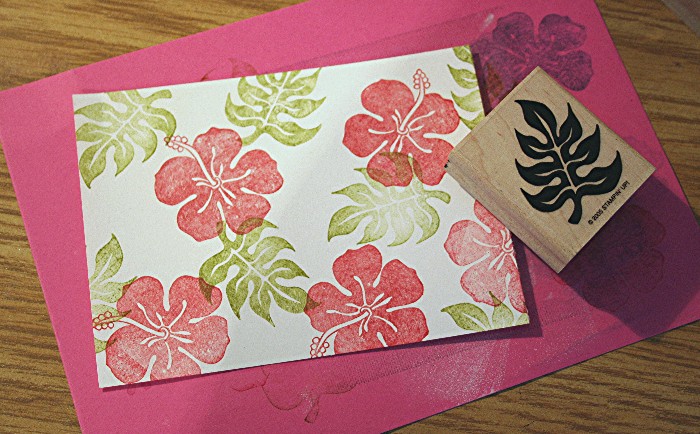
1. Take a piece of white or vanilla cardstock and stamp randomly with colored ink.

jks-emerging-color-1.jpg

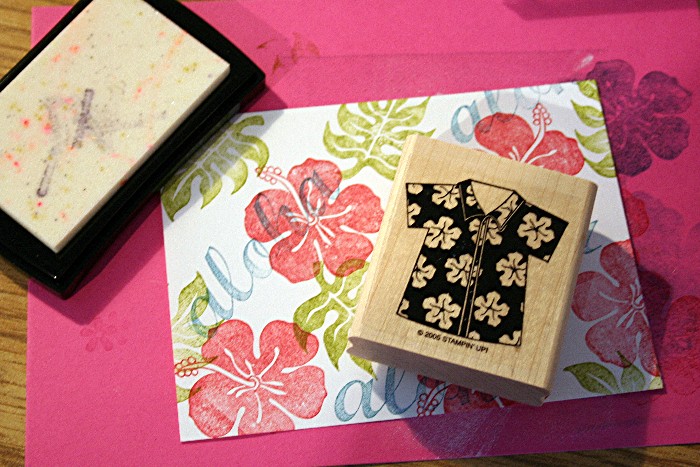
2. Stamp again with solid image stamps with Versamark watermark ink. Emboss with Clear Embossing powder. Heat embossing powder with heat gun.

jks-emeging-color-2.jpg

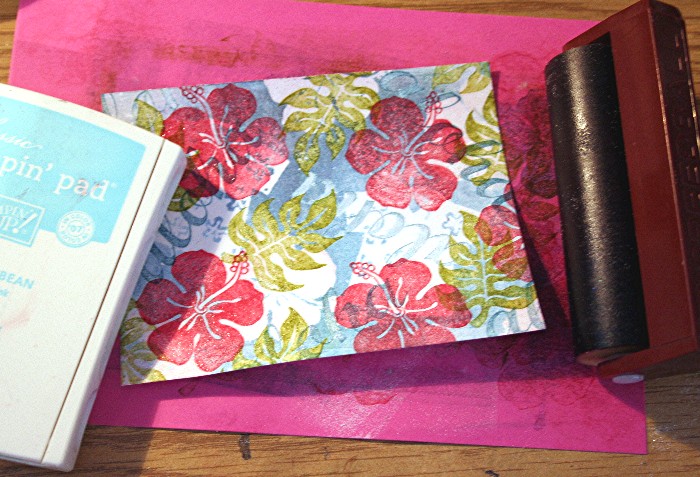
3. Brayer a layer of color over entire piece of cardstock. You can also sponge it if you do not have a brayer. Buff entire piece with a tissue to remove ink from embossed areas. Trim and create your card with it. Enjoy!

jks-emerging-color-3.jpg

Extra Ideas – For your final layer, use a muli-colored spectrum ink pad for a cool look!

Blog Celebration x 2!

Since my blog comments are finally working again, I’m now over 75 subscribers and I just reached 500 comments…yippee!…time for a blog celebration. This time I have TWO prizes up for grabs! One random drawn prize from the comments on this post and a second random draw for all my Feedblitz subscribers.

The only thing that has me sad is I miss my new look! Until my blog host can work things out, I’m back to the old.:( Hopefully it will only be a short time!

To enter…you may do one of the below or both! Prizes will drawn on Wednesday March 28th at noon EST. Please feel free to enter both draws but please only comment once. Thanks! If for some reason…you are still not able to comment…please e-mail me!

  1. Comment on this blog post & tell me how long you have been stamping or papercrafting for….
  2. Subscribe to my Feedblitz Blog by clicking on the Feedblitz button to the right in my sidebar and entering your e-mail address. You will receive an e-mail (no more than one per day) to let you know when my blog has been updated. If you are already a Feedblitz subscriber…you are already entered…no need to do anything!

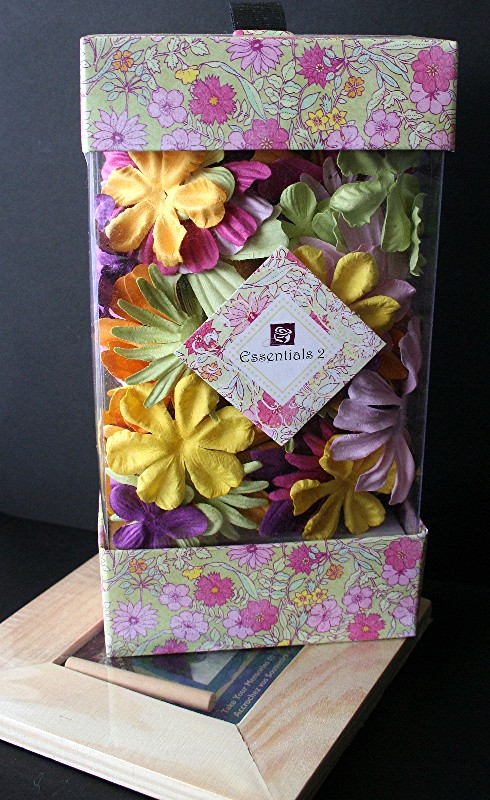
Bog Prize #1 – Package of Prima Essentials & Small Provocraft Frame

jks-blog-prima-prize.jpg

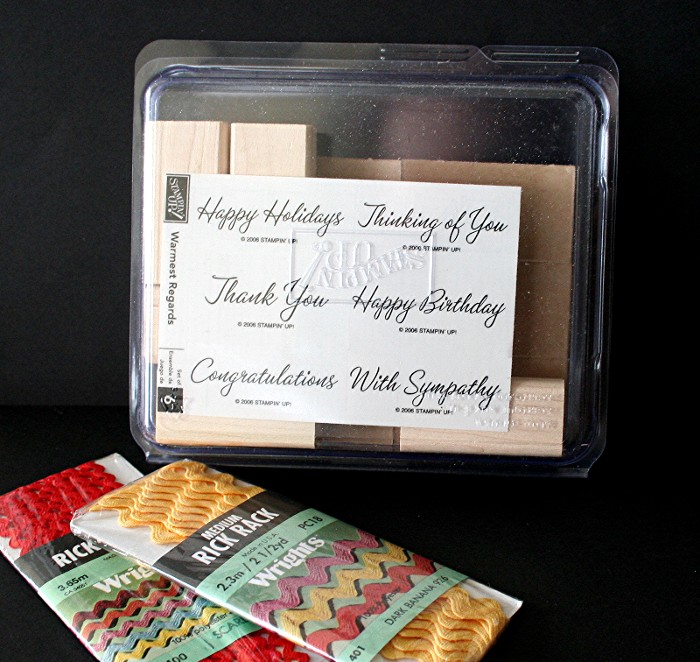
Blog Prize #2 – Warmest Regards SU Hostess Stamp Set & 2 packages of rick rack
!jks-blog-stamp-prize.jpg

I didn’t want to do this….

Sniff, sniff….

 I LOVE my new template, my new banner….but….

I have to find out if it is what is causing the commenting problem. So back to the old I go…I NEED your help again! If you have been having problems commenting on my blog, would you please try again now that my template is changed?! I am now over 500 comments and over 75 subscribers and am just dying to do another blog celebration! I don’t want to post it until it is fair for everyone! So if you could try again…i would be MOST grateful!

A plea for some help…

We are still working on figuring out the comment problem. Would some of you mind trying to comment on this thread. If you are able to, great!!! I’ll see it! If not…would you please e-mail me and let me know what is coming up? I’d LOVE to get this Blog Treat posted, but don’t want to do it until I make sure that everything is working and that it is fair for everyone! My e-mail link is right below my picture in the sidebar.

 Many thanks!!!