Category Archives: Tutorials & Techniques

A Resist & a Hop

 jks-ornamental-resist-close.jpg

Happy Monday! It’s officially summer and I have a summer-themed project to share. There’s lots going on today as we have a Challenge Chicks blog hop. It’s been a while so we’re really excited to share some projects with you today.

will-it-be-you.jpg

Have you heard about the Summer Stamp Star Challenge at CHF this summer? It’s a fabulous challenge that you won’t want to miss. There are five weeks of challenges with great prizes and the grand finale will be a guest designer spot at CHF for the month of September. As part of the winning prize, the winner will receive a month’s worth of stamp releases from Cornish Heritage Farms. If you’ve  noticed just how many releases we have a month,  you’ll know that it is a boatload of rubber. Whether Thomas Kinkade or Kim Hughes, Scrapblocks or Rummage Bin, Friendly Kritters or Scene-it are your thing…we can’t wait to see your designs. Be sure to check out the details here.

With five weeks of fun, goes five different challenges. I thought it would be fun to try out some of the challenges and perhaps inspire with ideas for them. The CHF design team has a sample for each of the challenges and for a few of the challenges…more. Check out Lisa Strahl, Becky Olsen, Joanne Allison, Sherrie Siemens, Kristine Reynolds, Jennifer Roach, & Lisa Silver.

Ornamental Resist
jks-ornamental-resist.jpg

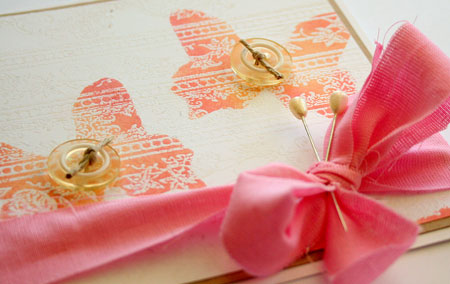
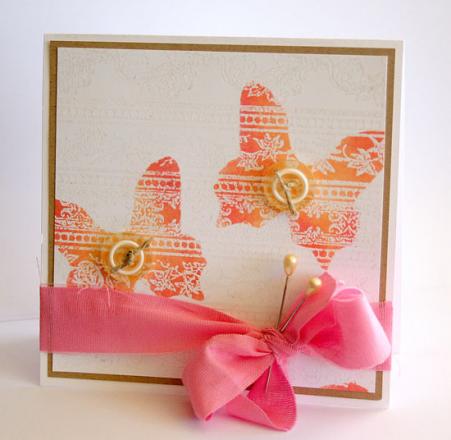
Resist techniques seem to be hot in the scrapbooking industry right now but they’ve always been a great technique that stampers have come back to time and time again. My design is for challenge #3: resist. To create my resist I stamped the Ornamental Borders Scrapblock onto some Simply Smooth white cardstock and embossed it with clear embossing powder. I then freehand cut a butterfly mask out of a roll of repositional masking, discarding the actual butterfly and using the negative shape instead. After placing the masking onto my background, I sponged the butterflies first with Dried Marigold Distress ink and then with Worn Lipstick Distress ink. Any dye ink will work well. I love how the embossing resists the dye ink and highlights the stamped pattern on the project.

Supply List:

Stamps: Ornamental Borders Scrapblock by Cornish Heritage Farms

Ink: Distress Embossing Ink, Dried Marigold & Worn Lipstick Distress ink by Ranger

Paper: Simply Smooth White cardstock by CHF, kraft cardstock by Bazzill Basics

Other: buttons by Melissa Frances, ribbon, corsage pins, clear embossing powder by Ranger, heat gun

Happy creating!
Julia

Just a Note…

Just a fun little note today. I love how this card turned out. I love music and I’m sure you know by now that the Aged Sheet Music Scrapblock™ is one of my absolute favorites. Think about it. For so many of our celebrations in life, music is always a big part of them. I decided to experiment a little with this stamp and try something different. While patterned paper makes designing quick and easy, I love going back to stamping techniques again and again for their versatility and there is something so satisfying about creating your own backgrounds from scratch. It’s simply yours and very unique.

Rhinestone Note

To create my “custom patterned paper” background, I stamped my Scrapblock™ onto white cardstock with Versamark Ink. I then embossed it with clear embossing powder to form a resist. Now for the fun albeit messy part. On a protected surface, I sprayed different colors of Glimmer Mist. You can dry carefully with your heat gun to speed up the process. Wipe excess ink from embossing to make the design pop.

Quick Tip: Shake Glimmer Mist well before using to make sure the shimmer particles are not stuck to the bottom of the bottle.

Thanks for stopping by, especially in this very busy season!

winter-julia.jpg

Supply List:

Stamps: Aged Sheet Music Scrapblock™, Classic Essential Expressions (mona Lisa Moments line) by Cornish Heritage Farms
Ink: Versamark by Tsukineko, Black Stazone by Tsukineko
Paper: White simply Smooth cardstock, black, by Prism
Other: May Road Clear note, chipboard by Maya Road, rhinestones by Westim Crafts, sewing machines, Worn Lipstick Distress Crackle Paint  , Glimmer Mist

Some more monochromatic images … a simple technique

I’ve been having fun playing around with one simple little product…the white colored pencil. Ever so humble…I really never thought of it much until the past week and now I can’t seem to put it down. Inspired by a design of Kim Hughes where she colored an image all in brown pencil…I decided to try my own version by just adding in  highlights using white. I love the monochromatic and vintage look of this simple technique. It brings me back to high school art class and reminds me of those conté crayon sketches we drew.

White Pencil Highlight Technique

  1.  Stamp line art image in brown ink on Kraft cardstock. I used Rich Cocoa Memento Ink. Detailed lines work best.
  2. Study your image to see where the highlights or light spaces would be. Color in lightly with white pencil.
  3. Go back and add stronger white highlights where needed to add extra dimension.

Chocolate Santa

jks-chocolate-santa.jpg

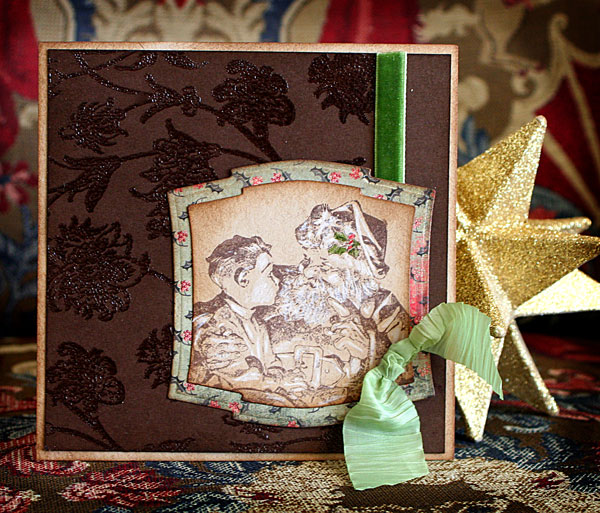
I am totally in love with this Santa’s Lap image! It’s actually a very large stamp but I wanted to focus in on darling expressions on the faces and die cut it down to my focal point. Using red and green colored pencils…I also highlighted the sprig of holly on Santa’s hat. To create the background I stamped the Ornamental Vines Backgrounder in Versamark on Suede Brown Dark cardstock andembossed with clear embossing powder.

Stamps: Ornamental Vines Backgrounder, Santa’s Lap (Saturday Evening Post line) by Cornish Heritage Farms
Ink: Versamark by Tsukineko, Vintage Photo Distress ink by Ranger, Rich Cocoa Memento ink by Tsukineko
Paper: kraft and suede brown dark cardstock by Prism, Basic Grey 6×6 paper pad
Other: ribbon by Making Memories, velvet ribbon by May Arts, clear embossing powder by Ranger, pencil crayons by Prismacolor, Spellbinder dies

55 Corvette Wishes

jks-55-corvette-wishes.jpg

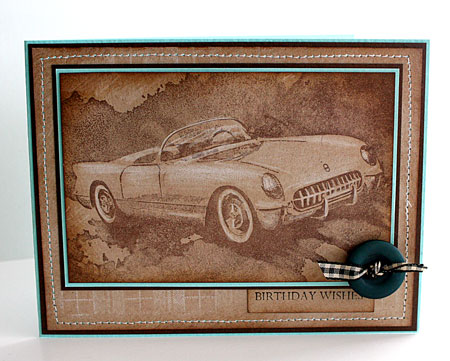
As I couldn’t stop with this technique…I had to try it out on this new Corvette Image by Cornish Heritage Farms.

Quick Tip: Try switching the Kraft cardstock to another medium toned hue for a different look.

Supply List:
Stamps:
1955 Corvette (GM line) By Cornish Heritage Farms
Perfect Plaid Scrapblock™ by Cornish Heritage Farms

Ink-Vintage Photo Distress Ink by Ranger,White Adirondack Pigment Ink by Ranger, Rich Cocoa Memento Ink by Tsukineko

Paper:Kraft, Frosted Teal, Suede Brown Dark by Prism

Other: sewing machine, button by Autumn Leaves, ribbon by creative Impressions, white colored pencil

Thanks for stopping by! Wishing you a beautiful Sunday!
a-signature-2.jpg

A little Western…

jks-western-elvis-flat.jpg

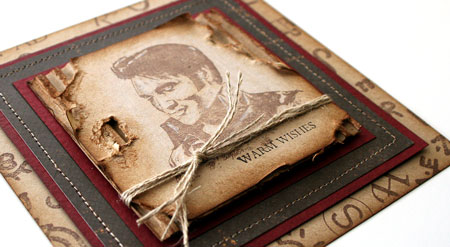
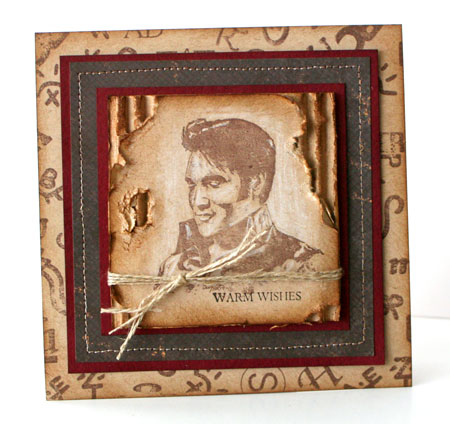
I have to tell you…I had soooo much fun making this card! I’m loving the masculine, textured look. You’re going to be seeing a lot more corrugated cardboard in my designs as I like fun additions. For this design I stamped this new Western Elvis stamp by Cornish Heritage Farms onto some Kraft cardstock before adhering it to my cardboard. It was then really easy to pull back edges and distress.

Rugged Elvis

jks-western-elvis.jpg

The technique I used for the Elvis image is really just a dark brown image stamped onto Kraft Cardstock. Using white colored pencil, I shaded in the highlights of his face, clothing and background for extra interest and dimension. I’ve been having so much fun with this simple concept. It adds a fabulous vintage look.

If you’re looking at the corrugated cardboard…Prima makes a Down Home Kit with yummy “down home” embellishments. I got mine from Jacksonbelle Embellishments. Lindsey is having a sale today through Monday. To get 20% off your order…just use the code THANK08.

Have a fabulous day!
a-signature-2.jpg

Supply list:

Stamps:
Western Elvis by Cornish Heritage FArms
Classic Essential Expressions (Mona Lisa Moments line) by Cornish Heritage Farms
Cattle Brands Backgrounder by Cornish Heritage Farms

Ink:
-vintage Photo Distress ink by Ranger
-Rich Cocoa Memento Ink by Tsukineko

Paper:
-Kraft and Crabapple Dark cardstock by Prism
-patterned paper from Thomas Kinkade Masculine Series paper pack by Cornish Heritage Farms

Other:
-cardboard by Prima Marketing
-linen thread
-white colored pencil
-sewing machine

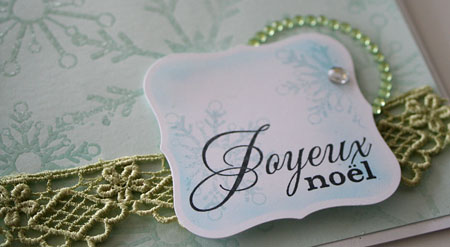
Joyeux Noel

jks-joyeux-noel-slice.jpg

A classic stamp set of snowflakes is always a must-have for those Christmas and Winter designs. I have two cards to share with you today featuring the Joyeux Noel Stamp set. Both designs feature super simple clear embossing for a couple different looks. One set + one product= two different looks. I LOVE that about stamping! I think I mentioned the other day that this set is the CHF product spotlight for the next two weeks. I hope you don’t mind another couple designs as I just can’t seem to put it down right now. 🙂

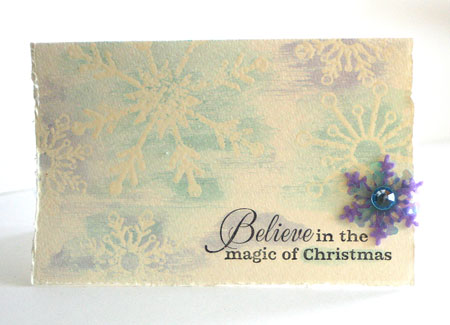
Christmas Magic

jks-christmas-magic.jpg

This design was super easy to do. Just stamp the notecard with the snowflakes in Versamark ink and emboss with Clear Embossing Powder. This will form a resist on the card front. To add color, simply brush with ink. I highlighted the two words Believe and Christmas in the ink colors as well.

Supply List:
Stamps: Joyeux Noel (Classic Collection) by Cornish Heritage Farms

Ink:
-Black Stazon ink by Tsukineko
-Aqua and Periwinkle Adirondack ink by Ranger

Other:
-Fabriano Mediovalis Notecard
-clear embossing powder by Ranger
-felt snowflake by Creative Impression
-rhinestone by MAMBI
-snowflake sequin by Queen and Co.

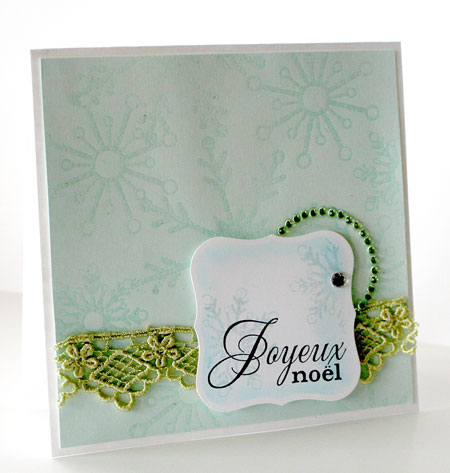
Joyeux Noel

jks-joyeux-noel.jpg

This design uses the same snowflakes stamped in Versamark ink on the cardstock. The embossed snowflakes are subtle in a tone on tone look and make a really pretty “clean” look.

Supply List:

Stamps:
-Joyeux Noel (Classic Collection) by Cornish Heritage Farms

paper:
-Simply Smooth white & Frosted Teal cardstock by Prism

Ink:
-Aqua Adirondack ink by Ranger
-Tuxedo Black Memento ink by Tsukineko
-Versamark ink by Tsukineko

Other:
-ribbon lace by Prima
-dies by Spellbinders
-rhinestones by MAMBI
-Copic airbrush system
-Clear Embossing powder by Ranger

Take care and have a great day!

a-signature-2.jpg

Simply Saturday… Simply Decorative

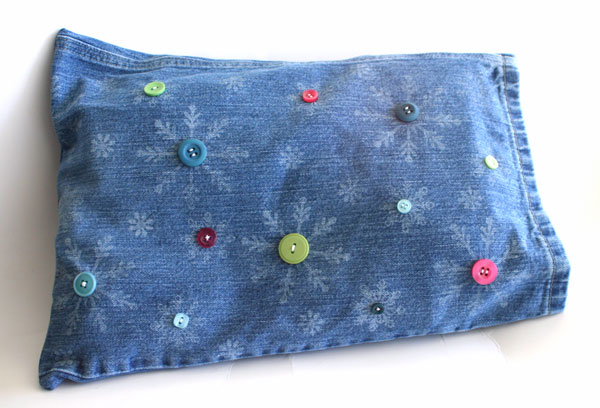
How often do you try stamping on something other than paper? Now and then I like to break out of the mold and try something different. A while ago I was throwing out a pair of my son’s jeans and had a bit of inspiration. With very little sewing the wide-legged jean leg would make a super easy pillow cover for the holidays. Because of the prefinished sides and bottoms…I only had to sew ONE seam! I know it’s a far cry from the days when I did heirloom sewing but…life is busier now!!!

Thanks so much for all your well wishes regarding my surgery. It went well and yesterday I started feeling more like myself. I imagine it will take a couple weeks for the inside swelling to go down and see how successful it was at minimizing my sinus headaches.

jks-denim-snowflake-pillow.jpg

To create this stamped holiday throw pillow, I inked up my snowflakes from the Joyeux Noel stamp set with White Colorbox Pigment ink from Clearsnap. The Joyeux Noel set is the Cornish Heritage Farms product spotlight for the next two weeks. That means a SALE! Actually this is one of my favorite sets for this season. The sentiments are gorgeous and thesnowflakes are perfect for all winter season long.

Quick Tip: Pigment or craft inks are the best inks for stamping on fabric. Heat set with an iron to ensure longevity.

Hope your Saturday is simply wonderful!

a-signature-2.jpg

Supply List:

Stamps: Joyeux Noel (Classic Collection) by Cornish Heritage Farms

Ink: White Colorbox Pigment  ink by Clearsnap

Other: old jeans, buttons by Autumn Leaves, thread, sewing machine

Airbrush Masking…a new spin

Here’s a design I’m really excited about and it’s so simple to do. As you know…I’ve been having fun with my airbrush tool lately and this is one project that shows you a neat idea for masking. Masking is one of those essential techniques when doing most airbrushing and you can use a mask you’ve created yourself, mask using a stencil or purchased mask or just use something you already have on hand by laying it on top of your project. I love KI Memories die cut papers and had a scrap leftover just large enough to use on the front panel of my design. As you can see…I didn’t actually keep the lace paper on my project but used it as a mask.

 Sweet Sixteenth

jks-sweet-sixteenth.jpg

Quick Tip: This is one great way to get lots of mileage (and a new look) from those expensive diecut papers. You can use the paper as a mask over and over OR simply use it as a mask once and then reuse the airbrushed mask in another project.

How to….Julia’s Airbrush Die-cut Paper Masking Technique

  1. Stamp  paper with Backgrounder Stamp.
  2. Lay piece of Lace die-cut paper over top to mask surface.
  3. Airbrush parts of the design using one color.
  4. Repeat airbrushing with two more colors till completely covered.
  5. Removed Lace paper mask.
  6. Cut panel to size and use on project.

This project is part of a Craft Critique review on the Copic Airbrush System.

Have fun with this technique!

a-signature-2.jpg

Stamps:
-Invitation Essentials (MLM Line) By Cornish Heritage Farms
-Spanish Script Backgrounder by Cornish Heritage Farms

Ink:
-black Memento ink by Tsukineko
-Pink Adirondack ink by Ranger

Paper:
-Simply Smooth White by Prism
-KI Memories lace paper (removed after spraying)

Other:
-flower and tape by Prima
-sewing machine
-Copic markers and airbrush system