Category Archives: Lily Bee

hey!

The sun is shining. That always puts me in a very happy mood so how about a bright, fun and happy card for today?

I’ve been doing some more recycling and repurposing and cut this cute denim pocket off of a pair of jeans that my little one wore out. Those knees are always the first to go you know but the pockets are great for scavenging for new projects.

I’ve created my own floral embellishment by layering zipper trim petals, a smaller flower and a very pretty jeweled button.

Supplies:

Have a bright and happy day!

laugh

What do you think of a neutral palette?

They don’t have to be boring. Add lots of textures and the neutral look shines.

I love die cut tags and recently had this Sizzix die out. The three tags made a fun and easy background for the card. Each tag is cut from the same piece of patterned paper. Because it was double sided I just flipped one side over for some subtle variation in the print. Some of my favorite Maya Road embellishments are clustered together to finish off the design.

Supplies:

Happy Monday!

Folded Chevrons Technique: the tutorial

Today I’m super excited to be able to share my new Folded Chevrons Technique with you.

edited to add…thanks for joining me!

This tutorial can not be found here: Folded Chevrons Video Tutorial at juliastainton.com


happy

What is happiness? I don’t think we ever arrive at a point in life where we say…this is happiness. Nothing is ever perfect or if it seems to be, well, it’s not for long. There are so many distractions in life.

I think that happiness is found in the little things. It’s found in being grateful. It’s found in the peace of knowing that you’re doing the right thing even when it’s hard. It’s found in a selfless attitude. In helping others. In a heart of praise.

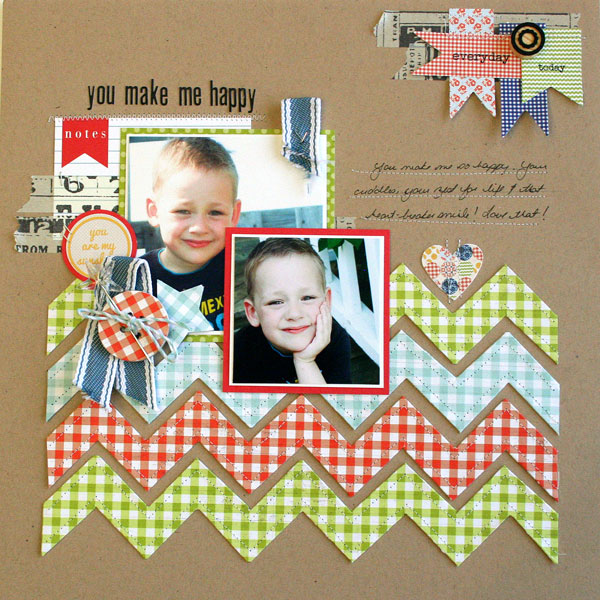
Today’s project is a layout about my youngest. He makes me happy. He is exuberant and it makes me smile.

I’m excited about this layout as it uses a new technique I dreamed up and finally found the time to test it out.  It worked just like a thought it would first try. Love that!

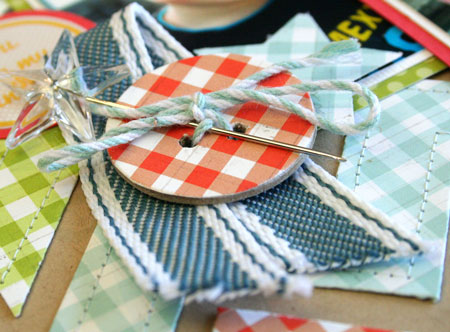
What is it? Well chevrons are so popular these days but they can be difficult to cut out without a template. I decided it would be fun to come up with a folded chevron technique that uses a 2″x12″ strip of paper. The folded edges look so pretty and the cuts and folds were super easy to do.

Today I’m on the Lily Bee Blog sharing this layout and more details. I hope you’ll join me here.

I’m also hoping to work on a new video tutorial for you today sharing how I made these chevrons. Stay tuned as I hope to be back tomorrow with it. Fingers crossed!

Edited to add: Video Tutorial can now be found here.

Supplies:

Have a happy, happy day!

nested eggs

I always look forward to Easter weekend each year. I love chocolate and eggs but importantly taking the time to consider the real meaning of Easter. This year my family will all be together again and I’m looking forward to that too.

The other day I was finishing up using the last of a roll of Glue Dots®. I go through this adhesive like crazy. I set the empty roll aside as I knew that I could definitely recycle it into something creative. Re-purposing packaging is a wonderful thing.

Yesterday I was busy creating when it hit me that these rolls would be a perfect way to display Easter eggs. Please forgive me that my egg isn’t died yet but I know you get the idea. Just picture my little project with a lovely pastel hand-dyed egg.

To create this project I covered my empty Glue Dots® roll with some patterned paper. I then adhered some lovely tulle trim around the inside of the roll. More of those wonderful Glue Dots® to the rescue.

Next came tying the roll with twine and fixing it in place with a Glue Dots® under the knot. And lastly, I adhered the flower in place as well. To finish it off, I put some sphagnum moss in the middle of the roll to make a little “nest” for the egg. Sweet!

Supplies:

I wrote this blog post while participating on the Glue Dots® design team.
Happy creating!

spring stamping

I’ve been busy stamping the past few days and found some time to have a little fun with my new Victoria Park line stamp set.  It’s always exciting to finally use it in person. When you design a set, you plan a lot of different ways to use it so that it will be the most fun and flexible for the end user.

Today’s card incorporates a couple ideas I had in mind for this set. I adore frames and this little frame turned out just how I’d hoped. It’s perfect for sentiments, embellishments and even tiny photos.

I’ve also created my own embellishment using the tiny floral spring and some of the patterned paper from the line. I stamped it in a permanent ink…my tried and true go-to ink, Jet Black Archival. You need to use a permanent ink so that it doesn’t run when you apply the Glossy Accents to adhere it to the Cabochon. I love how the glass bevel really creates a beautiful accent and also magnifies the image.

I’m sharing this card design and another stamped card on the Lily Bee Blog. I hope you’ll pop over and join me here.

Supplies:

Happy Saturday!

for the birds

With the arrival of spring, I’m really enjoying the return of the birds that go south for the winter. There’s nothing quite like their songs and calls coming through the open windows. Nature makes the most beautiful music.

I love birds and you can see that in the Victoria Park line. I thought creating a sweet paper crafted birdhouse would be a great use for this paper. This project was one that I sent to CHA in January for the booth display.

To alter a birdhouse, I first started with a wooden birdhouse that I picked up from Michael’s. Each surface is covered with papers from the line and trimmed out with some Maya Road accents.

Supplies:

Have a tweet day!