Category Archives: Tutorials & Techniques

What if…

I’m always looking for fun new things to try. Ways to get more use out of things I already have on hand. I love my Copic Markers but lately they’ve been getting a tad dusty. It was long past time to dig them out and have some creative fun.

While I was thinking about my markers, it occurred to me that I have two large bottles of Copic Blending Solution sitting in my cupboards. I should be using it. The Color-Bleed Grid Technique is what I came up with.

I hope you’ll join me today in the CLASSroom for the tutorial and step outs.

Have a super fabulous weekend all!

head over heels for sketches!

I adore sketches. Don’t you?

Card sketches are a great way to get you out of a rut and try something new. If you’re short on time, they take the guesswork out of design and make it fast.

I’m so excited to be part of the new Card Ideas for Paper Crafters, the latest special issue from Paper Crafts Magazine. Designing sketches and card projects are things I just love to do. Today on the Paper Crafts Connection, Susan Opel has asked me a few questions about designing sketches and I’ve created a card using one of the sketches from this latest issue. Check it out!

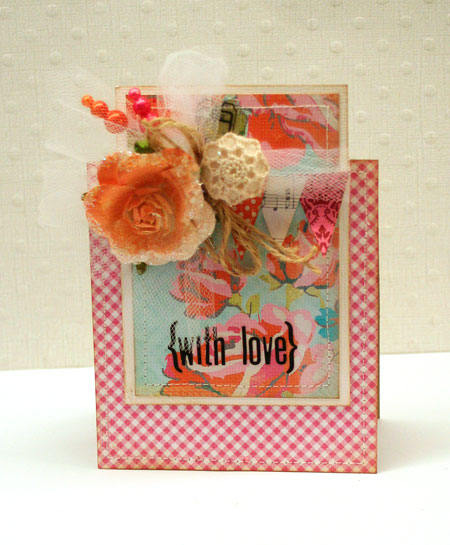
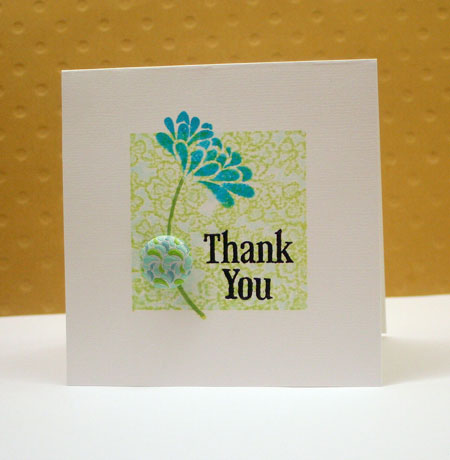
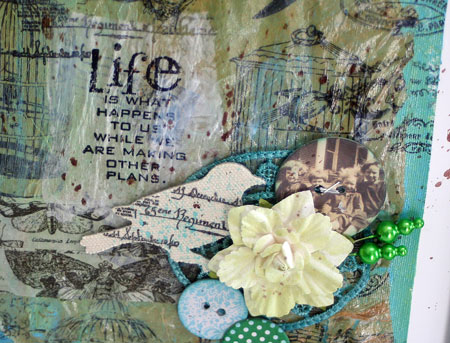
Here’s the card using my new paper line, Head Over Heels from Lily Bee Design. You can find the accompanying sketch at Paper Crafts Connection. I hope it will inspire you to get creating!

To create this design, I simply followed the sketch to make designing the card easy and quick. I’ve added in a few fun design ideas I want to share as well.

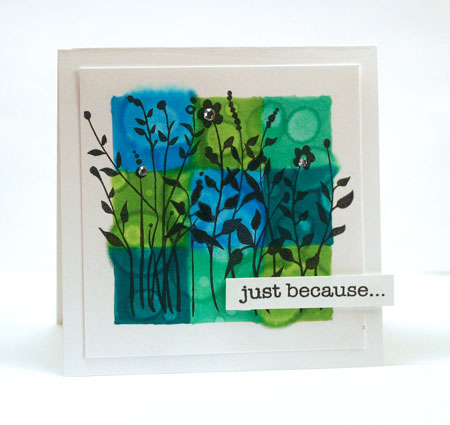
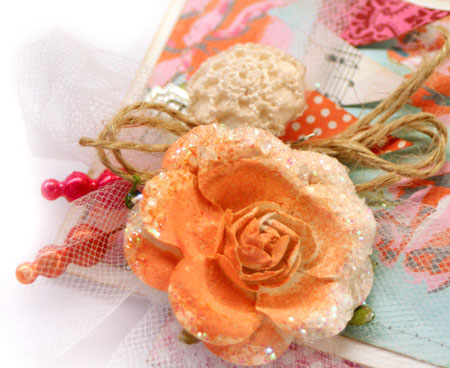
  • Customize a white flower by misting it with a dye ink spray that coordinates with your projects.
  • You can create your own custom colored trinket pins by airbrushing them exactly the color you want. I love using the Copic air brush system for this. It’s quick and easy.

Supplies:Head Over Heels patterned paper and stickers by Lily Bee Design, flower and crochet button by Prima, Tiger Lily Glimmer Mist by Tattered Angels, twine, tulle and white cardstock by Bazzill, sewing machine, Pearl Trinket Pins by Maya Road, Copic Markers, Copic Airbrush System

Since I love creating more than one project when my supplies are out, I decided to share a sketch with you that I designed and create a project to go with it.
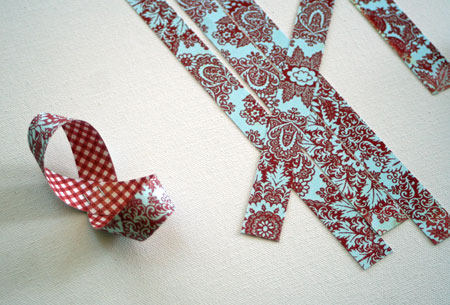
Anyone like argyle?


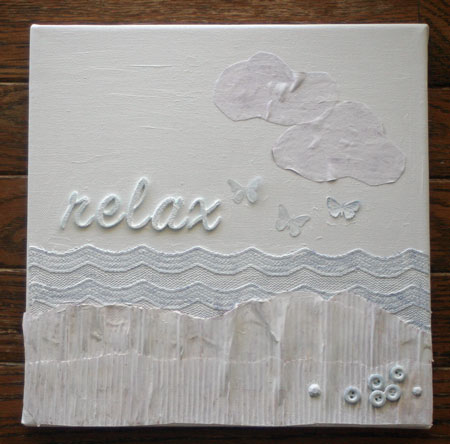
And here’s the quick card that was inspired by the sketch…

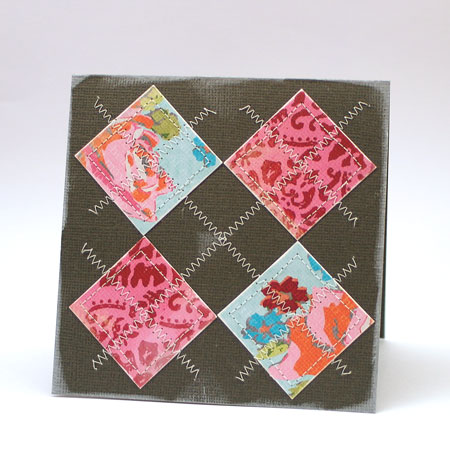
It also uses up pieces from my Head Over Heels line. It’s a great sketch for using up your scraps!

Don’t miss this!!!!….

Speaking of Head Over Heels, I can’t wait until it hits the store shelves in October. It’s expected to start shipping to stores October 17th so be on the lookout for it shortly thereafter. Is anyone interested in getting it long before the stores do?! Hop over to the Paper Crafts Connection where Lily Bee and Paper Crafts Magazine are giving away THREE collections of Head Over Heels to some lucky winners. Good luck!!!!

Your sketch crazy friend,

Stamper’s Block

I’m back!

No. I don’t have stamper’s block as the title suggests but I AM taking a little more time this summer to slow down and enjoy my family. One of the best ways to prevent creative block is some time away now and then to get refreshed and enjoy life. If I’m posting a little less than normal this summer, you’ll know that is what I’m doing. I’m taking some time here and there to smell the roses, sit on the beach, listen to my children laugh and enjoy the wind in my hair.

I know you’ll understand. Keep looking for me here 2-4 times a week though as I find I just can’t walk away completely. I always need a little creative therapy.

So what am I talking about with the stamper’s block title? It’s been a long time since I’ve had some time to play along with a challenge and I popped by Splitcoaststampers.com to see if something inspired me. It did! A challenge is always a great way to kick off some inspiration.

Today’s challenge is the Technique Lover’s Challenge and challenges you to twist up stamping with an acrylic block. A stamper’s block. 😉 As I’ve never done this, I gave it a whirl, had some fun and put my own twist on the technique. Here’s a link to the challenge and here’s my card…

Kissed Acrylic Block Stamping

This is a combination of two separate techniques. It’s amazing how many great stamping techniques you can combine to come up with a new and fresh idea. Here’s how I did it…

  1. Ink up your CLEAN acrylic block with a light colored ink. Experiment with different inks to see what works best for you.
  2. Ink up a background stamp. I’ve used the Hero Arts Lace Background stamp here.
  3. Press the inked lace stamp onto the inked acrylic block.
  4. Stamp your impression.

It’s so easy and I love the subtle look. Best of all you can use something you already have on hand instead of buying a new stamp.


Supplies: Basic Grey Sweet Threads Thank You stamp set and Lace Background Stamp by Hero Arts, Acrylic Block, Soft Pool Shadow Ink by Hero Arts, Jet Black Archival Ink and Aquamarine Archival Ink by Ranger, Pear Tart Memento Ink by Tsukineko, brad by Basic Grey, white cardstock by Bazzill

Have a creative day!

mixing it up

For those of you with a lovely long weekend, Happy Memorial Day! I hope you’re having a wonderful relaxing day.
In the summer I love relaxing at the lake. It’s my favorite place. Today I’m mixing things up here with a mixed media canvas. I’ve been dying to try out this popular trend and so here is my version and my first try at it. It was a little out of my comfort zone but I’m pretty happy with how it turned out. This is a medium I’d like to find more time to explore.

My canvas is 24″ square that I picked up at Michael’s and I’ve uses some great textures from my Gauche Alchemy kit this month. I just couldn’t leave without creating one last fun project. The wavy lace inspired a lake scene. Can you believe the lace was actually a deep, dark royal purple?!  The clouds have been created from some burgundy fabric, the butterflies from some silver foil confetti and the sand is some red corrugated paper.

To get the paint to adhere well to all the surfaces, you need to prime them with a thick coat of gesso. You can see in the above photo that I’ve covered the textures enough to cover up 99.9% of their color.

Then the fun begins…painting over the surface with layers of paint. I like mixing the paints right on the canvas and just adding color until I get the look I’m going for. To add further interest and to highlight texture, I’ve sponged on some Distress Ink and added areas of Crackle Accents for an aged look.

You can also find this project todayon the Gauche Alchemy blog.

Supplies: canvas from Michaels, corrugated paper, lace, butterflies, buttons, vintage sheet music and fabric from Gauche Alchemy, Picket Fence Stamp set by Lily Bee Design, Claudine Hellmuth Studio Gesso, Claudine Hellmuth Studio Paint in Classic Teal, Sable, Traditional Tan, Sky Blue & Blank Canvas by Ranger, Chipboard Banner by Maya Road, Jet Black Archival Ink by Ranger, Brushed Corduroy Distress Ink, Tumbled Glass Distress Ink & Barn Door Distress Ink by Ranger, Crackle Accents by Ranger, Thickers by American Crafts

Have a beautiful day!

Call Me

Today I have to learn how to let go.

My oldest moves out today. I’m so excited for him and his new opportunity, I know it’s time but the house just won’t be the same without him. He doesn’t like things all sentimental so I’ll keep this short and sweet. I love him and he will be very much missed. I’m counting on him calling and coming home often.

I’m so thankful for technology, aren’t you? The way we can keep in touch pretty much anywhere.

Yesterday I thought I’d create a little felt pouch to store my phone in and protect it. It’s a sweet little pouch  and if you don’t have a phone, it can be used for many other things. Today I’m in the CLASSroom with a tutorial and step outs. Here’s the link.

Now I’m off to get busy as it’s going to be a crazy day!

Have a fabulous weekend!


Paper Gift Bow Tutorial

Paper gift bows are so crazy easy to make and  I just adore the custom look. I may never buy another gift bow again! Give them a try and tell me what you think.

Paper Gift Bows Tutorial

Supplies: cardstock or patterned paper, stapler, adhesive

1. Cut strips of paper to these sizes… 3 – 3/4″x10″ strips, 2 – 3/4″x8.5″ strips, 1 – 3/4″x4″ strip

2. Start your bow by twisting each of the five long strips into a figure 8 shape and stapling in the center.

3. Adhere the large three looped strips together and the medium looped strips together.

4. Adhere the smaller strips into the center of the larger. Staple the small strip into a single loop.

5. Adhere the small loop into the center of your bow to finish it.

Use these fun paper bows to decorate packages and gift bags. They are perfect for a coordinated gift or for using of scraps of paper. If you have a 4.5″ x 10″ scrap of paper, you can make this bow. For this project I’ve used the Al Fresco paper from the Picket Fence line by Lily Bee Design.

Happy creating!


life

This time of year is all about new life.
Thinking about life has me remembering to make the most of each moment as I’ll only pass by this way once.

I’ve also been thinking about creative risks and experiments. Making my own art.

Here’s a little peek of some canvas wall art I’ve created.

I really enjoyed creating something new.

Want to see more or give it a whirl? I hope you’ll join me today in the CLASSroom for the entire project and step outs.

Wishing you a blessed Easter!