Category Archives: Glue Dots

nested eggs

I always look forward to Easter weekend each year. I love chocolate and eggs but importantly taking the time to consider the real meaning of Easter. This year my family will all be together again and I’m looking forward to that too.

The other day I was finishing up using the last of a roll of Glue Dots®. I go through this adhesive like crazy. I set the empty roll aside as I knew that I could definitely recycle it into something creative. Re-purposing packaging is a wonderful thing.

Yesterday I was busy creating when it hit me that these rolls would be a perfect way to display Easter eggs. Please forgive me that my egg isn’t died yet but I know you get the idea. Just picture my little project with a lovely pastel hand-dyed egg.

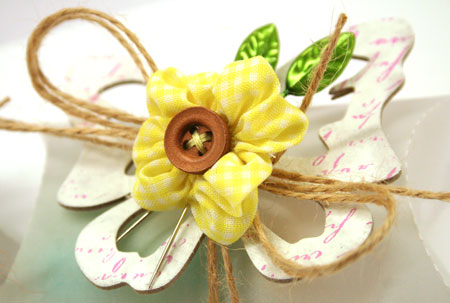
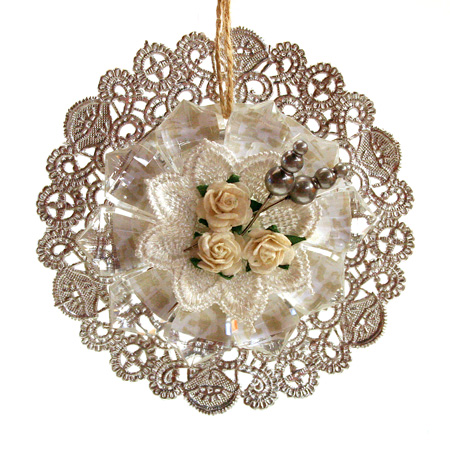
To create this project I covered my empty Glue Dots® roll with some patterned paper. I then adhered some lovely tulle trim around the inside of the roll. More of those wonderful Glue Dots® to the rescue.

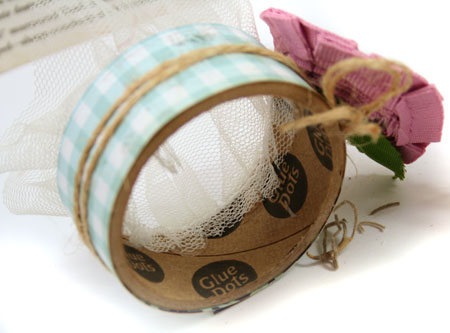
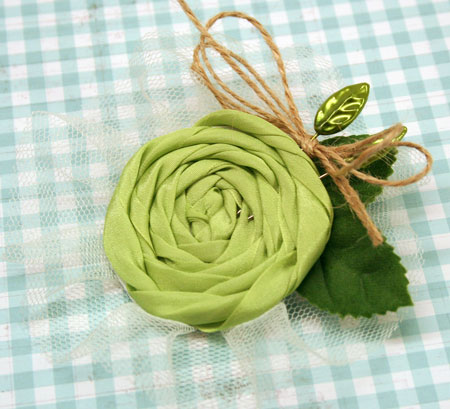
Next came tying the roll with twine and fixing it in place with a Glue Dots® under the knot. And lastly, I adhered the flower in place as well. To finish it off, I put some sphagnum moss in the middle of the roll to make a little “nest” for the egg. Sweet!

Supplies:

I wrote this blog post while participating on the Glue Dots® design team.
Happy creating!

tied up with string

Just a few more days until Easter! How are you packaging some of those sweets?

I thought some little vellum pillow boxes might just be the ticket. They are filled with mini eggs (Cadbury’s are my favorite!) that you can see through the vellum and they are all tied up with some twine and simple spring embellishments.

To create this sweet little pillow boxes, I started off with a Sizzix die. For me it’s a classic and a great way to package things. By using Vellum instead of cardstock, it just adds a light spring-like touch. Vellum can be hard to adhere though so this die cut pillow box is adhere with Glue Dots® Lines along the edge to keep it secure.

To keep my chipboard butterfly, embellishments and even my knotted twine in perfect place, I’ve turned to my favorite adhesive, Craft Glue Dots®. They have a really strong bond and are perfect for even heavy embellishments.

Supplies:

I wrote this blog post while participating on the Glue Dots® design team.
Happy creating!

Glittered

How do you line things up in a grid perfectly? It can be a bit tricky at times. Today I have a fun and quick card to share with you and it’s so easy to get the alignment. You don’t even have to measure!

I love Glue Dots® as my adhesive of choice. It’s perfect for adhering all those embellishments I love so very much. I’m used to using it in a roll but did you know that it comes in sheets too? I’m hooked on these sheets now.

Why? Well, they are so easy to use and they come with backing on both sides which make it really easy to create today’s card. This card uses sheets of Pop Up Glue Dots along with glitter to embellish this design. I think they look a little like gumdrops. Yummmm!

So what I’ve done here is take a sheet of the Pop Up Glue Dots®, remove one of the backing sheets and placed it face down onto my card. All 12 of the Glue Dots will be perfectly aligned. Easy Peasy! I then removed one of the perforated backing pieces at a time and applied glitter. Press it into the Glue Dots® very lightly with your finger and then move onto another color until finished.

Supplies: Pop Up Glue Dots® Sheets, white cardstock by Neenah, Glitter by Art Institute, rub-on by Bazzill, twine, Leaf Trinket Pins by Maya Road.

I wrote this blog post while participating on the Glue Dots design team.
Happy creating!

Shades of Green

I have a lot of lovely scrap ribbons and trims.

Seriously. A LOT!

Since one of my mottos for the year is use it or lose it, well…I’ve been looking for some ways to use things up. So instead of turning to patterned paper on this card design, I’ve used strips of ribbon to make a background of striped greens. It’s easy to adhere them with the Continuous Glue Lines® Roll from Glue Dots®

I’m also enjoying using the new XL Glue Dots® to make my own flowers and other embellishments. To make this St. Patrick’s Day themed design, I put together this little shamrock using some Maya Road zipper trim that is adhered together with the XL Glue Dots®.

My Irish eyes are smiling. 🙂

Supplies: XL Glue Dots®, Craft Glue Dots®, Continuous Glue Lines® Roll, misc. ribbons and trims, zipper trim by Maya Road, twine, mini pin by Tim Holtz, green pearl trinket pin by Maya Road

I wrote this blog post while participating on the Glue Dots design team.
Happy creating!

the wearing of the green

It’s March already and spring is just around the corner. I can’t wait to shed my drab winter duds and replace them with some bright and sunny weather wear.

St. Patrick’s Day is also around the corner and usually the day slides right by for me. I don’t have much green in my wardrobe. The other day I decided to make a fun little crafted pin to wear. I know it’s not covered with shamrocks but it’s me. I”m happy to be half-Irish but I tend to keep my shamrocks on my linen tea towels and on a little Shillelagh that we have.

To create this I’ve used two of the XXL Glue Dots®. First adhere one of them to some scrap cardstock and then make a rolled rose on in. Tuck the tail and adhere it to the reverse side and then place the other dot on the reverse side. Adhere the leaves. Adhere your tulle trim around the edges on the reverse and then adhere a punched cardstock circle. Adhere a pinback to the reverse. Insert your trinket pins into the flower and tie on some twine. It’s a quick and fun project.

Quick Tip: If you don’t want to wear it, this would make a fun custom embellishment for a card or scrapbook page.


Supplies:

I wrote this blog post while participating on the Glue Dots design team.
Happy creating!

mr and mrs.

Wow! Things have been busy around here since I last posted. I kept my word and really have buried myself in a spring cleaning craft room purge. I did a real clean sweep and have gotten rid of 95% of my patterned paper, older stamps and all kinds of things that I rarely use. Still can’t quite believe I’ve done that but things will be MUCH more efficient from now on.

I couldn’t resist making a few new cards from the bits and pieces I found. I’ll share those another day as they aren’t photographed yet. My daughter is on her way home and I pick her up shortly. So excited! She traveled all night to spend a couple days with us. Another girls’ lunch is in order don’t you think?

In the meantime… I have a shabby little wedding frame to share with you today. I was just thinking it would be cute on wedding tables too with table numbers in them or how about a large grouping of them with all sorts of pictures of the bride and groom?

One of the new products I have been enjoying lately is the XXL Glue Dots®. They are such a wonderful size for creating your own embellishments.

I’ve used two of the XXL Glue Dots® to create this rolled rose and tulle flower. Here’s how to do it…

  1. Punch a large circle from cardstock and apply your XXL Glue Dot® on it.
  2. Starting in the center, twist your linen ribbon and spiral it tightly around the Glue Dot until entire dot is covered.
  3. Trim away excess cardstock and adhere tail of ribbon on reverse.
  4. Apply a second XXL Glue Dot® to reverse side of rolled rose flower.
  5. Apply two layers of tulle ribbon around outside edge of Glue Dot.  Adhere to frame.

The vintage buttons are also adhered with dots to the frame. Mini Glue Dots® are the perfect size for adhering tiny buttons and their thin profile keeps them flat to the project.

Supplies: vintage buttons, Buttercup line patterned paper, frame: unknown, also…

I wrote this blog post while participating on the Glue Dots design team.
Happy creating!

Crystal Bliss

Sometimes ideas that pop into your head make you just so excited to see how they will turn out. I can’t tell you how much fun I had with today’s little project and while it looks pretty impressive, it’s a breeze to make. Yay!

How about a crystal flower accent that I’ve made into a tag? You can add it to a gift bag to make a beautiful wedding or anniversary gift bag or just leave it on it’s own and hang it to catch the light. My photos turned out pretty well but they just can’t compare to how pretty this looks when it catches the light.

So how did I make it? Glue Dots® has some exciting new products released for CHA this year. They are super-duper XL Glue Dots® and XXL Glue Dots® and they are amazing to work with! For this project I’ve used the XXL Glue Dots® that are 2″ in diameter and they come 24 to a package. I’ve already run out and I can’t wait to get my hands on more!

To start off with, I punched a 2.5″ circle out of some patterned paper. If you have a sharp eye you’ll notice I used some Victoria Park paper as it’s subtle and doesn’t take away from the crystals. The XXL Glue Dot® goes on next and then I spaced the crystals around the adhesive dot. I used some Maya Road crystals that unfortunately are no longer available but linked below, they have a slightly different style out that will work just the same.

After backing the crystal “flower” with a silver doily, I added in a Pop Up Glue Dots® in the center of the crystals and added in some pretty Maya Road embellishments. Now that I’ve made one, I could make more, each in a matter of minutes.

Supplies:

Additional supplies: Silver Foil Doilies and Kraft gift bag from Michael’s
I wrote this blog post while participating on the Glue Dots design team.
Happy creating!