Category Archives: Craft Critique Project

Joy

jks-holiday-joy-flat.jpg

Well…it’s almost here! Just six more days until Christmas! We’re actually celebrating one of our Christmases tomorrow with sixteen here for turkey tomorrow. I’m going to be a busy girl! Today I’m baking squash and making cheesecake and stuffing. Yummmm!

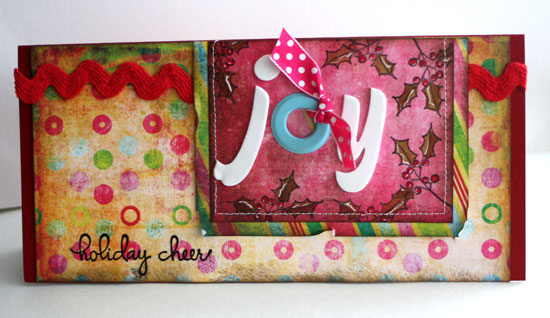
This card is kind of a mixed bag. Mostly a scrappy style card with some stamped touches, this card picks up its unique color combo from the Fancy Pants Designs Christmas paper.

Holiday Joy

jks-holiday-joy.jpg

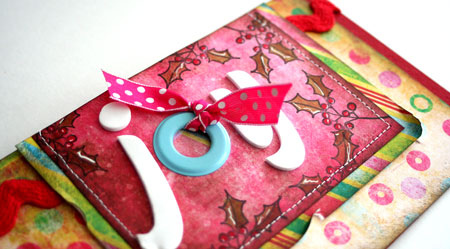
To make this card a little more “Christmassy” , I stamped holly sprays around the sentiment panel and colored them in with Copic Markers. Some white gel pen highlights tie in with the white American Crafts foam letters.

Quick Tip: Substitute fun embellishments such as this Making Memories Grommet for letters when spelling out a word.

Have a joyful day!

winter-julia.jpg

Supply List:

Stamps: Heart Warmers (Kim Hughes line) by Cornish Heritage Farms

Ink: Versamark by Tsukineko, Black Memento ink by Tsukineko

Paper: Fancy Pants Designs, Blush Red Dark cardstock by Prism

Other: ric rak & ribbon by Creative Impressions, black emb0ssing powder, markers by Copic, sewing machine, Making Memories Grommet, white gel pen

Circle of Love

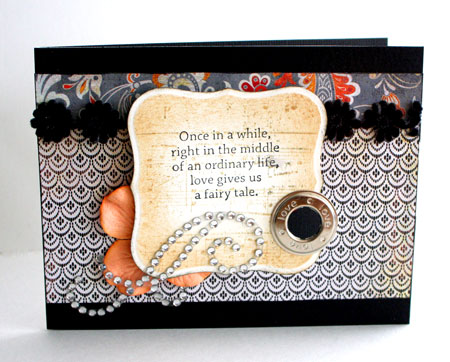
Now and then I buy something that I really want to try and there it sits. Hmmm….what’s with that? It may be a case of too much to do and not enough time. The Making Memories Grommet Tool Kit is one of those items and I used one of these Jumbo eyelets here on this wedding design. I especially love the look of the word grommets and I used one of them as an accent. I just love words!

Fairy Tale

jks-fairy-tale.jpg

After playing around with this tool…I’ve written a review on it for Craft Critique on the ins and outs of it. 🙂

Take care!

a-signature-2.jpg

Supply List:

Stamps: Aged Sheet Music Scrapblockâ„¢, Wedding Centers (Mona Lisa Moments line) by Cornish Heritage Farms

Ink: Tuxedo Black Memento Ink by Tsukineko, Antique Linen Distress ink by Ranger

Paper: Black & Natural Smooth  cardstock by Prism, 6×6 paper pad by Basic Grey

Other: dies by Spellbinders, ribbon and flower by Prima, rhinestone flourish, Wedding Word Grommet and Grommet Kit by Making Memories

Simply Saturday… simply airbrushing

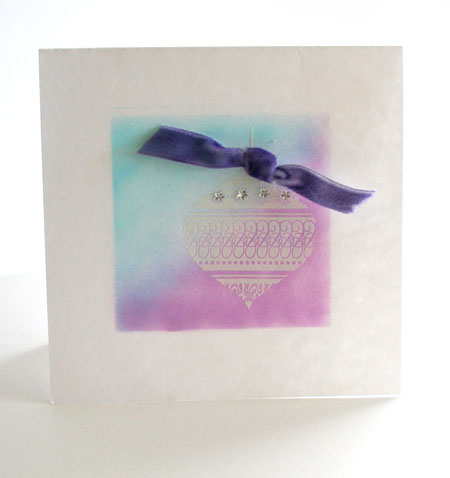
Happy Saturday! I like to keep Saturdays as simple as possible around here. So many people home and so much to cram into one day! I have two simple cards to share with you today, both using some quick and simple airbrushing. I’m loving how fun this airbrush is to use! In both these designs it gives a fresh graphic look. My first design doesn’t even use any stamping. Simply a masked, airbrushed background, a rub-on transfer and a couple embellishments.

Holiday Ornament Design

jks-airbrush-holiday-orname.jpg

Supply List: Simply Smooth White Cardstock by Prism, Copic markers and airbrush, rhinestones by MAMBI, blue Velvet ribbon (airbrushed to purple) – May Arts

Airbrush Elvis

jks-airbrush-elvis.jpg

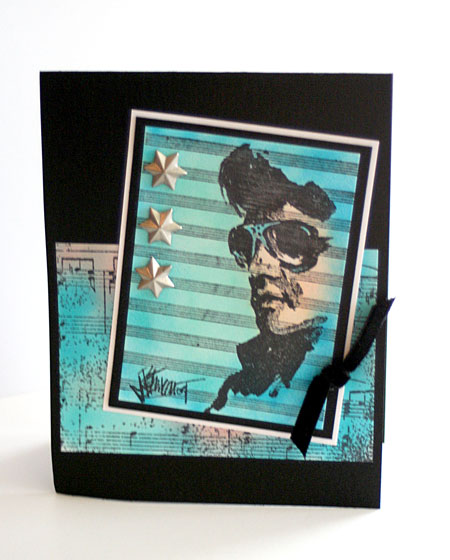
Now this Elvis image is so cool and funky looking…I thought it just had to be airbrushed. Since the image is quite large and indestinct in style…I didn’t even mask. I think Elvis is lookin pretty cool! The background is stamped with my Aged Sheet Music Scrapblockâ„¢ and then airbrushed in two blues and a pink. This was just so fun and quick to do!

Both these projects were part of a Craft Critique Copic Airbrush Review. If you’re thinking of buying this airbrush…you may want to check it out.

Enjoy your weekend!

a-signature-2.jpg

Supply List:
Stamps:
Sheet Music Elvis by Cornish Heritage Farms
Aged Sheet Music Scrapblockâ„¢ by Cornish Heritage Farms

Ink:
-Black Memento Ink by Tsukineko

Paper:
-black Prism
-Simply Smooth White Prism

Other:
-stars by creative Impressions
-black velvet ribbon by Creative Impressions
-Copic Markers
-Copic Airbrush system

Airbrush Masking…a new spin

Here’s a design I’m really excited about and it’s so simple to do. As you know…I’ve been having fun with my airbrush tool lately and this is one project that shows you a neat idea for masking. Masking is one of those essential techniques when doing most airbrushing and you can use a mask you’ve created yourself, mask using a stencil or purchased mask or just use something you already have on hand by laying it on top of your project. I love KI Memories die cut papers and had a scrap leftover just large enough to use on the front panel of my design. As you can see…I didn’t actually keep the lace paper on my project but used it as a mask.

 Sweet Sixteenth

jks-sweet-sixteenth.jpg

Quick Tip: This is one great way to get lots of mileage (and a new look) from those expensive diecut papers. You can use the paper as a mask over and over OR simply use it as a mask once and then reuse the airbrushed mask in another project.

How to….Julia’s Airbrush Die-cut Paper Masking Technique

  1. Stamp  paper with Backgrounder Stamp.
  2. Lay piece of Lace die-cut paper over top to mask surface.
  3. Airbrush parts of the design using one color.
  4. Repeat airbrushing with two more colors till completely covered.
  5. Removed Lace paper mask.
  6. Cut panel to size and use on project.

This project is part of a Craft Critique review on the Copic Airbrush System.

Have fun with this technique!

a-signature-2.jpg

Stamps:
-Invitation Essentials (MLM Line) By Cornish Heritage Farms
-Spanish Script Backgrounder by Cornish Heritage Farms

Ink:
-black Memento ink by Tsukineko
-Pink Adirondack ink by Ranger

Paper:
-Simply Smooth White by Prism
-KI Memories lace paper (removed after spraying)

Other:
-flower and tape by Prima
-sewing machine
-Copic markers and airbrush system

Simply Saturday…simply soldered

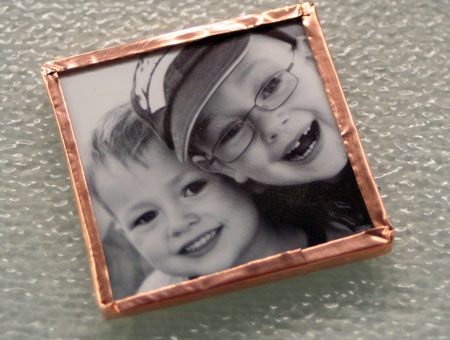
Really. It’s not that hard. It’s actually pretty simple. Just start with a simple project such as a photo and get soldering! I created this quick pendant with a photo of two of my boys on it. You’ve probably seen the photo before as I’ve used it on a couple layouts. If you’ve always wanted to try soldering…why not now? There’s time to put together a few fun projects for Christmas gifts!

Soldered Photo Charm

jks-soldered-photo.jpg

Here’s how to go about it!

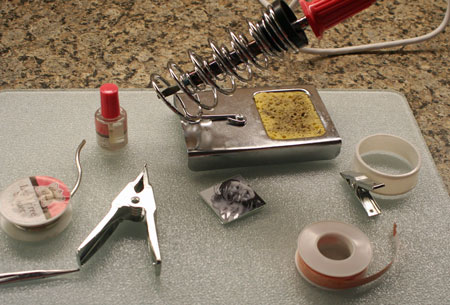
Soldering your project is really quite easy to do and just takes a little practice. Create your art the size of the glass slides you intend to use and then sandwich it between the two pieces. As you can see both sides of the design, don’t forget to add art to both front and back. Carefully wrap the edges with your copper foil tape and fold side edges over the glass on both the front and back sides. Fold corners neatly and burnish the foil to the glass to remove wrinkles and produce a secure frame. Hold your project with clamps provided as it will be too hot for your fingers. You will also need a heat-proof work surface. You can purchase a heat mat, use a large tile or as I do, use a glass cutting board. You don’t want small bits of molten solder ruining a beautiful counter or desktop. Plug in your soldering iron and heat well. Before adding solder, paint the copper foil tape edges with flux to help the solder spread evenly across your surface. Hold the solder to the top of your soldering iron to melt solder and then touch top of iron to copper surface. This will allow the solder to flow onto your copper. Lift the soldering iron up a little and move soldering iron along to allow solder to flow down onto the surface. It is best to apply small amounts of solder at a time. You can always go back and add more coats for a smooth beautiful finish.

jks-soldered-photo-supply-p.jpg

jks-soldered-photo-copper-s.jpg

jks-soldered-photo-flux.jpg

Sorry I don’t have a photo of the actual soldering but that would require more hands than I have!

Want more soldering ideas? Simply type solder in my search feature. 🙂 Part of today’s entry was part of a Craft Critique review here.

Have a simply wonderful Saturday!

a-signature-2.jpg

A little light…

I adore lighthouses. They remind me of wonderful trips to the East Coast as a child and more recently as an adult. I’m so excited about this new stamp set from Cornish Heritage Farms called Beacon of Hope. You may have seen some of them before. It’s a compilation of images and now they are all scaled and designed to work together with each other and some incredible sentiments.  This new line is called Scene-it and you’ll want to watch each month for the release as they are stunning, bring you limitless ways to stamp scenes, and put together in a set, they are an incredible value.

Sorry I’m just getting back to you with the winners of the blog goodies. I’m announcing them at the end of the post so keep reading. 🙂

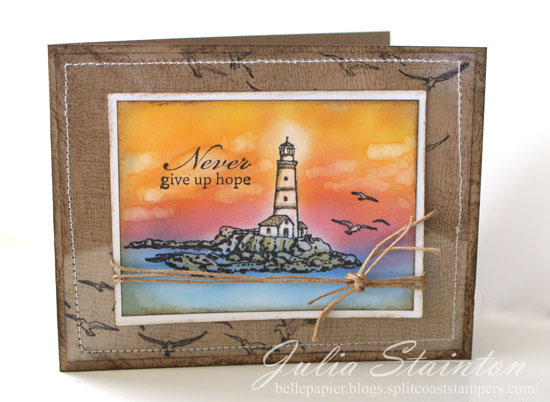
Never Give Up Hope
jks-never-give-up-hope.jpg

I’ve been having fun with my Copic Airbrush over the past few weeks and have gotten quite addicted to it. I know you’ll be seeing a lot of airbrushing in the weeks to come.This lighthouse background was created by stamping my image and then airbrushing over the design. No masking! I’m lazy! 😉 Because there wasn’t a large amount of white area..I simply took my Colorless Blender pen and removed the color from the lighthouse and seagulls. I used this same pen to color in clouds. To get the white glow around the light, I put my blender pen right into my airbrush and sprayed to remove the color softly.

To create my background I stamped the Cheesecloth Backgrounder onto my kraft cardstock card base. Seagulls from the Beacon of Hope set are stamped on my Clear Card Sheet layer before stitching it to my design.

This design is part of a new Craft Critique article that I’ve written on the Copic Airbrush System. If you’re interested in this product…check it out here.

Quick Tip: When airbrushing with Copic markers, make sure you use the same ink you would when coloring so that the image doesn’t bleed. I like to use Tuxedo Black Memento Ink by Tsukineko and Pitch Black Adirondack ink by Ranger is a good choice as well.

And now those winners! I used an on-line random number generator to choose two winners from the comments left. Thanks so much to everyone who stopped by!#16 Amy is the winner of the first package of goodies and #119 is Carrie…the winner of my second package of blog candy. Please e-mail me ladies with your addresses and I’ll get them out to you!

 Thanks so much for stopping by! I hope you have a fabulous Friday!

 a-signature-2.jpg


Supply List:
Stamps:
Beacon of Hope (Scene-it Collection) by Cornish Heritage Farms
Cheesecloth Backgrounder by Cornish Heritage Farms

Ink:
-Black Memento Ink by Tsukineko
-Black Stazon ink by Tsukineko
-Brushed Corduroy Distress ink by Ranger

Paper:
-Simply Smooth White by Prism
-Kraft Cardstock by Prism
-Clear Card Sheet by Cornish Heritage Farms

Other:
-hemp cord
-sewing machine
-markers by Copic
Simply Saturday….simply tags

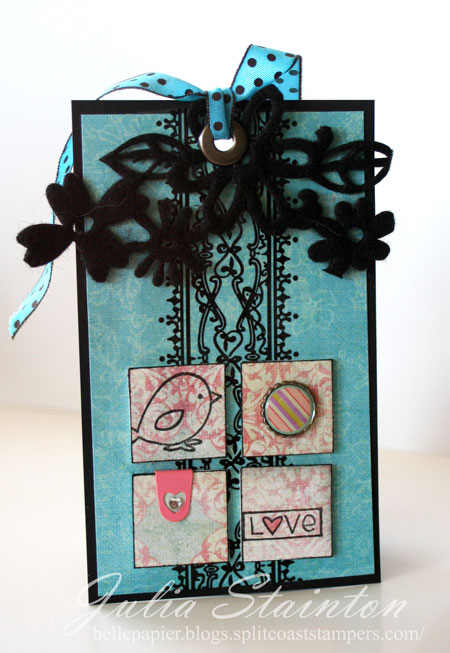
Tags are a fun way to add a special touch to gifts. They are also super quick and fun to make. This makes them perfect for trying out fun new ideas without committing to a large project. Today I have two fun tags to share with you. These tags were super quick to put together as I used some tag sketches from Page Maps for some quick inspiration.To create tags, use your imagination, use a sketch or look to card layouts for inspiration.

Quick Tip: Tags aren’t just for gifts! Incorporate them as an embellishment on a scrapbook layout or an altered project book.

Love Tag

jks-love-tag.jpg
Supply List:

Stamps:
Mocha Chica (Kim Huges line) by Cornish Heritage Farms

Ink:
-Brushed Corduroy distress ink by Ranger
-Black Palette ink by Stewart Superior

Paper:
-black cardstock by Prism
-Steel Toe Mary Janes by Prima patterned paper

Other:
-inchies
-decorative tape by Prima
-flet by Queen and Co.
-clip and brad by making Memories
-jumbo eyelet by We R Memory Keepers

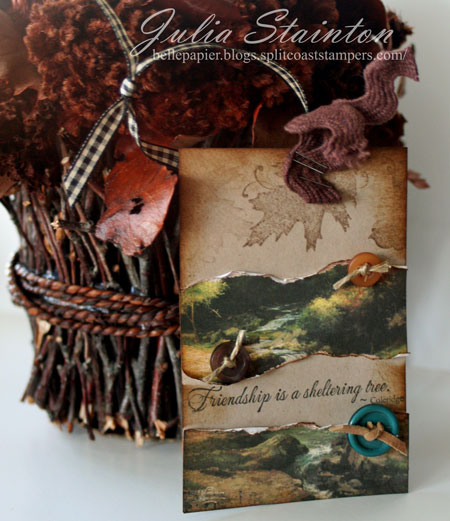
Tree Tag

jks-tree-tag.jpg


Supply List:

Stamps:
-Motivational Centers (Mona Lisa Moments line) by CHF
-Leaf and Acorns by Cornish Heritage Farms

InK:
-Brushed Corduroy Distress ink by Ranger
-Black Hybrid ink by Stewart Superior

Paper:
-Masculine series paper pack (Thomas Kinkade line) by Cornish Heritage Farms
-kraft cardstock by Prism

Other:
-buttons by Autumn Leaves
-ribbon by Creative Impressions
-twine
-stapler
-jumbo ric rack by Creative Impressions

These tags were created as part of a review last month at Craft Critique. Read the entire article here. If you’re inspired to try out a tag…share the link! I’d love to see what you create!

 Have a simply wonderful Saturday!

a-signature-2.jpg