Monthly Archives: June 2012

glorious & free

It’s the Canada Day weekend and a glorious one at that! I’m excited to be spending most of the weekend with my loved ones at the lake. I’m so happy to celebrate this weekend and so thankful to be born a citizen of this land. I think most of us take for granted our freedoms and it’s a good thing to stop and think about how blessed we are. Each year we celebrate Canada Day on July 1st celebrating the anniversary of the July 1, 1867 when we became a country.

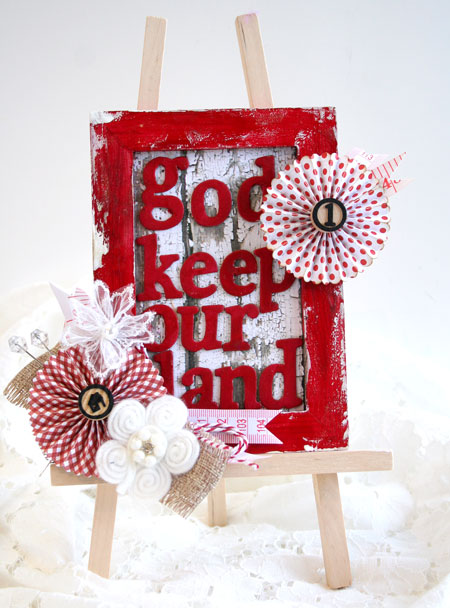
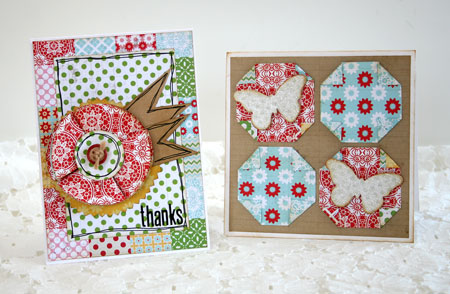
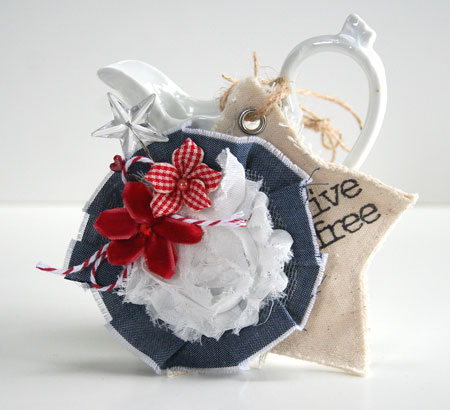
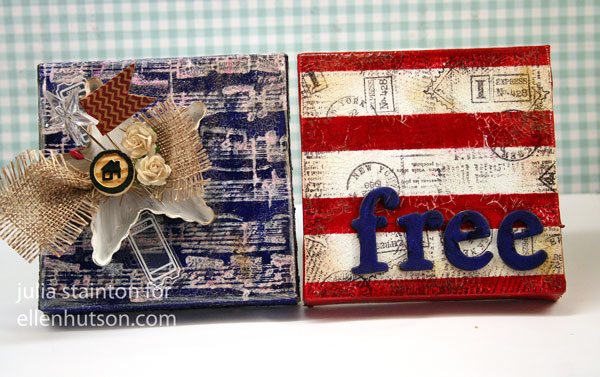
This year I wanted to create a Canadian themed project for the celebration. As I went through my stash, I found I didn’t have any maple leaf themed items. I really wanted to use what I had on hand so came up with a red and white themed frame. There are no leaves but I think it still has some Canadian flavour with the color scheme and part of our national anthem as the sentiment.

O Canada!
Our home and native land!
True patriot love in all thy sons command.
With glowing hearts we see thee rise,
The True North strong and free!
From far and wide,
O Canada, we stand on guard for thee.
God keep our land glorious and free!
O Canada, we stand on guard for thee.

To create this project I started off with a dollar store frame and stand and altered it. The wood frame is painted with layers of paint and distress crackle paint and inked with Distress Ink for a weathered look.

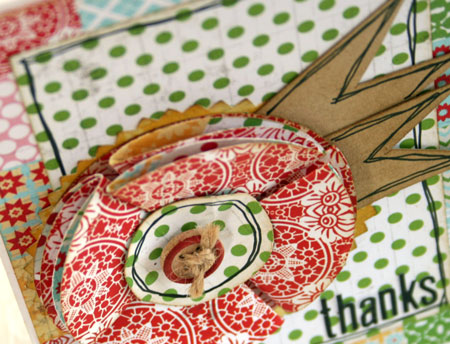
The embellishments are my favourite part of this project and I’ve used lots and lots of Glue Dots®. I started off embellishing this frame with the die cut rosettes. Putting them together is super easy with an XXL Glue Dot®. Craft Glue Dots® adhere the medium sized flowers and other trims and Mini Glue Dots® are perfect for adhering the chipboard letters.

Supplies: dollar store frame and… 

I wrote this blog post while participating on the Glue Dots® design team.
Happy Canada Day!


Lily Bee Blog Hop

Welcome to the Lily Bee Blog Hop! If you’ve just started…great to see you! If you began hopping from the new Lily Bee blog, well, I’m sure you’re chock full of inspiration from some talented ladies and you are almost done. The Lily Bee blog is now at a new location so if you haven’t stopped by, make sure you bookmark it. Stop by as there are fun sneak peeks at the new summer releases. You are going to love them!

Today I have two Lily Bee cards to share with you from the Handmade line. It’s one of my favorite lines and I love the fresh colors and the quilting theme.

Handmade lends itself to a homespun look so I’ve gone that route with this card design. A handmade folded circle flower is the main embellishments and I’ve added in some freehand pen work to accent some of the layers.

Each flower consists of 6 circles. Five are 2.5″ in size and four of them are folded in quarters and then adhered to the fifth. The last circle is 1.5″ and becomes the flower center.

My second card features squares with folded corners. It creates a fun quilt block look. The paper and chipboard butterflies are die cut and then covered with Rock Candy Distress Stickles.

Back to the blog hop….

Did you know Lily Bee is having a giveaway?! Here’s the details…

We will be giving away a $50 VISA gift card to one lucky winner. In order to be eligible, hoppers need to leave comments on each designer’s blog, and the Lily Bee Blog. Comments will be open until Monday, July 2nd, Midnight EST. We will announce the winner on the 4th of July post.

Sounds like an awesome prize! If you’d like to play along for a chance to win, the blog hop list is below.

Supplies:

Thanks for stopping by and have a wonderful long weekend!

live free

I’m counting the days down to the long weekend! I’m not sure how July 4th will work in the middle of the week but here in Canada, July 1st is smack dab in the weekend. For me July 1st is one of my favorite weekends of the year…celebrating Canada Day and for me, it signals the beginning of summer.

I’ll have a Canada Day project to share in a couple days but for now, how about another Fourth of July project for those who live south of the border?

I had almost forgotten about this project until today as I’m busy designing things for Summer CHA. This fun canvas tag with the patriotic theme was one that I created for the Maya Road booth last January.

To create this little tag, I used a canvas page out of the Maya Road Star Canvas Album. It’s stamped with the Art Journaling Words stamp set and then accented with lots of lovely Maya Road goodies.


Thanks for stopping by!

Doorways & New Paths

June is one of those crazy busy months here. We’re finishing up the last week of school which is always full fun and also of loose ends to end up the year. I know all the schools south of the border have been out for some time but it all works out for us as here in Canada, we don’t start back until after Labour Day.

Last Friday night we were excited to attend a graduation party for a family friend. She’s just finished high school and is off to university in Saskachewan. I created this card for her.  It’s not your typical grad card but I thought the doorway and butterflies represent new things. I know she’ll have some wonderful experiences as she moves away but she will be missed. Best wishes Judy!

Supplies:

Have a beautiful day!

stars and stripes

I’m a Canadian girl, through and through.

OK. So you’re probably doing a double-take with today’s project then, right?

Well this project is inspired by the new beautiful Maya Road Star Bottlecaps and I thought I’d jump outside the box and create a set of vintage style canvases for my American friends.

I hope you like them and I hope I got the look right! 🙂

Today I’m in the CLASSroom with the tutorial and step outs on how to create this mini canvas set. I hope you’ll join me here.

Have a fabulous weekend!

stamps and a b c’s

Stamped sentiment are wonderful aren’t they? You can use them over and over and over again. But what happens when you don’t have that perfect stamp to say what you mean?

How about an alphabet stamp set? You can use it unlimited times and create an unlimited amount of phrases for any occasion.

Today I’ve create a couple cards featuring alphabet stamp sentiments. I’m sharing the first with you here but you can find them both on the Maya Road Blog.

Quick Tip: Line up your alphabet letters on a clear acrylic block and stamp on scrap paper before committing to your project. That way you’ll make sure all the letters are lined up just the way you want them.

Once again I’m stamping on canvas. This was a page from a Maya Road canvas mini album. It’s been first misted with Maya Mists and the patterns are created by using the Maya Road Die Cut Kraft Doilies as a mask and then misting in blue over a Crafter’s Workshop Swiss Dot template.

Supplies:

Have a beautiful day!

open a window…a window card tutorial

There is something fun and unique about a window card. I love being able to peek inside a card window and get a little glimpse of what is to come.

So how about a window card using chipboard windows? I’m excited to share my sweet and shabby window card featuring Maya Road Chipboard. I  think the window boxes full of pretty blooms are my favorite part.

To help you recreate this card, I’ve put together a video tutorial to share with you. It’s featured today on the Maya Road blog so stop by and check it out.

Happy creating!