Monthly Archives: March 2012

spring stamping

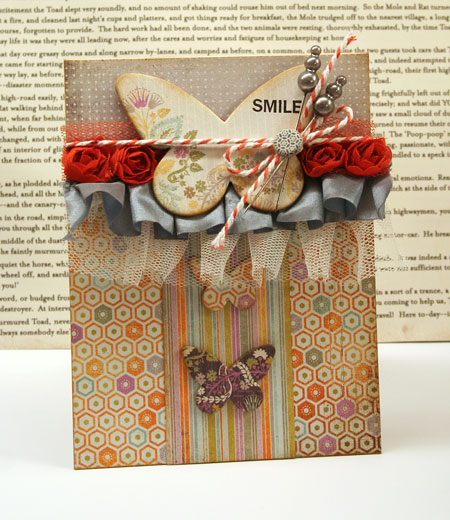
I’ve been busy stamping the past few days and found some time to have a little fun with my new Victoria Park line stamp set.  It’s always exciting to finally use it in person. When you design a set, you plan a lot of different ways to use it so that it will be the most fun and flexible for the end user.

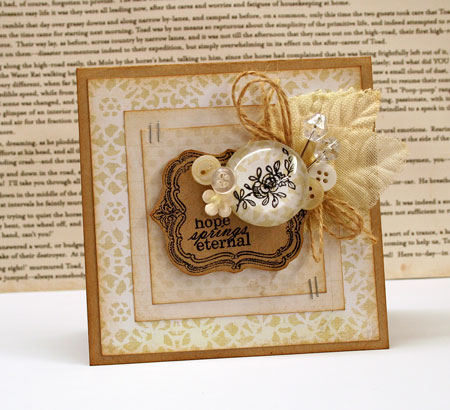
Today’s card incorporates a couple ideas I had in mind for this set. I adore frames and this little frame turned out just how I’d hoped. It’s perfect for sentiments, embellishments and even tiny photos.

I’ve also created my own embellishment using the tiny floral spring and some of the patterned paper from the line. I stamped it in a permanent ink…my tried and true go-to ink, Jet Black Archival. You need to use a permanent ink so that it doesn’t run when you apply the Glossy Accents to adhere it to the Cabochon. I love how the glass bevel really creates a beautiful accent and also magnifies the image.

I’m sharing this card design and another stamped card on the Lily Bee Blog. I hope you’ll pop over and join me here.

Supplies:

Happy Saturday!

altered canvas

Ready to break out of the box and get off the page?

I love using paper crafting supplies to try out creative ideas on other types of projects.

Here’s my latest…

You can find this project, lots of photos and how to’s in the CLASSroom. I hope you’ll join me!

Happy Creating!

in stitches

I love all things stitched.

I think it began as a child when I learned to do embroidery. I was always fascinated by my grandmothers’ skill with the needle. Both those wonderful ladies could make anything.

The latest Avocado Arts stamp set, Sew Nice, isn’t just sew nice. I think it’s sew wonderful! Just look at all the wonderful stitches stamps…

If perfect for stitchers and non-stitchers alike.

Quick Tip: When stamping an image repeatedly, flip it now and then to make it look less repetitive.

Some of the Avocado Arts Design Team have a little inspiration to share with you today. These girls never fail to inspire me so take a peek…

Supplies:

Happy stamping!

thoughts and prayers

We send cards to celebrate occasions but nothing means more than a card that comes at just the right time to say I care. It’s through those hard times that we really need to know that.

Today’s card is one of those designs. It’s subtle with some sweet canvas stamping but that little pop of color also brightens the design. A little bit of cheer.

Did you know that the Maya Road Chipboard Butterflies and their Canvas Butterflies perfectly coordinate? Here I’ve backed the stamped canvas butterfly with a chipboard one to add some dimension. The chipboard butterfly is inked up with the same ink for a little peek of color on the sides.

Supplies:

Take care!

for the birds

With the arrival of spring, I’m really enjoying the return of the birds that go south for the winter. There’s nothing quite like their songs and calls coming through the open windows. Nature makes the most beautiful music.

I love birds and you can see that in the Victoria Park line. I thought creating a sweet paper crafted birdhouse would be a great use for this paper. This project was one that I sent to CHA in January for the booth display.

To alter a birdhouse, I first started with a wooden birdhouse that I picked up from Michael’s. Each surface is covered with papers from the line and trimmed out with some Maya Road accents.

Supplies:

Have a tweet day!

Glittered

How do you line things up in a grid perfectly? It can be a bit tricky at times. Today I have a fun and quick card to share with you and it’s so easy to get the alignment. You don’t even have to measure!

I love Glue Dots® as my adhesive of choice. It’s perfect for adhering all those embellishments I love so very much. I’m used to using it in a roll but did you know that it comes in sheets too? I’m hooked on these sheets now.

Why? Well, they are so easy to use and they come with backing on both sides which make it really easy to create today’s card. This card uses sheets of Pop Up Glue Dots along with glitter to embellish this design. I think they look a little like gumdrops. Yummmm!

So what I’ve done here is take a sheet of the Pop Up Glue Dots®, remove one of the backing sheets and placed it face down onto my card. All 12 of the Glue Dots will be perfectly aligned. Easy Peasy! I then removed one of the perforated backing pieces at a time and applied glitter. Press it into the Glue Dots® very lightly with your finger and then move onto another color until finished.

Supplies: Pop Up Glue Dots® Sheets, white cardstock by Neenah, Glitter by Art Institute, rub-on by Bazzill, twine, Leaf Trinket Pins by Maya Road.

I wrote this blog post while participating on the Glue Dots design team.
Happy creating!

A Monday Smile

I know that not everyone loves Mondays so here’s a card with a warm color combo and a smile sentiment to start the day.

I don’t know what it is but suddenly I am loving orange. I even bought an orange handbag the other day. This orange and grey color combo is pulled from the new Plumeria line by Basic Grey. I’ve combined these beautiful papers with some great Maya Road trims for this card design.

Supplies:

I have a busy week so I’m off to start tackling my to do list. It’s mostly a creative to do list so I’m not minding it in the slightest!

Enjoy your day!