Monthly Archives: March 2011

Classic Black & Cream

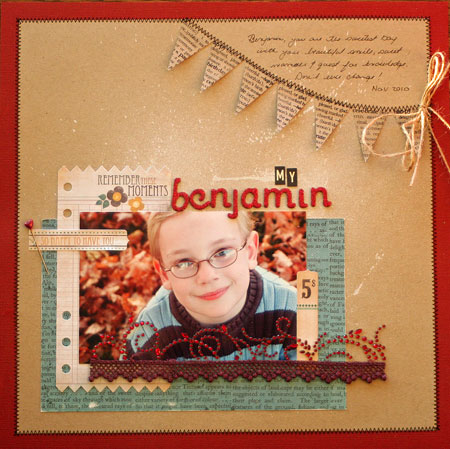
Anyone applying for the Lily Bee Design Team? I hope you do! It’s a fabulous company and a wonderful team to be on. The deadline is tomorrow so don’t forget!

One of the things I love most about Lily Bee product is it’s versatility. It can be dressed up or down, look modern or vintage…that perfect little black dress, you know?

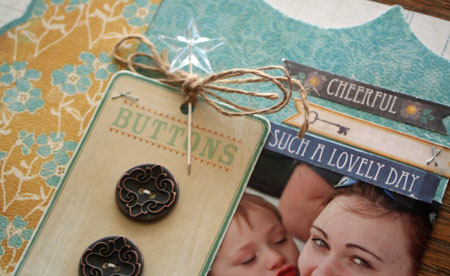
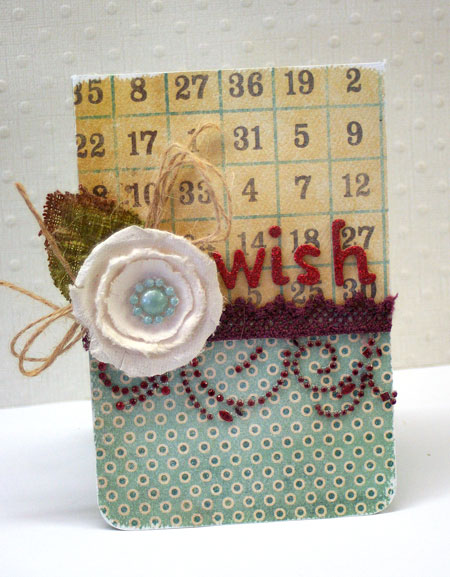
Here’s a little wedding card to show it all dressed up.

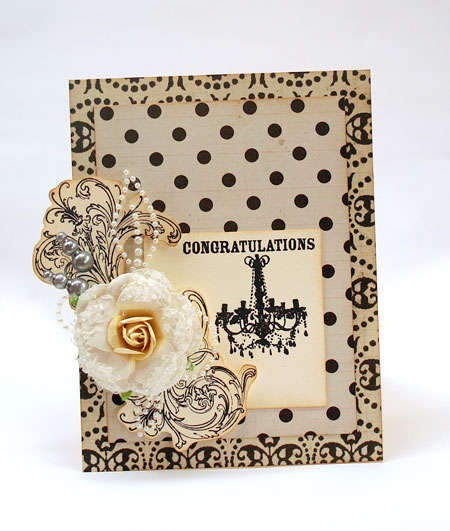
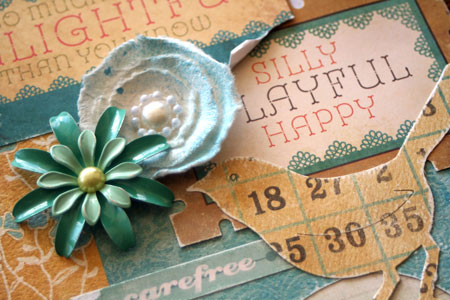
And speaking of versatility…can you tell these papers are from Lily Bee’s Christmas Town line? The papers are called Sleigh Ride and Christmas Window. Love that versatility!

Do you like sketch challenges? Check out the latest Lily Bee challenge and play along for a chance to win my Picket Fence line papers and stickers. Good luck!!!!

The beautiful and elegant stamps are by Stamper’s Anonymous. I stamped and then cut the flourish apart to be able to get it on the angle I wanted.

Supplies: Classic Cream Cardstock by Neenah, pearl leaf flourishes by Zva Creative, Jet Black Archival Ink by Brushed Corduroy Distress Ink by Ranger, Pewter Trinket Pins by Maya Road, Christmas Town line patterned paper by Lily Bee Design, Shabby French Stamp Set by Tim Holtz for Stamper’s Anonymous, flower by Prima,

Thanks for stopping by!

so much more

“so much more delightful than you know”

Don’t you just love that? That’s how I feel about my kids and so that journaling die cut was all I needed to inspire me to get creating.

This layout also comes as part of a challenge…

This project uses the latest Up the Street Scrapbooking kit and is also a challenge for you. If you’re like me you love die cut patterned paper but sometimes it is so pretty, it’s just hard to cut. I hope you’ll be inspired to try cutting into it and having some fun. Check out the challenge here.

So Delightful

We had such a great time on our family vacation in Florida. We loved every minute but the best thing was sharing the adventures and time with my children. I was so proud of how well they all got along and behaved throughout the trip. Yes the drive was long. Long, long, long! Over 21 hours to be exact and we drove straight through. We also had a wide variety of ages and personalities to work with. So while I could scrap fun moments and pictures of gators and palm trees, beaches and boats, this layout focuses on a sweet moment between siblings. Love you guys!

This little birdie just may be my new favorite die. Who would have thought I’d get so addicted to die cutting?!

Isn’t this a darling little button card by My Mind’s Eye. It’s part of the kit and while the buttons are gorgeous, I just couldn’t bear to take them off the original card. It’s sanded and tied with twine to make an instant embellishment.

And finally, the journaling. I wish I had bettering printing and handwriting! Oh well…it’s the thought that counts, right?

Enjoy your day!

Canvas Love

Canvas is such a great surface to work with. Pretty much anything you can do with paper, you can do with canvas.

Maya Road creates the most fabulous canvas albums that make unique mini albums. But why not take them apart? You can use them for so much more.

I’m super excited about the new Paper Crafts Magazine special issue, 350 Cards & Gifts. It arrived in my mailbox last week and I’ve been sitting down and enjoying all the wonderful ideas and possibilities. It’s chock-full of fabulous gift ideas. You’ll love it!

You’ll find one of my favorite projects from this issue below. I’ve used a couple Canvas Banner Maya Road albums as the base for it.

For a quick photo op, I just tied it on the front of an old dresser but it’s going to be hanging in my entryway to welcome people in.

Don’t you love how using the canvas album as a base makes it super easy to create? This banner uses the Cosmo Cricket Circa 1934 line for a classic look.

Quick Tip: Cut out letters with a digital craft cutter for quick letters in any size you want. I’ve used the Silhouette here.

It’s always so difficult to photograph a banner for blogland so here’s a closeup.

Happy creating!

I wish

i wish i had more time.
i wish it felt like spring.
i wish i didn’t procrastinate.
i wish i always knew the best thing to do.
i wish i were thinner.
i wish a good friend lived closer.

lots of wishes. of course i have more and i’m sure you do to. some of them i can’t do anything about and some  of them i can.

so now is the time to stop wishing and for me to start doing. it should be an interesting process!


this card uses the new Up the Street Scrapbooking kit. love it!

this prima flower (part of the kit too) is so pretty but to make it tie into this design better, i colored the center with a copic marker. remember how i said i saved some of the prima bling? this is the rest of it.

i am seriously lovin this kit. i can’t wait to share the next project i made in a few days. stay tuned!

wishing you a beautiful day!

a little warmth…

I am so jealous!

Some of you have spring and cherry blossoms!

Sigh…we still have snow and ice. I want spring!

While I impatiently wait, I need a little warmth. So here’s a fun and easy candle wrap….

I’ve used the back of the Fresh Air paper from the Picket Fence line. You know…the text paper…this is the reverse side on the 12×12 sheets. I’ve paired it up with lots of texture for a cozy look. The corrugated paper is from Creative Imaginations. I seriously want more of it. Canvas ‘ribbon” is just a piece of fabric torn into a strip and of course, to finish it off some darling little Maya Road pins and flowers.

I see the sun is peeking out now. I hope it’s going to melt some of the snow away!

Happy Saturday!


red & aqua

It’s still cold and snowy and I still have a lovely sinus cold. Please Spring! I need you!

When creating the other day, I turned to a bright and fun color combo to liven things up. A couple projects using my Picket Fence line are at the CLASSroom today. Here’s one of them…

Thanks for stopping by! You brighten my day…

my boy

Taking photos, especially of kids, can be a bit of a hit and miss adventure. With the advent of digital photography, it makes it so much easier to take a good picture. You can keep shooting and shooting until you get a good shot. Yes, it’s still tricky at times but I love not wasting film.

Last week I was going through some photos I took last November and came across this one of child number four. Love it! I printed it out so that I’d scrap it next.

Lucky me…I picked up the latest Up the Street Scrapbooking kit on Tuesday and the colors worked perfectly. It’s a fairly simple design to keep the focus on the photo.

My Benjamin

Do you see the white mist?! It’s Mr. Huey’s Calico White Color Mist. I saw this on a blog (sorry can’t remember where) and just had to have it. Of course, everywhere I looked it was all sold out. I was so excited to see that Tara has it in stock at Up the Street. It’s beautiful and subtle and I think I have a new product crush. Stay tuned. 😉

How about this lace/rhinestone embellishment for stunning? It’s part of the kit and I’ve saved a piece for another project too. That’s on my to do list for today.


Finally…the banner and the journaling. I’ve gotten over my fear of handwriting on my page. I rarely do anything else now. To create the banner…I saved the one inch strip of kraft cardstock that I cut off before matting the kraft with the red cardstock. Waste not, want not and all that! To make it stand out, it’s stamped with the Happy stamp from the Dictionary stamp set by Hero Arts.

Enjoy the day!