Monthly Archives: November 2008

Making Memories Spiral Journaling Books {C’est Bon}

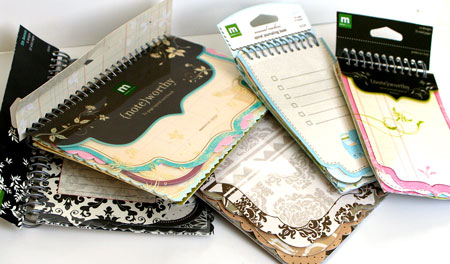
One new product from 2008 that I’ve really loved is the Making Memories Spiral Journaling Books. The fun scrappy office style is so “in” right now and I love how many different ways you can use them. Designed for the scrapbooking market to allow scrapbookers a quick and fun journaling space, these little tear-away sheets are also the perfect size to use on cards and altered projects. As you can see…I’m more than a little addicted to collecting them! 🙂

jks-spiral-books.jpg

What I love about them…

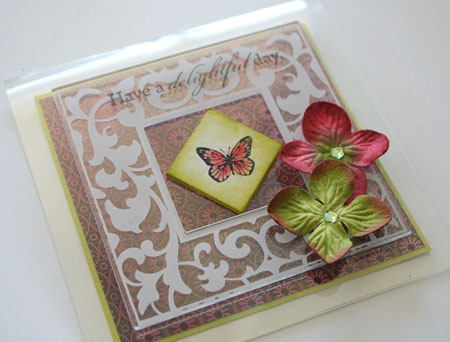
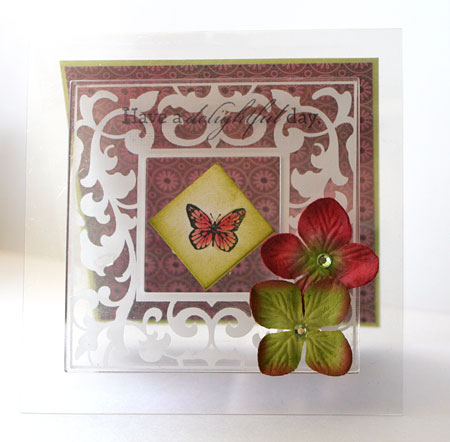
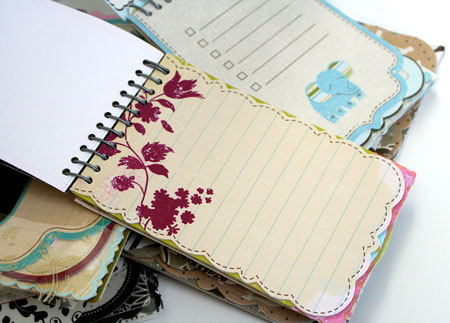
  • perfect size to use on cards as well as layouts
  • fun die-cut edges
  • lots of variety in each pack
  •  great for stamping on
  • many of the designs include lines that make it easy to space writing
  • love the texture the”notebook” edge gives
  • great variety of shapes
  • easy to find at your local scrapbook store
  • one package goes a long way
  • coordinate perfectly with other Making Memories products in the line
  • available in almost every Making Memories line releases as they have been so popular
  • designs are extremely easy to incorporate with other product on the market
  • inexpensive – price approx. $5.00 US (6.50-7.50 CDN) for thirty pages…$.17 a page

jks-sprial-close.jpgIdeas for Using Journal Sheets

  •  write your journaling on them…of course! 😉
  • stamp images on them
  • stamp sentiments
  • apply rub-on transfers
  • use as an anchor for your embellishments…cluster together on the sheet
  • layer under another layer
  • trim off the “notebook” edge if you want a cleaner look
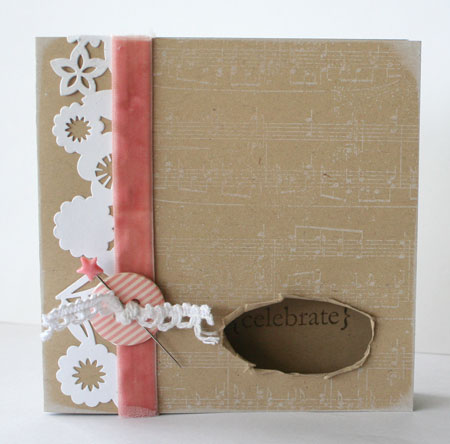
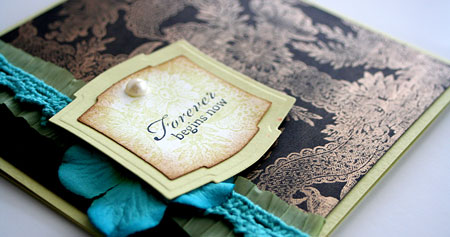
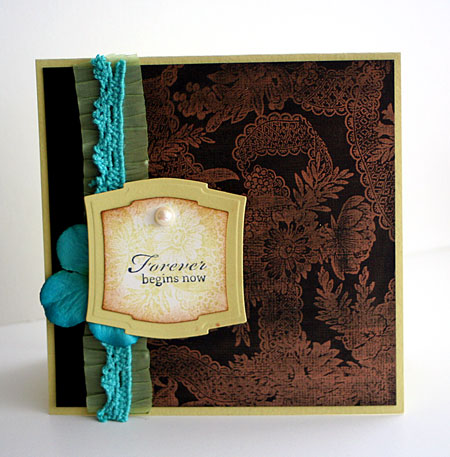
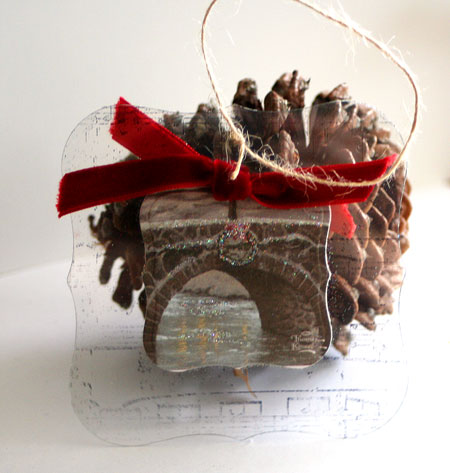
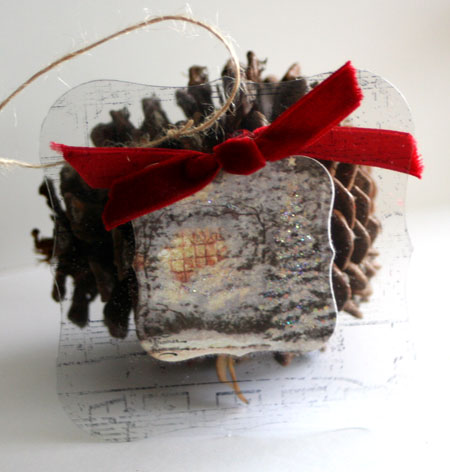
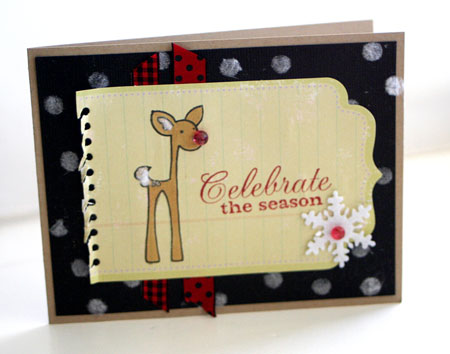
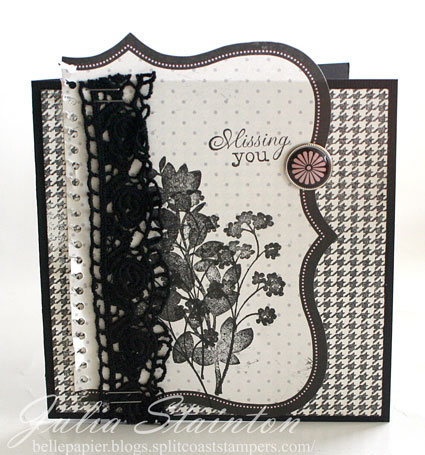
Pink Christmas

jks-pink-christmas.jpg

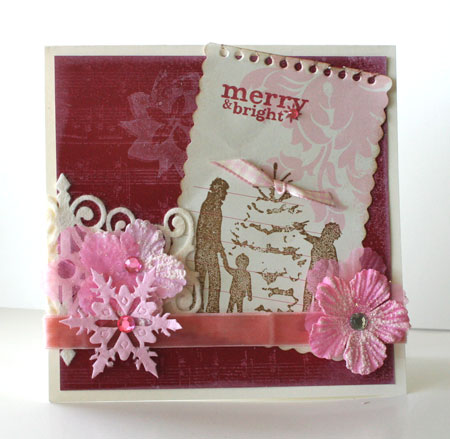
I created this non-traditional color scheme Christmas design using one of the Making Memories Journal Sheets. By simply stamping on it…I got a fun scrappy look.

Supply List:

Stamps:
Family Tree (Classic Collection) by Cornish Heritage Farms
Poinsettia (Classic Collection) by Cornish Heritage Farms
Aged Sheet Music Scrapblockâ„¢ by Cornish Heritage Farms

Ink:
-white pigment ink by Clearsnap
-Burnt Umber Palette ink by Stewart Superior
-Memento Ink by Tsukineko

Paper:
-blush Red Dark by Prism
-Natural Smooth by Prism

Other:
felt die-cut by Prima
flowers and snowflakes by Prima
-ribbon by Creative Impressions
rhinestones by MAMBI
-velvet by Melissa Frances
-Spiral Journaling Book by Making Memories

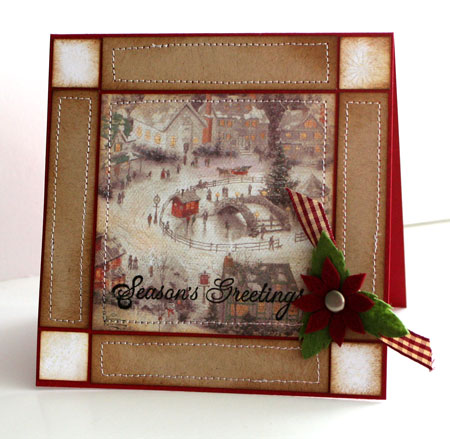
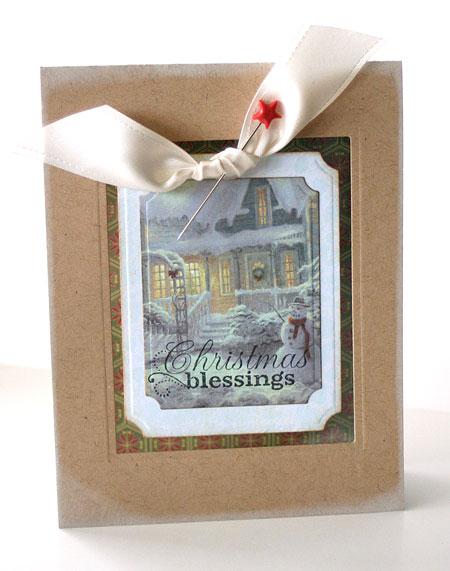
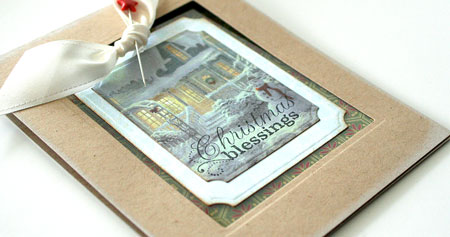
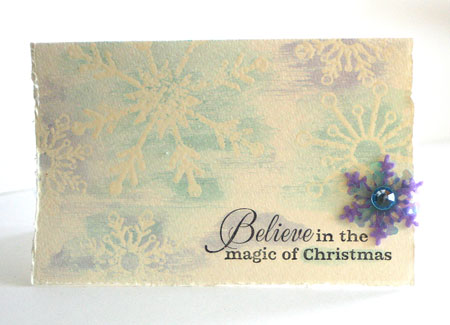
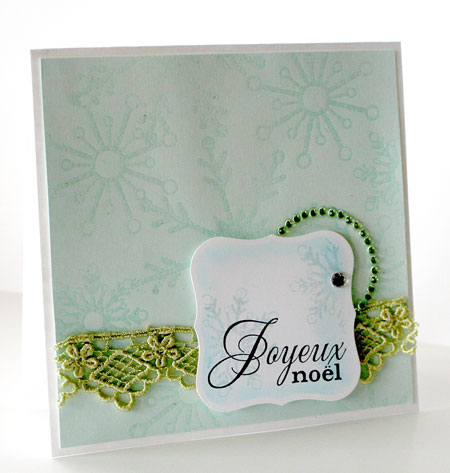
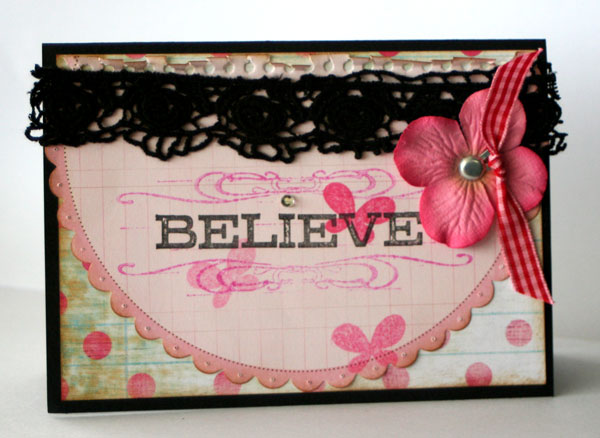
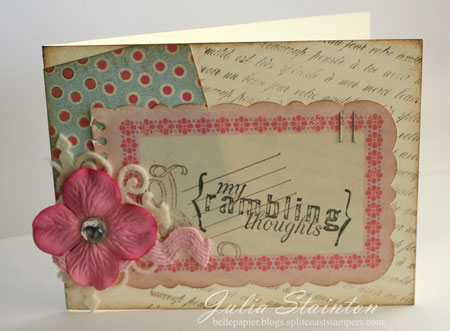
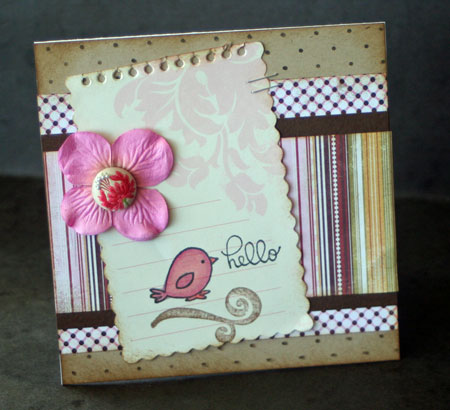
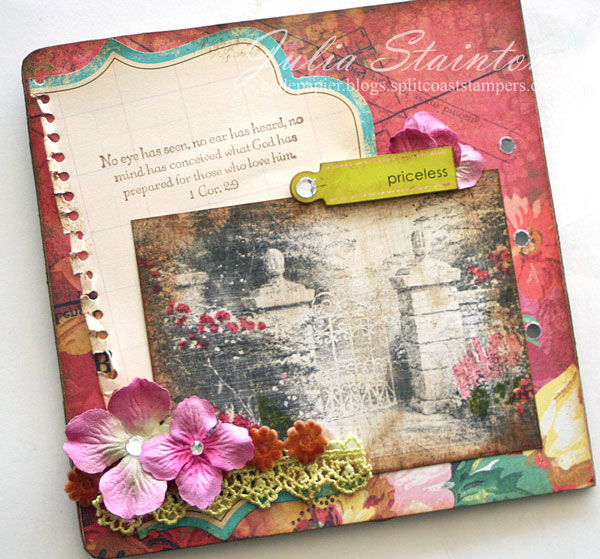
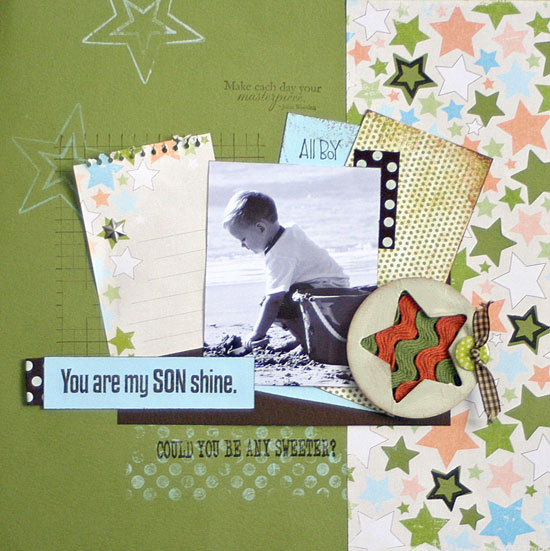
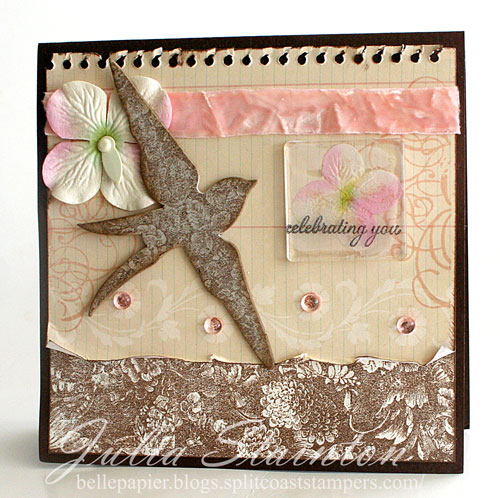
A few more…(These designs are all from my blog. Click on the image to enlarge)

jks-believe.jpgjks-rambling-thoughts.jpgjks-tweet-hello.jpgjks-flocked-deer.jpgjks-no-eye-has-seen.jpgjks-missing-you.jpgjks-sonshine-resized.jpgjks-celebrating-you-2.jpgjks-blessing.jpg

Where to Find Them…

  • local scrapbook store…I like to support my local store and they carry a good variety of them
  • on-line stores…try a goggle search

Quick Tip: This product moves fast so if you see it…buy it right away so you are not disappointed!

I hope you enjoyed this little peek into one of my favorite products! Have a wonderful Sunday!

a-signature-2.jpg

Simply Saturday…simple celebrate

Good morning! Happy Saturday! As you may know…I like to keep my Saturdays as simple as possible and here is a simple card for today’s post. I must admit…a lot of my simple cards are those ones I put together just for fun…those cleaning up the desk cards. 😉  This card was inspired by this one little scrap of Lace paper by KI Memories…I just couldn’t bear to throw it away. I’m glad I didn’t as it makes a darling little “lace” border on my card design.

Simply Celebrate

jks-celebrate.jpg

Quick Tip: Instead of adding a layer for your sentiment…try stamping it on the inside & creating a window to peek at it.

Hoping your Saturday is simply wonderful!

a-signature-2.jpg

Stamps:
Aged Sheet Music Scrapblockâ„¢ by Cornish Heritage Farms
Birthday Centers (Mona Lisa Moments) by CHF

Ink:
White pigment ink by Clearsnap
Burnt Umber Palette Ink by Stewart Superior

Paper:
-Kraft Cardstock by Prism
-white lace die-cut paper by KI Memories

Other:
-pin by Fancy pants designs
-epoxy button by Making Memories
-white vintage trim by Melissa Frances

A Kinkade Christmas

I’m having the hardest time putting away this Thomas Kinkade Christmas paper! I have two designs to share with you today and another two for next week. This paper is so pretty that all you need is a design, a stamped sentiment and a few simple embellishments and you are done.

Also…if you’re looking for a great excuse to do some more rubber shopping ;), Cornish Heritage Farms has double CHF points on all purchases today and Saturday.

Kinkade Greetings

jks-kinkade-greetings.jpg

This first design was actually inspired by a SCS Sketch Challenge on Wednesday. It’s been months since I’ve been able to play along and this sketch was so pretty…I couldn’t resist. Laundry and dishes can wait, right?! 🙂

Quick Tip: Highlight a sentiment by placing your embellishment at one end of it.

Supply List:

Stamps: Christmas Expressions (mona lisa moments line) by Cornish Heritage Farms
Ink: Versamark by Tsukineko, Vintage Photo Distress ink by Ranger
Paper: Blush Red Dark and Kraft by Prism, Thomas Kinkade Christmas Series Paper pack by Cornish Heritage Farms
Other:
-felt flower, ribbon and brad by Creative Impressions
-sewing machine
-black embossing powder

TK Christmas Window Card

This design uses my new Rectangle Spellbinders Dies. I wanted to

jks-tk-christmas-window-car.jpg

try out a window effect and decided to pair them up with my Rectangle Nestability dies. I was wondering exactly how they would be proportioned and it they would work together. I should have known that Ellen’s attention to detail would make them PERFECTLY compatible. Look how even that window is! In case it’s hard to see exactly how I put this card together in the photos…I die-cut and embossed my patterned papers. I think die-cut out my large rectangle from the Kraft card front. Inside I adhered a Clear Card Sheet layer in the window and then adhered my label cut images in front of it. IRL, it kind of gives the effect of hanging in mid-air. I also added a layer of patterned paper inside the card to add a little interest and hint at the inside.

Quick Tip: Adding the Clear Card Sheet layer adds stability to the large cut-out window.

jks-tk-christmas-window-fla.jpg
Stamps:
-Christmas Expressions (MLM) by Cornish Heritage Farms

paper:
Thomas Kinkade Christmas Series paper pack by Cornish Heritage Farms
-Kraft cardstock by Prism

Ink:
-White Adirondack pigment ink by Ranger
-Tuxedo Black Memento ink by Tsukineko

Other:
-ribbon
-dies by Spellbinders
-pin by Fancy Pants Designs

Thanks for stopping by! Have a fabulous weekend!

a-signature-2.jpg

Pearls

jks-forever-begins-now-slic.jpg

Classic pearls. They’re beautiful and elegant and always in style. The other day while going through my stash I came across some Pearl Ex. Now there’s something I haven’t used in a LONG time. It got me thinking about a Ways to Use it Challenge and how many Pearl products there are on the market. Think of it. Pearl Ex, Perfect Pearls, Liquid Pearls, Pearl embellishments such as stickers and brads. There’s even a great mother of pearl stamping technique. I’m sure there are others as well. Can you think of any? Today, I’d love to see what you can come up with as my challenge to you is to find Ways to Use Pearls. Here’s the link to the challenge. Hope you can play along!

Forever Begins Now

jks-forever-begins-now.jpg

I’ve been wanting to try out this new backgrounder (to be released tomorrow from Cornish Heritage Farms) and now seemed like the perfect time. It’s so elegant and perfect for so many things but I thought it would be wonderful  with Pearl Ex for a wedding card design. To create the shine, I simply stamped my Backgrounder in Versamark on my black cardstock. Then I brushed it lightly with Bronze Pearl Ex. I love the shimmer and it was so easy to do. If you’re wondering why the colors of the pearl ex look so differently in each picture…well…I’m not quite sure why. I guess the way the light was hitting. The top photo is actually the best representation of the pearl ex color IRL. 🙂

Quick Tip: Brush away excess pearl ex lightly with a brush and then a tissue. Do not smear ink! You can “fix” the Pearl Ex with a matte spray fixative.

Have fun with the challenge and happy stamping!

Julia

Supply List:

Stamps: Flowers and Lace Backgrounder by Cornish Heritage Farms, Wedding Centers (Mona Lisa Moments line) by Cornish Heritage Farms

Ink: Versamark by Tsukineko, Willow Adirondack by Ranger, Vintage Photo Distress ink by Ranger

Paper: Black, Spring Willow Light, Simply Smooth white cardstock by Prism

Other: pearl sticker by Making Memories, pearl Ex, Labels die by Spellbinders, lace by Making Memories, flower by Prima

Joyeux Noel

jks-joyeux-noel-slice.jpg

A classic stamp set of snowflakes is always a must-have for those Christmas and Winter designs. I have two cards to share with you today featuring the Joyeux Noel Stamp set. Both designs feature super simple clear embossing for a couple different looks. One set + one product= two different looks. I LOVE that about stamping! I think I mentioned the other day that this set is the CHF product spotlight for the next two weeks. I hope you don’t mind another couple designs as I just can’t seem to put it down right now. 🙂

Christmas Magic

jks-christmas-magic.jpg

This design was super easy to do. Just stamp the notecard with the snowflakes in Versamark ink and emboss with Clear Embossing Powder. This will form a resist on the card front. To add color, simply brush with ink. I highlighted the two words Believe and Christmas in the ink colors as well.

Supply List:
Stamps: Joyeux Noel (Classic Collection) by Cornish Heritage Farms

Ink:
-Black Stazon ink by Tsukineko
-Aqua and Periwinkle Adirondack ink by Ranger

Other:
-Fabriano Mediovalis Notecard
-clear embossing powder by Ranger
-felt snowflake by Creative Impression
-rhinestone by MAMBI
-snowflake sequin by Queen and Co.

Joyeux Noel

jks-joyeux-noel.jpg

This design uses the same snowflakes stamped in Versamark ink on the cardstock. The embossed snowflakes are subtle in a tone on tone look and make a really pretty “clean” look.

Supply List:

Stamps:
-Joyeux Noel (Classic Collection) by Cornish Heritage Farms

paper:
-Simply Smooth white & Frosted Teal cardstock by Prism

Ink:
-Aqua Adirondack ink by Ranger
-Tuxedo Black Memento ink by Tsukineko
-Versamark ink by Tsukineko

Other:
-ribbon lace by Prima
-dies by Spellbinders
-rhinestones by MAMBI
-Copic airbrush system
-Clear Embossing powder by Ranger

Take care and have a great day!

a-signature-2.jpg

Butterflies

jks-delightful-day.jpg

I have a quick and unique card to share with you today. Do you ever find embellishments in your stash that you’ve been hoarding? I’m trying to make a very conscientious effort to STOP hoarding! The item I really decided to stop hoarding in this project was the clear Making Memories adhesive frame. As you know… I LOVE clear so if one is good, wouldn’t two clear items be better???!! That being the case, I adhered my clear frame on the front of my Clear Card Sheet card base. I stamped the sentiment in Stazon right on top of the frame and wouldn’t you know it…if you turn an Inchie 45°, it is a perfect fit in the frame. Now that is one way to give that darling little butterfly some BIG presence.

The butterfly and sentiment are actually from a brand new unmounted Saturday Evening Post set called Vintage Butterflies. They are all gorgeous butterfly images that have been published in the Saturday Evening Post at some point or other. One of the things I really love about this set is how classic it is. Good art is timeless and there are a great variety of sizes to this set as well as sentiments making it so flexible!

A Delightful Day

jks-delightful-day-up.jpg

Quick Tip: Stamp on top of pre-made embellishments to customize them. Think outside the box and off the paper. 🙂

Thanks for stopping by today!

a-signature-2.jpg

Stamps:
Vintage Butterflies (Saturday Evening Post line) by Cornish Heritage Farms

Ink:
-Black Stazon by Tsukineko
-Tuxedo Black Memento Ink by Tsukineko
-Lettuce Adirondack ink by Ranger

Paper:
Clear Card Sheet by Cornish Heritage Farms
Eva 6×6 paper pad by Basic Grey
-flowers by Prima
rhinestones by MAMBI
markers by Copic
inchie
-acrylic frame by Making Memories

A little sparkle…

Today’s design is a quick tree ornament I created over the weekend. It feels good to be starting to papercraft again. I’ve been limiting it to rather quick projects as the headaches continue but I’m hoping I’ll be back to my normal self by the end of the week. This design uses some Clear Card Sheets, my Thomas Kinkade Christmas Series paper and my Sakura Glue Pen to add some glitter. You may be wondering where the challenge is in all this as Mondays around here always bring a challenge. This week the challenge it to use Sakura Glue pens, Glitter Pens or Glaze pens in your design. I love how easy these Sakura pens are to work with!

We’d love to have you play along with our challenge! Details will be posted shortly in the CHF Forum. The CHF DT always has some great samples to share with you. For inspiration visit… Dawn, Carole, Kim & Michele 🙂

TK Simply Clear Ornament

jks-tk-clear-ornament.jpg

This project is so easy to do. To create my ornament, I ran a piece of Clear Card Sheet through my Cuttlebug with a Spellbinders die. These Clear Sheets are MUCH stiffer than normal transparencies and will hold up well hung onjks-tk-clear-reverse.jpg the tree. To add some definition to the layer, I stamped it with my Aged Sheet Music Scrapblockâ„¢ in Black Stazon. Each Thomas Kinkade Christmas pack comes with smaller focal images and these are perfect for this project, I die cut them with the smallest die in the package…two for each ornament. Adhere one on each side of the ornament to finish it nicely and keep it looking great it if spins.

I love using my Sakura Glue Pen to add bits of glitter to highlight projects. It also works well for adding flocking or adhering small items…especially paper piecing. A little red velvet ribbon finishes off the design.

Quick Tip: Make cute gift tags with this project to hang on your packages.

Wishing you a great start to your week! Happy holiday crafting!

a-signature-2.jpg

Supply List:
Stamps: Aged Sheet Music Scrapblockâ„¢ by Cornish Heritage Farms
Ink: Black Stazon by Tsukineko
Paper: Clear Card Sheet by Cornish Heritage FArms, Thomas Kinkade Christmas Series paper pack by Cornish Heritage Farms
Other:
-ribbon by May Arts
-Spellbinders dies
-glitter from Art Institute
-Sakura glue pen