Monthly Archives: January 2008

Basic Grey Rub-on Roller {C’est Bon} … a tutorial and review

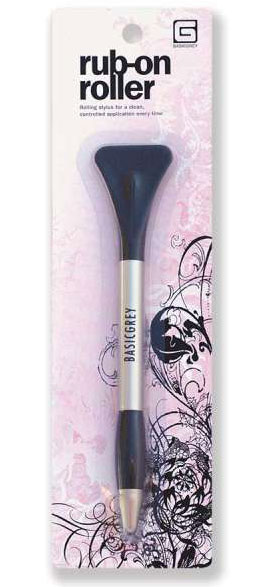
jks-rubon-roller-narrow.jpgWhen I first saw the Basic Grey Rub-on Roller advertised just before it was released…I just knew it would be one of those things I would have to try out. I love using rub-ons in some of my designs and they are great for applying to a variety of surfaces. Depending on the manufacturer…some rub-ons can be more difficult to apply than others. Most companies include a little popsicle sticker to burnish on your rub-on transfer but these can be hard to hold and sometimes, do not rub smoothly. While Basic Grey rub-on transfers are one of my top faves for ease of use and application…I decided to try it out and was so pleased with the results.

On one end of the Basic Grey rub-on roller is a rolling steel ball end. It works fabulously for applying the transfers smoothly and it rolls very well. I had previously tried my Empressor embossing tool but found the rolling ball on that really did not roll well with rub-ons…better than a popsicle stick but still left something to be desired. The Rub-on Roller was easy and comfortable to hold and is of sturdy construction. I love tools that are functional, take up little space, are well made and yes…well-priced. On all four…this rub-on roller takes top marks from me. I’d definitely recommend it if you frequently apply rub-ons.

How to Use It (pics to be edited in shortly)

1. Carefully cut out rub-on transfer and remove backing.

2. Place transfer on desired surface.

3. Roll ball end of of Rub-on Roller over rub-on until transfered.

4. Flip rub-on backing (you didn’t throw that out did you?! ) and place over rub-on. Smooth and burnish gently with flat end of Rub-on Roller for secure application.

Where to Buy…

  • I purchased my Basic Grey Rub-on Roller from Jacksonbelle’s ebay store.
  • You can also purchase it on-line at other stores if you search
  • Your local scrapbook supply store may carry this product.

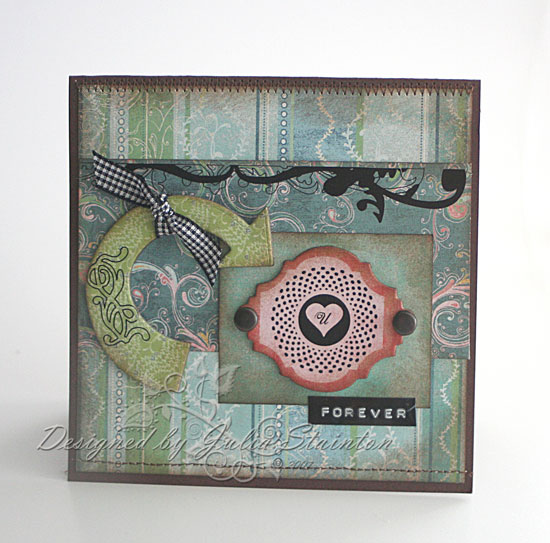
{heart} U Forever

jks-heart-u-forever.jpg

Actually while I was writing up this design…the sentiment got me thinking. I love your forever…reminds me of a darling childrens’ book that I used to read to my oldest children. I’m going to have to do some digging as I’m sure we still have it. I can’t remember the title but a beautiful rhyme in the story went like this…. I’ll love you forever, I’ll like you for always, As long as I’m living …my baby you’ll be. I know this is totally off topic…lol…this valentine is for my hubby. Notice how I tried to take a very pink paper line and make it more masculine by including lots of brown, black rub-ons and very green papers from the line.

This design uses the new Basic Grey Two Scoops 6×6 paper pack. Love those scaled down prints and other Basic Grey papers has that fabulous distinct look. A little distressed, a little fun, a little vintage, a little trendy. My first rub-on was placed along the top of my horizontal panel and is from the Basic Grey rub-ons line. I also purchased the new matching Two Scoops printed chipboard. This chipboard is so fun…already printed you can use as is, just punch, remove backing and adhere to design. No mess, no fuss. I decided to see how the rub-on roller would work for applying rub-ons to chipboard. Fabulous and fun…I added the black heart rub-on to my pink frame chipboard and a little fun flourish to my arrow.

Quick Tip: Don’t forget you can alter your printed chipboard if desired. I sponged this chipboard and applied rub-ons to it. You can also add glitter, bling, punch holes, stamp it, sand it…even cover it with paper if you don’t like the tones.

To finish off my design…some large antique copper brads from Creative Impressions anchor the pink chipboard and a little scrap of black gingham ribbon is tied to the arrow. I love my Dymo Label Maker for a quick sentiment addition…this time I added the word forever.

As rub-on transfer keep gaining in popularity with paper crafters… I know this is a fabulous tool that will be getting lots of use in the future. If you have any questions…feel free to ask them in the comment section and I’ll try my best to answer them by editing the answers into this post. Wishing you a wonderful Sunday!

Simply Saturday…

This is a super quick sketch for a busy Saturday. DH is working on the endless renovation again today while I suffer the worst sinus cold. For news on my craft room, it is slowly coming along. Now framed, insulated, the electrical roughed in and mostly drywalled…it is slowly taking shape. If we weren’t doing an addition and adding 3 other new rooms and a kitchen reno in the mix…I’m sure it would be done by now. Hubby says that waiting builds patience. I think I must be chock full of it by now as our entire 18 year marriage has been one long renovation! lol 😉

Simply Sweet & Floral

jks-so-sweet-floral.jpg

I’m going to keep this totally short today and just give you the supply list. Oh…I guess I’ll tell you athree things. One…this How Sweet it is Stamp Set if a Stamps for a Cause set by Gina K to raise money for Diabetes. A darling set well worth your purchase. Two…the pierced line along the left side….I did it by sewing without thread. Super quick and easy. If you do this…try it out on some scrap paper first to get the stitch length you wish. Three…Copic markers. Love them and enabler alert… Ellen Hutson has some brand new sketch marker packs and individual marker colors. I just wasn’t able to resist. 🙂

Cardstock: Very Vanilla, Certainly Celery – Stampin Up

Stamps: How Sweet It Is – Gina K

Ink: Black Palette Hybrid Ink – Stewart Superior

Other: sewing machine, markers – Copic, button – Autumn Leaves, faux rawhide cord – Dollar Store, flower – Prima, ribbon – Making Memories

Live Love Bloom

I wasn’t go to post again today but…

I just couldn’t resist today’s Limited Supply Challenge…using up scraps and embellishments on your desk. Well…right now my desk is pretty much buried with stuff. So much for spending the entire day last Saturday trying to clean it up! I could easily make 30 cards with the amount of things I have out right now. Anyway…I DID limit myself to just making one before running out for my errands this morning. Want to play along…here’s the LINK to the challenge. 🙂

I also just thought I’d mention something…a friend and I were chatting yesterday and she didn’t realize that Cornish Heritage Farms has their own forums and gallery. They’re really worth checking out! Lots of great samples for all the new releases as well as  other designs and the forum is a great place to chat, find out what’s going on and learn some new techniques.

Live, Love, Bloom

jks-live-love-bloom.jpg

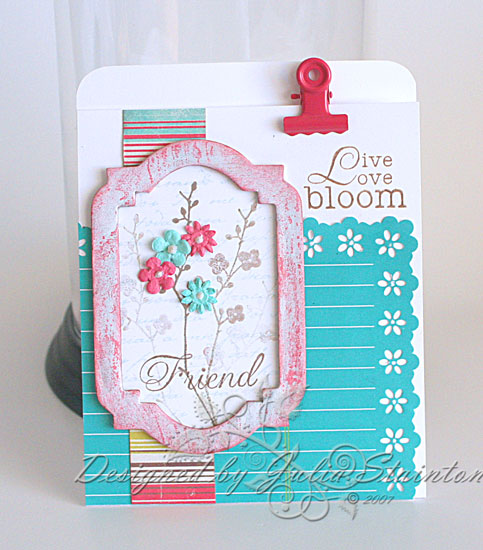
This design uses the Silhouette Blooms 2 stamp set by Kim Hughes that was released by Cornish Heritage Farms this week. I think this pretty flower sprig is my favorite and I stamped it repeatedly here without reinking for a soft effect. The Spanish Script Backgrounder is stamped in Aqua Adirondack ink over the flowers for a little interest. Tiny Prima flowers accent the main flowers on this design and the centers are filled with some Liquid Pearls.

To create my background some scraps of paper from my table. Sorry…don’t know the names of the papers as they are just the scraps but…the striped paper is by My Mind’s eye and the punched scalloped paper I think is by Creative Imaginations. The little Maya Road chipboard frame is once again…painted with white paint. Can you tell I’m loving this look? 😉 The frame was then sponged and stamped with the Montana Tree Bark Backgrounder. The stamped sentiments also come as part of the Silhouette Blooms 2 set.

Now….I’m going to tell you a secret…it’s also my quick tip for the day… 😉

Quick Tip: What started off as a mistake can always be turned into a design element. Sometimes those oh no moments can be turned around into a unique part of the design that you just would not have thought of otherwise. I had almost finished this design when I found out…yikes, I had adhered everything upside-down on the card! I almost cut the front off and then adhered it all to a new card base but instead…decided that the design would still work if I just rolled with it. I trimed 3/4 inch off the top of the card, added a little Making Memories dark rose colored clip and rounded the corner and voila…a fun look for my card that I will be trying again in the future. This time, on purpose. 😉

Great Canadian Winter, eh?

Snow, snow, snow! It’s been a super cold week here and I’ve been doing my best to stay indoors. Poor hubby though has been working outside all week. It takes him a long time to thaw out! I was wanting to play around with one of my new stamp sets from The Rummage Bin line by Cornish Heritage Farms. This is the Great Canadian Stamp Set…so fun! The words…Great Canadian, Winter and eh…just seemed to come together. I just have to give this design to one of my good friends. Born in Northern Ireland but raised in Venezuela…she really enjoys our Canadian winters…. 😉 Well…not!

Great Canadian Winter Card


jks-great-canadian-winter-2.jpg

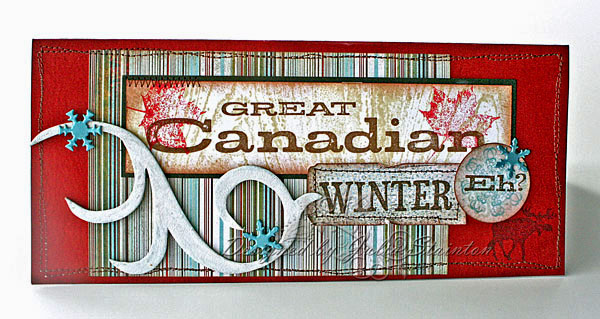
This design is a large 4 x 9 inch card design. The Blush Red Dark cardstock is layered with some striped Figgy Pudding paper from the 6×6 paper pack. The little Winter part of the sentiment was stamped onto some more Basic Grey patterned paper and stitched around for emphasis.

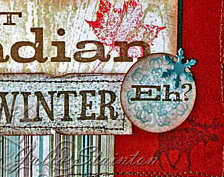
jks-great-canadian-winter-close.jpgTo create the main panel, I stamped my Great Canadian stamp in Burnt Umber and then used my Montana Tree Bark Backgrounder to add texture. I love this stamp…so flexible and great for masculine designs. The red leaves from the set are stamped in Cranberry using a second impression. I just had to work the “Eh?” into the card. After all…what’s a Canadian card without it? 😉 Just kidding… I never say it…well, hardly ever! Like my little moose tucked into the bottom right corner?

To embellish the design, I painted the scroll chipboard with white Making Memories paint to resemble a swirl of snow. Three little snowflake brads from Creative Impressions finish it off. I positioned them to draw your eye through the design and create a visual triangle.

So….make sure you have a good one….eh? 😉

ll6001_the_great_canadian_stamp_set_size_f1.jpg

Blessings, Dreams & Possibilities…

I just love this quote…

Every day is a blessing.

Every hour is a dream.

Every minute is a possibility.

So beautiful and just perfect to remind me of so many things I am grateful for. It also goes so well with my word of the year {embrace}. Embracing the time I have, my blessings, my dreams and possibilities…

Every Day is a Blessing

jksblessings-dreams-possibi.jpg

This design once again features the Time to Stamp stamp set from the newly released “The Rummage Bin” line by Lesley Langdon for Cornish Heritage Farms. I just lvoe the name of the line…every stamp is a little rubber treasure and the more I go through the sets…the more ideas and stamps and uses I find!

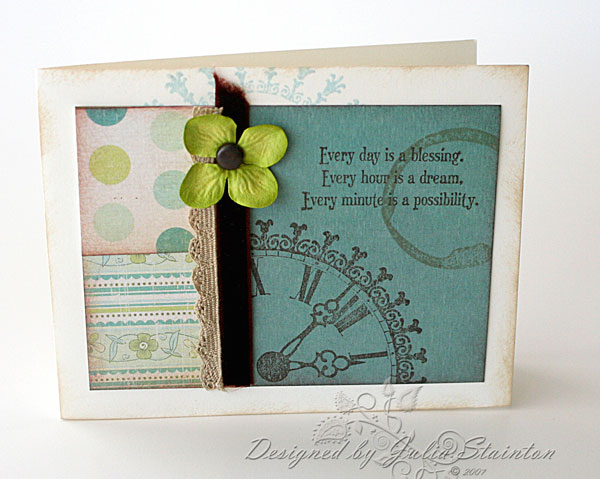
This design uses some simple stamping for a clean yet vintage look. And another variation of that teal and green combo… I just can’t stop! Tomorrow’s design is a totally different color combo from what I’ve been doing lately but you’ll have to wait until then! 😉 To make this design super quick…I used a sketch from Di Hickman’s sketch challenge #4. I turned it 90° ot the right and stamped on some patterned paper for a quick design. This Tres Jolie line from My Mind’s Eye makes it super easy to match up. The reverse side is always a beautiful rich, slightly textured surface that is perfect for stamping on…and of course…perfectly coordinated. The clock and sentiment are stamped in Burnt Umber Palette Ink and the decorative circle peeking out fo the top was stamped in Aqua Adirondack ink by Ranger. To create the coffee mug stain…you can find this stamp in another set from the same line… Ledger Me. I stamped it in Antique Linen distress ink. Some quick embellishments finish it off… chocolate brown May Arts velvet ribbon, some vintage trim by Making Memories and a Prima flower set with a Creative Impression’s brad finish it off.

It’s Time to Love…a design and another challenge

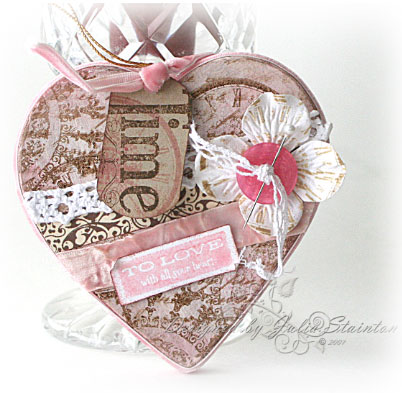
It’s Thursday again and time for another Way’s to Use it challenge. For this challenge…I’ve actually disguised the product quite well with stamping. This week the challenge is to use paint in your project. You can make a card or choose to alter an item like I did. This paper mache heart ornament was first painted with white Making Memories acrylic paint. I love the look of sponging ink color onto dried paint. It gives a totally different look than paper. Very soft and you can build up color by sponging different inks together. I think the effect is almost like an old plaster wall with graduations of color. If you’d like to join in the fun and use a little paint today, check out the challenge at WT150 Paint a project, use paint on a transparency…whatever…have some fun!

This design uses the brand-new just released today Time to Stamp set by Lesley Langdon from Cornish Heritage Farms. I’m totally loving this new line. Lisa Strahl has described it as “urban grunge with a feminine touch” and she is right on the money. These sets suit scrapbooking and card design and also lend themselves well to vintage, shabby chic and grunge styles. As you can see below…I really got into the vintage/shabby chic look when I created this yesterday. It’s a lot “busier” than I usually design but wow…I had SO much fun! You can check out this set and the other NINE new releases at Cornish Heritage Farms.

Time to Love

jks-time-to-love-soft-edges.jpg

AFter painting this heart with white paint, I sponged on some color using my Shell Pink & Cranberry Adirondack inks as well as my Antique Linen Distress Ink…all by Ranger. Are you sensing a trend here….almost every project I seem to make lately has Antique Linen used on it…my new staple. 🙂 To start stamping…I inked up my Spanish Script Backgrounder with Burnt Umber ink and stamped the surface of the heart. I randomly stamped the heart surface with clocks and an ornate stamp to layer the texture and interest.

Quick Tip: The CHF backgrounder stamps come unmounted with a cling foam base. You can use them as is without an acrylic block by laying them flat on your workspace. A cool feature of them is they are flexible. When stamping the uneven surface of this paper mache heart…I inked the stamp and then laid it on top. It was easy to press the stamp into my heart and still get a great impression on the uneven surface.

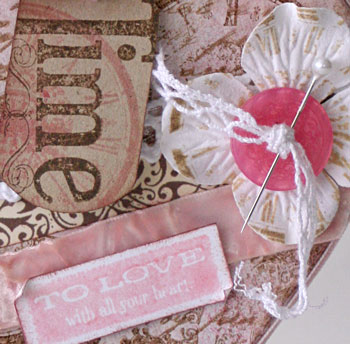
To add the main layers to my heart…I first adhered a strip of cardstock sticker from My Mind’s jks-time-to-love-mini.jpgEye…that scrolly brown and tan strip. The crocheted lace and crush velvet ribbon from Making Memories were then adhered and the ends trimmed off. I stamped the “To Love with all your heart” stamp in Shell Pink and added it to the design.

To “shabby up” my Prima flower…I stamped it in Antique Linen with the clock face. You are going to see LOTS of that clock in the future. I LOVE this set! An Autumn Leaves button tied with more cotton lace and a pin finish off the embellishments.

To fit the time into my design, I stamped it onto a tag punched with my EK Success punch. Part of the time stamp is cut off but that’s ok. You can still read it the way I’ve angled it and I’ve been really impressed lately with some design trends that only show part of the image. It is an interesting concept to explore…how much can I cut off and it still work? I want to play around with this idea some more! To finish it up…I know, I’ve been long-winded today…some sticky strip adheres some Pink Velvet May Arts ribbon around the shape and holds the tag onto the cord at the top.

Have a wonderful Thursday and hope to see you in the challenge! And… BTW…make SURE you go check out Lesley’s blog for a chance to win one of her fabulous sets!

Silhouette Blooms 2… a birthday sketch

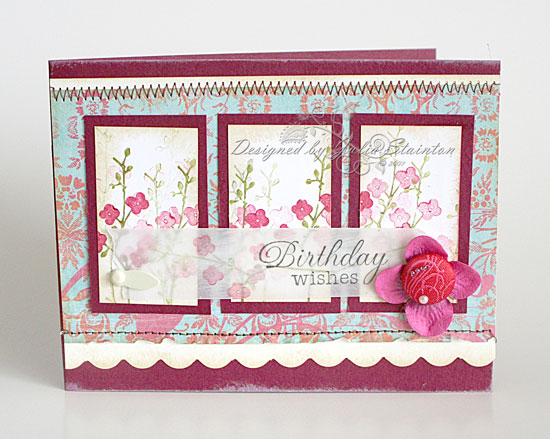
Wohoo! I didn’t even take time to cut out all my rubber…just enough to make this card. I just couldn’t resist! LOL This is the new Silhouette Blooms 2 set and it is so flexible and stunning…I know it will be one of my top faves! If you already own Silhouette Blooms 1…it coordinates perfectly and I love the new sentiments as well. I created this card for today’s sketch challenge SC160. I rarely use a lot of panels so this was a fun one to do. The top layer I used vellum for it to create a sheer look. Didn’t want to cover up all my new blooms!

As a note before I get to the rest of the post….I’ve been having a few problems with Feedblitz notifications going out. This is actually my second post of the day. Make sure you scroll down as there is another design and lots of links to goodies you don’t want to miss. 🙂

Bloomin’ Birthday Wishes

jks-bloomin-birthday.jpg
To create the panels of this card, I simply cut out a long strip of Natural Smooth cardstock and stamped my flowers. The flowers were inked with markers and then stamped a few times before inking again and repeating.
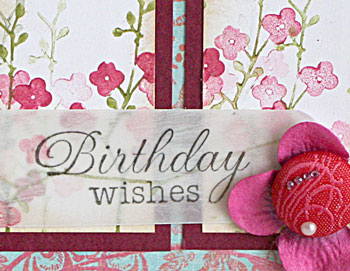
jks-bloomin-birthday-closeu.jpgAs I mentioned above…the vellum panel is stamped with a second impression flower and then Birthday Wishes. This card is for a special friend of mine. I’m sooo late at sending her a card. I honestly need to make a more concentrated effort this year in getting cards mailed out on time! For embellishment…I used one of my fabric brads from K & CO. This is my second last one and I’ve been hoarding them. I decided I should just break down and use it for this special card and then I can buy more! 🙂 the Prima flower is held in place with the brad and at the other side of the vellum…a little ivory Making Memories photo turn.

Quick Tip: Each side of a design does not have to be perfectly symmetrical. I used the flower/brad embellishment on the right to highlight the sentiment. Adding different embellishments to a very symmetrical design adds visual interest.

Supply List:

Cardstock: Natural Smooth, Razzleberry Dark, vellum – Prism

Patterned Paper: Rhonna Farrer for Autumn Leaves

Stamps: Silhouette Blooms 2 – Cornish Heritage Farms

Ink:Antique Linen Distress Ink – Ranger, Black & CanvasPalette Ink – Stewart Superior, Old Olive & Rose Red markers – SU

Other: Flower – Prima Marketing, ivory photo turn – Making Memories, sewing machine, brad – K & Co.