
One of my very favorite tools is my Crop-a-dile. The Crop-a-dile is a fabulous eyelet setting tool by We R Memory Keepers. When I first started papercrafting a few years ago, I just loved the look of eyelets. Still do for that matter! I did however, get tired of dragging out the hammer, and the punch, and the setter and the protective mat and then banging away making a huge noise. I just did not think they were worth the time and invested in brads as a much easier alternative.
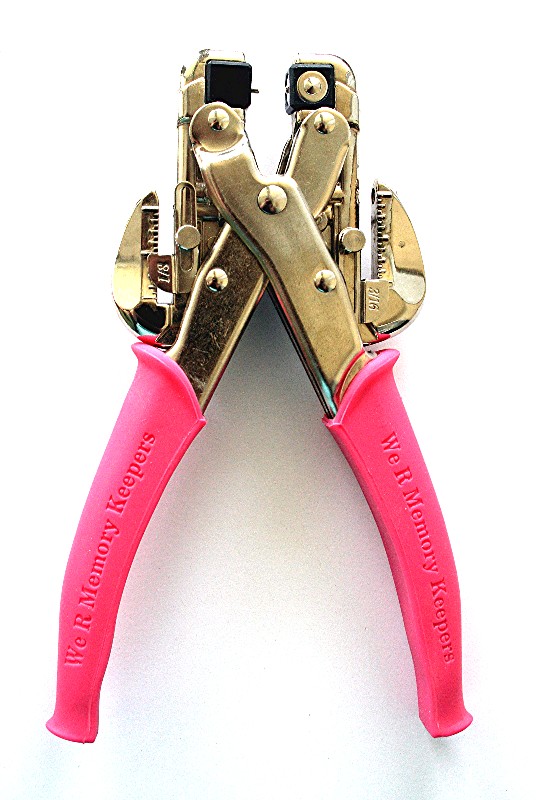
The Crop-a-dile from We R Memory Keepers
When I first saw the Crop-a-dile, I wondering whether I should actually purchase it. After all, I do have many tools that I thought were must-haves, that now sit around gathering dust. While I was deliberating, a couple friends on the Dirty Dozen Design Team with me, purchased them. Michele & Trudee highly recommended it and trusting their opinion, I decided to take the plunge. I just love it and today the Crop-a-dile is still one of my favorite tools.
The Crop-a-dile is strong and very well made. I just love how it easily punches through heavy materials allowing me to take papercrafting to new levels and new ideas. I love how I can use it to alter tin, heavy cardboard, and chipboard as well as just setting eyelets. The Crop-a-dile is very easy to use. No more banging and punching. It comes complete with the punching mechanism on the sides in two different sizes and the setting in the top. I’ve had a few people e-mail over the past year, asking if the Crop-a-dile is difficult on the hands to use. I’ve never had a problem, but then I don’t usually have problems with my wrists. I suggested they go to their local scrapbook store and ask to try it out. I know quite a few who tried the Crop-a-dile , purchased it and wrote me back saying that it really worked well, even with their difficulties.
Why I Love the Crop-a-dile
- High quality construction
- Virtually unbreakable
- It’s QUIET! Won’t wake the kids 🙂
- Pink! I can find it easily and no one will steal it
- You can set the depth from the edge that you wish to punch
- All one piece! – No little pieces to lose.
- Flexible…does snaps, as well as different sizes of eyelets
- Designed to set We R Memory Keepers gorgeous Designer Eyelets & Snaps
- Comfortable handle
- Easy to use even with Artritis and other concerns
- Well-designed – You cannot punch out a hole with the Crop-a-dile that the setter part of the tool cannot reach
- You can now buy it with a matching case complete with eyelets
Using the Crop-a-dile
The Crop-a-dile is really very easy to use once you understand it. I believe the part that throws most people off is the different settings. I would suggest if you are just starting out…just set it to what you standardly use and leave it there. If you are like myself, the mini eyelets are the most popular and used of the eyelets. Set the bits for that size and just leave it there until you are more confident. Little eyelets are so inexpensive, try it out on some scrap paper to make sure the eyelets are setting properly.
Quick Tip: If you are having trouble remembering your favorite settings, paint a little colored nail polish on the settings you use the most to make lining them up easy.
For most instances, the settings line up easily….A corrensponds with 1, B with 2, C with 3 and D with 4. The setting for mini eyelets is C-3 and probably the most used setting. The thing that confuses a lot of people is the which way to hold it to see the numbers. For the C-3 setting, you set the bits so that the C and the 3 are on the inside where your paper will be squeezed. If you are using Press slowly & firmly but not too hard…you don’t want to split the eyelets. Make sure your eyelets are inserted correctly before crimping. The prong part of the tool is inserted int othe top of the eyelet that you see in the finished product. If you need an instruction sheet, We R Memory Keepers has one on the their web-site, We R On the Net.
Things to do with a Crop-a-dile..
- punch and set eyelets
- punch and set snaps
- Punch and set large eyelets, designer eyelets or snaps
- Punch holes in tin or other metal
- Punch holes in chipboard or cardboard
- Punch easily through many layers of cardstock
- Punch through coasters
Designing for the Crop-a-dile
Admittedly there are some limitations with the Crop-a-dile. The reach of this tool is only so far and so it is always a good idea to keep that in mind when designing your project. If you wish to have eyelets in the center of your design, you can either revert back to the traditional anywhere punch (don’t get rid of yours, you may still need it) or plan on layers. Insert your eyelets in the layer before matting or layering to keep the distance manageble. A row of eyelets is manageble down the side of the design…just take that into consideration when you are cutting your card base. If you wish eyelets down the left side…traditionally where the hinge of the card base is….simply cut your card base lengthwise and use a top-hinged card format. Another challenge could be eyelets through the center of the design. To do this…you can set the eyelets into a strip of cardstock and then adhere to the card or you can design a card with a centre opening and a panel on either side. I believe it may be called a Gatefold design. During the next couple of weeks, I’ll try and give more examples so check back for more ideas!
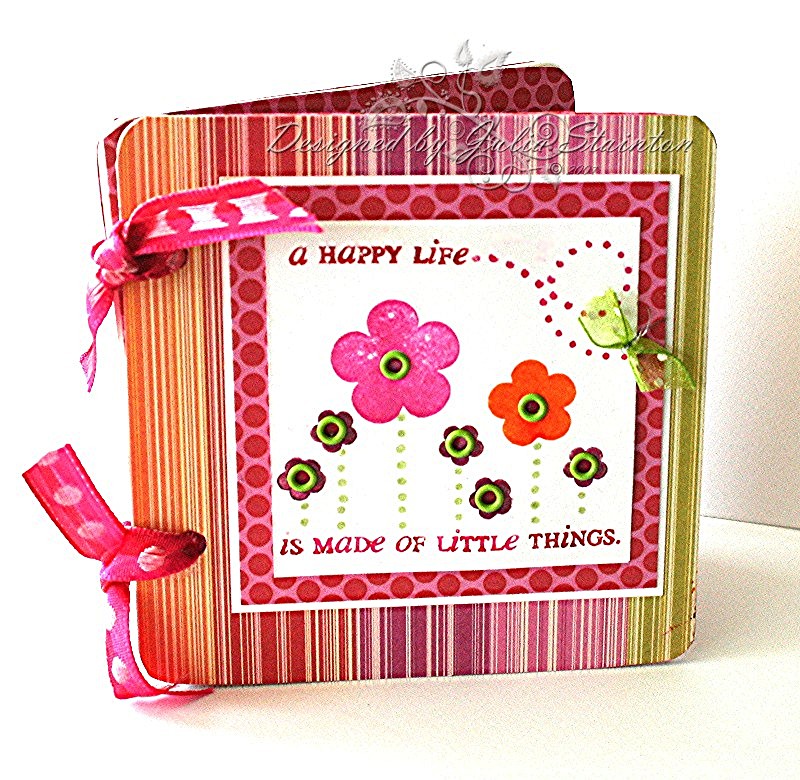
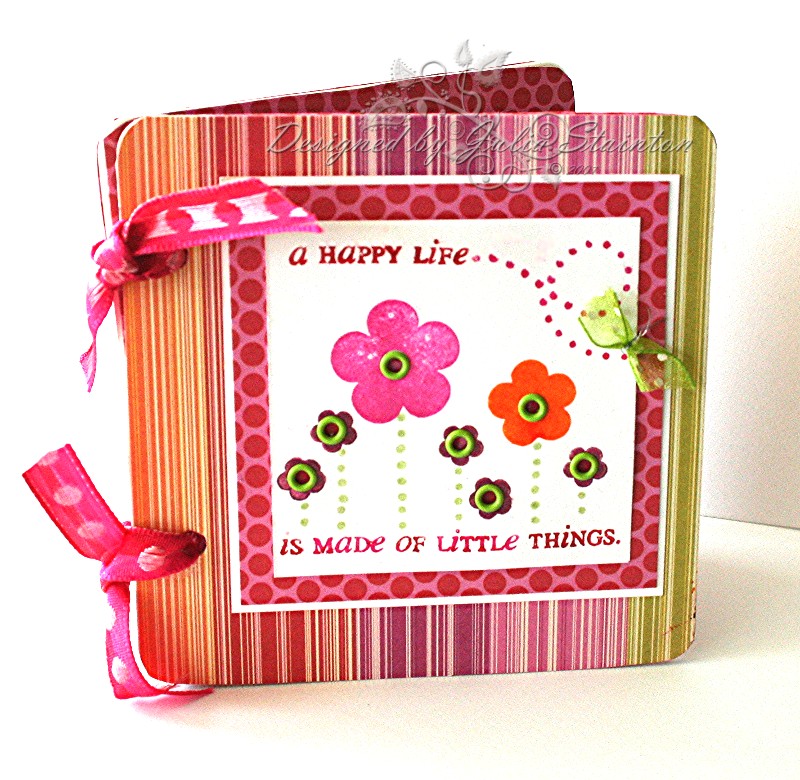
A Happy Life Coaster Card
I just had to give my Littly Lady set from Papertrey Ink another whirl. So cute! I bought this great paper Friday night at my local scrapbook store. I love the fun look and it has great patterns on both sides making it really easy to coordinate. While I was goign through my new goodies, I immediately thought this fun paper would be perfect with Little Lady.
I designed this card to give you a couple ideas on what the Crop-a-dile can do. It has been a while since I made a coaster card and the Crop-a-dile works great with coasters. Simply cover the coaster with paper, sand the edges and punch through the coaster where you want your holes. The ribbon ties make quick and easy hinges and also adds a fun touch. When tying the ribbon hinges on the coaster card, I lay my coasters our flat to build in enough ease to make opening and closing the card workable. The thing I love most about coaster cards is their sturdiness. They are almost like little books. Just something a little different and because of this, maybe a little special.
For the image… I started with the long sentiment from the Little Lady set. I inked up part of the sentiment with my Real Red marker and stamped it along the top of the square. For the rest of the sentiment, I inked up the words with alternating Pink Passion and Real Red Markers for a fun look. This may be a little hard to pick up in the photo. The flowers were then stamped in various inks and colors. I wanted to set the flower centers with eyelets with my Crop-a-dile so I made sure they would be with-in reach. The dotted stems were stamped using the tiny double dot stamp in the set and just lining up and stamped until I reached the appropriate length. I then stamped part of the swirly dots stamp after the first part of the sentiment to get a … punctuation effect, but actually it turns into the trail of a butterfly. The ribbon butterfly was the last little touch. I created a tiny butterfly from some green dotted ribbon and a fine piece of wire. The wire actually came out of the pink/red ribbon. I didn’t realize it was wired when I brought it home but I pulled out the wire and put it to good use in making a tiny butterfly. 🙂
Supply List:
Cardstock: Whisper White
Patterned Paper: Scenic Route Paper co.
Stamps: Little Lady – Papertrey Ink
Ink: Certainly Celery, Only Orange, Pink Passion, Real Red
Other: Coasters, ribbon – Michael’s, eyelets – Making Memories, Crop-a-dile – We R Memory Keepers
If you have any questions or comments on the Crop-a-dile, feel free to comment on this entry. I’ll be editing the post to answer them the best I can. Check back into tomorrow, I have another card for you using the beautiful designer snaps that are set with the Crop-a-dile.
Pingback: Belle Papier {pretty paper} » Bloom, Blossom, Flourish, Grow…
Pingback: Belle Papier {pretty paper} » Some eyelets for Father’s Day
Pingback: Have you use the Crop a dile? · Stamping @ CraftGossip
Pingback: Have you use the Crop a dile? · Craft Gossip :: Craft Blog Network
Pingback: Belle Papier {pretty paper} » Designer Snaps and Eyelets {C’est Bon}
Pingback: Belle Papier {pretty paper} » Seventeen Candles…
Pingback: Belle Papier {pretty paper} » U and I
Pingback: The Crop a dile C’est Bon — World of Warcraft and Wii Portal