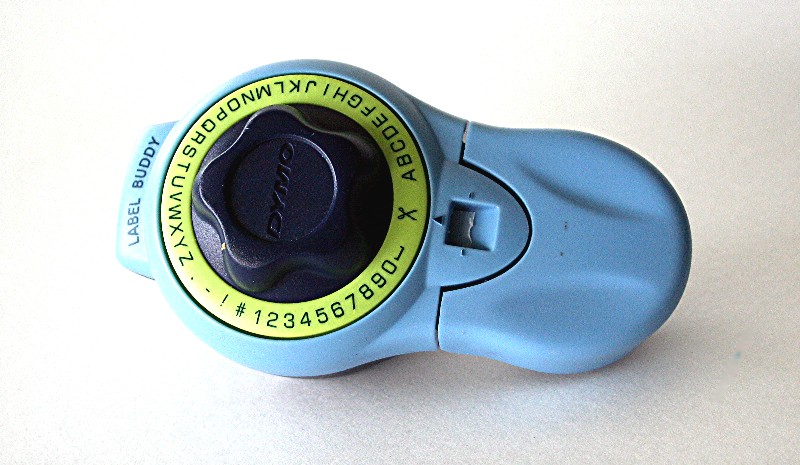
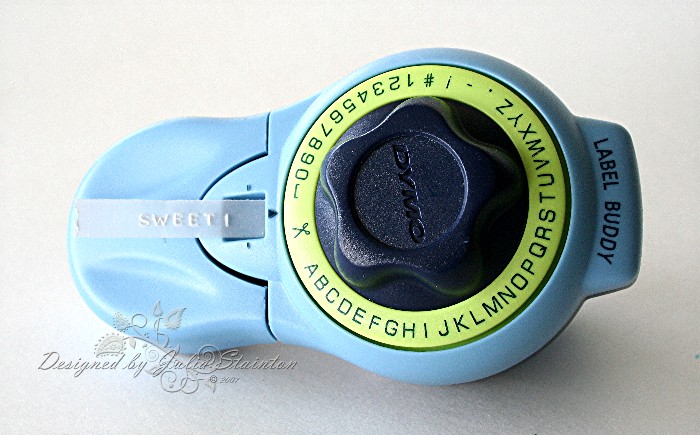
The Dymo Label Maker has been around a very long time, the Fifties to be precise. I remember my Dad owning a very basic model in the 70’s (yes, I can remember most of the 70’s LOL) that he used for labelling electrical paraphenilia on the job. I thought it was the coolest thing and was always trying to get permission to label things. Since then the label maker has gone through many changes. Electronic Models are now available and I’ve had fun playing with all the new options on those too at the office when I go visit. You can now change the fonts, colors, type size etc. and I’ve actually labelled quite a few Iris carts stuffed with craft supplies or toys to hopefully keep things where they belong.
When I saw this classic style label maker at Michael’s over a year ago, I just had to buy it! It was so inexpensive and I still haven’t used up all the label tape that comes with it. I love the classic or retro look you get with it. It has a bit of an edgy or industrial feel to it, making it perfect for use on masculine or teen designs. The tapes are very sturdy and weather proof and come backed with a very strong adhesive. Easily found refills come in black, red or blue. The way the label tapes work is by hand pressure. The applied pressure presses the die into the label tape and embosses it. The raised lettering is always white because of the embossing process.
The Dymo Label Maker is extremely easy to use. You may need to hide it from your kids if you don’t want to run out of labels. 🙂 Simply turn the dial to the character you wish to print and press firmly on the handle. It atomatically clicks ahead to the next space….just turn the dial again and click. There are spaces you can click on to leave a space between words, as well as punctuation marks and numerals. A lot of stamp sets do not include numbers and I love having this to fall back on if you want to personalize a birthday with a child’s age or an adult’s milestone birthday.
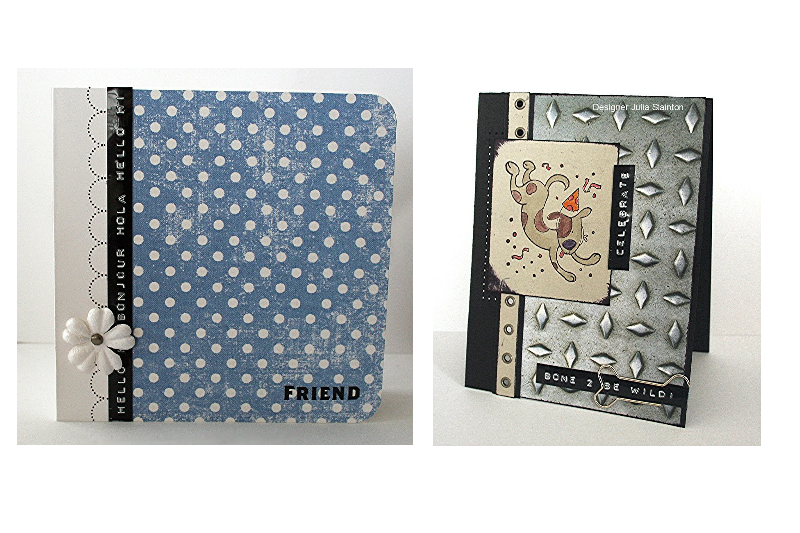
Some examples from my blog…to find the instructions for these cards, just enter Dymo in my search box in my sidebar.
Use Dymo Labels…
- to organize and label your craft products
- as an accent
- to write the perfect sentiment
- as a border
- use small strips for journalling
- try fun phrases License Plate or Computer shorthand style to add a cool touch {URAQT} for example
- When journalling, print or computer generate your paragraph and highlight certain words by inserting a label printed word. Make sure you plan ahead and leave enough space for this
- run vellum through it…see below tutorial
Embossed Vellum Tutorial
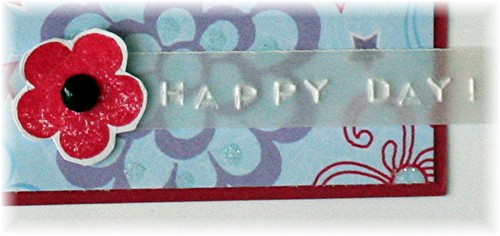
A very cool idea I disovered last year is that you can emboss vellum in your label maker. I just love the look…still fun but with a fresh new look and better suited for softer looking projects. Doing this is simple….you only need one supply, Vellum cardstock. You do need the heavier weight of cardstock vellum for this, as the lighter vellum just does not feed well through the label maker.
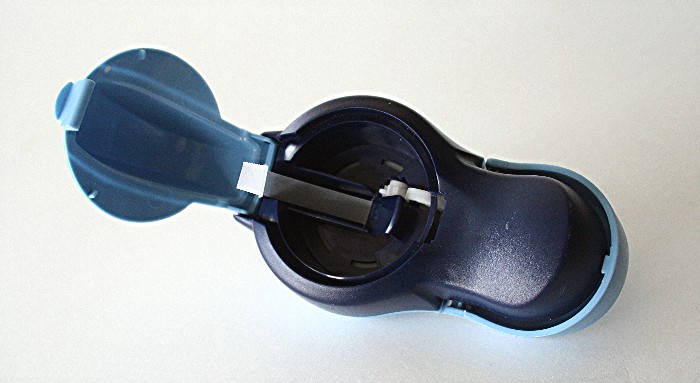
I use the Stampin Up cardstock vellum for this technique. It seems to be the perfect weight. Simply cut your vellum the long way with your paper trimmer to just under 3/8″ wide. Open the back of your label maker and remove the label tape. Carefully finsert the vellum strip into the feed. Press lightly on the vellum and click the handle until the vellum grabs and is pulled through. To get the right pressure needed to emboss the vellum may take a little more practice than just using labels. I suggest running a practice strip all the way through first until you get the hang of it. Too little pressure won’t emboss the vellum enough to read well and too much pressure will actually tear the vellum…not the look you are going for! 🙂
Quick Tip: The vellum can be a little more difficult to cut with the label maker. You may need click it forward until you are able to trim off with scissors.
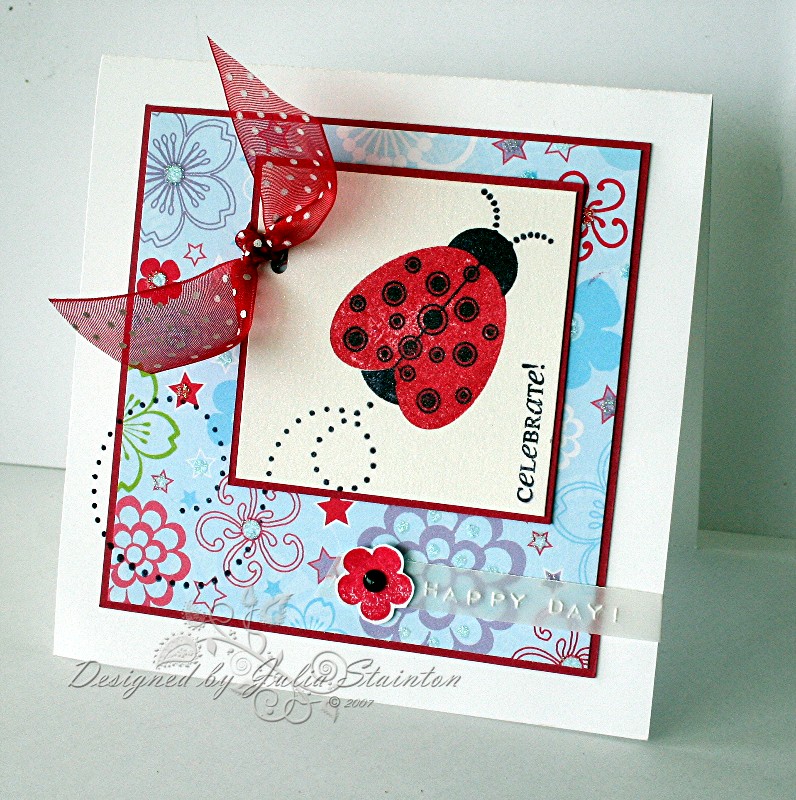
Little Lady Birthday Card (for close-up, click on card)
I was excited to finally get my new Papertrey Ink sets in the mail on Friday. It seems they got caught in Customs at the border…the joys of living in Canada! This is the sweetest set (Little Lady) and I just love it! For the main image, I inked up my new Ladybug with Rose Red ink and stamped it onto SU Shimmery White cardstock. I then inked up the second dotted stamp and stamped it over with basic black ink. After stamping the trail, sentiment and the little antenna, I matted the image with Rose Red.
For the main part of the card design, I created a 5″ square card base with Whisper White cardstock. I then layered on the darling pre-glittered, patterned paper from Provocraft. I don’t think the camera picked up the fun glitter on this paper, but it is so pretty in person. The layer was once again matted with Rose Red cardstock. I then lined up where my main image would go and then stamped the remainer of the trail across the layers of the card. I loved how easy it was to do this with the clear stamps.
For finishing embellishments, I punched the image layer and tied on a red dotted organdy ribbon. The color and the dots seem to go so well with the image. Lastly we come to the vellum punched label strip. I punched out Happy Day, leaving enough vellum on either side for attaching to the design.
Supply List:
Cardstock: Whisper White, cardstock Vellum, Rose Red, Shimmery White – Stampin Up
Patterned paper: Provocraft
Stamps: Little Lady – Papertrey Ink
Ink: Basic Black, Rose Red – Stampin Up
Other: Dymo Label Maker: ribbon – Michael’s, brad, punch
Each week I write a {C’est Bon} article about things that I like, products I love to use, good things I want to share with you. All {C’est Bon} articles are my own opinion and I am in no way affiliated with any company featured in this article.

