
This is a fun little project I came up with last summer…perfect for little photos. I’m making a few of these for my daughter’s friends. It is their grade eight graduation this year and some of them are going to different high schools. These are perfect little gifts and wouldn’t they be cute with a wallet sized school photo on one side and a short autograph on the opposite one? I actually made this project a few months ago as well with a group of teenage girls from the youth group. They really enjoyed making them and we had a really fun night. This might also be a fun little project for kids to make for their grandma to keep in her purse. It is easy enough to make and I know Grandma would treasure this little gift.

The pattern for this project is actually from a darling little book I found at my local scrapbook store last summer. Sorry I dont’ remember the original manufacturer…it was a sweet little embossed mini-book and I saw it and thought I could make a variation of it. I changed up the dimensions to make it a little larger and still work well with traditional sized cardstock. I’ve actually made a few variations on the theme. It is fun to see what you can come up with even in such a small size! Below are the instructions to my version of this little book.
Julia’s Mini-book Instructions
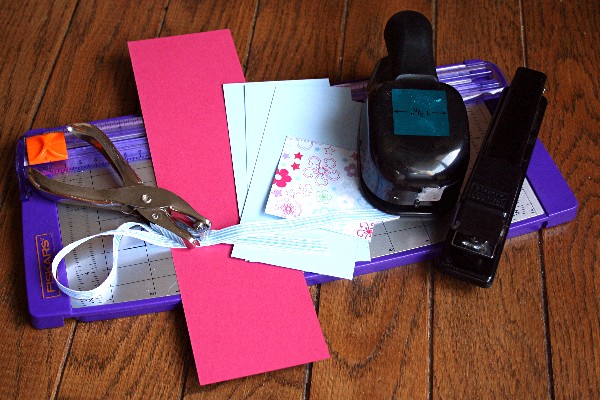
Supply List:
3″ x 11″ piece of cardstock for cover
2.5 ” square piece of patterned paper for inset
square punch 1 3/8″ or other punch
(3) pieces of 3″ x 5.75″ coordinating cardstock for inside pages
ribbon approximately 15″
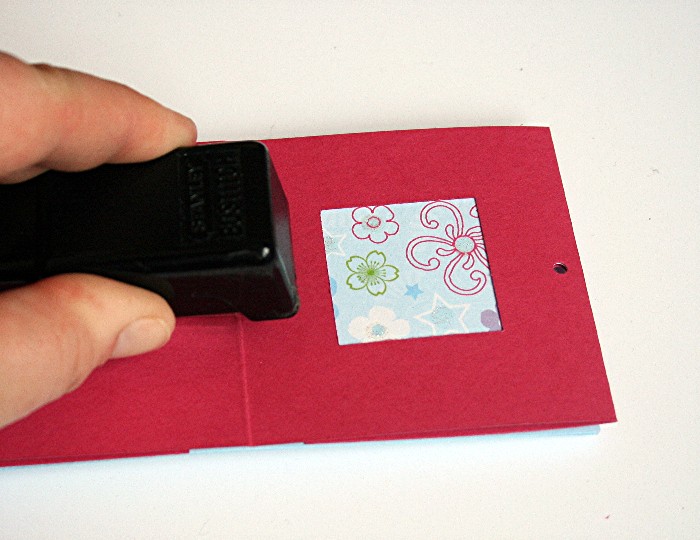
small hand-held hole punch
stapler
stamps or embellishments if desired
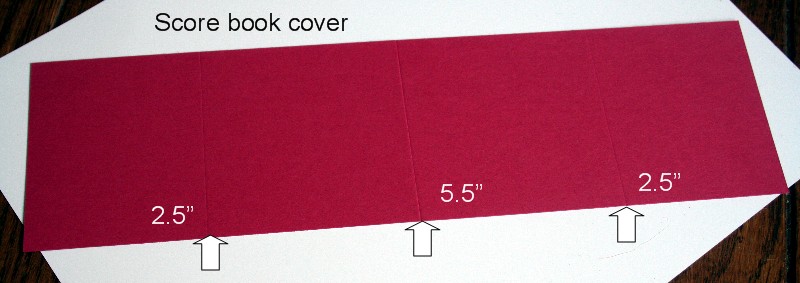
1. Start with a piece of cardstock 11″ x 3″. Score at midpoint, as well as 2.5″ from each side

2. Fold side panels into center.
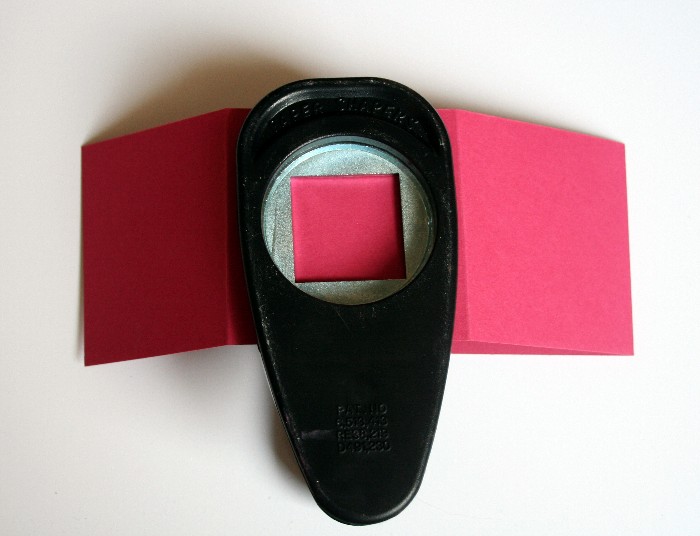
3. Open front panel and punch square opening. Line with small square patterned paper if desired.
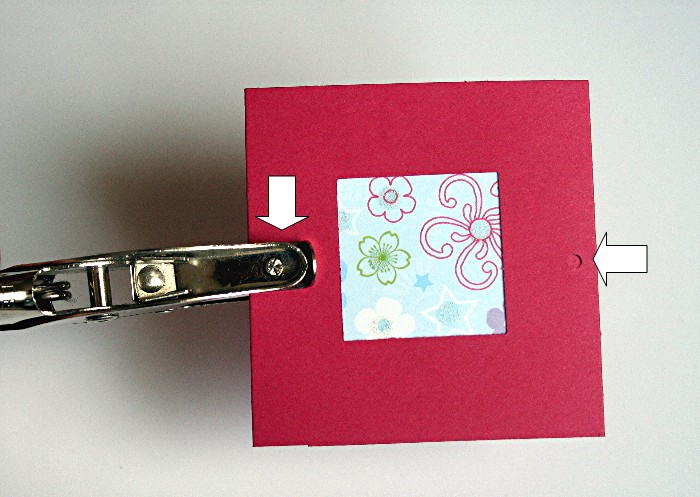
4. Punch holes in mini-book cover. Punch three times…once through spine (both layers), once through front right side (both layers) & once through back cover (both layers).
5. Score inside pages in half. Staple to mini-book cover.

6. Thread ribbon through holes.
7. Embellish as desired.
There are lots of things you can do to alter this little book…
- If you use double-sided cardstock, no insert it needed as it is self-patterning.
- Use a different shaped punch for a fun effect. I’ve used a tag punch before and it looks darling.
- Stamp on the cardstock before starting your book for a fun look. You could also stamp a little image on the inside panel as well.
- Change up the embellishments for various looks.
- Decorate the pages inside if desired.
- Add a monogram to the insert to personalize it.
Product List for above project:
Cardstock: Bashful Blue, Rose Red – Stampin Up
Patterned Paper: Provocraft
Stamps: Shapes and Stitches – Lizzie Anne Designs
Ink: Black – Stampin Up
Other: 1 3/8″ square punch- EK Success, hand held mini hole punch, ribbon – May Arts, stapler, Crystal Brad – Making Memories, Chipboard Star- K & Company
Quick Tip: If you like tutorials and techniques and wish to view more of the ones I’ve created, there are a couple easy ways to find them. In the sidebar, scroll down until you see A Few Tutorials I’ve Created for You. I’ve linked them up there to make them easy for you to find. Another way to find things you might be interested in or articles of a similar nature…just go to the line directly under the title….it has different headings. If you are interested in other stamping techniques…just click on that link and it will take you to all the entries that I have given instructions for a particular technique.
If this article has inspired you to make this project, I’d love to see your results! Feel free to post a link to it in the comments section on this entry. 🙂
Wishing you all a very safe and happy Memorial Day weekend!
Pingback: Crafts 'n' Coffee » Blog Archive » Library Musing